Intelbras AMT 8000 LITE User Manual
Hide thumbs
Also See for AMT 8000 LITE:
- Installation & user manual (28 pages) ,
- User manual (103 pages) ,
- Installation & user manual (28 pages)
Table of Contents
Advertisement
Quick Links
Advertisement
Table of Contents

Related Manuals for Intelbras AMT 8000 LITE


Summary of Contents for Intelbras AMT 8000 LITE
- Page 1 English User’s Manual AMT 8000 LITE...
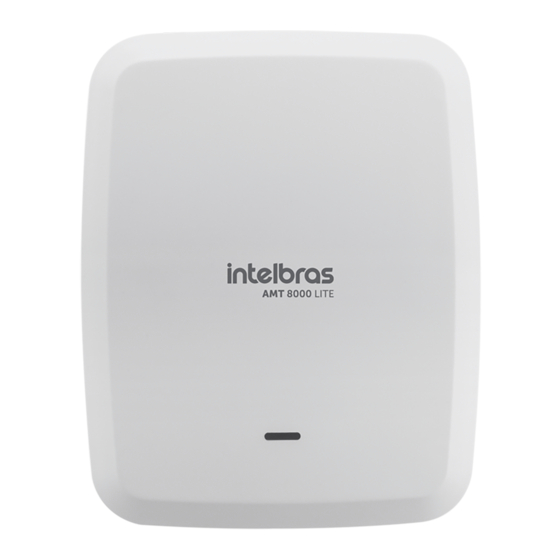
- Page 2 Congratulations, you have just purchased a product with Intelbras quality and safety. The AMT 8000 LITE wireless alarm center features advanced technology and is easy to program. All 8000 series devices can be connected, exchanging encrypted information, for increased system security. This center has an integrated siren and 16 partitions .The system has differentials such as a high-performance wireless...
- Page 3 » Perform periodic tests on it, in order to validate weather conditions, battery level and other factors, so that the site monitored by the system is always in proper operating conditions. » LGPD - General Personal Data Protection Law: Intelbras does not access, transfer, collect or otherwise process any per- sonal data from this product.
-
Page 4: Table Of Contents
4.4. AMT 8000 LITE Alarm Center ........ - Page 5 6.13. Alarm center time settings ..............63 6.14.
-
Page 6: Technical Specifications
(Stand by mode - continuous). ² Optional: for more information see www.intelbras.com.br . Attention: Intelbras wireless systems are tested to the highest standards and bring high reliability, however, due to the use/installa- tion in varied scenarios, some considerations must be taken into account: »... -
Page 7: Amt 8000 Lite Alarm Center Features
» Support 2 cellular chips (SIM card) with XG 2G or XG 3G module installed. » GPRS quad-band modem: compatible with most national GSM operators for the AMT 8000 LITE operating with the XG 2G and XG 3G module (sold separately). -
Page 8: Wireless Keyboard For Alarm Centers - Xat 8000
3.2. Wireless keyboard for alarm centers - XAT 8000 Optional dedicated accessory for configuring, checking status, and operating the AMT 8000 LITE alarm center. The commu- nication between the keyboard and the alarm center is carried out via a wireless signal, providing a simpler installation and with a longer communication range. -
Page 9: Remote Control - Xac 8000
The following figure shows an illustrative image of the keyboard: Wireless Keyboard XAT 8000 The keyboard has a tamper switch, located on its front side, under the cover, and activated by moving the keyboard cover, its function is to activate the keyboard. On the front of the XAT 8000 there is also a light guide for the brightness sensor, whose function is to control the brightness intensity of the display and keyboard for battery optimization. -
Page 10: Wireless Siren - Xss 8000
Communication between the siren and the alarm center is done through a wireless signal, providing a simpler installation with a long communication range. Up to 16 XSS 8000 sirens can be added to each AMT 8000 LITE alarm center. -
Page 11: Wireless Passive Infrared Sensor - Ivp 8000 Pet
The following figure shows an illustrative image of the XAS 8000 sensor: Opening sensor XAS 8000 The XAS 8000 sensor has a tamper switch, and if this tamper switch is opened/violated, registered sirens will trip and send the corresponding event if the Triggering Problems function is enabled (see section Triggering Problems ). The status of the communication between the sensor and the alarm center will be represented by the LED indicator located on the front. -
Page 12: Wireless Passive Infrared Sensor - Ivp 8000 Pet Cam
It has a camera that, after the sensor is triggered, sends the image of the location to applications and software compatible with the AMT 8000 LITE center. With low battery indication and communication status in the sensor, supervision, activation, and anti-tamper system with internal tamper to compose the 8000 line security system with the best results. -
Page 13: Wireless Passive Infrared Sensor - Ivp 8000 Ex
3.8. Wireless Passive Infrared Sensor - IVP 8000 EX Dedicated accessory for checking intrusions through infrared reading in outdoor environments, in a discreet and compact way and taking into account the presence of pets and not triggering the alarm. With low battery indication and communication status in the sensor, supervision, activation, and anti-tamper system with internal tamper to compose the security system 8000 line with the best results. -
Page 14: Transmissor Universal - Tx 8000
3.9. Transmissor universal – TX 8000 Optional accessory dedicated to receive signals from wired sensors and transmission of this reading to the AMT 8000 LITE alarm center. The operation of this device is the same as that of a wireless magnetic sensor XAS 8000, but its activation will occur every time another sensor has an opening/closing and sends a signal via a pair of wires of the dry contact type (NO or NC), thus transforming a wired sensor into a wireless one. -
Page 15: Wireless Actuator - Pgm 8000
Important: each AMT 8000 LITE alarm center can have up to 4 repeaters operating simultaneously, but all operating separately from each other, so there is no possibility of a repeater being used to extend the signal to another repeater, only in direct use between devices and the alarm center. -
Page 16: Installation Of The Center And Its Peripherals
Open the product’s box and then open the cover of the alarm center´s cabinet removing the screws, where you will be able to see two boards, that is, its basic configuration contains the board of the AMT 8000 LITE alarm center and its respective power supply and the rechargeable battery that comes with the center. - Page 17 The following image illustrates the center with all the devices that can be physically connected: AMT 8000 LITE/PRO Alarm center AMT 8000 LITE 1. Opening for the network cable (Ethernet). 2. Integrated siren connection. 3. Connector for Ethernet network cable.
-
Page 18: Power Supply For The Alarm Center (Full Range 90 And 265 Vac)
3. AC power connector. Attention: The AMT 8000 LITE alarm center does not have an auxiliary output to power other devices and you should not use any connection point on the boards of the center and its accessories for this function, because besides damaging the center, you can damage the devices because the center operates with different voltages depending on the circuit. -
Page 19: Battery
4.2. Battery The AMT 8000 LITE alarm center has an internal 3.7 Vdc rechargeable battery with a capacity of 2,000 mA. The battery connector is located on the power supply board and is used to connect the battery to the alarm system. To connect the battery to this connector use the cable that comes connected with it, as shown in the following figure. -
Page 20: Amt 8000 Lite Alarm Center
Note: to turn on the AMT 8000 LITE alarm center it must be connected to the AC mains and the 5-wire cable from the power supply must be connected to the Power Supply connector on the alarm center board, otherwise, the center will not turn on even if the power supply is on battery. -
Page 21: Partition
The 16 partitions can be controlled via keyboard, remote control, software, and applications compatible with the AMT 8000 LITE center, because one partition can be activated or deactivated without affecting the other. -
Page 22: Activation/Deactivation Of The Alarm Center
5.5. Activation/deactivation of the alarm center The alarm center can be activated and/or deactivated in different ways, depending on the defined settings. For any of the ways of activating the system, with non-zero exit time, after entering the password, the keyboard will beep at 1-second intervals. -
Page 23: Menu
Activation by master password or full password If you are using the master password or a full password (which has permission to enable/disable more than one partition), there are two ways of activation: » All partitions: enter the password, the exit timer will start, and at the end, all partitions will be activated. »... - Page 24 Bypass This function allows you to temporarily bypass one or more zones. With this function active, zones that are bypassed during the next activation will not generate triggers on the system if they are violated. After the system is deactivated, the zones that were bypassed will return to the normal configuration. Only the master password user and users with bypass permission can temporarily bypass a zone.
- Page 25 See the Connections section to define priority addresses and directions. » Cloud: it will display whether the center is connected to the Intelbras Cloud Server via ETHERNET or 2G/3G. This server allows communication between the AMT 8000 LITE and remote access via application.
-
Page 26: Remote Update
5.7. Remote Update The AMT 8000 LITE alarm center has remote software updates, and in the case of availability of new software versions, it is not necessary to use recorders or computer connections to be updated, downloading the new version through the Ethernet connection. -
Page 27: Programming
6. Programming The alarm center has several programmable parameters, which makes it versatile, allowing it to optimize its operation for each need. These settings are stored in EEPROM-type memory, thus avoiding the need for frequent reprogramming or if it is unpo- wered. - Page 28 Editing/Programming Command with Preview In programming mode, some commands can be entered in parts, so the first part of the command will be entered first and shown on the first line of the display and the value to be edited/viewed will be shown on the second line of the display. If the alarm center´s memory for the command entered is empty, the second line will be cleared.
-
Page 29: Wireless Devices (Register/Delete)
If during the wireless device registration process the device LED flashes red, press the device sync button for 15 seconds (for the XAC 8000, keep the top 2 buttons pressed) and restart the registration process. The AMT 8000 LITE center already comes with a wireless receiver integrated into it to receive and transmit signals to sensors, keyboards, and other devices. - Page 30 » First register the keyboards, to allow them to be used to register the other devices via programming. » It is recommended to use a maximum of 8 sensors with photo verification IVP 8000 Pet Cam per AMT 8000 LITE alarm center, but its registration can occur throughout the whole exclusive addressing range for sensors (01 to 64).
- Page 31 » IVP 8000 Pet: remove the protective cover from the battery compartment, press the synchronization key on it and check if the LED blinks green, indicating the successful registration, if the LED blinks red there was some failure and the process must be repeated.
- Page 32 Registration by keyboard command The registration of devices by keyboard commands directs them to the desired addresses, respecting the maximum limit of devices per type. The registration of the first keyboard must be done via the center´s key (see section Registering a wireless device via the synchronization button on the alarm center).
- Page 33 » Wireless Sensors (addresses 01 to 64): follows the same principle as the other devices, but each sensor will be associated with a zone in the center, according to the command given. To register wireless sensors type: 01 to 64 Enter Zone No.
- Page 34 » To register wireless actuators, type: 01 to 16 Enter Enter Actuate the wireless device Actuator No. » To delete Wireless Actuators type: 01 to 16 Enter Enter Actuator No. » RF Range Amplifier (REP 8000 repeater addresses 01 to 04): follows the same principle as the other devices. It is necessary to press the synchronization key on the back of the repeater (remove the base for fixation on surfaces and turn on its power supply, because for it to start the power supply must be on), after typing the following code, check if the LED flashes green, indicating a successful registration.
- Page 35 Automatic device rerouting is a feature of the AMT 8000 LITE alarm center that allows devices to search for a new route if it stays for 30 minutes without communicating with the alarm center or with the repeater if the device is already commu- nicating through a repeater.
-
Page 36: Wireless Sensor Functions
RF channel change The AMT 8000 LITE alarm center has 4 RF communication channels, operating on frequencies from 915 to 928 MHz and can change the channel used, in case there are other devices using the same frequency and thus causing interference. - Page 37 Zone tamper detection To program this function, type: Command to disable the sensor tamper: Enter Enter X = Zone group 0 to 6 Command to disable the digital tamper of the IVP 8000 EX Enter Enter X = Zone group 0 to 6 Note: function available from sensor version 2.0.0 onwards.
-
Page 38: Remote Control Key Functions
Setting the wireless infrared sensors The wireless infrared sensors registered in the AMT 8000 LITE alarm center can be customized to operate optimally, as described below: » Sensitivity: it will set the sensor to detect correctly, according to the installation area, having the setting of 4 types of sensitivity, ranging from minimum, normal, intermediate, and maximum (factory default normal sensitivity). - Page 39 Disabled Atv/Dtv all partitions Only activates all partitions Only disables all partitions Atv/Dtv all partitions in Parti al mode Only arms in Partial mode Panic with siren Silent panic Fire panic Medical emergency Atv/Dtv only Partition 1 Atv/Dtv only Partition 2 Atv/Dtv only Partition 3 Atv/Dtv only Partition 4 Atv/Dtv only Partition 5...
-
Page 40: Wireless Keyboard Functions
Activate + Partition + Password. In the AMT 8000 LITE it is possible to program/associate a keyboard (01 to 16) to one of the partitions (01 to 16), as described below. - Page 41 After entering the command, define to which partition the XAT 8000 Wireless Keyboard will belong, with the address being 00 for a common keyboard and 01 to 16 for a specific partition, and press Enter to confirm. If you only wish to view the configuration, press the Exit key and no programming will be changed.
-
Page 42: Siren Functions
Panic Key If the Panic key is pressed for 3 seconds, the siren will be triggered and the Audible panic event will be reported to the monitoring company. This key can assume the following configurations: Function Selection Disabled Audible panic Silent panic Fire panic Medical emergency... - Page 43 To edit/view the programmed value, type: Enter Siren Enter 01 to 16 After entering the command, define to which partition the XSS 8000 siren will belong, with the address 00 as common (the siren will be triggered if an event is generated in any of the partitions) or from 01 to 16 (the siren will only be triggered if the partition to which it was defined generates any event) according to the desired partition and press Enter to confirm.
- Page 44 After entering the command, through the XAT 8000 keyboard, mark which partitions will have the siren beep active, using the numbers on the keyboard to leave the partition marked. Select 0 for partition group 1 to 10 and 1 for partitions 11 to 16.
- Page 45 System Deactivation: » Non-partitioned center: activates the PGM output at the moment the center is deactivated. » Partitioned center: activates the PGM output only upon deactivation of the partition that the PGM belongs to. If the PGM is common it will activate with the deactivation of any of the partitions. Medical emergency: »...
- Page 46 » Partitioned center: In this case the operation will be the same as described for the non-partitioned center, regar- dless of whether the user in which the control is registered has permission to partition or not. See the item Remote Control Key Functions.
- Page 47 After changing the configured value, press Enter . If you only want to view the configuration, press Exit and no program- ming will be changed. Days for Scheduled Auto Activation of PGMS Selects the days when PGM Auto Activation will occur. The 8 key enables the function for programmed holidays. Enter Enter 01 to 16...
- Page 48 To edit/view the programmed value, type: 1 to 8 Enter Enter 01 to 16 Holidays The center has 10 memories (0 to 9) for programming dates that require a special time for Autoactivation and Auto Deactivation. When the system date is equal to one of the programmed dates, the day of the week settings will be overwritten by the time set in the address of the commands described above, referring to the programming of the alarm center’s auto-activation.
-
Page 49: Update
To edit/view the programmed value, type: Enter Enter 01 to 16 After changing the configured value, press Enter . If you only want to view the configuration, press Exit and no program- ming will be changed. 6.7. Update The AMT 8000 center has remote software update, and in the case of availability of new software versions it is not ne- cessary to use recorders or a computer connection to be updated, downloading the new version through the Ethernet connection. - Page 50 Programming password permissions Password Habilitation Create and delete secondary passwords Change the master password Enable/disable permissions for secondary passwords Master (initially random, see QR Code label ) Set date, time and day of week Edition of XAT 8000 keypad messages Activate/deactivate the center completely or in partitioned mode (Partition 01 to 16) Installer (factory default Perform all alarm center settings, except activating/deactivating the center,...
- Page 51 User group Users User group Users User group Users (GU) 61 to 70 (GU) 71 to 80 (GU) 81 to 90 Key 1 = user 61 Key 1 = user 71 Key 1 = user 81 Key 2 = user 62 Key 2 = user 72 Key 2 = user 82 Key 3 = user 63...
- Page 52 To use a 6-digit password, see the topic General Settings 1 in this manual. To program this function, type: User Enter Enter Password 00 to 97 4 or 6 digits Erase passwords using the master password The password for master user - 00 can only be changed and not deleted. On the other hand, passwords for user 01 to 97 can be deleted.
-
Page 53: Quick Setup For Monitoring
For more details about these settings refer to section 6.16. Monitoring Settings. Monitoring via Ethernet The center can report the events via IP communication to monitoring companies ( Software Receptor IP Intelbras). To do so, the following commands must be programmed: »... - Page 54 » Program DHCP If you do not have a DHCP server or do not wish to use this option, disable it and follow the next steps, where the IP, netmask, gateway, etc., will be added manually and not received from the connected network. Enter + 831 + Enter After the command, disable option 1 (mark 1) and press Enter to confirm.
- Page 55 » Program IP network communication port Port 1 = Enter + 802 + 1 + 4-digit port number + Enter Port 2 = Enter + 802 + 2 + 4-digit port number + Enter » Program destination domain name (DNS) If you don’t want to use DNS, skip to the next command, otherwise type: Enter + 803 + D + Enter , where D = 1 or 2 (DNS 1 or DNS 2).
-
Page 56: Zone Settings
» GPRS Heartbeat Interval (link test) Enter + 827 + TTM + Enter , where TTM = Heartbeat interval time from 000 to 255 minutes (default 005 minutes) » DNS servers for GPRS Enter + 828 + S + Enter , where S = 1 or 2 (Server 1 or Server 2) After entering the command, type the DNS server code (according to the server used) and then press Enter to confirm. - Page 57 Enable/Disable Zones The zones that are not being used must be disabled so that they will not trip when the center is activated using a remote control, or that, when trying to activate the center using a valid password, the keyboard emits an error beep indicating that the center has open zones.
- Page 58 » Fire Zone: it has the function of monitoring fire sensors - use the TX 8000 universal transmitter to receive the signal from a wired fire sensor. The configured zone will remain active 24 hours a day. If the sensor detects a problem, the fire event will be reported to the monitoring company and the siren will emit pulsed beeps.
- Page 59 When the system is deactivated, the zone will return to its normal operation. If the number of trips is programmed as 0 the function will be disabled. To program this function, type: Enter Number of triggers Enter 0 to 9 To edit/view the programmed value, type: Enter Enter...
-
Page 60: Programming The Center's Partitioning
6.11. Programming the center’s partitioning Enable Partitioning To enable the center partitioning (the center can have up to 16 partitions with activation/deactivation and independent event reporting), the following must be programmed: Enter Enter Use the 1 key on the keyboard to enable the central office partitioning, so that the number 1 remains marked to enable and unchecked to disable the partitioning and then confirm with Enter . -
Page 61: Timings
Attention: in addition to the programming points mentioned above, it is necessary that user passwords are created/ defined (topic Passwords) in addition to the registration of wireless controls for access (topic Remote Control ) and also to define the partitioning of keyboards ( topic Keyboard ) and sirens ( topic Wireless Sirens ). To edit/view the programmed value, type: User number Enter... - Page 62 To edit/view the programmed value, type: Enter Enter After changing the configured value, press Enter . If you only want to view the configuration, press Exit and no program- ming will be changed. Exit Timing The exit timer is used when you want to activate the center from the keyboard, and have time to leave the premises before the alarm triggers.
-
Page 63: Alarm Center Time Settings
6.13. Alarm center time settings The alarm center has an internal clock and calendar that must be programmed correctly so that when an event occurs, it will be stored in the buffer of the center (last 512 events) with the correct date and time, for remote queries through the monitoring/activation software. - Page 64 Time interval for date and time synchronization When this function is enabled, the alarm center will synchronize the date and time with the server where the Intelbras Re- ceptor IP software is installed (factory default synchronization 24 hours), for third-party software they should be consulted.
-
Page 65: Timezone
6.14. Timezone When the switchboard is programmed to synchronize the date and time automatically, programming this field adjusts the time zone according to the region where the switchboard is installed. Time zone ranges from 00 (disabled) to 25, where 01 means GMT -1, 02 means GMT -2, and so on. Brasilia time is GMT -3. To program, type the command below: Spindle Enter... -
Page 66: Periodic Test
6.15. Periodic test This function is used to verify the integrity of the communication channel between the alarm center and the monitoring company. If programmed, the Periodic test event will be reported periodically. Thus, if the monitoring company does not receive this event in the scheduled period, the communication channel can be considered inoperative. - Page 67 6. If you wish to enable the automatic synchronization of date and time with the server (make sure you are using the latest version of the Intelbras Receptor IP for the function to work correctly). Use the following table for the following necessary settings:...
- Page 68 Key 5 Thursday Key 6 Friday Key 7 Saturday Key 8 Holiday Partition autoactivation/auto deactivation selection Selects which partitions will have the programmed autoactivation and auto deactivation function. Factory default, all partitions enabled. To program this function, type: 0 = partitions 01 to 10 1 = partitions 11 to 16 Enter Partition group...
- Page 69 Days of the Week for Auto Deactivation Selects the days on which the Auto deactivation by partition will occur. Enter Enter Partition 01 to 16 Use the keys on the keyboard to set the days for the auto deactivation by partition to occur, so that the corresponding num- bers, that you want to have the days enabled, remain checked and the days with the function disabled remain unchecked, and then confirm with Enter .
-
Page 70: Monitoring Settings
Note: in the above command for unpartitioned center, use Partition = 01. 6.17. Monitoring settings The AMT 8000 LITE alarm center was specially developed to be monitored remotely, that is, a hired company can monitor in real-time several events, for example: »... - Page 71 expander devices tamper/expander devices tamper reset Sensor Tamper / Sensor tamper reset Low battery in wireless device/Device Battery Reset System activation/deactivation Automatic activation/deactivation Remote Activation/Deactivation One key activation Remote access Wrong password RF registration/deletion Registration/change/deletion of password Zone bypass/Zone bypass reset Periodic test Manual test Maintenance request...
- Page 72 Use the table above to perform the event locking/unlocking command: Zone No. Enter Enter 01 to 64 Reset type events Zone trigger Zone No. Event Contact-ID code 01 to 64 Reset zone trigger Use the table above to perform the Contact-ID event change command for zone reset, described below: Zone No.
- Page 73 Opening type events System Events Index Internal event Default code Low battery in wireless device Supervision failure Zone bypass AC network failure Low system battery Absent battery Remote deactivation Automatic deactivation System reset Programming change Failed to report event Wrong password Remote access Manual test Periodic test...
- Page 74 00 to 24 Push Events Notifications that will be sent to the Intelbras Guardian application when the corresponding event occurs with the center, requiring that the center is connected to the Internet (Ethernet, 2G, or 3G). For more information about the application see Using the Intelbras Guardian Application (for mobile devices)
- Page 75 RESET_BUFFER_EVENTS, Key 1 Enabled RESET_DATE_TIME, Key 2 Enabled TAMPER_KEYBOARD Key 3 Enabled TAMPER_SIREN Key 4 Enabled MAINTENANCE_REQUEST, Key 5 Enabled ELECTRICAL_GRID_FAULT_EXPANDER_MOD Key 6 Enabled TRIGGERING/DISABLING_PGM Key 7 Enabled RF REGISTRATION/EXCLUSION Key 8 Enabled PASSWORD REGISTRATION/CHANGE/EXCLUSION Key 9 Enabled Use the table above to disable/enable the sending of events to the monitoring application, as follows: Group of Push events Enter Enter...
- Page 76 An RJ45 type cable must be installed in the central station with the Ethernet signal coming from a router, switch, or directly from the signal received at the installation site. The center when connected via Ethernet can also be remotely accessed through Intelbras applications. Communication Priority Defines the priority communication channel to transmit the generated events.
- Page 77 GPRS, the reporting will be made to the same addresses. To receive events over the Internet, it is necessary to install the Intelbras Receptor IP software on the computer or use a monitoring software already compatible with the TCP/ IP communication of the AMT 8000 LITE center.
- Page 78 The following options configure the network properties in the alarm center, such as IP address, mask, gateway, etc., much like the settings for a network card in a computer. These settings enable the alarm center to connect to the Intelbras Re- ceptor IP software and transmit events.
- Page 79 IP address of the center IP Address of the local network to which the center is connected. To view/edit the IP address of the center simply perform the following procedure: 1. To program/change the IP address of the center type: 8120 Enter Enter...
- Page 80 The center has a connection to report events and to be accessed/controlled remotely through a 2G/3G cellular network. For this, it is necessary to install the XG 2G and XG 3G module together with the AMT 8000 LITE central. For 2G/3G communications, the chip (SIM card) must be enabled for a packet data plan. It is not necessary to enable voice service.
- Page 81 To program this function, type: Operator Enter Enter 1 = operator 1 2 = operator 2 After changing the configured value, press Enter . If you only want to view the configuration, press Exit and no program- ming will be changed. Password Password for 2G/3G connection to the operator’s network used.
- Page 82 With the same function as Heartbeat Ethernet Interval (link test), but relative to the GPRS channel. To check if the communication between the alarm center and the Intelbras Receptor IP software is working, the alarm center sends a message (known as Heartbeat or Keep alive) according to the programmed time interval. If the Intelbras Receptor IP does not receive this message within the programmed time interval, a failure event may be generated.
- Page 83 Interval between GPRS connection attempts When a cellular modem (XG 2G or XG 2G) connection failure occurs with the Intelbras Receptor IP software, the center tries to make a new connection with it. This function will set the time between these attempts and will leave the factory reset to zero (00 minutes).
-
Page 84: Activation/Deactivation Of Functions
1 to 5 6.18. Activation/deactivation of functions The AMT 8000 LITE alarm center has several functions that can be activated or deactivated according to the needs of each installation. These functions are divided into 6 groups: » General settings 1 »... - Page 85 To program this function, type: Enter Enter Function Partition One key activation Siren beep on activation/deactivation Activation with open zones 6-digit password Clear trigger remote control Use the keys on the keyboard to set the function status, so that the referring numbers, that will have the function active, remain checked and the functions that should be inactive remain unchecked, then confirm with Enter .
- Page 86 » Keyboard lock in case of incorrect password: if an incorrect password is entered 4 times, the keyboard will be blocked for 10 minutes and the event of incorrect password will be sent to the monitoring company. If the function is disabled, the event will be sent, but the keyboard will continue to function normally.
-
Page 87: Time To Send Ac Failure
Use the keys on the keyboard to set the function status, so that the referring numbers, which are to have the function active, remain checked and the functions that are to be inactive remain unchecked. Problems that generate triggering With this function enabled, sirens will be triggered if at least one of the following events is detected: supervision failure, tamper of the devices as well as intrusions in the system. -
Page 88: Quick Programming Reference
Temporary master password and installer reset If you have forgotten the master password or the installer password, you will not be able to enter programming mode and gain access to the center’s settings/operations. If this occurs, there is a temporary reset for these passwords by following this step: 1. - Page 89 Keyboard commands for wireless devices » Keyboard » Change the system language Enter Enter » I = 0: Portuguese » I = 1: Spanish » I = 2: English Note: function available as of version 1.0.1 of the XAT 8000 keyboard. »...
- Page 90 » Remote control firmware verification Enter + 645 + CC + Enter CC = 2-digit remote control number » Remote control key functions Enter + 65 + T + NU + FC + Enter T = control key from 1 to 3. NU = user number from 00 to 97.
- Page 91 Atv/Dtv partial mode only for Partition 16 PGM 01 PGM 02 PGM 03 PGM 04 PGM 05 PGM 06 PGM 07 PGM 08 PGM 09 PGM 10 PGM 11 PGM 12 PGM 13 PGM 14 PGM 15 PGM 16 » Wireless sensors »...
- Page 92 » Register wireless sirens Enter + 621 + NS + Enter + Actuate the siren by pressing the synchronization key. NS = siren number from 01 to 16. » Delete wireless sirens Enter + 721 + NS + Enter NS = siren number from 01 to 16. »...
- Page 93 E.g.ternal actuation (applications) Password actuation (passwords 51 PGM01 to 66 PGM16) System activation System deactivation Medical emergency: Event communication failure Siren problem: Trigger Trigger or silent panic Fire zone triggering: Zone 1 opening Remote control Activation / deactivation by time »...
- Page 94 » PGM 8000 actuator association for partitioning Enter + 563 + PGM +PP + Enter PGM = PGM number from 01 to 16. PP = partition 01 to 16. » Reset Wireless Devices » Delete all registered wireless devices Enter + 7 + Disable + Enter Note: all wireless devices in the center, including the keyboard itself, will be deregistered.
- Page 95 » Password permissions » Define permission for password partitioning Enter + 21 + NU + GP + Enter NU= user number from 01 to 96. GP = group of partitions, with partitions 01 to 10 in group 0 and partitions 11 to 16 in group 1. »...
- Page 96 » Automatic Zone Cancellation Enter + 53 + N + Enter N = number of triggers from 0 to 9. On input Enter + 09 + ZZ + Enter ZZ= zones 01 to 64 On input partition Enter + 516 + GP + Enter GP = group of partitions, with partitions 01 to 10 in group 0 and partitions 11 to 16 in group 1.
- Page 97 Alarm center time settings » Clock Enter + 400 + HH + MM + SS + Enter HH = hours from 00 to 23. MM = minutes from 00 to 59. SS = seconds from 00 to 59. » Calendar Enter + 401 + DD + MM + AA + Enter DD = day from 01 to 31.
- Page 98 Periodic testing » Enable periodic testing by time schedule Enter + 470 + HH + MM + Enter HH = hours from 00 to 23. MM = minutes from 00 to 59. » Disable periodic test by time schedule Enter + 470 + Disable + Enter »...
- Page 99 P = port to which the center is to be connected, where 1 = port 1 and 2 = port 2. After the command enter the 4-digit port number. Note: this field determines the port to which the alarm center will connect, factory default: 9009. The Intelbras Receptor IP software must be configured for the same port.
- Page 100 » Program DHCP If you do not have a DHCP server or do not want to use this option, proceed to the next step, otherwise, type the next command and also the following ones. Enter + 831 + Enter After the command, with the keyboard keys, enable option 1 (dial 1) and press Enter to confirm. »...
- Page 101 » Interval between GPRS connection attempts Enter + 829 + TG + Enter , where TG = interval time of reconnection attempts from 00 to 20 (default: 00 minutes) » Cloud Connection Enter + 512 + Enter After the command, use the keys on the keyboard to enable option 6 and press Enter to confirm. Programar telefone para chamadas GSM »...
- Page 102 » Enable/Disable Contact-ID code for system events of opening type Enter + 904 + II + Enter II = system event index from 00 to 26 Opening type events System events Index Internal event Default code Low battery in wireless device Supervision failure Zone bypass AC network failure...
- Page 103 » Setting Contact-ID code for Reset-type system events, type: Enter + 914 + II + Enter II = system event index from 00 to 26 Opening type events System events Index Internal event Default code Wireless device low battery reset Supervision failure reset Zone bypass reset AC network reset...
- Page 104 » Setting Push event code Enter + 92 + EV + Enter + Select the event + Enter EV = group of events from 0 to 3, where group 0 is from 01 to 10 and so on up to group 3, which is from 31 to 35. Events group Event Default value...
-
Page 105: Homologation
» Activation/deactivation of functions Enter + 51 + GF + Enter + FUNCTION + Enter GF = function group 0 to 5. FUNCTION = key corresponding to the function . Function Function Function group 0 Function group 1 Function group 2 Function group 5 group 3 group 4... -
Page 106: Warranty Terms
7. Intelbras is not responsible for the installation of this product, nor for any attempts of fraud and/or sabotage on its products. Keep the software updates and applications used up-to-date, if relevant, as well as the network protections required for protection against intrusions (hackers). - Page 107 Support via e-mail: suporte@intelbras.com.br Customer Service: 0800 7042767 Where to buy? Who installs it? 0800 7245115 Produced by: Intelbras S/A – Indústria de Telecomunicação Eletrônica Brasileira Rodovia BR 459, km 124, 1325 – Distrito Industrial – Santa Rita do Sapucaí/MG – 37540-000 01.23 CNPJ 82.901.000/0016-03 –...
Need help?
Do you have a question about the AMT 8000 LITE and is the answer not in the manual?
Questions and answers