Table of Contents
Advertisement
Quick Links
Advertisement
Table of Contents

Subscribe to Our Youtube Channel
Related Manuals for Intelbras AMT 8000


Summary of Contents for Intelbras AMT 8000
- Page 1 User's manual AMT 8000...
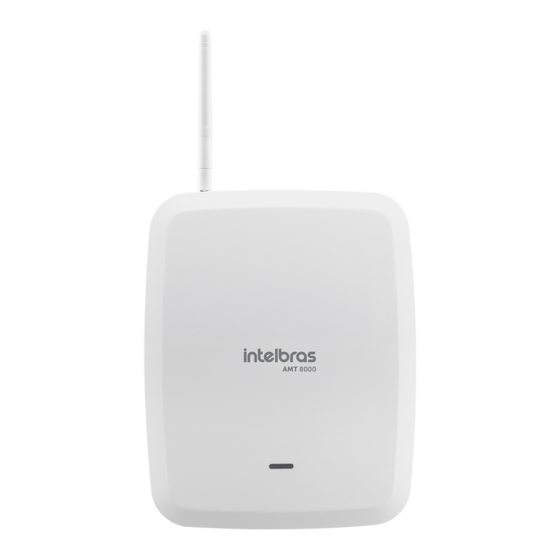
- Page 2 Congratulations, you have just purchased a product with Intelbras quality and security. AMT 8000 Wireless Alarm Center has advanced technology and is easy to program. Due to its differentiated technology, the following unique wireless devices can be connected to this center: XAC 8000 remote control, XAS 8000 magnetic wireless...
- Page 3 Care and Security » Follow all instructions in the manual for product installation and handling. » Perform the installation in environments not susceptible to factors such as rain, fog and splashes of water. » Wireless communication technology, when exposed to environments with high power radiation, may suffer interference and have its performance impaired.
-
Page 4: Table Of Contents
4.5. AMT 8000 Alarm Center ........ - Page 5 Using the XAT 8000 Wireless Keyboard Using AMT Remote Mobile Application (for mobile devices) Using the AMT 8000 programmer (for computers) Using Intelbras Guardian application (for mobile devices) 6.2. Wireless devices (register/delete) ....... . .46...
- Page 6 Changing RF Channel 6.3. Wireless sensor functions ........55 Wireless sensor testing Device Address Identification Adjusting Wireless Infrared Sensors...
- Page 7 Enable/Disable zones Partial mode (stay) Zone Functions Zone operation mode Automatic zone cancellation 6.11. Programming the alarm center partitioning ......83 Enable partitioning Partitioning the zone Password Partitions...
- Page 8 Monitoring via GPRS (General Packet Radio Service) connection 6.17. Functions via SMS ......... .124 Sending SMS messages Sending chip options and operating method Select SMS events...
- Page 9 Autoactivation/autodeactivation and Autoactivation/autodeactivation per partition Wi-Fi Connection Settings for monitoring and SMS Fault sending time System Reset Reset of the entire system except wireless device registration Warranty Term...
-
Page 10: Technical Specifications
AMT 8000: 5.2 Watts AMT 8000 + FXO 8000: 5.8 Watts AMT 8000 + XAG 8000: 8.1 Watts Average power¹ AMT 8000 + FXO 8000 + XAG 8000: 8.2 Watts Antenna type: internal Antenna gain: 0 dBi Wireless communication frequency... -
Page 11: Amt 8000 Alarm Center Features
Attention: Intelbras wireless systems are tested to the highest standards and bring high reliability, however, due to their use/installation in various scenarios, some considerations must be taken into account: » Transmitters/receivers may be being disturbed by radio signals, natural interference,... -
Page 12: Amt 8000 Accessories
» Remote software update through Ethernet or Wi-Fi connections. 3. AMT 8000 Accessories AMT 8000 alarm center can have several accessories grouped to compose the monitoring and security system, with the accessories responsible for communication and monitoring, sound warning, LCD keyboard and several sensors, for better adequacy and composition of the necessary protection system. -
Page 13: Communication Module Via Telephone Line - Fxo 8000
XAG 8000 GPRS Module Note: XAG 8000 module is compatible with most national GSM operators with 2G technology. XAG 8000 module can only be used with the AMT 8000 alarm center. 3.2. Communication module via telephone line - FXO 8000 ... -
Page 14: Wireless Keyboard For Alarm Centers- Xat 8000
8000 alarm center. Communication between the keyboard and the center is made through a wireless signal, providing a simpler installation and long communication range. Up to 16 XAT 8000 keyboards can be added to each AMT 8000 alarm center. Features »... - Page 15 » Text message display. » Display of the battery level of the alarm center. » Display of zone status (open/closed). » Signs the status of the partitions. » Panic, Medical Emergency and Fire function. » Violation protection (tamper). » Sound signalling during operation. »...
-
Page 16: Xac 8000 Remote Control
3.5. Wireless siren - XSS 8000 Optional dedicated accessory for status audible warning, intrusion and emergency indications from the AMT 8000 alarm center. Communication between the siren and the center is made through a wireless signal, providing a simpler installation and long communication range. - Page 17 » Features Sound power from 100 dB to 1 meter. » Communication status check through LED. » Audible trigger if communication is lost with the alarm center. » Wireless communication with the alarm center (915 to 928 MHz) via internal antenna, power 11 dBm.
-
Page 18: Wireless Magnetic Sensor - Xas 8000
3.6. Wireless magnetic sensor - XAS 8000 Optional dedicated accessory for door and window open checking in a distinctive, discreet and compact design. With low battery indication and sensor communication status, supervision, activation and anti-violation system with internal tamper to compose the 8000 line security system with maximum results. -
Page 19: Passive Infrared Wireless Sensor - Ivp 8000 Pet
3.7. Passive infrared wireless sensor - IVP 8000 Pet Dedicated accessory for checking intrusions through infrared reading in indoor environments, in a discreet and compact way and taking into account the presence of a pet and not triggering the alarm. With low battery indication and sensor communication status, supervision, activation and anti-violation system with internal tamper to compose the 8000 line security system with maximum results. -
Page 20: Passive Infrared Wireless Sensor - Ivp 8000 Pet Cam
It has a camera that after the sensor triggering, sends the image of the site to the applications and software compatible with the AMT 8000 Alarm Center. With low battery indication and sensor communication status, supervision, activation and anti-violation system with internal tamper to compose the 8000 line security system with maximum results. -
Page 21: Universal Transmitter - Tx 8000
Optional accessory dedicated to receive wired sensor signals and transmission of this reading to the AMT 8000 alarm center. The operation of this device is the same as that of a XAS 8000 wireless magnetic sensor, but it will be activated every time... - Page 22 » Fastening by screws (not included) or double-sided tape (not included). » DC Power Supply: 1 CR2450 type 3 Vdc battery of long life lithium. » Communication supervision and encrypted transmission. » Range: up to 600 m with direct view in open field.
-
Page 23: Range Rf Amplifier (Rep 8000 Repeater)
» Rechargeable battery. » Includes 7 Vdc/500 mA source. Important: each AMT 8000 alarm center can have up to 4 repeaters operating simultaneously, but all in separate operation from each other, so there is no possibility of one repeater being used to extend the signal to another, only in direct... - Page 24 The following figure shows the illustrative image of the repeater: Range RF Amplifier (REP 8000 Repeater) Range RF Amplifier (REP 8000 Repeater) has a tamper key against violation, located at the back of the repeater, and if this key is opened/violated, registered sirens will trigger and send the corresponding event if the Problems that generate trigger function is enabled (see the Problems that generate trigger section).
-
Page 25: Installation Of The Alarm Center And Its Peripherals
Attention: only connect the AMT 8000 alarm center to the mains and battery after the installation of all equipment and peripherals. Open the product box and then open the cover of the AMT 8000 alarm center cabinet by removing the screws, where two plates can be seen, that is, its basic configuration contains the AMT 8000 alarm center board and its respective power supply and rechargeable battery that comes with the system. - Page 26 25. Flat cable input of the power supply. 26. Radio connector (future use). Attention: the AMT 8000 alarm center does not have an auxiliary output to feed other devices and no connection point must be used on the alarm center cards...
-
Page 27: Power Supply For The Alarm Center (Full Range 90 And 265 Vac)
4.1. Power supply for the alarm center (full range 90 and 265 Vac) Alarm unit is equipped with a full range switching source that works with the input voltage of 90 and 265 Vac without the need of a voltage selector switch. This way, even if some voltage variation occurs in the mains, the alarm unit will continue working normally (as long as the voltage is in the range of 90 to 265 Vac). -
Page 28: Battery
4.2. Battery AMT 8000 alarm center has an internal rechargeable battery of 3.7 Vdc and a capacity of 3,000 mA. The battery connector is located on the power supply board and is used to connect the battery to the alarm system. To wire the battery to this connector use the cable that comes with it, as shown below. -
Page 29: Fxo 8000 Phone Module
In the XAG 8000 module there are two slots to be allocated two chips (SIM card) being superimposed on each other, with chip 1 being above chip 2. When installing the chips, let the metal contacts of the same face down and insert until the end of the slot for the correct allocation of chips. -
Page 30: Amt 8000 Alarm Center
Once the installation is finished, connect the alarm center to the local mains and the rechargeable battery. Note: to connect the AMT 8000 alarm center it is necessary that it is connected to the AC mains and the 5-way cable of the source is wired to the Source connector of the alarm center board, otherwise the alarm center will not power on even if the same is with battery. -
Page 31: Display Of Troubles
5.2. Display of troubles The occurrence of troubles is described as follows: On the XAT 8000 keyboard the icon will flash. If any trouble is detected, press the up or down arrow keys on the XAT 8000 keyboard to view them. To end the display, press the Exit key. Note: if the Indication of troubles by the siren in the activation/deactivation function and Beeping of the siren in the activation/deactivation are enabled and if any trouble is detected, 1 long beep will beep on activation and 2 long beeps... - Page 32 The 16 partitions can be controlled via keyboard, remote control, software and applications compatible with the AMT 8000 unit, because one partition can be activated or deactivated without influencing the other.
- Page 33 » Partial (stay): zones selected for this option remain inactive during activation Partial mode independent of the partition associated with it. Example: Assuming that for partition 01, composed of zones 01 to 10, only zones 01 to 05 are enabled as Partial mode. When the command for the Partial mode option is executed for a specific partition, in this case, partition 01, if someone passes the sector where sensors 01 to 05 are located, the alarm center will not fire - zones where the occupants will be present and...
- Page 34 » When the alarm center or partition receives the command to activate and any of the zones are open, a fault/error will be generated (long beep on the keyboards) and it will only be possible to activate the alarm center when all zones are closed in the case of a full or non-partitioned system, or in the case of partitioned systems with the zones of the respective closed partitions.
- Page 35 Remote control activation/deactivation To activate/deactivate the system by remote control, it must be registered with the alarm center, as described in section 6.2. Wireless devices (register/delete). The control is factory set so that button 1 only deactivates the alarm center, button 2 only activates and button 3 disabled.
- Page 36 Deactivation by master password or full password If you are using the master password or a full password (which has permission to enable/disable all partitions), there are two ways of deactivation: » All partitions: enter the password and all partitions will be disabled. »...
- Page 37 Bypass Through this function it is possible to temporarily cancel one or more zones. This function activates the zones that are cancelled (bypassed) during the next activation will not generate triggers in the system if they are violated. After the system is deactivated, the zones that were cancelled will return to normal configuration.
- Page 38 Status of the sensors in their respective zones will be displayed, distributed in divisions of 10 zones. To change the zone group press the directional keys down or up, for example, to access zones 41 to 50, press the down key on the keyboard until the number 4 appears in front of the first square, making the number 1 referring to zone 41 and so on, making the number 5 referring to zone 50.
- Page 39 IP1/IP2 connections status display function. In this example, IP1 is connected via Ethernet Refer to the Connections section for setting priority addresses and directions. » Cloud: Will display whether the center is connected to the Intelbras Cloud server via ETHERNET or GPRS. This server allows communication between AMT 8000 and remote access via application.
- Page 40 Wireless signal from the following devices may be displayed: » Sensors: devices registered in the alarm center at 01 to 64 addresses. To view the signal of the sensors with the marker on it press Enter and then, with the arrow keys, switch between the sensors.
- Page 41 It will display the battery level of the keyboard. 5.7. Remote update AMT 8000 alarm center has remote software updates, and if new software versions are available, it is not necessary to use recorders or connect to computers to be updated by downloading the new version through Ethernet or Wi-Fi connections.
- Page 42 6. Programming Alarm center has several programmable parameters, which makes it versatile, allowing it to optimize the operation for each need. These settings are stored in EEPROM type memory, thus avoiding the need for frequent reprogramming or if it is not fed. To program these parameters, it is necessary to use two special passwords, called master password (the center initially has the random master password indicated on the QR code label inside the cabinet) and installer password (factory default:...
- Page 43 Note: » If you wish to cancel the typing of a sequence before finishing, keep the Back key pressed until receiving the confirmation beep or press the Exit key and start typing again from the beginning of the sequence indicated in the manual.
- Page 44 Enter Memory N° Enter 1 to 8 If you only want to view the setting, press the Exit key and no programming will be changed. Note: Some commands can be entered either by the direct editing/programming mode or by the editing/programming mode with display. Bit Editing Command In programming mode, some commands are entered with a special edit mode, which simplifies data entry and allows the display of the current programming.
- Page 45 Internet via Ethernet, Wi-Fi or GPRS (XAG 8000 module added to the device is required). For more information about the AMT Remote Mobile application, please access the link http://www.intelbras.com. Note: it is required that the computer/remote access password is enabled, see 6.8. Passwords section.
- Page 46 6.2. Wireless devices (register/delete) AMT 8000 alarm center already comes with the wireless receiver integrated to it in order to receive and transmit signal to sensors, keyboards and other devices. Table below shows how many and which wireless devices can be registered in the alarm center.
- Page 47 » It is recommended to use a maximum of 8 sensors with photochecking IVP 8000 Pet Cam per AMT 8000 alarm center, however their registration can occur during the entire address range exclusive to sensors (01 to 64).
- Page 48 To delete a registered keyboard in the alarm center, keep the synchronization key of the device pressed for 20 seconds, until the Unlocked keyboard information is shown on its display. Note: when physically erasing the keyboards, they must be erased from the memory of the alarm center via programming.
- Page 49 To delete a sensor registered in the alarm center, hold down the synchronization key on the device for 20 seconds until the LED flashes red twice. Note: when physically erasing sensors, they must be erased from the alarm center memory via programming. »...
- Page 50 » Keyboards (addresses 01 to 16): with the keyboard to be registered near the alarm center, insert the following code and press the synchronization key at the back. The keyboard addressing will be according to the command entered, respecting the maximum limit of 16 devices of this type and after registration, all being added the common partition.
- Page 51 To delete remote controls, type: 00 to 97 Enter User N° Enter » Wireless sensors (addresses 01 to 64): follows the same principle as the other devices, but each sensor will be associated to a zone of the alarm center, according to the command performed.
- Page 52 » Wireless sirens (addresses 01 to 16): follow the same principle as the other devices. It is necessary to press the synchronisation key on the back of the siren (remove the base for fixing on surfaces), after entering the following code, check if the LED flashes green, indicating success in the registration.
- Page 53 Attention: for a device to pass through the range extension of the RF amplifier (REP 8000 repeater) it is necessary that it does not have direct communication with the AMT 8000 alarm center or the communication is bad with indication varying between orange and red, otherwise it will communicate directly with the center without passing through the amplifier.
- Page 54 (see Bloqueiossection). Changing RF Channel AMT 8000 alarm center has 4 RF communication channels, operating in the frequencies from 915 to 928 MHz and it is possible to change the channel used, if in the place where the system is located there are already other devices using this same frequency and thus causing interference.
- Page 55 Note: For partitioned system you will see P00 for common partition or P01 to P16 according to which partition the device belongs. Adjusting Wireless Infrared Sensors Wireless infrared sensors registered in the AMT 8000 alarm center can be customized to operate in the best way, as described below:...
- Page 56 » Sensitivity: will adjust so that the sensor detects correctly, according to the installation area, having the adjustment of 4 types of sensitivity, varying from the minimum, normal, intermediate and maximum (factory standard normal sensitivity ). Although programming is permitted at the center, it is not possible to change the sensitivity of the XAS 8000 and TX 8000 sensors.
- Page 57 6.4. Functions of Remote Control Keys The buttons on the XAC 8000 controls come out of the factory with the following functions: » Button 1: arm (function 02). » Button 2: disarm (function 03). » Button 3: disabled (function 00). With the following command and indicative table it is possible to change the function of each remote control keys.
- Page 58 Atv/Dtv only Partition 15 Atv/Dtv only Partition 16 Atv/Dtv Partial mode (stay) for Partition 1 only Atv/Dtv Partial mode (stay) for Partition 2 only Atv/Dtv Partial mode (stay) for Partition 3 only Atv/Dtv Partial mode (stay) for Partition 4 only Atv/Dtv Partial mode (stay) for Partition 5 only Atv/Dtv Partial mode (stay) for Partition 6 only Atv/Dtv Partial mode (stay) for Partition 7 only...
- Page 59 Activate + Partition + Password. In AMT 8000 it is possible to program/associate a keyboard (01 to 16) to one of the partitions (01 to 16), as described below.
- Page 60 Note: » All keyboards leave the factory programmed for the common partition 00. » Even if the keyboard is set to the partition, specific passwords are required to perform the partition functions through it. » A keyboard can be registered in a single partition or become common to all partitions, and if the command is redone, only the last command will be valid.
- Page 61 Description Message group User, device or zone Name of the alarm center Users 00 to 99 Zones 01 to 64 Partitions 01 to 16 Keyboards 01 to 16 Sirens 01 to 16 After entering the command, the sequence entered will appear on the first line of the displayand the previously programmed message on the second.
- Page 62 To edit/view the programmed value, type: Enter Enter After entering the command, define which function will have the Panic key, being the selection 0 as disabled, 1 as Audible Panic (factory default), 2 as silent panic, 3 as fire panic and 4 as medical emergency and press the Enter key to confirm. If you only want to view the setting, press the Back/Exit and no programming will be changed.
- Page 63 After entering the command, define which partition the XSS 8000 siren will belong to, with the address 00 as common (the siren will be triggered if an event is generated on any of the partitions) or from 01 to 16 (the siren will be triggered only if the partition to which it was defined, generates any event) according to the desired partition and press Enter key to confirm.
- Page 64 » In case of partitioned system and with siren without partition defined for it, beeping will take place on the common siren, if the system does not have common siren, beeping will not have activation/deactivation for this partition and neither will beeping of the other sirens for this partition in case of triggering.
- Page 65 Exit key and no programming will be changed. 6.7. Update AMT 8000 alarm center has remote software updates, and if new software versions are available, it is not necessary to use recorders or connect to computers to be updated by downloading the new version through Ethernet or Wi-Fi connections.
- Page 66 6.8. Passwords Attention: » The alarm center to be operated/configured requires passwords, being some passwords are created through programming mode (secondary passwords, duress) and the installer password has the 9090 factory standard . In case of remote access password and master password for increased security are random passwords which are available on the QR Code label together with the MAC address of the alarm center.
- Page 67 Programming password permissions Password Enabling Create and delete secondary passwords Change the master password Master (initially Enable/disable secondary password permissions random, see QR Code Adjust date, time and day of week label) Editing XAT 8000 keyboard messages Activate/deactivate the center completely or partitioned (Partition 01 to 16) Installer (factory Perform all settings of the alarm center, except enable/disable the center, default password:...
- Page 68 User User User Users of Users of Users of group group group 31 to 40 41 to 50 51 to 60 (GU) (GU) (GU) Key 1 = user 31 Key 1 = user 41 Key 1 = user 51 Key 2 = user 32 Key 2 = user 42 Key 2 = user 52 Key 3 = user 33...
- Page 69 Password programming using the installer password Changing passwords using the installer password With the installer password it is allowed to change only the installer password (User = 99) and the computer/remote access password (User = 98). The user password 98 is always with 6 digits and does not depend on setting, but the user password 99 can be with 4 or 6 digits.
- Page 70 Delete the passwords using the master password The master user password - 00 can only be changed and not deleted. User passwords 01 to 97 can be deleted. To program this function, type: Enter User Enter 01 to 97 Password Permissions Secondary passwords that are created (01 to 96) will be allowed to enable/disable the entire system and can be enabled to have the following accesss/permissions according to the needs of each installation.
- Page 71 Partition Permission Enter Password number Group of partitions Enter From 01 to 96 0 = partition from 01 to 10 1 = partition from 11 to 16 After entering the command, using the XAT 8000 keyboard, mark which partitions the password will be allowed to, using the numbers on the keyboard to leave marked for the partition.
- Page 72 6.9. Quick setup for SMS monitoring and programming In this section the processes for reporting events for monitoring companies through the phone line channels, IP communication and GPRS connection are briefly described. The option to send SMS is also described. For more details on these programming please refer to the 6.16.
- Page 73 Monitoring via Ethernet/Wi-Fi The alarm center can report events via IP communication to monitoring companies (Software Receptor IP Intelbras), for this the following commands must be programmed: If you are using the Wi-Fi connection before you set the monitoring options, program the following commands: Note: the alarm center connects only with 2.4GHz routers.
- Page 74 » Programming the reporting mode Enter + 17 + 4 + 0 + 0 + Enter » Program communication priority (Ethernet only) Enter + 19 + 0 + Enter » Program target IP Enter + 801 + I + Enter , where I = 1 or 2 (target IP 1 or target IP 2) After the command, enter the IP number of the monitoring company (example: 192.168.001.100) and press the Enter key to confirm.
- Page 75 After the command, using the keys on the keyboard, enable option 1 (marking 1) and press the Enter key to confirm. » Programming the network mask Enter + 8130 + Enter After the command, enter the network mask number and press the Enter key to confirm.
- Page 76 » Entering the programming mode with the installer password Enter + installer password (factory default: 9090 ) » Schedule monitoring account Enter + 15 + PP + Enter , where PP = partition from 01 to 16 After the command, enter the 4-digit monitoring account number and press the Enter key to confirm.
- Page 77 » Enable the chip to be used Enter + 832 + Enter After the command, use the keys on the keyboard to enable options 1 (chip 1), 2 (chip 2). » Program login Enter + 822 + O + Enter , where O = 1 or 2 (Operator 1 ou Operator 2) After the command, type the login (according to the operator used) and then press the Enter key to confirm.
- Page 78 » Exit programming mode with installer password Installer password (factory standard: 9090 ) » Check the GPRS signal level Press the Menu key, navigate through the arrow keys, access the GPRS Signal option and check the signal through the 1 to 10 markings. »...
- Page 79 » Exit programming mode with installer password Installer password (factory standard: 9090 ). » Test to check if the SMS configuration worked » Test receiving SMS: activate the alarm center and wait for the reception of the activation event by SMS. »...
- Page 80 Enable/Disable zones The zones that are not being used must be disabled so that they do not fire when the alarm center is activated using a remote control, or when trying to activate the alarm center using a valid password, the keyboard beeps indicating that the alarm center has open zones.
- Page 81 Zone Functions The zones of the alarm center leave the factory configured as immediate, i.e. when are violated they generate the immediate event/fire, but can be configured for the following functions: » Timed zone for input: allows you to define which zones will be timed when the alarm center is activated.
- Page 82 To program this function, type: From 1 to 6 From 0 to 6 Enter Zone Functions Zone group Enter Zone Functions Timed Follower 24 Hour Panic Medical emergency Fire Use the keys on the keyboard to define the function of the zone, so that the numbers that you want to have the zone with the given function remain marked and the zones without the function remain unchecked, then confirm with the Enter key.
- Page 83 Use the keys on the keyboard to define the zone mode, so that the reference numbers, which you wish to have the zone with the given mode, remain marked and the zones without the mode remain unchecked, then confirm with the Enter key.
- Page 84 Partitioning the zone When the system is partitioned, the zones can be divided as follows: » Common zone (default): the zone does not belong to any of the partitions. It is only activated when all partitions are activated (activation by master password or full password) and deactivated whenever one of them receives the command to deactivate.
- Page 85 After entering the command, using the XAT 8000 keyboard, mark which partitions the password will be allowed to, using the numbers on the keyboard to leave marked for the partition. After changing the configured value, press the Enter key. If you only want to view the setting, press the Back/Exit and no programming will be changed.
- Page 86 To program this function, type: 000 to 255 seconds Enter Partition Input time Enter 01 to 16 To edit/view the programmed value, type: Enter Partition Enter 01 to 16 After changing the configured value, press the Enter key. If you only want to view the setting, press the Exit key and no programming will be changed.
- Page 87 To program this function, type: 000 to 255 seconds Enter Partition Output time Enter 01 to 16 To edit/view the programmed value, type: Enter Partition Enter 01 to 16 After changing the configured value, press the Enter key. If you only want to view the setting, press the Exit key and no programming will be changed.
- Page 88 Clock To set the clock, type: Enter Hours Minutes Seconds Enter To edit/view the programmed value, type: Enter Enter After changing the configured value, press the Enter key. If you only want to view the setting, press the Exit key and no programming will be changed. Calendar To set the calendar, type: Month...
- Page 89 Time interval for date and time synchronization When this function is enabled, the alarm center will synchronize the date and time with the server where the Intelbras IP Receiver software is installed (24 hour factory standard synchronization), for third party software they should be consulted. The synchronization will occur in the following situations: »...
- Page 90 6.14. Periodic Test This function is used to check the integrity of the communication channel between the alarm center and the monitoring company. If programmed, periodically will be reported the Periodic Test event. Thus, if the monitoring company does not receive this event in the programmed period, the communication channel can be considered inoperative.
- Page 91 000 to 255 hours Enter Enter Time between tests Note: To deactivate the periodic test by time interval, program as 000. To edit/view the programmed value, type: Enter Enter After changing the configured value, press the Enter key. If you only want to view the setting, press the Exit key and no programming will be changed.
- Page 92 Programmed and Inactivity Autoactivation can be used together. For example, if you want the center to be automatically activated by inactivity only after 10:00pm. For this programming we have 3 examples that explain the alarm center's Autoactivation, displayed below, considering that the Programmed Autoactivation will be at 10:00pm and the inactivity time will be 10 minutes: 1.
- Page 93 5. Adjust the day of the week; 6. If you want to enable automatic time and date synchronization with the server (make sure you are using the latest version of Intelbras IP Receiver for the correct effect). Use the table below for the following required settings:...
- Page 94 Enter Partition Enter 01 to 16 Use the keyboard to set the days for partition autoactivation occurs, so that the numbers you want to have the days enabled remain checked and the days with the disabled function remain unchecked, then confirm with the Enter key. Note: in the above command for non-partitioned alarm center, use Partition = 01.
- Page 95 Enter Partition Enter 01 to 16 Use the keyboard to set the days for partition autodeactivation occurs, so that the numbers you want to have the days enabled remain checked and the days with the disabled function remain unchecked, then confirm with the Enter key. Note: in the above command for non-partitioned alarm center, use Partition = 01.
- Page 96 When the system date is the same as one of the programmed dates, the settings of the weekday will be superimposed by the times programmed in the address of the commands described above, referring to the programming of autoactivation of the alarm center.
- Page 97 Note: in the above command for non-partitioned alarm center, use Partition = 01. 6.16. Telephony and Monitoring Settings AMT 8000 alarm center was specially developed to be monitored remotely, that is, a contractor can monitor several events in real time, for example: »...
- Page 98 Low System Battery/Restore System Battery System Reset Programming change Absent Battery/Restoration Battery Phone line Cut/Restore Phone line Failure to communicate event Failure of supervision/Restoration supervision Expander Device Tamper/Restore Expander Device Tamper Sensor Tamper / Restore Sensor Tamper Low Battery of Wireless Device/Restoration Device Battery System Activation/Deactivation Automatic Activation/Deactivation Remote Activation/Deactivation...
- Page 99 » Sensor communication failure in zone 12: event 147 (factory standard) and with user/zone being 012 . » Sensor reset in zone 64: event 130 (factory standard) and with user/zone being 064 . » Sensor tamper in zone 05: event 383 (factory standard) and with user/zone being 005 .
- Page 100 After entering the command, enter the event value in hexadecimal format from 000 to FFF (accepts numbers from 0 to 9 and the letters B, C, D, E and F) and press the Enter key to confirm. If you only want to view the setting, press the Exit key and no programming will be changed.
- Page 101 Events of the restoration type Sensor tamper Zone no. Event Contact-ID Code 01 to 64 Sensor tamper restoration Use the table above to carry out the Contact-ID event change command for zone sensor tamper restoration, as described below: Enter Zone N° Enter 01 to 64 After entering the command, enter the event value in hexadecimal format from...
- Page 102 Use the table above to perform the Contact-ID event change command to activate each registered user, as described below: To edit/view the programmed value, type: Enter User N° Enter 01 to 97 After entering the command, enter the event value in hexadecimal format from 000 to FFF (accepts numbers from 0 to 9 and the letters B, C, D, E and F) and press the Enter key to confirm.
- Page 103 Use the table above to perform the change command to open system events , as described below: Enter Index Enter 00 to 24 After entering the command, enter the event value in hexadecimal format from 000 to FFF (accepts numbers from 0 to 9 and the letters B, C, D, E and F) and press the Enter key to confirm.
- Page 104 Push Events Notifications that will be sent to the Intelbras Guardian application when the corresponding event occurs with the alarm center, and the alarm center must be connected to the Internet (Ethernet, GPRS or Wi-Fi).
- Page 105 BATEIRA_BAIXA_SENSOR, Key 1 Enabled Key 2 Enabled FALHA_SUPERVISAO_RF, Key 3 Enabled BYPASS_ZONA, Key 4 Enabled BYPASS_AUTOMATICO, Key 5 Enabled FALHA_REDE_ELETRICA, Key 6 Enabled BATERIA_PRINCIPAL_BAIXA, Key 7 Enabled BATERIA_PRINCIPAL_AUSENTE, Key 8 Enabled FALHA_LINHA_TELEFONICA, Key 9 Enabled ARME_DESARME_REMOTO, Key 0 Enabled AUTO_ARME_DESARME, Key 1 Enabled ARME_RAPIDO,...
- Page 106 Use the keyboard to enable the Push event options, so that the corresponding numbers you wish to have the function enabled remain marked on the display and then confirm with the Enter key. If you only want to view the setting, press the Back/Exit key that no programming will be changed.
- Page 107 » Phone 1/2 Protocol: indicates the protocol that will be used when phone 1/2 is dialed: » 0: Contact-ID. » 1: Programmable Contact-ID. To edit/view the programmed value, type: Enter Enter After changing the configured value, press the Enter key. If you only want to view the setting, press the Exit key and no programming will be changed.
- Page 108 3 and then you can execute this command so that the rest of the programming is done remotely, using a microcomputer with a modem and the installed Intelbras AMT 8000 programmer software.
- Page 109 0 to 9 or the letters B, C, D, E and F. If you only want to view the configuration, press the Exit key and no programming will be changed. Note: if the AMT 8000 alarm system is not partitioned, use the partition as 01.
- Page 110 Pending Event Reset This command will cancel the sending of all events not transmitted, but the events remain recorded and can be accessed through the download. For example, if the system has been left without a phone line installed for some time, the event buffer can have up to 512 events not transmitted.
- Page 111 (check the distance between the signal replicator device and the alarm center). The alarm center when connected via Wi-Fi can also be accessed remotely through Intelbras applications.
- Page 112 To connect to a Wi-Fi network, the following commands are required: To program or change the name of the Wi-Fi network, type: Enter Enter After entering the command, use the keys on the XAT 8000 keyboard to enter the name of the network you wish to connect, paying attention to special characters if applicable and after changing the value, press the Enter key.
- Page 113 After entering the command, use the keys on the XAT 8000 keyboard to define the type of network configuration that will connect. Selection Type of configuration Wi-Fi Disabled Wi-Fi enabled / in case of AC failure, operates on battery Wi-Fi enabled / only with active AC network After selecting the type of setting, press the Enter key to confirm.
- Page 114 Ethernet, Wi-Fi or GPRS, reporting will be done to the same addresses. To receive events through the Internet, it is necessary to install the Intelbras IP Receiver software on the computer or use a monitoring software already compatible with the TCP/IP communication of the...
- Page 115 To program this function, type: Enter IP Address Enter 1 - IP1 2 - IP2 After the command enter the IP number of the monitoring company (example: 192.168.001.100) and press the Enter key to confirm. If you only want to view the setting, press the Back/Exit key that no programming will be changed.
- Page 116 IP networks. This field defines the port to which the center will connect, factory default 9009 . Intelbras IP Receiver software must be configured for the same port. Some ports may be being used by other applications, so choose one that is free, preferably above 1000.
- Page 117 The following options configure the network properties in the alarm center, such as IP address, mask, gateway, etc., very similar to the settings of a network card on a computer. These settings enable the alarm center to connect to the Intelbras IP Receiver software and transmit events.
- Page 118 2. The current address will be displayed, being the factory default 192.168.001.100 , to enter/change the address, enter the new programming and press Enter to confirm the programming; 3. If you only want to view the setting, press the Back/Exit key that no programming will be changed.
- Page 119 Heartbeat Ethernet interval (link test) To check that the communication between the alarm center and the Intelbras IP Receiver software is working, the alarm center will send a message (known as Heartbeat or Keep alive) according to the programmed time interval. If Intelbras IP Receiver does not receive this message in the programmed time interval, a failure event may be generated.
- Page 120 Login Login for connection to the GPRS network of the operator used. This field accepts letters and numbers and can contain up to 16 digits. The following are the standard logins of some operators. Operador Login Claro claro Vivo vivo Note: this information may be changed without prior notice.
- Page 121 To program this function, type: Enter Operator Enter 1 = operator 1 2 = operator 2 After the command, type the password (according to the operator used) and then press the Enter key to confirm. If you only want to view the setting, press the Exit key and no programming will be changed.
- Page 122 To check that the communication between the alarm center and the Intelbras IP Receiver software is working, the alarm center sends a message (known as Heartbeat or Keep alive) according to the programmed time interval. If Intelbras IP Receiver does not receive this message in the programmed time interval, a failure...
- Page 123 To edit the link test interval, type: Enter Interval Enter 001 to 255 minutes To edit/view the programmed value, type: Enter Enter After changing the configured value, press the Enter key. If you only want to view the setting, press the Exit key and no programming will be changed. Note: In order to minimize excessive data consumption, it is recommended a time longer than 2 minutes for each test interval, being the factory default in 5 minutes.
- Page 124 This feature is mainly applied in installations that use prepaid plans and has the purpose of reducing credit consumption in constant situations of connection failure, unavailability of services by the operator or the Intelbras IP Receiver software (ex.: offline software ).
- Page 125 Event Message Name of alarm center Alarm center activation Activation User name Name of alarm center Deactivation of the alarm Deactivation center User name Name of alarm center Trigger Trigger Zone name Name of alarm center Audible or silent panic Panic Zone + Number of the programmed zone as panic or panic user Name of alarm center...
- Page 126 Key 3 Sending SMS Key 4 Receiving SMS Use the 1, 2, 3 and 4 on the keyboard to enable the chip and operating method options, so that the corresponding numbers that you wish to have enabled remain marked on the display and then confirm with the Enter key. If you only want to view the setting, press the Back/Exit key that no programming will be changed.
- Page 127 Note: enter the number of the phone to be programmed, starting with the DDD, then operator and finally the number always starts with the digit 9 (nine) - if it is cellular - followed by more 8 (eight) numbers. E.g.: Memory Number with position 1...
- Page 128 Function SMS message to be sent Activates the complete center !passwordA! Only activate partition 01 !passwordA01! Only activate partition 02 !passwordA02! Only activate partition 03 !passwordA03! Only activate partition 04 !passwordA04! Only activate partition 05 !passwordA05! Only activate partition 06 !passwordA06! Only activate partition 07 !passwordA07!
- Page 129 Exit key and no programming will be changed. 6.18. Activation/deactivation of Functions The AMT 8000 alarm center has several functions that can be activated or deactivated according to the needs of each installation. These functions are divided into 6 groups: »...
- Page 130 » Activation by a key: If this function is activated, you can activate the system by pressing the Active key for 3 seconds. All partitions will be activated in the case of a partitioned center, if a common keyboard is used, and in the case of a keyboard with permission on a specific partition, only this partition will be activated.
- Page 131 General settings 2 The parameters configured in this function group are described below: » Silent panic by key 0 : if key 0 is pressed for 3 seconds, the siren will remain off and the Silent Panic event will be reported to the monitoring company. »...
- Page 132 Use the keyboard to set the function status, so that the numbers that you want to have the function active remain checked and the functions that should remain inactive remain unchecked, then confirm with the Enter key. Locks The parameters configured in this function group are described below: »...
- Page 133 Function Key 1 Alarm center Tamper Key 3 Phone line cut Use the keyboard key 3 to enable the alarm center function, so that the number 3 remains checked to enable and unchecked to disable and then confirm with the Enter key.
- Page 134 Function Call back Overlay of answering machine Real-time reporting Periodic test only by phone Disable beep of output time Use the keyboard to set the function status, so that the numbers that you want to have the function active remain checked and the functions that should remain inactive remain unchecked.
- Page 135 Function Key 1 Key 2 Failure of supervision Key 3 Key 4 Phone line cut Key 5 Tamper of devices Key 6 Do not generate trips Use the keyboard to set the function status, so that the numbers that you want to have the function active remain checked and the functions that should remain inactive remain unchecked, then confirm with the Enter key.
- Page 136 If the Reset Lock is enabled, it is not possible to perform the Reset of system (see 6.18. Activation / deactivation of item functions ). Temporary Reset of Master and Installer Passwords If you have forgotten the master password or the installer password, you will not be able to enter programming mode and gain access to the center's settings/ operations.
- Page 137 6.21. Quick programming reference This quick reference considers that the alarm center is in programming mode and assumes the reading of the complete manual and knowledge of the result of each function. When accessing the programming mode, editing or viewing some programming through the keyboard, if the sequence or password is accepted, 2 confirmation beeps will be emitted, otherwise a long error beep will be emitted, in which case the insertion of the password or command must be started again.
- Page 138 The addressing of the keyboard will be according to the sequence performed, respecting the maximum limit of 16 devices of this type. To delete a registered keyboard in the alarm center, keep the synchronization key of the device pressed for 20 seconds, until the Unregistered keyboard information is shown on its display.
- Page 139 » Delete wireless keyboards Enter + 720 + NT + Enter NT = keyboard number from 01 to 16. » Wireless Keyboard Partition Enter + 223 + NT + PP + Enter NT = keyboard address from 01 to 16 PP = partition from 00 to 16 (00 = common keyboard, i.e.
- Page 140 NU = user number from 00 to 97. » Delete remote control Enter + 70 + NU + Enter NU = user number from 00 to 97. » Functions of Remote Control Keys Enter + 65 + T + NU + FC + Enter T = control key of 1 to 3.
- Page 141 Atv/Dtv only Partition 16 Atv/Dtv Partial mode (stay) for Partition 1 only Atv/Dtv Partial mode (stay) for Partition 2 only Atv/Dtv Partial mode (stay) for Partition 3 only Atv/Dtv Partial mode (stay) for Partition 4 only Atv/Dtv Partial mode (stay) for Partition 5 only Atv/Dtv Partial mode (stay) for Partition 6 only Atv/Dtv Partial mode (stay) for Partition 7 only Atv/Dtv Partial mode (stay) for Partition 8 only...
- Page 142 Note: for XAS 8000 and TX 8000 the Sensitivity, Sensor LED andOperation Mode settings are allowed by the unit, but only the LED configuration is accepted by XAS 8000 and TX 8000. » Wireless sensor testing Enter + 52 + Enter + Activate sensor »...
- Page 143 NA = amplifier number from 01 to 04. » Delete Range RF Amplifier (REP 8000 Repeater) Enter + 722 + NA + Enter NA = number of amplifier from 01 to 04. » Reset wireless devices » Delete all registered wireless devices Enter + 7 + Disable + Enter Note: all wireless devices in the alarm center, including the keyboard itself, will be unregistered.
- Page 144 Note: It is necessary that the alarm center is connected to the Internet through the Ethernet or Wi-Fi connection present in the center and described in the following commands/information its settings. It is not possible to download/update software through the GPRS connection due to the connection download rate and excessive consumption of the package used.
- Page 145 P = permission setting, 5 active only and 6 bypass permission. GS = group of passwords from 0 to 9, with group 0 going from 01 to 10, group 1 from 11 to 20 and so on, closing with group 9 from 91 to 97. »...
- Page 146 » Zone operation mode Enter + 0 + MP + G + Enter MP= mode of zones from 7 or 8. G = Zones group from 0 to 6. After inserting the command, use the keyboard , to enable/disable the corresponding zones for the group and press the Enter key to confirm.
- Page 147 Timings » Input Timing Enter + 42 + PP + TTS + Enter PP = partition from 01 to 16 (non-partitioned alarm center, use PP = 01). TTS = time from 000 to 255 seconds. » Output Timing Enter + 44 + PP + TTS + Enter PP = partition from 01 to 16 (non-partitioned alarm center, use PP = 01).
- Page 148 Periodic Test » Enable periodic testing by time Enter + 470 + HH + MM + Enter HH = hours from 00 to 23. MM = minutes from 00 to 59. » Disable periodic test by time Enter + 470 + Disable + Enter »...
- Page 149 6 = Friday, 7 = Saturday. » Autoactivation Time Enter + 462 + PP + D + HH + MM + Enter PP = partition from 01 to (non-partitioned alarm center, use PP = 01). D = weekday from 1 to 7 (1 = Sunday, 2 = Monday, 3 = Tuesday, 4 = Wednesday, 5 = Thursday, 6 = Friday, 7 = Saturday).
- Page 150 » Insert password of the network to be connected Enter + 851 + Enter + Insert network password + Enter » Enable/disable Wi-Fi Note: the alarm center connects only with 2.4GHz routers. Enter + 852 + Enter + TP + Enter TP = type of configuration.
- Page 151 Contact-ID and 1 = Programmable Contact-ID. Note: the programmable Contact-ID protocol can only be edited by the download/ upload software ( AMT 8000 programmer ). » Program number of attempts to report an event Enter + 13 + T + Enter , where T = number of attempts from 1 to 9 »...
- Page 152 Note: This field defines the port to which the center will connect, factory default : 9009 . Intelbras IP Receiver software must be configured for the same port. Important: you must not use the same port from another manufacturer for this communication, because there is the possibility of conflict.
- Page 153 » Programming the gateway Enter + 8140 + Enter After the command, enter the network gateway number and press the Enter key to confirm. » Programming DNS Servers for Ethernet Enter + 815 + S + Enter , where S = 1 or 2 (Server 1 or Server 2) After the command, enter the DNS1 server number and press the Enter key to confirm.
- Page 154 If the PIN is incorrect the chip will be locked. Enter + 825 + O + PIN number with 4 digits + Enter , where O = 1 or 2 (Operator 1 or Operator 2) » Heartbeat GPRS interval (link test) Enter + 827 + TTM + Enter , onde TTM = Heartbeat interval time from 000 to 255 minutes (default 005 minutes ) »...
- Page 155 Contact-ID Codes For the following commands that configure the Contact-ID code, the communication protocol must be set to Programmable Contact-ID (see Event Reporting Mode ), otherwise events will be sent with the standard Contact-ID. » Set up Contact-ID code for zone opening type events Enter + 901 + ZZ + Enter ZZ = zone from 01 to 64 After entering the command, enter the event value in hexadecimal format from...
- Page 156 After entering the command, enter the event value in hexadecimal format from 000 to FFF (accepts numbers from 0 to 9 and the letters B, C, D, E and F) and press the Enter key to confirm. Factory default 401 . »...
- Page 157 Programming change Failure to communicate event Incorrect password Remote access Manual testing Periodic Test Event Buffer Reset Restart date and time Tamper of expansion devices Tamper sensors Maintenance request » Setup Event Code Push Enter + 92 + EV + Enter + Select event + Enter EV = group of events from 0 to 3, group 0 being from 01 to 10 and so on, until group 3 being from 31 to 35.
- Page 158 AUTO_ARME_DESARME, Key 1 Enabled ARME_RAPIDO, Key 2 Enabled ARME_DESARME_SOB_COACAO, Key 3 Enabled RESET_SISTEMA, Key 4 Enabled PROGRAMACAO_ALTERADA, Key 5 Enabled FALHA_AO_COMUNICAR_EVENTO, Key 6 Enabled SENHA_INCORRETA, Key 7 Enabled ACESSO_DOWNLOAD, Key 8 Enabled TESTE_MANUAL, Key 9 Enabled TESTE_PERIODICO, Key 10 Enabled RESET_BUFFER_EVENTOS Key 1 Enabled...
- Page 159 Fault sending time » AC mains failure Enter + 481 + TM + Enter TM = 01 to 99 minutes failure send time. System Reset Reset of the entire system except wireless device registration Enter + 0000 + Enter » Reset of the entire system (Programming, Messaging and Wireless Devices) Enter + 9999 + Enter Approval...
- Page 160 Warranty Term It is expressly stated that this contractual warranty is given subject to the following conditions: Name of customer: Signature of the customer: No. of the invoice: Date of purchase: Model: Serial No: Reseller: 1. All parts, pieces and components of the product are warranted against any manufacturing defects, which may present, for a period of 1 (one) year - this being 90 (ninety) days of legal warranty and 9 (nine) months of contractual warranty - as from the date of purchase of the product by the Consumer, as stated in the...
- Page 161 6. This warranty does not cover loss of data, so it is recommended that the Consumer make a regular backup of the data on the product. 7. Intelbras is not responsible for the installation of this product and also for any attempts of fraud and/or sabotage on its products. Keep software and application updates, if any, up to date, as well as network protections necessary to protect against hackers.
- Page 162 US Robotics is a registered trademark of USRobotics. Motorola is a registered trademark of Motorola, Inc. Lucent is a registered trademark of Alcatel-Lucent. Agere is a registered trademark of LSI Corporation. Android is a registered trademark of Google, Inc. Windows, Windows XP, Windows Vista, Windows 7, MSN, NetMeeting, Windows, DirectX, Direct Sound 3D and Media Player are registered trademarks or trademarks of Microsoft Corporation in the United States or other countries or regions.
- Page 163 Support via e-mail: suporte@intelbras.com.br Customer Service: 0800 7042767 Where to buy? Who installs it? 0800 7245115 Produced by: Intelbras S/A – Indústria de Telecomunicação Eletrônica Brasileira Rodovia BR 459, km 124, 1325 – Distrito Industrial – Santa Rita do Sapucaí/MG – 37540-000 03.20 CNPJ 82.901.000/0016-03 –...
Need help?
Do you have a question about the AMT 8000 and is the answer not in the manual?
Questions and answers