Table of Contents
Advertisement
Quick Links
Advertisement
Table of Contents

Related Manuals for Intelbras AMT 4010 Smart


Summary of Contents for Intelbras AMT 4010 Smart
- Page 1 Installation Guide AMT 4010 Smart AMT 4010 Smart Net...
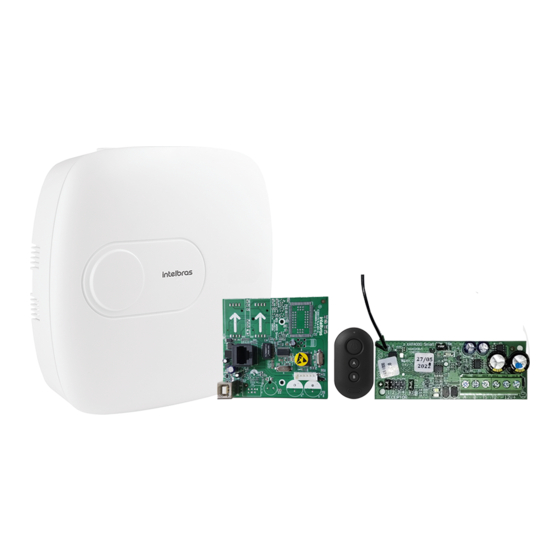
- Page 2 Alarm center Congratulations, you have just purchased a product with Intelbras quality and safety. The AMT 4010 Smart/AMT 4010 Smart Net alarm center has advanced technology and is easy to program. It has 8 memories for telephone numbers, Panic function,...
-
Page 3: Table Of Contents
Summary 1. Installation 2. Quick Access Keys (starting with version 1.6.0) 3. Quick Programming Reference 3.1. New QR CODE Label ......... . .7 3.2. - Page 4 3.26. Editing XAT 2000 LCD/XAT 4000 LCD keyboard messages ... . .29 3.27. Keyboard Messages Reset ........30 3.28.
-
Page 5: Installation
1. Installation 7 8 9 10 11 1. Connector for connection to the XEG 4000 Smart, XG 4000 Smart or XE 4000 Smart board 2. Connector for power supply from the switched-mode power supply 3. Battery connector 4. Positive of the siren output 5. - Page 6 21. Output for telephones 22. Telephone line input 23. DX-Net/Radioenge Radio Output 24. Connector for writing to the microcontroller of the AMT 4010 Smart/AMT 4010 Smart 25. USB connector for bootloader and downloading/uploading the center’s pro- gramming Full range switching power supply (90 and 265 Vac):...
-
Page 7: Quick Access Keys (Starting With Version 1.6.0)
This quick reference assumes that the alarm center is in programming mode and presumes that you have read the entire manual and know each function’s result. Manual available at: www.intelbras.com.br. 3.1. New QR CODE Label To maintain the ease of connection between the alarm center and our applications... -
Page 8: Passwords Programming 1
If you wish to access the alarm center with one of our compatible applications via CLOUD, just use the QR CODE reader of the application, read the QR CODE code from the label on the cover of the center and it will automatically fill in the MAC, Master password and Remote Access password fields in the application. -
Page 9: Password Programming 2
Register time for the temporary password Enter + 43 + ? ? + ? ? ? ? + Enter ?? = password number 01 to 60 for temporary passwords ???? = 4-digit time (0001 to 1000 hours), this time leaves the factory empty. Command to delete passwords Enter + 20 + ?? + Enter ?? = password number, from 01 to 61... -
Page 10: User Attributes (As Of Version 1.90)
Where: G = Passwords group: P = Permission: 0 = passwords 1 to 8 1 = partition A 1 = passwords 9 to 16 2 = partition B 2 = passwords 17 to 24 3 = partition C 3 = passwords 25 to 32 4 = partition D 4 = passwords 33 to 40 5 = only active... -
Page 11: Zone Configuration
Enter + 2902 + XX + Enter, where XX goes from 01 to 60 Key 1* Has permission to trigger the PGM 9 Key 2* Has permission to trigger the PGM 10 Key 3* Has permission to trigger thePGM 11 Key 4* Has permission to trigger the PGM 12 2902... - Page 12 Electric Fence Trigger Zone The event generated in this trigger will be 131. To program it, check the topic 3.7. Zone Attributes ( as of version 1.90). Note: As of version 5.0 the Zone Attributes function will be removed and the pro- gramming command will be: Enter + 68 + G + Enter G = 0...
- Page 13 Zone operation mode Enter + 0 + M + T + Enter + select zone + Enter M = operation mode from 5 to 8 5 = smart 6 = fast 7 = silent 8 = normally open contact T = group of zones from 0 to 7 »...
-
Page 14: Partitioning
Note: The zones that can be configured with this function are 17 to 64. And they can be programmed as shown in the table below: Enter + 78 + G + Enter G = 0 Not applicable Not applicable Zones 17 to 24 25 to 32 33 to 40 41 to 48... -
Page 15: Zone Attributes (As Of Version 1.90)
After introducing the programming (select which partition and zone group) define which zones will be active in the partition so that the zone marker is selected. Repeat the same programming for the other partitions and zone groups (zones 1 to 8 will always be shown in each programming). -
Page 16: Power-On Input (As Of Version 2.00)
Enter + 3902 + XX + Enter, where XX goes from 01 to 64 Key 1 Timed Zone Key 2 Follower Zone Key 3 24h Zone Key 4 Panic Zone 3902 Zone 01 to 64 Key 5 Medical Emergency Zone Key 6 Fire Zone Key 7... -
Page 17: Manual Bus Scan (As Of Version 3.80)
3.10. Manual bus scan (as of version 3.80) To enable: Enter + 518 + enter Key 5 Manual scan mode To perform manual scan: Enter + 37 + enter 3.11. Timing (Programming only by the installer) Entry Timer Programming Enter + 42 + ? + ??? + Enter ? = partition 0 = timing of partition A 1 = timing of partition B... -
Page 18: Auto Activation
Calendar Programming Enter + 401 + DD + MM + AA + Enter DD = two-digit day MM = two-digit month AA = two-digit year Enable the siren beep on activation/deactivation Enter + 510 + Enter + select the 3 key + Enter Enable siren beep on activation/deactivation from the remote control Enter + 51 + 6 + Enter + select option 3 + Enter Enable siren beep on activation/deactivation from the keyboard... -
Page 19: Scheduled Auto Activation And Autodeactivation
3.13. Scheduled auto activation and autodeactivation Note: as of version 2.30, scheduled auto activation will be usable together with auto activation when idle. (Programming only by the installer) Day of the week adjustment Day of the week: from 1 to 7 1 = sunday 7 = saturday Enter + 4 0 2 + ? + Enter... - Page 20 Scheduled auto activation Time Day of the week: from 1 to 8 1 = sunday 7 = saturday 8 = holiday Enter + 4 6 2 + ? + ? ? + ? ? + Enter Minutes with two digits Hours with two digits from 00 to 59 from 00 to 23...
- Page 21 Time interval for date and time synchronization Three-digit time interval from 000 to 255 hours 000 = disabled Enter + 4 0 3 + ? ? ? + Enter Time zone Enter + 0 5 + Time zone + Enter Time zone goes from 000 (disabled) to 012.
-
Page 22: Current Setting Of The Siren And Auxiliary Outputs
To perform the settings below enter programming mode using the installer password. 3.15. Easy registration of wireless devices (as of version 1.90) Note: as of version 3.30 of AMT 4010 SMART and AMT 4010 SMART NET it will not be possible to register devices out of programming mode. -
Page 23: Remote Control
Regarding remote controls from other manufacturers, they must have the following features to work with our centers: 1. Operate in OOK modulation; 2. Operate on 433.92 Mhz frequency; 3. Transmission rate 1.886 Kbps. (Out of programming mode) Remote control registration 0 + XX + Enter, where XX goes from 00 to 60 Wireless sensor registration 1 + XX + Enter, where XX goes from 17 to 64... - Page 24 Delete wireless remote control Enter + 70 + ?? + Enter = erases remote control ?? = user number from 00 to 61 Wireless medical emergency Enter + 65 + Enter To delete devices registered as medical emergency Enter + 75 + Enter Wireless panic and fire Enter + 6 + ? + ?? + Enter ? = function number...
-
Page 25: Wireless Sensors
3.17. Wireless sensors We do not guarantee the registration/functionality of our centers with wireless sen- sors that are not manufactured by Intelbras. Enter + 61 + ?? + Enter + activate wireless sensor ?? = zone number 17 to 64... -
Page 26: Sensor Connection Configuration (Valid For Versions 1.80 And Up)
3.19. Sensor connection configuration (valid for versions 1.80 and up) Type Configuration for the center zones Configuration for XEZ zones Single zone without end-of-line resistor Single zone without end-of-line resistor Single zone without end-of-line resistor and Single zone without end-of-line resistor and with tamper detection with tamper detection Single zone with end of line resistor and wiring... -
Page 27: Pgm Output
2 = zones 17 to 24 3 = zones 25 to 32 4 = zones 33 to 40 5 = zones 41 to 48 6 = zones 49 to 56 7 = zones 57 to 64 3.21. PGM output Enter + 50 + A + B + ?? + Enter A = 1 (PGM1) 2 (PGM2) 3 (PGM3) -
Page 28: Choice Of Partition To Activate Pgms 1, 2 And 3 At System Startup And Shutdown (As Of Version 2.10)
Key 4 Partition D 3.23. PGM outputs of PGM expanders (Only for AMT 4010 Smart/AMT 4010 Smart NET version prior to 1.3.0) To enable the expanders´ PGMs 4 to 19, type: 5 = exp. PGM Nº 1 6 = exp. PGM Nº 2 7 = exp. -
Page 29: Pgm Outputs Of Pgm Expanders (As Of Version 1.3.0)
Enter + Cancel + Enter 3.26. Editing XAT 2000 LCD/XAT 4000 LCD keyboard messages Note: From version 3.30 onward of the AMT 4010 SMART and AMT 4010 SMART NET, it will not be possible to edit the center’s messages. Editing will only be possible through the Remote AMT or the Remote AMT App. -
Page 30: Keyboard Messages Reset
?? = from 01 (line 1) to 02 (line 2) editable message 3.27. Keyboard Messages Reset Note: From version 3.30 onward of the AMT 4010 SMART and AMT 4010 SMART NET, it will not be possible to reset the center’s messages. -
Page 31: Monitoring Configuration
Function group Function Function Function Function Function group = 1 group s = 2 group = 3 group = 4 group = 5 Siren beep on Medical Keyboard Telephone Real-Time Siren activation/ emergency by lock if wrong line cut-off Reporting problem deactivation key 5... - Page 32 ? = 0 -> account belongs to partition A or the system is not partitioned ? = 1 -> account belongs to partition B ? = 2 -> account belongs to partition C ? = 3 -> account belongs to partition D ???? = 4-digit account number Monitoring account in hexadecimal Enter + 15 + ? + Activate + Enter...
-
Page 33: Configuration Of Call Answering For Download/Upload
4 = regular IP 5 = split IP 6 = double IP 7 = double mix 8 = DX-Net/Radioenge radio B = telephone protocol 1 C = telephone protocol 2 Note: the Split Telephone, Split IP and Double Mix functions have been removed as of version 5.0. - Page 34 Programming the number of rings to answer Enter + 12 + ?? + Enter ?? = 2-digit number of rings from 00 to 20 Number of attempts to report an event Enter + 13 + ? + Enter ? = number of attempts from 1 to 9 Level of the generated DTMF signal Enter + 18 + ? + Enter ? = 0 = level 0 (low)
-
Page 35: Local Ethernet Configuration
Enables the sending of events to Guardian on server 1 Key 8¹ Enables the sending of events to Guardian on server 2 ¹ Only valid for AMT 4010 SMART and AMT 4010 SMART NET as of version 3.00 and 2.00 of XEG 4000 SMART. Viewing the center’s MAC Enter + 811 + Enter 3.31. -
Page 36: Configuration For Gprs (General Packet Radio Service)
DNS servers for Ethernet Enter + 815 + ? + Enter + edit the server + Enter ? = 1 - server 1 2 - server 2 Note: helps with connection stability. Ethernet heartbeat interval (link test) Enter + 816 + ??? + Enter ??? = Three-digit interval from 001 to 020 minutes Note: the center, from version 5.0 onwards, generates the following event when a Connection Failure and Restoration occurs. - Page 37 Operator Password Claro claro Vivo vivo Enter + 824 + ? + Enter + edit the APN + Enter ? = 1 - operator 1 2 - operator 2 Operator tim.br Claro claro.com.br or generic.claro.com.br Vivo zap.vivo.com.br gprs.oi.com.br Enter + 825 + A + BBBB + Enter A = 1 - operator 1 2 - operator 2 BBBB = PIN...
- Page 38 SMS and GPRS connection. » The center does not send silent panic SMS. » As of version 3.00 AMT 4010 SMART and AMT 4010 SMART NET it will not be possible to disable AMT Mobile. » The SMS sending and SMS receiving functions have been removed as of ver-...
-
Page 39: Functions Via Sms
Select SMS events Note: The Select SMS Events Function has been removed as of version 5.0. Enter + 833 + Enter Key 1 SMS on activation Key 2 SMS on activation Key 3 SMS for triggers (will send only the first trigger that occurs)) Key 4 SMS activation/deactivation by the duress password Telephone for SMS... -
Page 40: Reset By Programming Mode
This feature is an option to update the center´s software using a USB AB cable (not supplied by Intelbras) connected to the computer. This update must be performed by a qualified person, before using it, consult Intelbras technical support to download the Bootloader Wizard App software and also to learn how to use this feature. -
Page 41: Warranty Terms
Warranty Terms It is hereby expressly stated that this contractual warranty is conferred under the following conditions: Name of client: Client Signature: Invoice Nº: Date of purchase: Model: Serial Nº: Retailer: 1. All parts, pieces and components of the product are guaranteed against eventual manu- facturing defects, which they may eventually present, for a period of 1 (one) year - this being 90 (ninety) days of legal guarantee and 9 (nine) months of contractual guarantee -, as from the date of purchase of the product by the Consumer, as shown on the invoice... - Page 42 Consumer make a regular backup copy of the data on the product. 7. Intelbras is not responsible for the installation of this product, nor for any attempts of fraud and/or sabotage on its products. Keep the software updates and applications used up-to-date, if relevant, as well as the network protections required for protection against intrusions (hackers).
- Page 44 Support via e-mail: suporte@intelbras.com.br Customer Service: 0800 7042767 Where to buy? Who installs it? 0800 7245115 Produced by: Intelbras S/A – Indústria de Telecomunicação Eletrônica Brasileira Rodovia BR 459, km 124, 1325 – Distrito Industrial – Santa Rita do Sapucaí/MG – 37540-000 01.21 CNPJ 82.901.000/0016-03 –...
Need help?
Do you have a question about the AMT 4010 Smart and is the answer not in the manual?
Questions and answers