Polygroup SUMMER WAVES ST1100 Owner's Manual
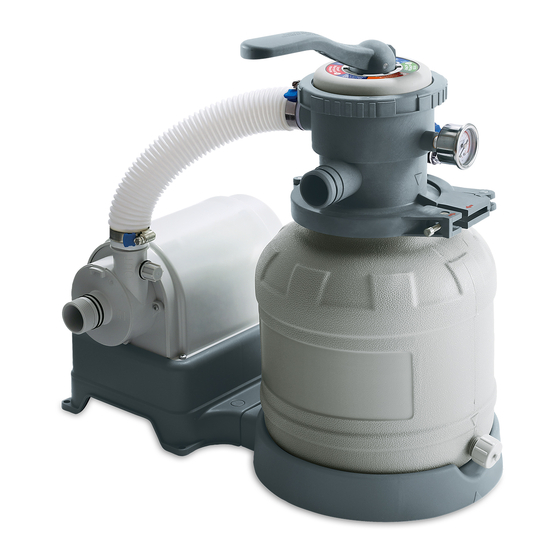
Sand filter pump for above-ground swimming pools
Hide thumbs
Also See for SUMMER WAVES ST1100:
- Owner's manual (44 pages) ,
- Owner's manual (18 pages) ,
- Owner's manual (36 pages)
Advertisement
Quick Links
SUMMER WAVES
SAND FILTER PUMP
READ AND KEEP THESE INSTRUCTIONS FOR FUTURE REFERENCE
For answers to common questions, setup videos and
troubleshooting tips, visit support.polygroupstore.com
or call Customer Service: +1 (888) 919-0070
DO NOT RETURN PRODUCT TO STORE
Should you encounter a problem with your Polygroup
directly to Polygroup
. For any setup and troubleshooting issues, visit support.polygroupstore.com. Customer Service: +1 (888) 919-0070.
®
You may be asked to return all or part of the product for inspection and/or repair. Do not return any product to Polygroup
Authorization number.
DISTRIBUTED BY: Polygroup
For questions and issues, contact Customer Service at +1 (888) 919-0070 from 8AM to 5PM MST, Monday-Friday.
FOR ABOVE-GROUND SWIMMING POOLS
ST1100 (10") / ST1600 (12") Models
Product, DO NOT return the product to the place of purchase. All warranty claims must be made
®
Trading Limited. Unit 606, 6th Floor, Fairmont House, No.8 Cotton Tree Drive, Central, Hong Kong.
®
Extended operating days and hours during peak season requirements.
®
To order parts and
accessories, visit
polygroupstore.com
without a Return Merchandise
®
EN
09C3A4USA317
©2021
Advertisement

Related Manuals for Polygroup SUMMER WAVES ST1100


Summary of Contents for Polygroup SUMMER WAVES ST1100
- Page 1 . For any setup and troubleshooting issues, visit support.polygroupstore.com. Customer Service: +1 (888) 919-0070. ® You may be asked to return all or part of the product for inspection and/or repair. Do not return any product to Polygroup without a Return Merchandise ®...
- Page 2 God outside the control of Polygroup . Non-manufacturing defects, such ® as grasses that may grow through the ground cloth and/or pool liner are examples of which Polygroup cannot be held responsible for. ®...
- Page 3 CUSTOMERS WHO PURCHASE POOLS MAY BE REQUIRED BY LOCAL OR STATE LAW TO INCUR ADDITIONAL EXPENSES WHEN INSTALLING A POOL, IN ORDER TO COMPLY WITH STATE OR LOCAL LAWS REGARDING FENCING AND OTHER SAFETY REQUIREMENTS. CUSTOMERS SHOULD CONTACT THEIR LOCAL BUILDING CODE ENFORCEMENT OFFICE FOR FURTHER DETAILS. POLYGROUP IS NOT RESPONSIBLE FOR ANY ADDITIONAL EXPENSES THAT YOU MAY INCUR.
- Page 4 Turn on the pump for the recommended hours daily. If you are unsure of the time frames please refer to support.polygroupstore.com for the recommended Pump Operation Hours based on pool types and sizes. Clean and replace filter cartridge frequently. Replace only with a genuine Polygroup / Summer Waves Brand filter cartridge.
- Page 5 Risk of Electrocution • Keep all electrical lines, radios, speakers, and other electrical appliances away from the pool. • Do not place the pool near or under overhead electrical lines. First Aid • Keep a working phone and a list of emergency numbers near the pool. •...
- Page 6 OWNER′S MANUAL Safety Education Programs and Materials Educational programs and materials (i.e., seminars, workshops, brochures, videos, instructional guides) are available from the APSP, other aquatic safety groups, and from private firms. As a means of communicating useful safety information to pool owners/operators, and users, industry members are permitted to provide such information to owners/operators and to request or require owners/operators to sign a statement that they have received, read, and will follow the guidelines.
- Page 7 • All electrical components shall be installed in accordance with Article 680 of the National Electrical Code (NEC) “Swimming Pools, Fountains and Similar Installations” or its latest approved edition. • The ST Series Sand Filtration Systems are manufactured by Polygroup and ETL control number 4000608 and 4006317 - double insulated and grounded - ®...
- Page 8 OWNER′S MANUAL Sand Specifications: Fill the tank with #20 silica sand ONLY. You can purchase the sand from your local home improvement or building material stores. WARNING: Using the incorrect sand may damage the filtration system and will void the warranty. RETURN FITTING SET SUCTION FITTING SET...
- Page 9 SETUP INSTRUCTIONS Before assembling your product, please take a few minutes to check the contents and become familiar with all the parts. WARNING: CLIMBING HAZZARD! PLEASE PREVENT CHILDREN FROM CLIMBING ON THE FILTRATION SYSTEM TO GAIN ACCESS TO THE POOL. Tools required: 2.
- Page 10 OWNER′S MANUAL 5. Insert and push the Lock Pins all the way down to 6. With the Drain Valve of the Sand Tank pointing outwards, secure the Pump to the Sand Tank Base place the Sand Tank onto the Sand Tank Base PUSH Drain Valve ALIGN...
- Page 11 9. Fill the tank with #20 silica sand ONLY. You can purchase the 10. Remove the Sand Guard and save for future use. sand from your local home improvement or building material stores. Slowly pour sand into the Sand Tank until the sand level is between the Min and Max marks on the Center Pipe Sand...
- Page 12 OWNER′S MANUAL 12. Place the Clamp around the flange of the 6-Port Valve 13. Close the Clamp by pushing the two jaws as close together and Sand Tank as possible. IMPORTANT: Align the hinge on the Clamp with the ridge on the flange of the 6-Port Valve PUSH The hinge of Clamp aligned...
- Page 13 17. Connect the Short Hose between the Pump Outlet and the 16. When the Clamp is tightened and no more turns can be 6-Port Valve Inlet. Tighten the Hose Clamps with a flat-blade made, flip and push the Cam Handle towards the Sand Tank to secure.
- Page 14 OWNER′S MANUAL USE OF PUMP Before using the Pump IMPORTANT: 1. Make sure to press the pump power switch to OFF before plugging the Power Cord Set into a power outlet. 2. Always PRESS DOWN the 6-Port Valve Handle BEFORE switching handle positions. 3.
- Page 15 USE OF PUMP 1. Make sure the pump is switched OFF. 2. Plug the Power Cord Set to a grounded receptacle. 3. BACKWASH the sand: ALWAYS BACKWASH THE SAND BEFORE FILTERING. This prevents fine sand from going through the pump and then to the pool, meanwhile washes off the dirt and debris of the sand. a.
- Page 16 OWNER′S MANUAL GFCI PLUG INSTRUCTIONS 1. Locate a grounded receptacle at least 15 feet (4.5 m) away from the pool. GFCI Plug with Timer Function 2. To turn on the Pump, plug in the GFCI power cord set to the power outlet. 3.
- Page 17 PUMP MOTOR CARE IMPORTANT! This Sand Filter Pump is protected by a thermal switch, a safety device that stops the pump from running when it is overheated, to prevent damage to the pump and prolong its service life. If your pump turns off automatically, it’s likely the pool water temperature is too high or the water flow through the pump is insufficient for cooling down the pump.
- Page 18 OWNER′S MANUAL TROUBLESHOOTING GUIDE WARNING: TURN OFF THE PUMP AND UNPLUG THE POWER CORD BEFORE TROUBLESHOOTING THE FILTER PUMP. Problem Cause Solution A. The Pump not plugged in OR the A. Plug the GFCI Power Cord Set to a 3-wire grounded power outlet, then press the Power Cord Set 4 not activated RESET button to start the Pump.
- Page 19 WINTERIZING, DISASSEMBLY & STORAGE 1. First, unplug the Power Cord Set of the system. 2. Loosen all Hose Clamps . Remove the Hose and allow water to drain. 3. Remove Drain Valve Cap from the Sand Tank and allow water to drain. Replace and tighten the Drain Valve Cap 4.
- Page 20 OWNER′S MANUAL 6-PORT VALVE PARTS LIST Wrench Locking Ring Valve Handle Valve Gasket Top Cover O-Ring Pressure Gauge Drain Indicator Valve Housing Drain Indicator Gasket Valve Grate Gasket...
- Page 21 6-PORT VALVE SETUP 1. Using the Wrench, twist counterclockwise to loosen and remove the Locking Ring. 2. Fit the Gasket in place. 3. Insert the Top Cover O-Ring into the groove of the Valve Housing. Top Cover O-Ring Valve Gasket Valve Housing...
- Page 22 OWNER′S MANUAL 4. Insert the Valve Handle into the Valve Housing. Make sure that the key aligns with the keyway. 5. Place the Locking Ring over the Valve Housing. 6. Tighten the Locking Ring with the Wrench. Locking Ring...
- Page 23 ASME COMPLIANT SUCTION FITTING INFORMATION PSF-2021A and PSF-2021B Suction Outlet Fitting (For Aboveground Pool) • PSF-2021A and PSF-2021B Suction Outlet Fittings are certified by IAPMO in accordance with the ASME/ANSI/APSP/ICC-16 2017 Suction Fittings for Use in Swimming Pools, Wading Pools, Spas, and Hot Tubs. •...
- Page 24 OWNER′S MANUAL Important Information about Suction Outlet Fitting Assembly (SOFA) WARNING! This is a BLOCKABLE VGBA Suction Outlet that must ONLY be installed in a multiple VGBA Suction Outlet system. • When installing and using this equipment, basic safety precautions shall always be followed, including the following: IMPORTANT SAFETY INSTRUCTIONS. •...
Need help?
Do you have a question about the SUMMER WAVES ST1100 and is the answer not in the manual?
Questions and answers