Advertisement
OWNER'S MANUAL
SUMMER WAVES
®
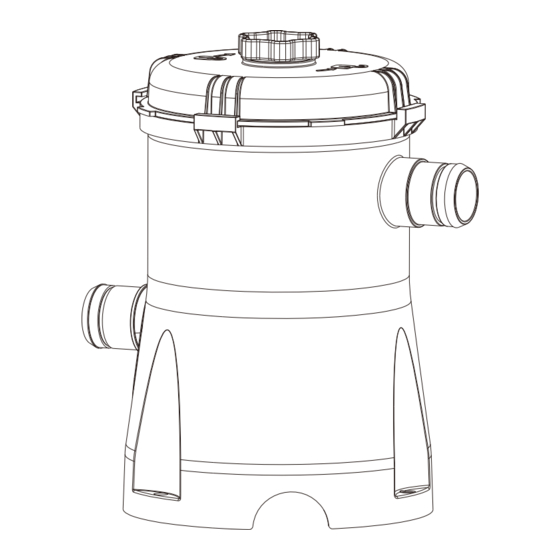
CARTRIDGE FILTER PUMP
FOR ABOVE GROUND SWIMMING POOLS
RP350-S / BS & RP400-S / BS models
READ, AND KEEP THESE INSTRUCTIONS FOR FUTURE REFERENCE
Should you encounter a problem with your Polygroup
Product, please do not return the product to the place of purchase. All Warranty claims must be made directly to
®
Polygroup
. Prior to contacting Customer Service, please first review the Troubleshooting Guide in the Installation Manual, or review the FAQ at www.Polygroup.com.
®
Please review setup instruction videos on www.Polygroup.com/video. If you are still unable to correct the problem, please contact Polygroup
Customer Service at
®
Appendix . Have the product type and your purchase receipt ready. Our Customer Service Representative will assist you in resolving the problem. You may be asked
to return all or part of the product for inspection and/or repair. Do not return any product to Polygroup
without a Return Authorization number.
®
®
Trademarks used in some countries of the world under license from Polygroup
LIMITED (MACAO COMMERCIAL OFFSHORE).,
TM
®
Unit J, 10
Floor, Macau Square, Av do Infante D.Henrique, No.43-53A, Macau. Tel:(853) 2875 2606
th
Distributed in European Union By QATC Ltd, Eldon Way Industrial Estate HOCKLEY, ESSEX SS5 4AD UK Tel: 01702208172 support@summerwaves.co.uk
Advertisement
Chapters
Table of Contents

Related Manuals for Polygroup RP350-S


Summary of Contents for Polygroup RP350-S
- Page 1 ® CARTRIDGE FILTER PUMP FOR ABOVE GROUND SWIMMING POOLS RP350-S / BS & RP400-S / BS models READ, AND KEEP THESE INSTRUCTIONS FOR FUTURE REFERENCE Should you encounter a problem with your Polygroup Product, please do not return the product to the place of purchase. All Warranty claims must be made directly to ®...
- Page 2 TABLE OF CONTENTS Warnings 3 ~ 6 Save These Instructions & Filter Pump Power Information & Parts List 7 ~ 9 Setup Instructions 10 ~ 11 Filter Pump Operation & Pump Motor Protection & Filter Cartridge Cleaning and Replacement 12 ~ 13 Pump Maintenance &...
-
Page 3: Warnings
OWNER’S MANUAL IMPORTANT SAFETY INSTRUCTIONS When installing and using this electrical equipment, basic safety precautions should always be followed, including the following: READ AND FOLLOW ALL INSTRUCTIONS Keep for Future Reference. Failure to follow these warnings and instructions can result in serious injury or death to users, especially children. DANGER WARNING NO DIVING! -
Page 4: Warnings
9. WARNING! The power cord of the transformer and the filter pump cannot be replaced. If the cord is damaged, the transformer and the filter pump should be disposed of. 10. WARNING! To avoid the risk of electric shock, connect the filter pump only to a receptacle protected by a ground fault circuit interrupter (GFCI) or Residual-current device (RCD). - Page 5 OWNER’S MANUAL Circulation Systems 1. Installers shall follow written instructions regarding positioning of all equipment connected to the circulation systems. 2. The installer shall follow written instructions provided for operating the circulation system components. 3. All circulation system components and pump that require replacement or servicing shall be installed according to the pump’s instruction manual. 4.
- Page 6 15. GENERAL INFORMATION: The pool must be stored away if temperature is expected to fall below 4ºC (39ºF). 16. All parts should be cleaned using mild soap and lukewarm water only. DO NOT use detergent or hot water. 17. Make sure that all parts are dry before storing them to prevent mildew from forming. 18.
-
Page 7: Save These Instructions
- 220~240 V.A.C. - 50 Hz. (ALL Units must have a minimum of 105 V.A.C. to start and run properly.) FILTER PUMP POWER INFORMATION Model Voltage AMPERAGE Wattage (W) Water Proof Level Input voltage 220-240V RP350-S / BS 0.15 Amps 20 Watts IPX7 Input voltage 220-240V RP400-S / BS 0.2 Amps 25 Watts... - Page 8 RP350 / RP400...
- Page 9 OWNER’S MANUAL 13 A RP350 RP400...
-
Page 10: Setup Instructions
SETUP INSTRUCTIONS Before assembling your product, please take a few minutes to check the contents and become familiar with all the parts. WARNING: POSITION THIS PRODUCT AWAY FROM THE POOL, SO AS TO PREVENT CHILDREN FROM CLIMBING ON IT AND ACCESSING THE POOL. 1. - Page 11 OWNER’S MANUAL 5. Connect the Hose form the Suction Fitting to the Filter Pump 6. Connect the Hose form the pool Return Fitting to the Filter Pump Inlet. outlet. 7. Tighten all Hose Clamps to prevent water leakage. 8. Do not plug in the filter pump at this point. Begin to fill water until the water level reaches the fill line.
- Page 12 FILTER PUMP OPERATION 1. Plug the pump to a properly grounded receptacle at least 15 feet (4.5m) away from the pool. 2. Check the return fitting on the inside of the pool for correct flow; it should feel like a solid stream of water returning to the pool. You can use the return flow as a gauge to determine when the filter needs cleaning or replacement.
- Page 13 OWNER’S MANUAL 6. Suntan oils, body oils, and algae can form a coating on the filter pleats which may not be thoroughly removed by hosing. Such films of oils and/or algae will rapidly clog up the filters’ pores, greatly reducing filtration. Therefore, it is imperative to remove such materials from the filter element as soon as possible. To remove oils, we recommend soaking the cartridge in a solution of 1 pound of tri-sodium phosphate (or any other strong detergent) to 5 gallons of water for up to 12 hours.
-
Page 14: Troubleshooting Guide
TROUBLESHOOTING GUIDE WARNING: UNPLUG THE POWER CORD BEFORE TROUBLESHOOTING THE FILTER PUMP. SYMPTOM CAUSE SOLUTION A Unit not plugged in A Unit must be plugged into a grounded power outlet. Motor fails to start or kicks on and off B Low voltage B Check the line voltage, it must be in the range of 220 to 240V. -
Page 15: Rotor Replacement Instructions
OWNER’S MANUAL ROTOR REPLACEMENT INSTRUCTION 1. Unplug the Power Filter Pump. Remove the Flow Diverter ,Suction Fitting Screen and Suction Fitting Base from the Return Fitting and Suction Fitting and flow plug with Plug 2. To depressurize the Filter Pump system, vent the filter pump by twisting the Vent Screw counter-clockwise. - Page 16 6. To replace the Rotor Assembly , remove the Volute Cover Screw Set and the Volute Cover and pull out the Rotor Assembly from the Stator Insert new Rotor Assembly into the Stator 7. Align the Shaft Properly and fasten the Volute Cover With the Volute Cover Screw Set 8.
- Page 17 OWNER’S MANUAL REPLACEMENT PARTS ORDERING INFORMATION RP350 RP400 DESCRIPTION PART # Suction Fitting Base P58PF5470W05 P58PF5470W05 Suction Fitting Screen P58PF5480P01 P58PF5480P01 Flow Diverter P58PF5520P01 P58PF5520P01 Plug P58PF5460K01 P58PF5460K01 Hose P58125036W01 P58125036W01 Hose Clamp P58220221W05 P58220221W05 Vent Screw P58534000W05 P58534000W05 Vent Screw O-Ring P58031000K01 P58031000K01 Seal Top...
-
Page 18: Customer Services Contact
OWNER’S MANUAL CUSTOMER SERVICES CONTACT COUNTRIES / REGIONS SERVICE CENTER LOCATIONS Telephone: 01702208172 United Kingdom Address: QATC Ltd 12 Eldon Way Hockley Essex SS5 4AD France Telephone: 33(0) 9 69 360535 Spain Telephone: 0902848775 Telephone: 0800788298 Italy Address: 12 Eldon Way Hockley Essex Telephone: 0621 8455 210 Germany...
Need help?
Do you have a question about the RP350-S and is the answer not in the manual?
Questions and answers