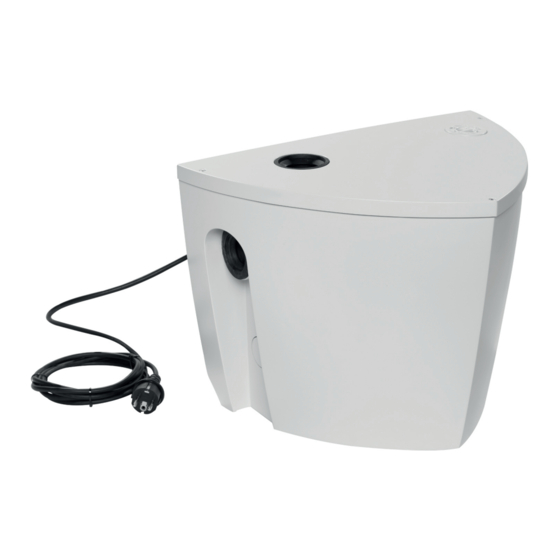
KSB AmaDrainer-Box Mini Supplementary Operating Manual
Hide thumbs
Also See for AmaDrainer-Box Mini:
- Installation & operating manual (44 pages) ,
- Installation & operating manual (46 pages)
Summary of Contents for KSB AmaDrainer-Box Mini
- Page 1 Automatic Waste Water Lifting Unit AmaDrainer-Box Mini Replacing the Ama-Drainer N Submersible Motor Pump by an AmaDrainer 3 Submersible Motor Pump Supplementary Operating Manual...
- Page 2 All rights reserved. The contents provided herein must neither be distributed, copied, reproduced, edited or processed for any other purpose, nor otherwise transmitted, published or made available to a third party without the manufacturer's express written consent. Subject to technical modification without prior notice. © KSB SE & Co. KGaA, Frankenthal 05/08/2021...
-
Page 3: Table Of Contents
Contents Contents Glossary .............................. 4 Supplementary Operating Manual ....................... 5 General................................ 5 Installation at Site............................. 6 1.2.1 Removing the Ama-Drainer N...................... 6 1.2.2 Preparing the AmaDrainer 3 ....................... 7 1.2.3 Installing the AmaDrainer 3 ...................... 10 Commissioning / start-up .......................... 11 Replacement kit.............................. 12 AmaDrainer-Box Mini 3 of 14... -
Page 4: Glossary
Glossary Glossary Mat. No. This identification number is composed of an 8- digit numerical code that uniquely identifies a product entered in SAP. AmaDrainer-Box Mini 4 of 14... -
Page 5: Supplementary Operating Manual
Reference number of the installation/operating manual AmaDrainer-Box Mini 2336.83 AmaDrainer-Box Mini models manufactured between 2011 and 2021 are fitted with Ama-Drainer N submersible motor pumps. In 2021 the Ama-Drainer N type series was superseded by the AmaDrainer 3 type series. This supplementary operating manual serves to replace an Ama-Drainer N submersible motor pump by an AmaDrainer 3 submersible motor pump. -
Page 6: Installation At Site
7. Always flush the collecting tank if it has been used for handling noxious, hot or other hazardous fluids. 8. Remove float 74-4 incl. its float lever from segment 59-49. Clean and store the float and lever. AmaDrainer-Box Mini 6 of 14... -
Page 7: Preparing The Amadrainer 3
1 Supplementary Operating Manual 1.2.2 Preparing the AmaDrainer 3 ü The replacement kit is available. (ð Section 1.4, Page 12) ü The AmaDrainer 301 submersible motor pump (AmaDrainer-Box Mini) or AmaDrainer 301 C submersible motor pump (AmaDrainer-Box Mini C) is available. ü Float 74-4 (incl. float lever) of the Ama-Drainer N is available. - Page 8 Fig. 6: Fitting the sensor guide 11. Fit segment 59-49 (included in the replacement kit) on the protrusion provided. 59-49 Fig. 7: Fitting the segment AmaDrainer-Box Mini 8 of 14...
- Page 9 Segment 59-49 has to be held firmly in place by the anti-lift protection (A) and still be able to move freely. Fig. 8: Fitting the anti-lift protection 13. Clip the float lever with float 74-4 (of Ama-Drainer N) onto segment 59-49. 59-49 74-4 Fig. 9: Fitting the float incl. float lever AmaDrainer-Box Mini 9 of 14...
-
Page 10: Installing The Amadrainer 3
4. Pre-assemble hoses 719 (included in the replacement kit) with the hose connection (A) and four pipe clamps 733. The screws of the pipe clamps in the middle have to be located at the bottom. AmaDrainer-Box Mini 10 of 14... -
Page 11: Commissioning / Start-Up
9. Mount the cover in accordance with the operating manual of the grey water lifting unit. 1.3 Commissioning / start-up ü The operating manual of the grey water lifting unit is available. 1. Commission / start up the grey water lifting unit in accordance with the operating manual. AmaDrainer-Box Mini 11 of 14... -
Page 12: Replacement Kit
Table 2: Replacement kit Item Description Connection AmaDrainer Mat. No. [kg] Replacement kit for AmaDrainer-Box Mini 19066504 0.4 ✘ For replacing an Ama-Drainer N installed in AmaDrainer-Box Mini by an AmaDrainer 3 Comprising: installation parts and discharge line Order the replacement kit in addition to the required AmaDrainer 3. - Page 14 KSB SE & Co. KGaA Johann-Klein-Straße 9 • 67227 Frankenthal (Germany) Tel. +49 6233 86-0 www.ksb.com...


Need help?
Do you have a question about the AmaDrainer-Box Mini and is the answer not in the manual?
Questions and answers