Table of Contents
Advertisement
Available languages
Available languages
Quick Links
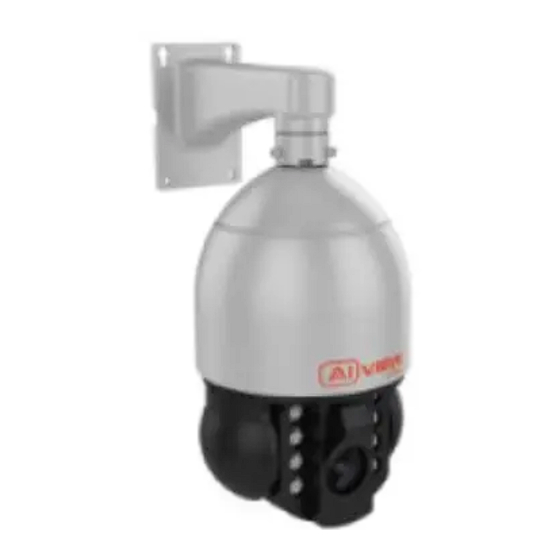
Ultra zoom Speed Dome
AI-based Camera
Qualcomm products contained here in are products of Qualcomm Technologies, Inc. and/or its subsidiaries.
Qualcomm is a trademark of Qualcomm Incorporated, registered in the United States and other countries.
The Made with Qualcomm Technologies logo is a trademark of Qualcomm Incorporated.
Advertisement
Table of Contents

Related Manuals for Bkav AI View S500-0233


Summary of Contents for Bkav AI View S500-0233
- Page 1 Ultra zoom Speed Dome AI-based Camera Qualcomm products contained here in are products of Qualcomm Technologies, Inc. and/or its subsidiaries. Qualcomm is a trademark of Qualcomm Incorporated, registered in the United States and other countries. The Made with Qualcomm Technologies logo is a trademark of Qualcomm Incorporated.
- Page 2 INSTALLATION GUIDE Model: S500-0233...
-
Page 3: Product Kit
PRODUCT KIT Camera Wall Bracket Installation guide Thank you letter Drilling position decal... - Page 4 PRODUCT KIT Set 4 of screws Hex tool Safety cable and anchors size 3, 5...
-
Page 5: Technical Specification
TECHNICAL SPECIFICATION Power AC24V 5% Max 35W Power consumption Max 37W (with PTZ) Protection standards IP66, IK10 Resolution, frame rate FHD 1920x1080, Max 60fps Digital zoom Optical zoom Focal length 4.5 - 148.5mm Field of view (horizontal-vertical) Near: 60.1° - 36.2° / Far: 2.28° - 1.29° Micro SD card External, up to 256GB -40°C - 60°C (-40°F - 140°F) -
Page 6: Product Overview
PRODUCT OVERVIEW Wall bracket Ethernet interface Safety cable 24VAC power supply Audio in Audio out Camera body Infrared LED Camera lens... - Page 7 INSTALLATION GUIDE Step 1: Fix the camera on the bracket and tighten the screws it in the place (Figure 1). Step 2: Assemble safety cable into the bracket (Figure 2).
- Page 8 INSTALLATION GUIDE Step 3: Apply positions decal and drill 4 anchors to the wall. Fix the camera onto the wall with the screw (Figure 3). Drilling position decal...
-
Page 9: Connecting The Signal Wire
CONNECTING THE SIGNAL WIRE Connect network signal and 24VAC power supply . Network cable Ethernet interface 24VAC power supply Black wire Red wire Audio out Audio in... -
Page 10: Camera Field Of View
CAMERA FIELD OF VIEW 360° 95°... - Page 11 ATTENTION Note: During a power outage, the camera will be down as shown in the image above. When power is on, the camera will return to its previous position.
- Page 12 THE MEMORY CARD AND RESET INSTALLATION Reset installation: Open the protective cover that protects the camera against dust and water to reset the device. Memory card: Open the protective cover, you can find the location of Micro SD card. Micro SD card Reset factory Note: Power off the camera, press and hold the factory reset button.
-
Page 13: Accessing The Camera
ACCESSING THE CAMERA Password setting The IP address of camera is set to DHCP mode by default. For the camera enables the DHCP by default, you need to use the AI View Scanner App to scan IP. Note: To complete the installation steps for the camera, refer to the User Manual. The system will ask you to reset the password on your initial access. -
Page 14: Software Installation
SOFTWARE INSTALLATION Login screen When accessing the camera, a login window will appear. Enter your user name and password to access the camera. 1. Enter "admin" in the <User name> box. 2. Enter your chosen password in <Password> box. 3. Click User name Password... -
Page 15: Safety Information
Improper installation may cause damage to the product. Contact Bkav's customer support or authorized Bkav agents if you experience any problems. This equipment has been tested and found to comply with the limits for a Class A digital device, pursu- ant to part 15 of the FCC rules. -
Page 16: Warranty Information
WARRANTY INFORMATION For information about AI View product warranty and thereto related information, go to aiview.ai/warranty. -
Page 17: Hướng Dẫn Lắp Đặt
HƯỚNG DẪN LẮP ĐẶT Model: S500-0233... - Page 18 BỘ SẢN PHẨM ĐÓNG GÓI Camera Gá đỡ camera Sách hướng dẫn lắp đặt Thư cảm ơn Decan định vị khoan...
- Page 19 BỘ SẢN PHẨM ĐÓNG GÓI Bộ 4 vít và neo Dây an toàn Bộ lục giác...
-
Page 20: Thông Số Kỹ Thuật
THÔNG SỐ KỸ THUẬT Nguồn AC24V 5% Tối đa 35W Nguồn tiêu thụ Tối đa 37W (Có điều khiển PTZ) Tiêu chuẩn bảo vệ IP66, IK10 Độ phân giải, tốc độ khung hình FHD 1920 x 1080, Tối đa 60fps Zoom số... - Page 21 TỔNG QUAN THIẾT BỊ Gá đỡ camera Dây an toàn Cổng kết nối mạng Cổng cắm nguồn 24VAC Đầu vào âm thanh Đầu ra âm thanh Thân camera Đèn hồng ngoại Ống kính...
- Page 22 HƯỚNG DẪN LẮP ĐẶT Bước 1: Cố định camera trên gá đỡ và vặn chặt vít cổ giữ camera (Hình 1). Bước 2: Kết nối dây an toàn giữa thân camera và gá đỡ camera (Hình 2).
- Page 23 HƯỚNG DẪN LẮP ĐẶT Bước 3: Dán Decan định vị lỗ khoan lên tường và khoan lỗ đặt 4 neo vào tường. Cố định camera lên tường bằng vít (Hình 3). Decal vị trí khoan...
- Page 24 KẾT NỐI DÂY TÍN HIỆU Kết nối tín hiệu mạng và nguồn 24VAC. Dây mạng Đầu chờ kết nối mạng LAN Dây nguồn 24VAC Dây đen Dây đỏ Đầu ra âm thanh Đầu vào âm thanh...
- Page 25 GÓC NHÌN CỦA CAMERA 360° 95°...
- Page 26 CHÚ Ý Chú ý: Khi camera mất nguồn, camera sẽ cụp xuống như hình vẽ. Khi camera khởi động lại, camera sẽ quay trở lại vị trí lúc trước khi mất nguồn.
- Page 27 LẮP THẺ NHỚ VÀ KHÔI PHỤC CÀI ĐẶT GỐC Khôi phục cài đặt gốc: Mở nắp bảo vệ camera để đặt lại thiết bị. Lắp thẻ nhớ: Mở nắp bảo vệ để thấy vị trí của thẻ Micro SD. Vị trí thẻ nhớ SD Vị...
- Page 28 TRUY CẬP CAMERA Cài đặt mật khẩu Địa chỉ IP của camera được đặt theo cơ chế cấp phát động IP (DHCP). Bạn cần sử dụng phần mềm AI View Scanner để tìm kiếm IP của camera. Lưu ý: Để hoàn thành các bước cài đặt cho camera bạn vui lòng xem tài liệu Hướng dẫn sử dụng WebUI. Hệ...
- Page 29 CÀI ĐẶT PHẦN MỀM Màn hình Login Khi bạn truy cập vào camera, cửa sổ đăng nhập sẽ hiện ra. Nhập Tài khoản và mật khẩu để truy cập vào camera. 1. Nhập “admin” vào ô <User Name> trong cửa sổ. 2.
- Page 30 Việc lắp đặt không cẩn thận có thể gây hư hỏng cho sản phẩm. Liên hệ với bộ phận hỗ trợ khách hàng của Bkav hoặc các đại lý ủy quyền của Bkav khi gặp vấn đề. Thiết bị này đã được thử nghiệm và tuân thủ các giới hạn dành cho thiết bị kĩ thuật số loại A, theo phần 15 quy tắc FCC.
- Page 31 THÔNG TIN BẢO HÀNH Để biết thông tin về bảo hành sản phẩm AI View và các thông tin liên quan, hãy truy cập aiview.ai/warranty.
- Page 32 BKAV CORPORATION Address: 2nd Floor, HH1 Building, Yen Hoa Urban Area, Yen Hoa Ward, Cau Giay District, Hanoi City, Vietnam Website: www.aiview.ai Email: aiview@bkav.com...
Need help?
Do you have a question about the AI View S500-0233 and is the answer not in the manual?
Questions and answers