Table of Contents
Advertisement
Quick Links
Advertisement
Table of Contents

Related Manuals for Electrolux EOC3431AOX


Summary of Contents for Electrolux EOC3431AOX
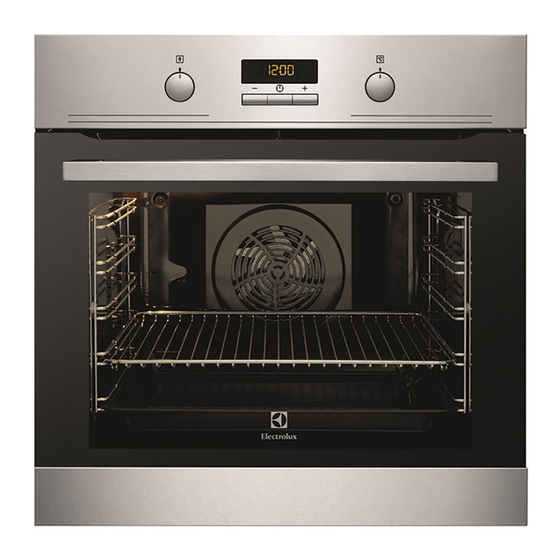
- Page 1 EOC3431AOX Oven User Manual...
-
Page 2: Table Of Contents
13. ENERGY EFFICIENCY.................. 31 WE’RE THINKING OF YOU Thank you for purchasing an Electrolux appliance. You’ve chosen a product that brings with it decades of professional experience and innovation. Ingenious and stylish, it has been designed with you in mind. So whenever you use it, you can be safe in the knowledge that you’ll get great results every time. -
Page 3: Safety Information
ENGLISH SAFETY INFORMATION Before the installation and use of the appliance, carefully read the supplied instructions. The manufacturer is not responsible for any injuries or damages that are the result of incorrect installation or usage. Always keep the instructions in a safe and accessible location for future reference. -
Page 4: Safety Instructions
Always use oven gloves to remove or put in • accessories or ovenware. Before carrying out any maintenance, disconnect the • appliance from the power supply. Ensure that the appliance is switched off before • replacing the lamp to avoid the possibility of electric shock. - Page 5 ENGLISH 2.2 Electrical connection 2.3 Use WARNING! WARNING! Risk of fire and electrical Risk of injury, burns and shock. electrical shock or explosion. • All electrical connections should be • This appliance is for household use made by a qualified electrician. only.
- Page 6 2.5 Pyrolytic cleaning • Discoloration of the enamel or stainless steel has no effect on the performance of the appliance. Risk of Injury / Fires / • Use a deep pan for moist cakes. Fruit Chemical Emissions juices cause stains that can be (Fumes) in Pyrolitic Mode.
-
Page 7: Product Description
ENGLISH 2.7 Disposal Ovens and can be also a source for low level harmful fumes. • Fumes released from all Pyrolytic WARNING! Ovens / Cooking Residues as Risk of injury or suffocation. described are not harmful to humans, • Disconnect the appliance from the including infants or persons with mains supply. -
Page 8: Before First Use
4. BEFORE FIRST USE 4.2 Preheating WARNING! Refer to Safety chapters. Preheat the empty appliance to burn off the remaining grease. To set the Time of day refer 1. Set the function and the maximum to "Clock functions" chapter. - Page 9 ENGLISH 5.3 Oven functions Oven function Application Off position The appliance is off. True Fan Cook‐ To bake on up to three shelf positions at the same time and to dry food. Set the temperature 20 - 40 °C lower than for Top / Bottom Heat. Conventional To bake and roast food on one shelf position.
-
Page 10: Clock Functions
5.4 Display A. Timer B. Heat-up and residual heat indicator C. Water drawer (selected models only) D. Core temperature sensor (selected models only) E. Door lock (selected models only) F. Hours / minutes G. Clock functions 5.5 Buttons Button... - Page 11 ENGLISH 6.2 Setting and changing the in the display. The appliance deactivates automatically. time 4. Press any button or open the oven door to stop the acoustic signal. After the first connection to the mains, 5. Turn the knob for the oven functions wait until the display shows to the off position.
-
Page 12: Using The Accessories
6.7 COUNT UP TIMER To reset the Count Up Timer, press and hold . The timer starts to count up again. 7. USING THE ACCESSORIES When you use the core temperature WARNING! sensor for the first time, the default Refer to Safety chapters. - Page 13 ENGLISH When the appliance calculates the provisional duration time for the first time, the symbol flashes in the display. When the calculation ends, the display shows the duration of the cooking. Calculations run in the background during the cooking and the duration Wire shelf and baking tray / deep pan value in the display is together:...
-
Page 14: Additional Functions
°C °C 2. Put the wire shelf on the telescopic runners and carefully push them into Make sure you push back the telescopic the appliance. runners fully in the appliance before you close the oven door. 8. ADDITIONAL FUNCTIONS 8.1 Using the Child Lock... -
Page 15: Hints And Tips
ENGLISH dangerous overheating. To prevent this, activates again automatically when the the oven has a safety thermostat which temperature drops. interrupts the power supply. The oven 9. HINTS AND TIPS aluminium foil on the components WARNING! when you cook. This can change the Refer to Safety chapters. - Page 16 Food Top / Bottom Heat True Fan Cooking Time Com‐ (min) ments Tempera‐ Shelf po‐ Tempera‐ Shelf po‐ ture (°C) sition ture (°C) sition Short‐ 3 (2 and 20 - 30 In a cake bread mould dough Buttermilk 80 - 100 In a 26 cm cheese‐...
- Page 17 ENGLISH Food Top / Bottom Heat True Fan Cooking Time Com‐ (min) ments Tempera‐ Shelf po‐ Tempera‐ Shelf po‐ ture (°C) sition ture (°C) sition Biscuits / 140 - 150 25 - 45 In a bak‐ pastry ing tray stripes - one level Biscuits / 140 - 150...
- Page 18 Bread and pizza Food Top / Bottom Heat True Fan Cooking Time Com‐ (min) ments Tempera‐ Shelf po‐ Tempera‐ Shelf po‐ ture (°C) sition ture (°C) sition White 60 - 70 1 - 2 pieces, bread 500 gr per...
- Page 19 ENGLISH Food Top / Bottom Heat True Fan Cooking Time Com‐ (min) ments Tempera‐ Shelf po‐ Tempera‐ Shelf po‐ ture (°C) sition ture (°C) sition Pork 90 - 120 On a wire shelf Veal 90 - 120 On a wire shelf English 50 - 60...
- Page 20 9.6 Grilling Preheat the empty oven for 3 minutes before cooking. Food Quantity Tempera‐ Time (min) Shelf po‐ ture (°C) sition Pieces 1st side 2nd side Fillet max. 12 - 15 12 - 14 steaks Beef max. 10 - 12...
- Page 21 ENGLISH Pork Food Quantity (kg) Temperature Time (min) Shelf posi‐ (°C) tion Shoulder, neck, 1 - 1.5 160 - 180 90 - 120 1 or 2 ham joint Chop, spare rib 1 - 1.5 170 - 180 60 - 90 1 or 2 Meat loaf 0.75 - 1...
- Page 22 9.8 Moist Fan Baking During cooking, open the appliance door only when For best results follow the necessary. baking times listed in the table below. Food Temperature Time (min) Shelf posi‐ (°C) tion Bread sticks (500 g in total)
- Page 23 ENGLISH Vegetables Food Temperature Time (h) Shelf position (°C) 1 position 2 positions Beans 60 - 70 6 - 8 1 / 4 Peppers 60 - 70 5 - 6 1 / 4 Vegetables for 60 - 70 5 - 6 1 / 4 sour Mushrooms...
-
Page 24: Care And Cleaning
10. CARE AND CLEANING WARNING! Refer to Safety chapters. 10.1 Notes on cleaning • Clean the front of the appliance with a soft cloth with warm water and a cleaning agent. 2. Pull the rear end of the shelf support •... - Page 25 ENGLISH 2. Clean the inner side of the door with The cleaning reminder hot water, so that the residues do not goes out: burn from the hot air. • after the end of the 3. Set the Pyrolysis function. Refer to Pyrolysis function.
- Page 26 Make sure the glass slides out of the supports completely. 8. Clean the glass panels with water and soap. Dry the glass panels carefully. When the cleaning is completed, install the glass panels and the oven door. Do 3. Close the oven door halfway to the the above steps in the opposite first opening position.
-
Page 27: Troubleshooting
ENGLISH 10.7 Replacing the lamp 1. Deactivate the appliance. 2. Remove the fuses from the fuse box Put a cloth on the bottom of the interior or deactivate the circuit breaker. of the appliance. It prevents damage to the lamp glass cover and the cavity. The back lamp WARNING! 1. - Page 28 Problem Possible cause Remedy The lamp does not oper‐ The lamp is defective. Replace the lamp. ate. The core temperature sen‐ The plug of the core tem‐ Put the plug of the core sor does not operate. perature sensor is not cor‐...
-
Page 29: Installation
ENGLISH Problem Possible cause Remedy The display shows an error There is an electrical fault. • Deactivate the oven code that is not in this ta‐ with the house fuse or ble. the safety switch in the fuse box and activate it again. - Page 30 12.1 Building In 12.3 Electrical installation The manufacturer is not responsible if you do not follow the safety precautions from the Safety chapters. min. 550 This appliance is supplied with a main plug and a main cable. min. 560 12.4 Cable...
-
Page 31: Energy Efficiency
ENGLISH 13. ENERGY EFFICIENCY 13.1 Product Fiche and information according to EU 65-66/2014 Supplier's name Electrolux Model identification EOC3431AOX Energy Efficiency Index 81.2 Energy efficiency class Energy consumption with a standard load, con‐ 0.93 kWh/cycle ventional mode Energy consumption with a standard load, fan- 0.69 kWh/cycle... - Page 32 When you use Moist Fan Baking, the lamp automatically deactivates after 30 seconds. 14. ENVIRONMENTAL CONCERNS Recycle the materials with the symbol marked with the symbol with the household waste. Return the product to . Put the packaging in applicable your local recycling facility or contact containers to recycle it.
- Page 33 ENGLISH...
- Page 34 www.electrolux.com...
- Page 35 ENGLISH...
- Page 36 www.electrolux.com/shop...
Need help?
Do you have a question about the EOC3431AOX and is the answer not in the manual?
Questions and answers