Table of Contents
Advertisement
Advertisement
Table of Contents

Related Manuals for Mamiya 6


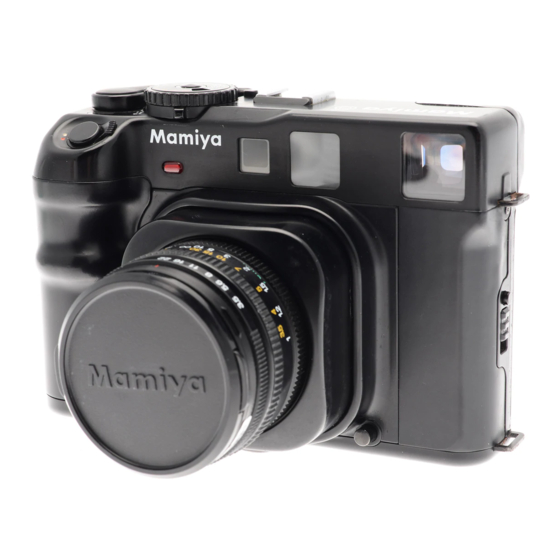
Summary of Contents for Mamiya 6
- Page 2 Three interchangeable lenses, a 75mm standard, a 50mm wide-angle and a 150mm telephoto, make the New Mamiya 6 a system camera that serves many needs. The New Mamiya 6 is built with traditional precision workmanship and optical perfection.
- Page 3 Special Features of the New Mamiya 6 ... Nomenclature and Functional Parts s ... Preparatory steps for use ... Mounting/Removing g Lenses ... How to Retract the Lens Mount ... 1 1 Inserting Batteries ... Opening/Closing g Light Shield Curtain ... 13 Releasing the e Shutter ...
- Page 4 6 x 6 Square Format The 6 x 6 medium format lends itself to this “quick-draw” range- finder camera, which has the handling ease of a 35mm camera but the advantages of a 360% larger negative and therefore far superior image quality.
- Page 5 The retractable Iens mount greatly reduces the profile of the New Mamiya 6. making it more convenient to store and carry.
- Page 9 Body cap...
- Page 10 In order to attach the lens, first pull out the lens mount and remove the camera body cap. To do this, while pressing the retraction/ extension button (A) in, pull the lens mount out by gripping the cross bar of the lens cap. Then, while pressing the lens release button (B) in, rotate the cap counterclockwise, and align the groove (C) on the cap’s side with...
- Page 11 [Mounting lens] Remove the front and rear lens caps. a The front lens cap can be removed by pressing in the tabs on the right and left with your fingers and pulling the cap towards you. * The rear lens cap can be removed by rotating it counterclockwise.
- Page 12 Insert the two bat- teries, being sure to properly place each battery with the “+” side up, facing the cover. The New Mamiya 6 uses either two SR44 silver oxide batteries or two LR44 alkaline manganese batteries.
-
Page 13: Battery Check
[Battery check] 1. Power can be turned on/off with the small lever beside the shutter release button. (ON) Align the white dot on the lever with the white dot on the camera body. (OFF) Align the white dot on the lever with the red dot on the camera body. - Page 14 Before opening/closing the light shield curtain, be sure to cock the shutter, otherwise, it will not open/close. Never touch the light shield curtain or the bellows. If touched, light leakage or a mal- function may result. [Opening the light shield curtain] To open the light shield curtain, slide the light shield curtain release lever along to fol- low the arrow down and right.
- Page 15 (Photographing position) (See page 11) 5. Back cover ... Open. (See page 15) 6. Release the shutter ... (See page 19) Note: If the shutter is not released, a red (LED) in the viewfinder will light; repeat steps 2 to 5 again.
- Page 16 Set the film speed of the film being used by shutter speed lining up the outer rim of the dial and rotate it until the correct IS0 value appears in the window. [Opening/closing the back cover] While depressing the back cover lock but- ton, simultaneously push down the lock lever in the direction of the arrow and the back will open.
- Page 17 [Memo clip] The memo clip on the back cover is used to hold the film box to serve as a convenient reminder of the type of film in the camera or for recording the date. 1. Push the spool release lever of right side to the right, and install the take-up spool in the take-up spool chamber, then push the lower spool stud up.
- Page 18 Then ( V ) on close the back cover. 6 . Wind the film advance until it stops and “1” appears in the exposure counter window. Make sure backing paper advances evenly be- tween the spool flanges and does not begin to slant.
- Page 19 The New Mamiya 6 has an aperture-prior- ity, AE lens shutter. Once the aperture and film speed are set, the AE meter selects a proper shutter speed in relation to the set aperture. Under the manual photographic mode, proper shutter speed is indicated by a red LED within the viewfinder.
- Page 20 The shutter release button is designed so that pressure can be applied in two stages. When it is slightly touched, correct metering data is displayed on the left side of the view finder. When it is depressed all the way, the shutter is released and an exposure is made.
- Page 22 When the lens has been focused, the double-image superimposing rangefinder produces two superim- posed images within the square 0 of the viewfinder. How To: 1. Position the subject within the central square 0 2. Rotate the focusing ring until the two images The two images can also be superimposed by using the boundary line between the viewfinder and the square or split image.
- Page 23 1. Press the shutter release button when you have focused and determined compos- ition. 2. Advance the film by winding the film advance lever until it stops. (The shutter is then cocked.) 3. After completing the last exposure, wind the advance lever several times, until the film with its backing paper is completely wound onto the take-up spool.
- Page 24 1. Align ” 0 ” on the shutter speed dial with the white line index mark on the camera body. 2. Be sure to set the exposure compensa- tion scale to 0. 3. Set the aperture to the desided "f" number according to conditions.
- Page 26 The depth-of-field varies according to the aperture. The smaller the aperture (f/8, f/11, f/16...) the greater the depth-of-field; the larger the aperture (f/8, f/5...) the smaller the depth-of-field. To take pictures which are sharp from foreground to infinity or when taking snap shots, the focusing range is extended or depth increased by using a smaller aperture.
- Page 27 The exposure compensator functions in a number of important ways. It can be used to correct exposure values (EVs) or the differ- ences in brightness between a primary sub- ject and its background - especially when over or under-exposures occur. It can also be used when filters are employed or when engaged in available light photography - or under high contrast conditions (i.e.
- Page 28 The new Mamiya 6 features an X synchro flash terminal and its lens shutter system permits flash synchronization at all shutter speeds. Shoe-mounted flash units can be attached directly to the hot-shoe, while flash brackets can be attached to the tripod socket for larger flash guns.
- Page 29 The emergency winding-stop release button should not be used for any other purposes. Since the New Mamiya 6 has a 6 x 6 for- mat, it is not necessary to adjust for vertical and horizontal composition. Because most...
- Page 30 Filter size: 58mm Hood: Bayonet type Dimensions: 55 (length) x 64mm (diameter) Weight: 335g G3.5/75L (75mm f/3.5) Lens construction: 6 elements in 4 groups Angle of view: 55° Minimum aperture: 22 35mm equivalent: 41 mm Minimum focusing distance: 1 m Minimum magnification: 0.089...
- Page 31 G4/50L G3.5/75L G4.5/1 50L...
- Page 32 [Lens hood] For 50mm f/4: Bayonet type (58mm in diameter) For 75mm f/3.5: Bayonet type (58mm in diameter) For 150mm f/4.5 Screw-in type (67mm in diameter) All are supplied with the lenses. [Diopter correcting lens] Focusing accuracy diminishes when the eye diopter is incorrect.
- Page 33 3. Exposure prevention when lens mount is retracted Power supply: Two 1.5V batteries (MS 76, SR44 or LR44) Dimensions: Camera body: 6.1” (155mm) length x 4.3” (109mm) height x 2.7” (69mm) depth - 2.1” (54mm) depth when lens mount retracted Body with 75mm lens: 6.1”...
- Page 34 Uniquely designed to prevent mistakes, the New Mamiya 6 incorporates numerous safety features. If the shutter will not function, it is very likely due to user error rather than camera malfunction. Should something appear to go wrong, be sure to review the following points.
- Page 35 For a general overhaul, cleaning, or repairs, take the camera to your nearest authorized Mamiya Service Center or ask your camera shop for advice. This product employs a protective circuit for prevention of electrostatic electrification.
Need help?
Do you have a question about the 6 and is the answer not in the manual?
Questions and answers