Table of Contents
Advertisement
Quick Links
Download this manual
See also:
User Manual
Preface
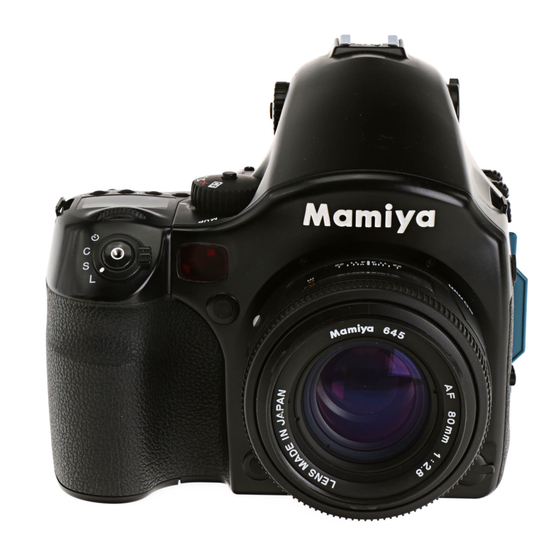
Congratulations on your purchase of the Mamiya 645 AFD
Camera.
Mamiya pioneered the 645 SLR system camera three decades ago and the
1
Mamiya 645 AFD , with its TTL auto-focus, auto-exposure, auto-flash and
auto-film winding features is the latest Mamiya masterpiece and reflects its
long tradition of medium format camera expertise.
2
Combining 35mm handling ease and speed with the advantages of an almost
3x larger image size, it is a full-featured camera, utilizing many digital con-
trols, LCD displays and is ready for the age of digital photography.
3
Its high-tech focal plane shutter with speeds up to 1/4000 sec. permits flash
sync up to 1/125 sec. and has an exclusive "Safety Retraction" feature, which
protects it against accidental damage.
4
The AE Prism Finder with its many features, protected by a sturdy magne-
sium housing, and also the Power Drive Grip, are now integral components of
the die cast aluminum camera body, designed for heavy professional use.
All the many features, safety interlocks and other important information are
5
covered in detail in these instructions. It is imperative that you read them
thoroughly before you put your camera to work, in order to ensure proper
operation and maximum results.
Note:
In order to acquaint yourself with the functions of the camera, you will want to
practice without film. Please see bottom of page 11 how the camera can be tested
without film.
1
Special Advice To Professional Photographers
Your Mamiya 645 AFD is designed for heavy professional use and will give you a long
service life if properly maintained. Your camera and lenses have many moving parts
which require periodic lubrication. Its electronic components, too, are subject to wear
and tear and are affected by ambient conditions like dust, sand, sea air, heat and mois-
ture.
If cameras had odometers like automobiles, it would be easier to specify servicing sched-
ules. May we suggest that if you shoot thousands of film rolls per year, you send your
equipment annually for servicing by the Mamiya distributor in your country.
Mamiya 645 AFD corresponds with digital backs compatible with MSC (Mamiya Serial
Communication of External) system.
2
Advertisement
Table of Contents

Related Manuals for Mamiya 645 AFD II


Summary of Contents for Mamiya 645 AFD II
- Page 1 Mamiya pioneered the 645 SLR system camera three decades ago and the Mamiya 645 AFD , with its TTL auto-focus, auto-exposure, auto-flash and Your Mamiya 645 AFD is designed for heavy professional use and will give you a long auto-film winding features is the latest Mamiya masterpiece and reflects its service life if properly maintained.
-
Page 2: Table Of Contents
Names of Parts and Functions Hot shoe (page 80) Exposure compensation dial lock Diopter adjustment lens (standard accessory) (page 22) release button (page 63) Exposure mode dial lock release button (page 53 to 60) Eyepiece shutter lever Dark slide storage pocket (page 34) (page 74) Exposure mode setting dial Memo clip (page 101) -
Page 3: Each Liquid Crystal Display (Lcd)
Each Liquid Crystal Display (LCD) Main LCD Viewfinder with LCD read-outs on bottom Program shift indicator Program mode mark Auto focus area frame Shutter speed (second)/Calendar AE lock mode mark Custom function mode mark Aperture/Calendar Multiple exposure mode mark User function mode mark Exposure compensation mode mark AF area mark... -
Page 4: Liquid Crystal Display
Electronic Dial Operations / Liquid Crystal Display Electronic Dial Operation Position Front dial Rear dial Display examples when one of the custom functions is specified Program shift (P Select function No. (Select one of the user functions) Tv, Av step (Select step width for Tv and Av) Aperture adjustment Compensation Value (Set the step width for exposure compensation) AF area (Select an AF area) -
Page 5: Release Button
Content Preface ......................1 to 2 Aperture Priority AE (Av) .................. 55 Names of Parts and Functions ..............3 to 4 Shutter Priority AE (Tv) ..................56 Each Liquid Crystal Display (LCD) ............. 5 to 6 Manual Mode (M) ..................57 to 60 Electronic Dial Operation/Liquid Crystal Display ........ -
Page 6: Camera Operation Test
Camera Operation Test This is a simple way to test the camera and auto focus without film. “P” Mode is the easiest. You may use any mode but “CF”. Before Taking “A-S” Mode is the easiest. You may Photographs use any mode. Preparation before taking photographs This chapter describes how to put in the batteries, how to in-... -
Page 7: Inserting The Batteries
The camera will not operate Checking the Battery Power Inserting the Batteries ( without batteries Be sure to turn the switch of the Shutter Release Button to “L” as shown in the top Set the shutter release mode selector lever to “S” (to turn the power on). illustration, to turn the power off. -
Page 8: Installing The Battery In The Magazine
Installing the Battery in the Magazine Batteries Care 1. Life of the batteries that come with the camera body is subject to storage conditions. The button battery supplies power to the magazine's LCD when the film magazine is detached from the camera. When the film magazine is attached to the camera body, it is powered by the camera's batteries. -
Page 9: Attaching / Removing Lens
Attaching / Removing Lens Attaching 2. Attaching the lens Align the white alignment dot of the lens (on the 1. Remove the front body cap, just like shiny flange) with the camera's white dot, fit the you would remove a lens, by pushing lens into the camera and rotate it clockwise until the lens release button backward... -
Page 10: Attaching / Detaching The Magazine
Attaching / Detaching the Magazine 3. Then you move them together like you close Installation and removal of the magazine and its dark slide a book until they lock and you hear the focal Unless the dark slide is inserted in the magazine, you cannot install and remove the plane shutter open. -
Page 11: Diopter Adjustment
Diopter Adjustment Replacing the Diopter Correction Lens 1. Remove the lens supplied with the finder by Look through the viewfinder and make sure that the focus frame (Rectangle with pulling it downward. Circle) is in sharp focus. If it is not, turn the diopter adjustment dial in the “–” direction if you are nearsighted, in the “+”... -
Page 12: Setting The Index Number
Setting the Index Number The index number consists of 4 digits (0000 to 9999). The index number is stored in 6. After the index number is specified, press the set button for approximately one the camera body so that when replacing a series of roll film holders, the camera will second to store the setting. -
Page 13: Setting Date And Time
Setting Date and Time 5. Turn the front and back dials to set the date 1. Turn on the power. and time. Set the shutter release mode selector lever to Turn the front dial to select "month-date-year" “S” or “C.” or "hour-minutes-seconds"... -
Page 14: Strap
Strap Put the neck strap through the camera’s strap lugs as shown on the diagram and tighten it. For safety, check that the strap is securely fastened to the strap mount. For safety, pull the strap strongly to check if it is secured to the strap mounts. Basic Operation This section describes basic camera operations, how to load film and basic full automatic photography. -
Page 15: Attaching The Lens And Magazine
Attaching the Lens and Magazine Setting the Film Speed Attaching the lens The film speed (ISO sensitivity value) is the reference for all exposure and must be set correctly. If the set value differs from the actual value of the film in use, under- or over- 1. -
Page 16: Loading Film In The Magazine
Loading Film in the Magazine A roll of film can be inserted into the magazine whether the magazine is installed onto When the pressure plate (120/220) is set erroneously: the camera body or not. Plate Loaded Result Setting Film 1. Open the back cover of the - Inaccurate focusing. - Page 17 6. Attach the leader paper of the 8. Close the back cover. film to the empty spool. Push in the upper part of the back cover firmly to close it. As shown in the figure left, gently insert the leader paper tip into the groove on the empty After attaching the magazine onto the camera spool that is on the “SPL”...
-
Page 18: Taking Photos In The Full Automatic Mode
Taking Photos in the Full Automatic Mode 1. Set the shutter release mode selector lever to “S” 3. Set the exposure mode selector dial to “P” (pro- (single-frame advance mode). gram auto exposure). There are four exposure modes: “P” (program There are two shutter release modes: “S”... -
Page 19: Shutter Release Button / Holding The Camera
Shutter Release Button / Holding the Camera 5. Focus Shutter Release Button 1. Aim the camera so that the subject is within the focus frame The shutter release button has a two-step action. When pressed lightly it stops at a certain point. -
Page 20: Removing A Partially Exposed Roll Of Film
Removing a Partially Exposed Roll of Film 1. Insert the dark slide in the magazine. 6. Unloading the exposed film. When the roll of film is completely exposed, the camera automatically advances the film completely to the end. The LCD panel displays “End.” 1. -
Page 21: Applied Photography And Various Functions
Applied Photography and Various Functions This chapter describes various functions of the camera. -
Page 22: Focus Modes
Focus Modes Single focus mode (S) Focus Area With custom functions (C-03 on page 88) you can select a focus area that suits the This mode uses the focus-priority mechanism. subject. The shutter can be released when the focus mark in the viewfinder is lit. -
Page 23: Manual Focus Mode
LCD panel. 2. Manual Focus Operation for Telephoto and Zoom lenses. All Mamiya 645 AF Telephoto and Zoom lenses can be switched from Auto Focus to Manual Focus by sliding the focusing ring on the lens FORWARD until it clicks. When this is done, the “Auto Focus”... -
Page 24: Manual Focusing Using The Focus Mark
When Auto Focus is Failed Manual focusing using the focus mark The auto focus function requires contrast on subject. Auto focusing may fail to achieve focus with certain subjects described below. In such cases, either switch to the (Focus confirmation method) manual focus mode and focus manually or focus an object at the same distance as With this camera, the focus mark lights in the viewfinder’s LCD when the picture is... -
Page 25: Using The Focus Lock Function
Using the Focus Lock Function AF Assist Infrared Light When the subject is dark or the low-key and the If the object that you want to focus on is not in the focus frame , the camera camera fails to auto-focus, a red lamp may light focuses on the background at the center. -
Page 26: Shutter Release Modes
Shutter Release Modes Single-Frame Mode Electrical Contacts The film is advanced by one frame at time the shutter is released. Set the shutter release mode selector lever to “S”. Continuous Mode Photographs are taken continuously as long as the shutter release button is pressed. Set the shutter release mode selector lever to “C”. -
Page 27: Exposure Modes
Exposure Modes Program Shift (P Program AE (P) You can change the shutter speed and aperture by turning the front and rear dials in The aperture and shutter speed are determined automatically for the optimum the “P” (Program AE) mode. In order to avoid blurred images (shake while releasing exposure, according to the existing ambient light. -
Page 28: Aperture Priority Ae (Av)
Aperture Priority AE (Av) Shutter Priority AE (Tv) Set the desired aperture, and the camera selects the optimum shutter speed accord- Set the desired shutter speed and the camera selects the optimum aperture accord- ingly. Use the Av mode to maintain specific control over depth of field, i.e. taking ingly. -
Page 29: Manual Mode (M)
Manual Mode (M) This mode is used to set both the aperture and shutter speed for total exposure 4. When the shutter release button is half- control. pressed, the difference between the present Shutter speeds can be selected from B (bulb), 30 seconds to 1/4000 of a second. settings and the metered value is displayed in Aperture values can be set from the open to the minimum aperture. -
Page 30: Mode (X)
X Mode (X) One-push shift function When difference between the set value and metered value is displayed on the viewfinder LCD in the Manual “M” mode, press the AEL button for approx. 1 second Select this mode when you use a flash. The and the camera will automatically adjust the shutter speed to achieve the correct shutter speed will be fixed of 1/125 second of exposure based on the set aperture value. -
Page 31: Exposure Metering Modes
If a polarizing filter is necessary, use a circular With the A-S auto metering mode, average or polarizing filter. A linear polarizing filter is not spot exposure metering is selected automati- compatible with the Mamiya 645 AFD and its cally and the appropriate exposure is set operations. accordingly. -
Page 32: Exposure Compensation
Exposure Compensation In some situations, such as a great difference between the subject and background Turn the rear dial left to increase the compensa- brightness or overall subject tones that will not meter correctly because they are all tion. Turn it right to decrease the compensation. black or white, the resulting photograph may be under- or overexposed. -
Page 33: Ae Lock Mode
AE Lock Mode Metered-value difference indicator The AEL button will lock the Auto-exposure value as the photo is being recomposed. 1. Turn the shutter release mode selector lever Keep pressing the AEL button , and the to “S” or “C.” difference between the metered exposure value and the exposure of the new composi- 2. -
Page 34: Auto Bracketing Mode
Auto-Bracketing Mode With auto exposure bracketing, you can bracket the exposure automatically for three (or two) successive frames, when it is difficult to determine an exposure compensation value. 1. Turn the shutter release mode selector lever to the “S” or “C” position. When set at the “S”... -
Page 35: Multiple Exposure Mode
Multiple Exposure Mode To cancel the Multiple Exposure Mode Using the multiple exposure mode, you can expose several shots on the same frame. Make sure to pull the dark slide out. And hold 1. Turn the shutter release mode selector to the the emergency film winding button and half- “S”... -
Page 36: Taking Photos With The Mirror Up
Taking Photos with the Mirror Up This function prevents mirror-caused vibrations which may blur the image in close-up Turn the shutter release mode selector to the “C” position and set the auto bracket- photography, when shutter speed is slow, when a telephoto lens is used, or when ing before starting the mirror-up shot. -
Page 37: Eyepiece Shutter Lever
Self Timer Mode Eyepiece Shutter With this function, under the default setting the shutter is released 10 seconds after the Close the eyepiece shutter when there is a strong light source behind the camera or shutter release button is pressed. The self timer lamp flashes slowly for the first 7 when pressing the shutter release button without looking through the viewfinder. -
Page 38: Extended Exposure Mode (Bulb Modes)
Extended Exposure Modes (Bulb Modes) Backlight Button To expose film longer than 30 seconds, adjust the shutter speed to “B” (bulb). In order to To see the main panel at night or in dark places, prevent camera shake, use an electromagnetic shutter release and tripod. press the backlight button The backlight will go on approximately 10 seconds and go off unless there is another... -
Page 39: Shutter Release Mode Selector Lever
Depth of Field / Depth of Field Preview Front / Rear Dial Lock Mechanisms Depth of Field When the Electronic Dial Lock is “On,” all currently set values in “Av” (Aperture Priority AE), “Tv” (Shutter Priority AE) and “M” (Manual mode) cannot be adjusted with the Depth of field (D.O.F.) is defined as the zone of sharpness before and behind the front or rear dials. -
Page 40: Hot Shoe
Use The sensor is connected via the Mamiya 645 AFD s dedicated hot-shoe to a shoe- or the procedure described below when taking photos using infrared film. -
Page 41: Flash Compensation Settings
Flash Compensation Settings For example: By combined use of a Metz flash and the SCA3952 adapter, the camera adjusts for When the size of the subject you want to light with the flash is relatively small within the flash. It can be adjusted within 3EV in increments of 1/3 steps. - Page 42 Flash Photography with electronic flash models other External LCD Panel (normal display) 4. Half press the shutter release than Metz button, the “ ” (when positive 1. To use a grip type flashguns or a strobe with adjustment) or “ ” (when negative other electric contacts than X contact, connect adjustment) displays.
-
Page 43: Superimposing Data
Superimposing Data This is a function to allow various pieces of shooting information to be superimposed on the edge of the film. The info that is superimposed can be selected from the following three modes. To specify this function, use the Custom settings (C-04 on page 88). -
Page 44: Setting Custom Functions
Types of Custom Functions Setting Custom Functions The custom functions allow you to change the method for using or accessing the C-00: Choose a set of user functions camera functions as you like. Take photographs the way you are most comfortable with. - Page 45 Types of Custom Functions C-05: Select a way of setting aperture after changing lenses. C-10: Specify the order for taking pictures in an auto bracket shot. The aperture is set to After replacing the lens, After replacing the lens, The camera stores the Normal, under, and over Normal, over, and Under, normal, and...
- Page 46 Types of Custom Functions C-16: Select a way for the program shift. C-21: Select whether or not to display the exposure meter difference in the M mode. Shift along the program Shift by putting priority Shift by putting priority Displayed Not displayed line on the aperture value...
- Page 47 Types of Custom Functions Common setting items C-26: Select a way of setting shutter speed when using the dedicated flash (in the P and Av modes). C-31 to C-36 are common settings. Each of these settings is reflected in other users. * Dedicated flash: Metz flash and SCA3952 adapter Therefore, these items cannot be set differently for each user.
-
Page 48: Miscellaneous Operations
Types of Custom Functions C-35: Adjust the date and time. Press the set button Press the set button for one Select the month (M), date (D), year (Y), hour, second to store the settings or minute using the front dial. The selected item will blink. -
Page 49: Changing The Focusing Screen
Focusing Screen down. by using a blower. If the Focusing Screen needs cleaning, send it to the nearest authorized Mamiya service center. Do not attempt to clean the surface of the Focusing Screen, as it is very delicate. -
Page 50: Using The M645 Manual Focus Lenses
Using the M645 Manual Focus Lenses External Battery Socket When using the MAMIYA M645 manual focus lens, mount the focusing screen for manual When using the camera at cold temperatures where the battery capacity may drop, focus lenses (sold separately). -
Page 51: Using A Tripod
Check to see if the batteries are installed. Check to see if the batteries are dead. Check to see if the power is on (the shutter release selector lever is other than in the This is the socket for connecting a Mamiya “L” position). -
Page 52: When Any Of These Displays Appear
When Any of These Displays Appear The camera caution mark will blink when the dark slide has not been pulled out, no film is present, or when the camera detects an abnormality. -
Page 53: Specifications
: TTL direct flash control, supports Metz SCA3002 system special HP402 magazine) (SCA3952 Adapter) Lens Mount : Mamiya 645 AF Mount, compatible with M645 Mount (manual Film transport : Automatic via built-in motor, single or continuous exposures focus confirmation, focus aid, stopped-down exposure metering) -
Page 54: Common Sense Camera Care And Practice
• Do not store the camera at temperatures exceeding 40˚C (105˚F) and -10˚C (15˚F). Also avoid humid or sea air environment. 1) The degree of such a malfunction or damage will be judged by the Mamiya service • Prolonged disuse shortens camera life. Periodically exercise the shutter (at different department. - Page 55 MEMO...
- Page 56 Printed in Japan Instructions 100% Recycled Paper 320100-EH-01E...
Need help?
Do you have a question about the 645 AFD II and is the answer not in the manual?
Questions and answers