Mamiya 645AFD Instructions Manual
Hide thumbs
Also See for 645AFD:
- Instruction manual (6 pages) ,
- Instructions manual (56 pages) ,
- User manual (106 pages)
Table of Contents
Advertisement
Quick Links
Advertisement
Table of Contents

Related Manuals for Mamiya 645AFD


Summary of Contents for Mamiya 645AFD
- Page 2 Contents...
- Page 4 Congratulations on your purchase of the Mamiya 645 AF Camera Mamiya pioneered the 645 SLR camera nearly three decades ago, and the 645 AF , with its TTL auto focus, auto exposure, auto flash, and auto film winding,reflects Mamiya's long tradition in medium format expertise.
-
Page 5: Special Advice To Professional Photographers
If cameras had odometers like automobiles, it would be easier to specify servicing schedules. May we suggest that if you shoot thousands of rolls of film a year, you have your equipment serviced annually by the Mamiya distributor in your country. Mamiya 645 AF corresponds with digital backs compatible with the MSCE (Mamiya Serial Communication of External) System. -
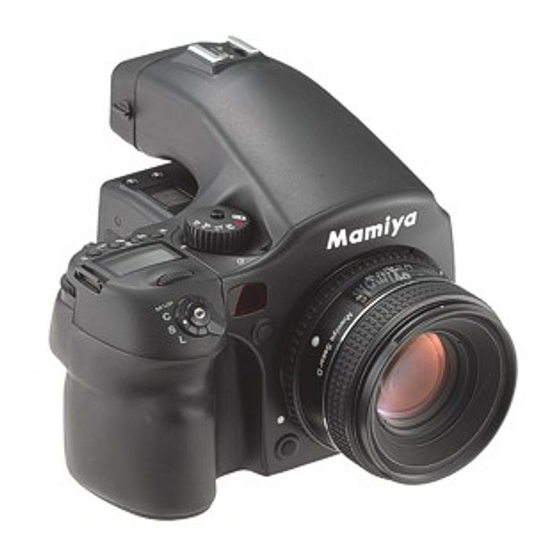
Page 6: Names Of Parts
Names of Parts Hotshoe Exposure Mode Dial Lock Release Button Exposure Compensation Dial Lock Release Button Exposure Mode Setting Dial Exposure Compensation Dial Auto Focus Supplemental Infrared Light Emission Window Eyepiece Shutter Lever Main Liquid Crystal Display (LCD) Rear Dial Mirror Strap Lug Front Dial... - Page 7 Exposure Mode Selector Lever Rubber Eyepiece Exposure Mode Selector Lever Strap Lug Lock release Button Diopter Adjustment Dial Dark Slide Magazine Release Button Magazine Cover Release Button Magazine Cover Lock Button Magazine Lock Button Synchro Terminal Focus Mode selector Lever Mirror-up Lever Electronic Shutter Release Socket...
- Page 8 Diopter Adjustment Lens (accessory) Dark Slide Storage Pocket Film Tab Box Pocket Magazine Battery Cover Screw Cap External Power Socket Battery Case Lock Lever Battery Case Tripod Socket Magazine LCD Panel Main LCD Backlight Button Down Button F2 Key F1 Key SET Button Up Button Flash Auto...
-
Page 9: Main Liquid Crystal Display (Lcd)
Main Liquid Crystal Display (LCD) Shutter Time (seconds) Superimpose Mode Shooting Data Self-time Mode Mark Superimpose Mode Calendar and Index Number Multiple Exposure Mode Mark Auto Bracketing Mode Index Mode Manual Focus Mode Battery Power Indicator Program Mode Aperture Program Shift Indicator Dial Lock Indicator Magazine LCD Film Sensitivity (ISO 25-6400) -
Page 10: Viewfinder With Lcd Readouts
Viewfinder with LCD Readouts Auto Focus Area Frame Exposure Compensation Mark AE Lock Display Exposure Compensation Vale Display Out of Focus Direction Marks Flash Charge indicator Aperture Focus Marks Shutter Speed Exposure Metering Mode Display... -
Page 12: Electronic Dial Operations
Electronic Dial Operations... -
Page 13: Inserting The Batteries
Inserting the Batteries Before inserting or removing the batteries, be sure to turn the Shutter Release Button's switch to the "L" position, as shown in the illustration. 1. Set the Shutter Release Button's switch to "L". 2. Lift the Battery Case Lock Lever, turn it counter- clockwise, and then pull out the Battery Holder. -
Page 14: Checking Battery Power
Checking Battery Power Set the Battery Mode Selector Lever to "S" (power on). The condition of the batteries is indicated in the lower right corner of the Main LCD. The batteries have a sufficient amount of power. There is little power remaining. The camera will still operate;... - Page 15 Installing the Magazine Battery The button battery supplies power to the magazine when it is detached from the camera. When the magazine is attached to the camera body, it receives power from the camera's batteries. 1. Remove the Battery Compartment screw cover using a coin or straight-blade screwdriver.
-
Page 16: Battery Care
Battery Care 1. The sealed, new batteries supplied with this camera may have been subjected to storage conditions that could reduce their service life. Therefore, it is advisable to replace then with a fresh set of batteries as soon as possible. 2. -
Page 17: Attaching And Removing A Lens
Attaching and Removing a Lens Attaching 1. Remove the Front Body Cap by pushing the Lens Release Lever (A) in the direction of the arrow, turning the cap counterclockwise until it stops, and then lifting the cap out of the camera body. To remove the Front Lens Cap, squeeze the two sections together, and then lift cap off the lens. -
Page 18: Attaching And Removing The Magazine
Attaching and Removing the Magazine Unless the dark slide is inserted in the magazine, you cannot attach or remove the magazine from the camera body. When the camera's batteries or low, or batteries are not installed in the camera, the dark slide cannot be removed, although the magazine can be attached or removed from the camera body. - Page 19 Removing 1. Insert the dark slide into the magazine. 2. With your thumb, first push button (A) down, and then simultaneously push button (B) in, The magazine will separate from the camera body. When the magazine is removed from the camera body, the shutter will automatically open.
-
Page 20: Diopter Adjustment
Diopter Adjustment Look through the viewfinder and make sure that the focus frame (the rectangle with a circle) is in sharp focus. If it is not, turn the Diopter Adjustment Dial in the "-" direction if you are nearsighted and in the "+" direction if you are farsighted. If this adjustment does not pro- duce a sharp image, you may need to use an optional diopter correction lens, Diopter Adjustment Dial... -
Page 21: Replacing The Diopter Correction Lens
Replacing the Diopter Correction Lens 1. Remove the lens supplied with the finder by pulling it down. 2. Push the replacement Diopter Correction Lens into the frame until it clicks and locks into place. If there is any dirt or dust on the lens, remove it with a blower or a lens brush, If there are any fingerprints on the lens, wipe them off using lens tissue. -
Page 22: The Camera Strap
The Camera Strap Put the strap through the camera's Strap Lugs, as shown in the illustration, and then tighten it. For safety, pull the strap firmly to assure that it is attached correctly. -
Page 23: Attaching The Lens
Attaching the Lens 1. Align the white alignment dot on the lens (A) with the white dot on the camera body (B). 2. Fit the lens into the camera body, and then turn it clockwise until it clicks and locks into place. -
Page 24: Loading Film In The Magazine
Loading Film in the Magazine Film can be loaded into the magazine whether it is attached to the camera or not. 1. Open the magazine's Back Cover. Simultaneously push down button (A) while pressing button (B) in. 2. Remove the Roll Film Insert. Squeeze the center "645"... - Page 25 4. Attach an empty spool to the Roll Film Insert. Flip the Spool Clip (E) "SPL" away from the spool, fit an empty spool between take-up Spool Studs (F), and then return the Spool Clip "SPL" to its original position. 5.
-
Page 26: Contact Points Of Each Electrical Component
If the film is not wound correctly, the film counter display disappears and the "" mark is displayed on the LCD. Do not wrap too much leader around the empty spool as doing so may expose the film to light. To prevent accidental fogging, do not pull out the leader too far or load or unload film in direct sunlight. - Page 27 2. Set the Focus Mode Selector Lever, located at the lower left front of the camera, to "S" (Singe- focus Mode). There are three focus modes: "S" Single- focus Mode, "C", Continuous-focus Mode, and "M", Manual-focus Mode. 3. Set the Exposure Mode Selector Dial to "P" (Program Auto Exposure) There are four exposure modes: "P", Program AE, "Av", Average Priority AE, "Tv", Shutter-priority AE and "M", Manual Mode.
- Page 28 4. Set the Exposure Metering Mode Selector Lever to "A-S" (Average-Spot Auto Switching). There are three exposure metering modes: "A" where the average light from the entire frame is measured with emphasis on the center of the frame, "S" in which the light in a spot at the center of the frame is measured.
-
Page 29: Shutter Release Button
Shutter Release Button The Shutter Release Button has a two-step action: A half-press of the button will activate the camera, and turn on the power. A full press of the Shutter Release Button activates the shutter. Half Press Shutter Release Position Holding the Camera Hold the camera's grip firmly when photographing. -
Page 30: Removing A Partially Exposed Roll Of Film
3. Remove the film. Flip the Spool Clip (D) "SPL" away from the spool, and then take out the roll of film. 4. Seal the film using the film tape. Use the film tape included with the roll of film to seal the film and prevent Film tape it from unrolling. -
Page 31: Camera Operation Test
Camera Operation Test... -
Page 32: Focus Modes
LCD Panel. 2. Manual Focus Mode for telephoto and zoom lenses only. All Mamiya 645 AF telephoto and zoom lenses can be switched between auto focus and manual focus by sliding the Focusing Ring FORWARD until it clicks. -
Page 33: Lenses Having A Focus Mode Selector
3. Focus the lens. Turn the Focusing Ring (A) to adjust focus. When the subject is in focus, the Focus Mark will be lit in the viewfinder. Lenses Having a Focus Mode Selector When you install a lens with a Focus Mode Selector, you can change between auto... -
Page 34: Subjects Where Auto Focus May Not Work
is lit in the viewfinder, focus is behind the subject. is lit in the viewfinder, focus is in front of the subject. In focus Turn the Focusing Ring clockwise Turn the Focusing Ring counterclockwise Subjects Where Auto Focus May Not Work The auto-focus function requires sufficient subject contrast, therefore auto focus may not be possible with the types of subjects described below. -
Page 35: Using The Focus Lock Function
Using the Focus Lock Function If the subject you want to focus on is not in the Focus Frame the camera will focus on the background at the center of the frame. In such cases, use the Focus Lock Mechanism to lock the focus before releasing the shutter. -
Page 36: Single-Frame Mode
Single-Frame Mode The film is advanced one frame each time the Shutter Release Button is fully depressed. Set the Shutter Release Selector Lever to "S". Continuous-Frame Mode Photographs are taken continuously as long as the Shutter Release Button is full depressed. Set the Shutter Release Selector Lever to "C". -
Page 37: Shifting The Program
Shifting the Program Then the camera is in "P" (program AE) Mode, you can change the shutter speed to a higher speed PH or a lower speed PL in increments of +- 1.0EV by turning the Front or Real Dial. Turn the Front or Rear Dial to shift the shutter speed between the +- 1.0EV values. -
Page 38: Shutter-Priority Ae
Shutter Priority AE Set the desired shutter speed, and the camera will automatically select the optimum aperture. Use this mode to maintain control over action-based photography. 1. While pressing the Exposure Mode Setting Dial Lock Release Button (A), turn the Exposure Mode Setting Dial to the "TV"... -
Page 39: One Push Shift Operation
When the Shutter Release Button is pressed down halfway, the difference between the metered settings and the manual setting is displayed in the viewfinder. This value is displayed in 1/3 stop increments within a range of +- 6EV. For example, "+2/3" indicates +2 1/3EV; "-5.7" indicates - 5 2/3EV, etc. -
Page 40: Exposure Metering Modes
X Mode (X) Select this mode when you are using flash. The shutter speed will be fixed at 1/125 sec. for synchronization. Time Mode (T) Use this mode for making long exposures, Exposure Metering Modes Changing Modes To change metering modes, press the Exposure Metering Selector Lock Release Button, and then move the Exposure Metering Selector Lever up or down. -
Page 41: Exposure Compensation
Spot Exposure Metering Mode (S) Set the Exposure Metering Mode Selector Lever to "S". The light in the center circle of the viewfinder is used to determine exposures. This mode is suited to strongly backlit subjects, or when you want to measure a specific area. When the spot you want to measure is not in the center of the frame, use the AE Lock Function. -
Page 42: Auto Bracketing Mode
Auto Bracketing Mode When you have a subject that it is difficult to determine the Exposure Compensation, or when you take another photography with only slightly different exposure values, use the Auto-Bracketing function. 1. Turn the Shutter Release Mode Selector Lever to either "S"... -
Page 43: Ae Lock Mode
Automatic Exposures in Auto-Bracketing Mode When Continuous Mode (C) is selected, the camera will take three frames in series when the Shutter Release Button is pressed. For optimum sharpness, use a tripod To exit AutoBracketing Mode, press the Function Mode Setting Button (A) three times. -
Page 44: Multiple Exposure Mode
Metered Value Difference Indicator Press the AEL Button (A), the viewfinder displays the difference between the metered exposure value and a new composition. This indicator is useful for checking if a subject with a very different light level can be photographed or not. Multiple Exposure Mode Multiple Exposure Mode enables exposing several exposures on the same frame. - Page 45 3. Press the Shutter Release Button. The film will not advance until the specified number of exposures has been taken. Canceling Multiple Exposure Mode Remove the dark slide, and then depress the shutter Release button halfway while pressing the Mid Roll Film Advance Button (B). The film will advance one frame and Multiple Exposure Mode is canceled.
-
Page 46: Self-Timer Mode
Self-Timer Mode With the default setting, the shutter is released 10 seconds after the Shutter Release Button is fully pressed. The Self-Timer lamp flashes slowly for the first seven seconds, then it flashes quickly for the last three seconds before the shutter is released. -
Page 47: Extended Exposure Modes
Extended Exposure Modes To expose film for longer than 30 seconds, set the shutter speed to "B" (Bulb) or "T" (Time). In order to prevent camera shake, use an electromagnetic or mechanical cable release and a tripod. Bulb Mode Bulb Mode uses electronic control, so the batteries are in constant use during the entire exposure. -
Page 48: Mirror-Up Photography
Mirror-up Photography Use this function to avoid any camera vibrations when using slow shutter speeds, telephoto lenses, etc., where even the slightest camera vibration could result in a blurred image. When the mirror is up, auto focus and the metering functions cannot be used. Therefore, focus and exposure should be set before raising the mirror. -
Page 49: Depth Of Field
Using Manual Mode 1. Turn the Focus Mode Selector Lever to "M" (Manual Focus Mode). 2. Turn the lens Focusing Ring to focus your subject. 3. Depress the Shutter Release Button halfway to meter the subject. 4. Turn the Exposure Setting Dial to "M" (Manual Mode). -
Page 50: Depth-Of-Field Preview Button
Focusing Ring clockwise and set the Distance Scale to the Infrared Mark. You cannot photograph in AE Mode when using infrared film. Flash Photography In addition to its standard flash sync system, the Mamiya 645 AF features TTL (through-the-lens), off-the-film (OTF) electronic flash metering. - Page 51 The film's ISO value is automatically set via the camera's magazine. Any adjustment to the ISO is instantly recognized after the setting is locked and the Shutter Release Button is pressed half- way. When magazines with different ISO settings are installed on the camera, the TTL flash connection instantly recognizes the change.
- Page 52 Metz Flash SCA 3952 System Functions The shutter cannot be released until the flash's OK light is lit. When using a SCA 300 flash, also use the Metz SCA 3000C converter. To use the guide number indicated on the flash, wait several seconds after the Charge Complete Indicator is displayed before using the flash.
- Page 53 4. Turn the Front or Rear Dial to select the flash compensation value. Main Panel (normal display) 5. Press the Shutter Release Button down halfway. The "o" (positive adjustment) or "u" (negative adjustment) is displayed on the Main LCD and in the viewfinder. Flash Photography with Non Metz Units 1.
-
Page 54: Setting The Date And Time
This camera's sync terminal is an X contact. When using MF or M grade flash bulbs, set the shutter speed to 1/30 sec. or slower for MF bulbs and 1/15 sec. or slower for M bulbs. WARNING Using flash units specifically designed for other makes of cameras may damage the camera's internal mechanisms if connected to the hotshoe. -
Page 55: Setting The Index Number
Setting the Index Number 1. Turn the Shutter Release Mode Selector Lever to "S" to turn on the power. 2. Press the Key for about two seconds, and then turn the Front or Rear Dial to display SEt2 on the Main LCD Panel. - Page 56 4. Turn either the Front or Rear Dial and choose DATA or DAY to superimpose the information. Select OF to cancel the function. Data Superimpose Modes DATA: The following data is superimposed: exposure mode, aperture, shutter speed, exposure compensation, exposure metering mode, index number, and auto bracketing.
- Page 57 Changing the Viewfinder Display in Manual Mode (M) When the Exposure Mode Setting Dial is set to "M", it is possible to only display the focus and flash charge marks in the viewfinder. This function is useful when exposure settings will not change, or the information in the viewfinder could be distracting.
-
Page 58: Front And Rear Dial Lock Mechanisms
4. Press the Key again and turn the Front or Rear Dial to select OF. 5. Press the Button for about two seconds to register the setting. Returning to the Normal Display Repeat Steps 1 - 4, turn the Front or Rear Dial to select On, and then press the Button for about two seconds to register the change. -
Page 59: Af Supplemental Infrared Light Canceling Function
6. Press the Button for about two seconds to register the value. After the value is registered, the shutter speed and aperture cannot be changed by turning the Front or Rear Dials. If you operate the Electronic Dial with Electronic Dial Lock ON, L blinks in the Main LCD to affirm that the lock is functioning correctly. -
Page 60: Changing The Flash Auto Adjustment Procedure
Changing the Flash Auto Adjustment Procedure Flash compensation and exposure compensation may be set independently, or combined when a Metz flash and SCA 3952 Adapter are used. 1. Install the SCA 3952 Adapter on the Metz flash. 2. Insert the adapter and flash in the camera's hotshoe, and then turn the Locking Knob (A) to secure the unit to the camera. -
Page 61: Changing The Focusing Screen
Do not clean the screen with any chemical, lens tissue, etc. If a focusing screen needs cleaning, sent it to your Mamiya authorized service center. Using M645 Manual Focus Lenses When using M645 manual focus lenses, the Manual Focus Lens Focusing Screen must be installed in the camera. -
Page 62: External Battery Socket
With AE operation, select the Av (Aperture Priority AE) and choose the Spot Exposure Mode (S). You can use the lens in conjunction with stop-down metering. 6. Depress the Shutter Release Button down halfway to show the shutter speed. Available Functions with M645 Lenses X = Not available O = Available When using a lens with an aperture of f/5.6 or larger, you can adjust the... -
Page 63: Using A Tripod
1/4-20 bushing (B). Electromagnetic Shutter Release Contact This port is used to connect a Mamiya Electromag- netic Cable Release, which is helpful when using the camera with the mirror up and when photogra- phing at slow shutter speeds. - Page 64 If this is the case, turn the camera OFF, and then remove the batteries. Reinstall the batteries, and then turn the power ON. If the camera still does not function correctly, contact your local authorized Mamiya service center.
-
Page 65: When Any Of These Displays Appear
120 roll (16 exposures) 220 roll (32 exposures) Polaroid Pack Film Lens mount: Mamiya 645 AF mount, compatible M645 mount (manual focus confirmation, focus aid, stopped-down exposure metering Viewfinder: Fixed prism viewfinder with 0.71x magnification, built-in diopter adjustment (-2,5 to +0.5 diopter and 0 to +3 diopter) - Page 66 Focusing screen: Interchangeable between Matte (standard), Checker and Microprism C for M645 lenses Field of view: 94% of actual image Viewfinder information: Focus mark, out-of-focus direction marks, aperture value, shutter speed, metering mode (A, S, A/S), exposure com- pensation, flash ready light (when used with a Metz flash AF sub-beam: Activates automatically under low light or low contrast condi- tions;...
-
Page 67: Common Sense Camera Care And Practice
Main LCD Panel: On camera body, displays aperture, shutter speed, self-timer, BL (backlight), battery check, multiple exposure, Programmed AE or Programmed AE shift value, data imprinting Magazine: Interchangeable, ISO speed, 120 or 220 film Data imprinting: Seven segment dot-matrix, DATA mode: exposure mode, aperture, shutter speed, exposure compensation, metering mode, ID number, DAY mode: year, month, date, time, ID number, switchable be- tween enabled and disabled... -
Page 68: The Importance Of Proper Maintenance
4. Damage caused by dropping, impact, fire, flood, etc. will be evaluated by your Mamiya service center. When the product is judged to be repairable, the user will be charged for the repairs, even the damage occurred during the warranty period.
Need help?
Do you have a question about the 645AFD and is the answer not in the manual?
Questions and answers