Table of Contents
Advertisement
Advertisement
Table of Contents

Related Manuals for Mamiya 645 AF


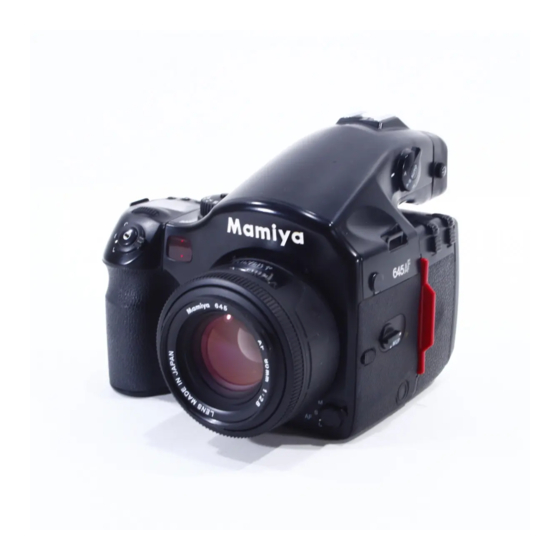
Summary of Contents for Mamiya 645 AF
- Page 2 Special Advice To Professional Photographers Your Mamiya 645 AF is designed for heavy professional use and will give you a long service life if properly maintained. Your camera and lenses have many moving parts which require periodic lubrication. Its electronic components, too, are subject to wear and tear and are affected by ambient conditions like dust, sand, sea air, heat and moisture.
-
Page 3: Table Of Contents
Front dial (Page 71) Shutter release mode selector lever (Page 47) Congratulations on your purchase of the Mamiya 645AF and welcome to the world-wide family of happy Mamiya camera owners! Hot shoe (Page 63) Exposure mode dial lock release button (Page 39) -
Page 4: Main Liquid Crystal Display (Lcd)
Diopter adjustment lens (standard accessory) (Page 14) Magazine LCD Panel (Page 6) Down button (Page 18) Main Liquid Crystal Display (LCD) Dark slide storage pocket (Page 20) Superimpose mode shooting data (Page 75) Film box tab pocket Screw cap for battery compartment for Superimpose mode magazine LCD (Page 17) calendar and index... - Page 5 Viewfinder with LCD read-outs on bottom AE lock display Focus marks displayed when subject is in focus Exposure metering mode display This diagram is for explanatory purposes. The actual display may differ. Basic Operation ...10 Autofocus area frame Auto Focus Function ...30 Exposure compensation ±...
- Page 6 Exposure Compensation ...46 Single-Frame Mode / Continuous Mode ...47 Additional Shooting Modes ...48 Auto Bracketing Mode ...49 Multiple Exposure Mode ...51 Self Timer Mode ...53 Applied Photography ...54 Extended Exposure Modes ...55 AE Lock Mode ...57 Taking Photos with the Mirror Up ...59 Depth of field ...61 Infrared Photography .
-
Page 7: Inserting The Batteries
Inserting the Batteries (The camera will not operate without batteries) Set the shutter release mode selector lever to "L" (to turn the power off). Use six "AA" alkaline and lithium batteries. 1. Lift the battery case lock lever, turn it counter clockwise and pull out the battery holder. -
Page 8: Diopter Adjustment
Diopter Adjustment Look through the viewfinder and make sure that the focus frame (Rectangle with Circle) is in sharp focus. If it is not, turn the diopter adjustment dial in the "-" direction if you are nearsighted, in the "+" direction if you are farsighted. If this is not sufficient you may require an optional diopter corrected lens. -
Page 9: Attaching/Removing The Lens
Attaching/Removing the Lens Attaching 1. Remove the camera's lens opening cap, just like you would remove a lens, by pushing the lens release button “A” backward and then turn the lens cap or the lens itself counter clockwise and lift out. To remove the front lens cap, squeeze the shiny sections together and lift out. -
Page 10: Installing The Battery In The Magazine
Installing the Battery in the Magazine The button battery supplies power to the magazine's LCD when it is detached from the camera. When it is attached the power is supplied by the camera's batteries. 1. Remove the battery compartment cover screw. Use a coin or suitable screw driver and turn it counter clockwise. -
Page 11: Attaching/Detaching The Magazine
Attaching/Detaching the Magazine When there are no batteries in the camera, the shutter's "Safety Retraction" feature, keeps it in the open position and the magazine's dark slide cannot be pulled out, even when it is attached to the camera. Film winding and shutter release are also blocked in this case. -
Page 12: Loading Film In The Magazine
Loading Film in the Magazine 1. Open the back cover of the magazine. By first pushing the button “A” down and then button “B” simultaneously. 2. Take out the roll-film insert. Squeeze the center block "645" “C” between your fingers and pull it out. •... -
Page 13: Shutter Release Button/Holding The Camera
7. Insert the loaded film insert into the magazine. While squeezing the center latches together, place the film insert, with the feed spool on top, in the magazine and with pressure on the left and right blocks “G” push it into proper position. (You will hear a click). -
Page 14: Taking Photos In The Full Automatic Mode
Taking Photos in the Full Automatic Mode 1. Set the shutter release mode selector lever to "S" (single-frame advance mode). There are two shutter release modes: "S" (singleframe advance mode) and "C" (continuous advance mode). (See page 47.) When set to "L", the power is turned off. 2. -
Page 15: Lock Release Button
5. Focus. 1. Aim the camera so that the subject is within the focus frame 2. Half-press the shutter release button. The focus is adjusted automatically. When the focus mark lights……..The picture is focused. 3. When lights, press the shutter release button to make exposure(s). Defocusing Marks Flashing: The picture is not focused and the shutter cannot be released. -
Page 16: Removing A Partially Exposed Film Roll
To remove partially exposed film roll, insert the dark slide in the magazine and press the shutter button and the forced film advance button “A” simultaneously. This causes the film to be taken up till the end and the magazine's LCD panel shows "End". -
Page 17: Single Focus Mode
Single Focus Mode (S) This mode uses the focus priority mechanism. The shutter can be released when the focus mark in the viewfinder is lit. This mode is suited for still subjects. The focus is locked when the mark lights in the viewfinder's LCD. *The shutter cannot be released if the subject is not in focus (if the light). -
Page 18: Manual Focusing Using The Focus Mark
Manual focusing using the focus mark. (Focus confirmation method) With this camera, a focus mark lights in the viewfinder's LCD when the picture is in focus. With the shutter release button half-pressed, turn the lens focusing ring to focus on the subject. When the subject is in focus, the LCD. -
Page 19: Using The Focus Lock Function
Using the Focus Lock Function If the object on which you want to focus is not in the focus frame, the camera focuses on the background at the middle. In such cases use the focus lock mechanism to lock the focus before taking the picture. 1. -
Page 20: Camera Operation Test
Camera Operation Test This is a simple way to test the camera and autofocus without film. "P" Mode is the easiest. You may use any mode but "T". 1. Set the shutter release mode se- 3. Open the back cover. lector lever to "S"... -
Page 21: Rear Dial
Program AE (P) The aperture and shutter speed are determined automatically for the optimum exposure, according to the existing ambient light. This mode is best suited for general photography, allowing the user freedom to concentrate on the subject. Turn the exposure mode setting dial and set it to "P"... -
Page 22: Exposure Mode Dial Lock Release Button
Shutter Priority AE Set the desired shutter speed and the camera selects the optimum aperture accordingly. Use the Tv mode to maintain specific control over action, i.e. shooting sporting events or deliberately blurring your subject. 1. Turn the exposure mode setting dial and set it to "Tv"... -
Page 23: Manual Mode
*If the difference between the manual setting and the metered value is greater than 6 EV, "-u-" (under) or "-o-" (over) flashes in the viewfinder's LCD panel. *Exposure compensation cannot be used while in the manual mode. *When the difference between the manual setting and the metered value is displayed in the viewfinder's LCD panel while in the manual mode and the exposure compensation dial is set to a position other than "0", the value displayed is the difference between the manual setting and the metered value... -
Page 24: Dial
• lf a polarizing filter is necessary, use a circular polarizing filter. A linear polariz- ing filter is not compatible with the Mamiya 645 AF and its operations. Exposure Compensation In some situations, such as a great difference between the subject and background brightness or overall subject tones that will not meter correctly because they are all black or white, the resulting photograph may be under- or overexposed. -
Page 25: Release Button
Single-Frame Mode/Continuous Mode Single-Frame Mode The film is advanced one frame at a time each time the shutter release button is pressed. Set the shutter release mode selector lever to "S". Continuous Mode Photographs are taken continuously as long as the shutter release button is pressed. Set the shutter release mode selector lever to "C". -
Page 26: Release Button
In situations which are difficult to confidently meter for exposure, use the Auto Bracketing function. In this mode, three frames are taken successively with different exposures set automatically (overexposure, standard and underexposure). 1. Turn the mode setting dial and select "P", "Av"... -
Page 27: Multiple Exposure Mode
Multiple Exposure Mode With the multiple exposure mode, the same frame of film can be exposed multiple times. 1. Press the mode setting button ”A” twice to en- ter the multiple exposure mode. 2. Turn the front or rear dial to set the number of additional exposures. -
Page 28: Self-Timer Mode
Self Timer Mode With this function, under the default setting the shutter is released 10 seconds after the shutter release button is pressed. The self timer lamp flashes slowly for the first 7 sec- onds, then flashes quickly for the last 3 seconds before the shutter is released. Use this function to take group photos or to photograph yourself. -
Page 29: Extended Exposure Modes
Extended Exposure Modes To expose the film for extended times (over 30 seconds), set the shutter speed to bulb or set the exposure mode setting dial to "T" (Time Mode). Bulb Mode The bulb mode uses electronic control, so the batteries are in constant use during the entire exposure. -
Page 30: Ae Lock Mode
AE Lock Mode When the AEL button “C” is pressed, the exposure is locked to the value metered at that time. Use this when the object you want to use for exposure metering and the object on which you want to focus are different or when you want to take continuous photographs without changing the exposure. -
Page 31: Mirror Up Lever
Taking Photos with the Mirror Up Use this when you want to avoid even the slightest shocks, for example when taking photos with a slow shutter speed using a tripod, with a telescopic lens, for close-ups, reproductions, etc. Neither the auto focus mechanism nor the exposure metering mechanism function when the mirror is raised. -
Page 32: Depth Of Field
Depth of field Depth of field (D.O.F) is defined as the zone of sharpness before and behind the plane of focus. It depends on camera subject/distance, focal length of lens, aperture setting and distance the lens is focused at. In addition to visual observation via the depth of field preview button (See page 66.), the D.O.F can be determined by using the depth of field scale on each lens. -
Page 33: Flash Photography
Flash Photography In addition to its standard flash sync system, the Mamiya 645 AF features TTL (through the lens), off the film (OTF), electronic flash exposure automation. A flash sensor located inside the camera body reads the flash reflected off the film surface at the moment of exposure. -
Page 34: Flash Photography With Flashes Other Than Metz Flashes
Do not attach a dedicated flash unit to the camera's hot shoe that is not designed specifically for the Mamiya 645AF. To use this type of flash, use a flash bracket or other means, and connect the synchro cord to the camera's synchro terminal. -
Page 35: Changing The Focusing Screen
*Never touch the surface with bare fingers. Should dust settle on it, merely blow away by using a blower. *If the Focusing Screen needs cleaning, send it to the nearest authorized Mamiya service center. Do not attempt to clean the surface of the Focusing Screen, as it is very delicate. -
Page 36: External Power Socket
External Power Supply When using an external battery case for cold weather operation (sold seperately), connect it to the external power socket. 1. Set the shutter mode selector lever to "L". 2. Remove the cap. Use a coin, etc., to remove the external power socket's cap. -
Page 37: Front/Rear Dial Lock Mechanisms
Electronic Dial Operations Front/Rear Dial Lock Mechanisms When the Electronic Dial Lock is "On", all currently set values in "Av" (Aperture Priority AE), "TV” (Shutter Priority AE) and "M" (Manual mode) cannot be adjusted with the front or rear dials. This prevents accidental adjustment of shutter speed or aperture values. 1. -
Page 38: Superimposing Data
Superimposing Data (the data is superimposed on the film outside of the image area) This function allows you to superimpose exposure or date information on the film outside the image area. When selected, the superimposing mode is displayed on the main LCD. Setting the Date and Time 1. -
Page 39: Selecting The Data To Be Superimposed
Selecting the Data to be Superimposed There are two data modes which will superimpose information onto the film. If you do not desire to superimpose any information, this function may also be switched off. 1. Set the shutter release mode selector lever to "S"... -
Page 40: Changing The Viewfinder Display In The Manual Mode"M
If the error display is not canceled when the shutter release button is pressed again, insert the Dark slide, half-press the shutter release button while pressing the roll film holder's manual film advance button to wind up the film, then contact your nearest Mamiya agent or service center. Error Messages... -
Page 41: If The Shutter Cannot Be Released
“B”. Auxiliary Release Contact This is the Port for connecting a Mamiya electromagnetic cable release (sold separately) when taking photos with the mirror up, with long exposures or with slow shutter speeds. -
Page 42: Diopter Adjustment
: 120 roll film (16 exposures); 220 roll film (32 exposures); Polaroid Land Pack Film (requires special HP402 magazine) Lens Mount : Mamiya 645 AF Mount, compatible with M645 Mount (manual focus confirmation, focus aid, stopped-down exposure metering) Viewfinder : Fixed prism viewfinder magnification x0.71; built-in diopter adjustment (-2.5 to +0.5, separate diopter correction lenses provide... -
Page 43: Common Sense Camera Care And Practice
Common Sense Camera Care and Practice The Mamiya 645 AF is a precision optical/mechanical instrument, built for heavy profes- sional use and a long service life, if properly treated and maintained. Please observe these basic caveats: • Read instructions before using camera. -
Page 44: After-Sale Servicing
Mamiya service center for the serviceability. *Servicing of malfunction or damage due to dropping, impact, fire, flood, etc. 1) The degree of such a malfunction or damage will be judged by the Mamiya service department. 2) Such a malfunction or damage will be classified either non-serviceable or serviceable.
Need help?
Do you have a question about the 645 AF and is the answer not in the manual?
Questions and answers