Advertisement
Quick Links
GENERAL INSTALLING & FES
FELINO
FROM RE5247
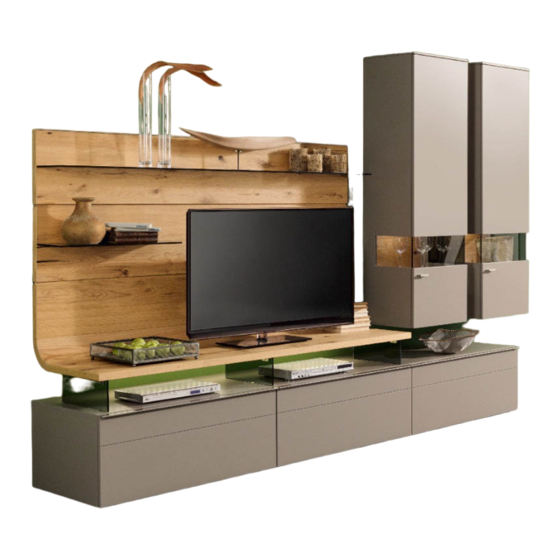
IMAGE 1, Example wall-element combinations FE3 and FE1
PLEASE NOTE!
CAUTION! Follow the specifications carefully when fitting wall units. Secure all
elements that may tip with the anti-tip mechanisms supplied.
IMAGE 2, Fit anti-tilt guard!
4x17 roundhead
screw
5.5x70 cheese-head
screw
Press levelling glides
into holes provided and
align units
GENERAL FELINO INSTALLATION + FES
Wall plug,
dia. 8 mm
+/-
Qualified specialist personnel
A fixing bracket with metal pin is fitted
as anti-tilt guard to all 5R and 8R base
units to prevent them from tipping
forward. A 5x60 mm countersunk
screw and an 8 mm dia. plastic wall
plug are used. The 12 mm cover plate
only covers the fitting when mounted
at an angle.
1
Advertisement

Related Manuals for GWINNER FELINO


Summary of Contents for GWINNER FELINO
- Page 1 The 12 mm cover plate screw only covers the fitting when mounted at an angle. Wall plug, dia. 8 mm 5.5x70 cheese-head screw Press levelling glides into holes provided and align units GENERAL FELINO INSTALLATION + FES...
- Page 2 To install wall panels, see separate installation instructions! The wall plugs supplied are suitable for the following sub-surfaces: Concrete, solid brick, ventilating brick, hollow concrete blocks. If there is a different subsurface, select an appropriate fixing material. GENERAL FELINO INSTALLATION + FES...
- Page 3 5x70 mm pan-head screws (Fig. 4, centre hole = top edge of carcase less 49 mm) IMAGE 6 To install anti-tilt guard, see image. 2 To install top panel, see image 3 GENERAL FELINO INSTALLATION + FES...
- Page 4 If there is a different subsurface, select an appropriate fixing material. IMAGE 8, Hängeschränke aufhängen Adjusting the wall units– Caution! Check from above that all Upper adjustment screw fittings have been fitted in the rails. = depth adjustment Lower adjustment screw = height adjustment GENERAL FELINO INSTALLATION + FES...
- Page 5 Always press Fit connector housing with plastic sleeve into M6 threaded stud on lower countersink! Sleeve wall panel, connect panel or screw must and tighten fitting. not be allowed to protrude! GENERAL FELINO INSTALLATION + FES...
- Page 6 Installing handle on glass doors with double glass panel Screw-mount handles with 3.5x17 countersunk head screw 6 ea. for 130 cm handle, Screw-mount handles with 2 x M4x25 9 ea. for 195 cm handle plate screws + 2 x plastic sleeves. GENERAL FELINO INSTALLATION + FES...
-
Page 7: Handle Installation
Only connect the lights to the safety transformers in accordance with EN 61558 (VDE 570) using 12-volt direct current (DC). The total power consumption of the connected lights (see type label) must not exceed the transformer nominal capacity. GENERAL FELINO INSTALLATION + FES... - Page 8 ET1-65, EK1-65, E1-65, 3 glasses 476 / 376 / 296x70x4 mm Front gap adjustment with magnet Adjust the front gap by turning the magnet with a screwdriver. (For large glass cabinet doors + lower section flaps) GENERAL FELINO INSTALLATION + FES...
- Page 9 Height grid for FELINO wall units with 1.5 incr. base Drilling/installation dimensions for wall units Increment heights (1 incr. = 176 mm) 4R= 704 4R= 704 4R= 704 1643 1643 1643 4R= 704 4R= 704 4R= 704 1467 1467 1467...
- Page 10 Height grid for FELINO wall units with 2.3 incr. base Drilling/installation dimensions for wall units Increment heights (1 incr. = 176 mm) 4R= 704 4R= 704 4R= 704 1775 1643 1775 4R= 704 4R= 704 4R= 704 1599 1467 1599...
- Page 11 FELINO lighting plan without radio remote control Lighting diagram - Felino without FKS Important note on LED lighting: Important information about LED lighting: Caution, Note the maximum transformer Only connect lights to safety transformers Only connect the lights to the safety transformers load.
- Page 12 FELINO lighting plan with FKS4 Important information about LED lighting: Caution, Note the maximum transformer Only connect the lights to the safety transformers load. Overloading the transformer reduces in accordance with EN 61558 (VDE 570) using its service life. Fault! 12-volt direct current (DC).
Need help?
Do you have a question about the FELINO and is the answer not in the manual?
Questions and answers
Hi need installation instructions for a gwinner feline media unit
The installation instructions for the GWINNER FELINO media unit include the following steps:
1. Top Panel Installation: Refer to Image 3 for correct positioning.
2. Anti-Tilt Guard: Install as shown in Image 2.
3. Wall Panels: Use 5.5x70 mm cheese-head screws with 8 mm wall plugs. Only use the supplied wall plugs for suitable surfaces like concrete, solid brick, ventilating brick, and hollow concrete blocks. For other surfaces, appropriate fixings must be selected.
4. Wall Units (Hängeschränke):
- Ensure all upper adjustment screw fittings are in the rails.
- Use the upper adjustment screw for depth adjustment.
- Use the lower adjustment screw for height adjustment.
5. Glass Shelf and Upper Wall Panel Assembly:
- Use adjusting spindles M8x15 with mounting plates (40x15x2).
- Use 3.5x17 mm pan-head screws.
- Connect 19 mm wall panels with the glass shelf.
- Fit a steel dowel with a barrel nut on the upper wall panel.
Separate installation instructions apply to some components like wall panels and upper wall panel with shelf.
This answer is automatically generated
Hi I need installation instructions for the gwinner media tv unit wohnwand wall unit T0207
To install the GWINNER FELINO media TV unit wall unit T0207, follow these steps:
1. Connect Units: Use M4x28 connecting screws with sleeve nuts to connect the units. Press levelling glides into the provided holes and align the units.
2. Wall Mounting:
- Fasten the mounting rails (provided) to the wall.
- Use 8 mm diameter plastic wall plugs and 5x70 mm pan-head screws.
- The center hole of the mounting rail should be placed at the top edge of the carcase minus 49 mm.
3. Wall Surface Requirements:
- The supplied wall plugs are suitable for concrete, solid brick, ventilating brick, and hollow concrete blocks.
- For other surfaces, use appropriate fixing materials.
4. Unit Adjustment:
- Use the upper adjustment screw for depth.
- Use the lower adjustment screw for height.
- Check adjustments from above.
5. Anti-Tilt Guard: Install as shown in the referenced image (not provided in the text).
6. Cover Caps: Use 5 mm nickel-plated cover caps to cover unused holes in cabinet sides.
7. Wall Panels: Refer to separate installation instructions for installing wall panels.
This answer is automatically generated