Advertisement
Quick Links
INSTALLATION ROWS WITH SUPPORTING SELECTIONS
MEDIA CONCEPT
FROM R5750 ONWARDS
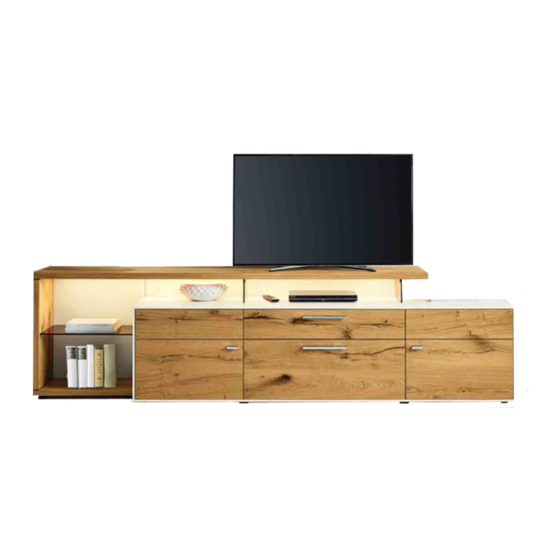
IMAGE 1 Example walls SP12, SP67 and SK121
SP67
SP12
PLEASE NOTE!
CAUTION! Follow the specifications carefully when fitting wall units.
Secure all elements that may tip with the anti-tip mechanisms supplied.
IMAGE 2, fitting the feet, aligning the supporting section panel.
Push six levelling gliders
+/-
into the intended holes
Align the lower supporting section panel
MEDIA CONCEPT INSTALLATION – ROWS WITH SUPPORTING SELECTIONS
Qualified specialist personnel
SK121
Note the safety catch for
2-incr. carcase.
SP12
Tighten
screw no. 3.
1
Advertisement

Subscribe to Our Youtube Channel
Related Manuals for GWINNER MEDIA CONCEPT SP67


Summary of Contents for GWINNER MEDIA CONCEPT SP67
- Page 1 INSTALLATION ROWS WITH SUPPORTING SELECTIONS MEDIA CONCEPT FROM R5750 ONWARDS Qualified specialist personnel IMAGE 1 Example walls SP12, SP67 and SK121 SP67 SP12 SK121 PLEASE NOTE! CAUTION! Follow the specifications carefully when fitting wall units. Secure all elements that may tip with the anti-tip mechanisms supplied. IMAGE 2, fitting the feet, aligning the supporting section panel.
- Page 2 IMAGE 3, connecting the lower supporting-section corner Six dia. 8x50 Fit the Cobra glass-shelf wooden dowels supports using 3.5x17 Liko screws Connect the supporting section panel to the supporting section side panel from below using two Seko Spax 5x 80 screws IMAGE 4, fitting the supporting section‘s rear panel Connect the rear panel to the...
- Page 3 IMAGE 6, fitting the cover panels and glass clamp fittings Secure the 13-mm cover panels at the marked points from the inside. Use 4x27 mm counter- sunk screws and cover caps „LN195“ light, only if Fit four glass clamp fittings Secure the cable with a requested by the at the marked points using...
- Page 4 IMAGE 8, aligning the plinth + drilling the 198-cm top element 5.5x70 cylinder-head screw + 8 mm wall plug + WP5L/WP5R wall uprights Align the assembly aid flush with the front edge of the plinth panel The wall plugs supplied are suitable for the following sub-surfaces: Concrete, solid brick, ventilating brick, hollow concrete blocks.
- Page 5 IMAGE 10, pre-assembling the upper supporting section panel Fit the glass sides Fit four glass clamp fittings 308 x 139 x 8 mm with buffer at the marked points using 3x15 Liko screws Two Rastex screw- in dowels Secure the cable with a „LN195“...
- Page 6 IMAGE 13, hanging and aligning the 198-cm top element Fit the 308 x 139 x 8 mm glass sides with a buffer and remove the assembly aid Adjusting the wall units Tighten the screw no. 3, safety catch. IMAGE 14, Wall unit + drilling wall panel Combi MC968K with supporting selection SK121 5.5x70 cylinder-head screw Drill dowels 8mm and...
- Page 7 IMAGE 15, (Supporting section + UTB3 complete) SP67 IMAGE 16, fitting the cover panels and levelling gliders Secure the 13-mm cover panels at the marked points from the inside. Use 4x27 mm countersunk screws and cover caps Push 5 levelling gliders into the intended holes IMAGE 17, Rear panel attachment RWA Screw the bottom rear...
- Page 8 IMAGE 18 Fit the Cobra glass-shelf supports using 3.5x17 Liko screws Six dia. 8x50 wooden dowels Connect the supporting section panel to the supporting section side panel from below using two Seko Spax 5x 80 screws Adjust the rear anel in the groove Connect the rear panel to the supporting section panel and side panel at a right! IMAGE 19...
- Page 9 IMAGE 20 Tighten the fittings by turning them Slide in the glass intermediate shelf IMAGE 21, drilling the wall units and wall panels Combi MC917 with supporting selection SP67 Drill the 8-mm wall plug 5.5x70 cylinder-head screw and screw in the wall hook + 8 mm wall plug Caution: Take other...
- Page 10 IMAGE 22 Drilling dimensions top cabinets for supporting sections, height 2R+ 3R, width -165cm, 198cm, -230cm; 5.5x70 cylinder-head screw + 8-mm wall plug + Wall rails WP5L/ WP5R The wall plugs supplied are suitable for the following sub-surfaces: Concrete, solid brick, ventilating brick, hollow concrete blocks. If there is a different subsurface, select an appropriate fixing material.
Need help?
Do you have a question about the MEDIA CONCEPT SP67 and is the answer not in the manual?
Questions and answers