Table of Contents
Advertisement
Quick Links
®
Owner's Manual
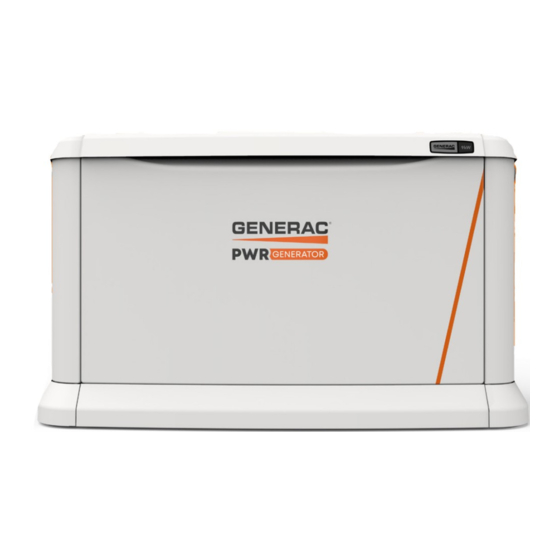
PWRgenerator™ Air-Cooled Generators
9 kW
WARNING
Loss of life. This product is not intended to
be used in a critical life support application.
Failure to adhere to this warning could result
in death or serious injury.
(000209b)
Register your Generac product at:
WWW.GENERAC.COM
1-888-GENERAC
(888-436-3722)
SAVE THIS MANUAL FOR FUTURE REFERENCE
Advertisement
Table of Contents

Subscribe to Our Youtube Channel
Related Manuals for Generac Power Systems PWRgenerator 9 kW


Summary of Contents for Generac Power Systems PWRgenerator 9 kW
- Page 1 ® Owner’s Manual PWRgenerator™ Air-Cooled Generators 9 kW WARNING Loss of life. This product is not intended to be used in a critical life support application. Failure to adhere to this warning could result in death or serious injury. (000209b) Register your Generac product at: WWW.GENERAC.COM 1-888-GENERAC...
- Page 2 Use this page to record important information about this generator. Record the information found on the unit data label on this page. See General Information for the location of the unit Model: data label. The unit has a label plate affixed to the inside par- tition, to the left of the control panel console as shown in Fig- 2-1.
-
Page 3: Table Of Contents
Table of Contents Section 1: Safety Information Menu System Navigation ..........17 Setting the Exercise Timer ........19 Introduction ..............1 Read This Manual Thoroughly ........1 Battery Charger ............19 Safety Rules ..............1 Automatic Sequence of Operation ......19 How to Obtain Service ..........1 Cranking ..............19 General Hazards ............2 Cleaning Cycle ............19 Exhaust Hazards ............3... - Page 4 Table of Contents This page intentionally left blank. Owner’s Manual for PWRgenerator Air-Cooled Generators...
-
Page 5: Section 1: Safety Information
Safety Information Section 1: Safety Information Introduction Safety Rules The manufacturer cannot anticipate every possible cir- Thank you for purchasing this compact, high perfor- cumstance that might involve a hazard. The alerts in this mance, air-cooled, engine-driven generator. manual, and on tags and decals affixed to the unit, are designed to automatically supply direct current (DC) elec- not all inclusive. -
Page 6: General Hazards
Safety Information General Hazards WARNING DANGER Moving Parts. Do not wear jewelry when starting or operating this product. Wearing Loss of life. Property damage. Installation must jewelry while starting or operating this product always comply with applicable codes, standards, laws could result in death or serious injury. -
Page 7: Exhaust Hazards
Safety Information Exhaust Hazards DANGER DANGER Electrocution. Verify electrical system is properly grounded before applying power. Asphyxiation. Running engines produce carbon Failure to do so will result in death or serious monoxide, a colorless, odorless, poisonous injury. (000152) gas. Carbon monoxide, if not avoided, will result in death or serious injury. -
Page 8: Explosion Hazards
Safety Information WARNING WARNING Consult Manual. Read and understand manual Risk of Fire. Hot surfaces could ignite completely before using product. Failure to combustibles, resulting in fire. Fire could completely understand manual and product result in death or serious injury. could result in death or serious injury. - Page 9 Safety Information WARNING Environmental Hazard. Always recycle batteries at an official recycling center in accordance with all local laws and regulations. Failure to do so could result in environmental damage, death, or serious injury. (000228) Always recycle batteries in accordance with local laws and regulations.
- Page 10 Safety Information This page intentionally left blank. Owner’s Manual for PWRgenerator Air-Cooled Generators...
-
Page 11: Section 2: General Information
General Information Section 2: General Information Generator Component Locations 012454 Figure 2-1. 9 kW—Components and Control Locations Lock with cover Battery compartment Oil fill cap/dipstick Fuel inlet (battery not supplied) Main line circuit breaker Exhaust enclosure Oil filter Data decal location (generator disconnect) Airbox with air cleaner Status LED indicators... -
Page 12: Data Decals
General Information Data Decals Two decals on the generator provide information about the unit itself and required fuel inlet pressure for correct opera- tion. Model Data Decal Includes important information about the unit including: • Model number • Serial number •... -
Page 13: Specifications
General Information Specifications Generator Model 9 kW Rated voltage 400 VDC Rated maximum load current (amps) at rated 22.5 voltage with LP* Main line circuit breaker 30 amp (generator disconnect) Battery requirement 12 volts, Group 26R-540CCA Minimum (field supplied) (see Replacement Parts Enclosure Aluminum... -
Page 14: Protection Systems
General Information Protection Systems System Components The generator may need to run for long periods of time Air Induction - Intake manifold with no operator present to monitor engine or generator - Air cleaner conditions. The generator is equipped with protection Fuel Metering - Electronically controlled mixer systems to automatically shut down the unit to protect... -
Page 15: Activating The Generator
General Information Activating the Generator The generator should be activated upon initial startup. See installation manual for complete instructions. Replacement Parts Description 9 kW 26R Exide battery 0H3421S Spark plug 0G0767B (RC12YC or equivalent) Oil filter 070185E Air filter 0J8478 Control panel fuse 0D7178T Converter module fuse... - Page 16 General Information This page intentionally left blank. Owner’s Manual for PWRgenerator Air-Cooled Generators...
-
Page 17: Section 3: Operation
Operation Section 3: Operation Site Prep Verification 3. Press down on lid above side lock, and unlock latch to correctly open lid. 4. Repeat for other side. Lid may appear stuck if pres- DANGER sure is not applied from the top. Automatic start-up. -
Page 18: Intake Side Panel Removal
Operation NOTE: Always lift front access panel straight up before pulling away from enclosure (B and C). Do not pull panel away from the enclosure before lifting up (D). Intake Side Panel Removal Figure 3-3. Intake side panel (A) must be removed to access battery compartment, fuel regulator, and sedi- ment trap. -
Page 19: Auxiliary Shutdown Switch
Operation Auxiliary Shutdown Switch CAUTION Equipment Damage. The auxiliary shutdown switch is not to be used to power down the unit under normal operating circumstances. Doing so will result in equipment damage. (000399) All generators are equipped with an external means of shutting down the generator which complies with the lat- est NEC code requirement. -
Page 20: Operating Modes
Operation Operating Modes Interface Menu Displays LCD Panel Mode Description • Power will be apportioned between PWRcell Feature Description Battery and PWRcell Inverter. • Operation of engine without power being gener- Default page displayed if no buttons are ated is possible in this mode if PWRcell Battery pressed for 60 seconds. -
Page 21: Menu System Navigation
Operation Menu System Navigation Press ESCAPE button from any page to access the MENU. You may need to press the ESCAPE button several times ↑ ↓ before reaching the MENU page. Navigate to the desired menu by using the buttons. Press ENTER button when desired menu is displayed and flashing, Figure 3-8. - Page 22 Operation Figure 3-9. Navigation Menu Owner’s Manual for PWRgenerator Air-Cooled Generators...
-
Page 23: Setting The Exercise Timer
Operation Setting the Exercise Timer Automatic Sequence of Operation This generator is equipped with a configurable exercise Cranking timer. Configuration can be performed directly at the con- The system will control the cyclic cranking as follows: trol panel. There are two settings for the exercise timer: •... - Page 24 Operation NOTE: See Figure 3-10. Remove front and intake pan- els from unit, and remove 15A fuse (A) from converter. 014082 Figure 3-10. 15A Fuse Location To turn generator back ON: NOTE: Install 15A fuse and enclosure panels if mainte- nance was performed.
-
Page 25: Pwrcell System
Operation PWRcell System 013746 Figure 3-11. PWRcell System Example Solar panels PWRcell Inverter PV link Grid PWRcell Battery Loads PWRgenerator Protected loads REbus Communication Auto Start/Stop State of Charge (SoC) Setpoints All communication between REbus devices takes place There are two user-adjustable PWRgenerator setpoints over the REbus conductors using Power Line Carrier which dictate when the PWRgenerator will automatically (PLC) communication. -
Page 26: Adjusting Pwrgenerator Setpoints
Operation • PWRcell Battery SoC is below AutoStopSoC set- point of the PWRgenerator. Proceed as follows to manually start or stop the PWR- generator from the PWRcell Inverter ICM: 1. Press left and right arrow keys to access PWRgen- erator device page. Press center button to enter PWRgenerator menu. -
Page 27: Section 4: Maintenance
Maintenance Performing Scheduled Maintenance Regular maintenance will improve performance and It is important to perform maintenance as specified in the extend engine/equipment life. Generac Power Systems, Service Schedule for correct generator operation. Inc. recommends that all maintenance work be per-... -
Page 28: Service Schedule
Maintenance Service Schedule Daily If Running Schedule A Every Schedule B Service Continuously or Every Two Years or Every 1500 Hours Year Before Each Use 500 Hours Inspect enclosure louvers for dirt and debris * ● Inspect lines and connections for fuel or oil leaks ●... -
Page 29: Checking Engine Oil Level
Maintenance Checking Engine Oil Level Engine Oil Requirements CAUTION WARNING Engine damage. Verify proper type and quantity of Risk of burns. Allow engine to cool before engine oil prior to starting engine. Failure to do so draining oil or coolant. Failure to do so could could result in engine damage. -
Page 30: Servicing The Air Cleaner
Maintenance 8. Press MANUAL button on control panel to start 3. Remove spark plug(s) and inspect. Install new engine. Run for one minute, and inspect for leaks. plug(s) if existing plug(s) is worn or if reuse is ques- tionable. 9. Press OFF button on control panel to stop engine. Wait five minutes. -
Page 31: Inspecting The Battery
Maintenance • Discharge static electricity from the body before touching battery by first touching a grounded metal WARNING surface. Electrical shock. Disconnect battery ground Battery should be regularly inspected per Service terminal before working on battery or battery Schedule. Contact an IASD for assistance if necessary. wires. -
Page 32: Post Maintenance Checks
Maintenance Performing Fuel System Leak Test 3. See Figure 4-5. Unscrew and remove cap (A). DANGER Explosion and fire. Fuel and vapors are extremely flammable and explosive. No leakage of fuel is permitted. Keep fire and spark away. Failure to do so will result in death or serious injury. -
Page 33: Attention After Submersion
Maintenance Attention After Submersion 8. Remove spark plug(s) and spray a fogging agent into spark plug(s) threaded openings. Install and DO NOT start or operate generator if it has been sub- tighten spark plug(s) to specification. merged in water. Have an IASD thoroughly clean, dry, 9. - Page 34 Maintenance This page intentionally left blank. Owner’s Manual for PWRgenerator Air-Cooled Generators...
-
Page 35: Section 5: Troubleshooting / Quick Reference Guide
Troubleshooting / Quick Reference Guide Section 5: Troubleshooting / Quick Reference Guide Generator Troubleshooting Problem Cause Correction Correct short circuit condition by replacing 7.5A fuse in generator control panel or 15A fuse in Blown fuse. bottom of DC converter. Contact an IASD if fuse continues to blow. - Page 36 Troubleshooting / Quick Reference Guide Problem Cause Correction Excessive engine oil. Adjust oil to correct level. Faulty engine breather. Contact an IASD for assistance. Unit consumes large amounts of Incorrect type or viscosity of oil. Engine Oil Requirements. Damaged gasket, seal, or hose. Inspect for oil leaks.
-
Page 37: Quick Reference Guide
Troubleshooting / Quick Reference Guide Quick Reference Guide To clear an active alarm, press OFF button on the control panel, then the ENTER button, and finally the AUTO button. Contact an IASD if alarm reoccurs. Active Alarm Problem Action Solution Check generator FLASHING Unit running in AUTO... - Page 38 Troubleshooting / Quick Reference Guide Active Alarm Problem Action Solution Unit will not start in Check LEDs / screen OVERVOLTAGE Contact an IASD. AUTO with utility loss. for alarms. AUXILIARY Check auxiliary Set auxiliary shutdown switch(es) to Unit will not start. SHUTDOWN shutdown switches CLOSED (I).
- Page 40 ©2022 Generac Power Systems, Inc. Generac Power Systems, Inc. All rights reserved. S45 W29290 Hwy. 59 Specifications are subject to change without notice. Waukesha, WI 53189 No reproduction allowed in any form without prior written 1-888-GENERAC (1-888-436-3722) consent from Generac Power Systems, Inc. www.generac.com...
Need help?
Do you have a question about the PWRgenerator 9 kW and is the answer not in the manual?
Questions and answers