Advertisement
Quick Links
Advertisement

Related Manuals for Sim-Lab GRID DDU5


Summary of Contents for Sim-Lab GRID DDU5
- Page 1 INSTRUCTION MANUAL GRID DDU5 VERSION 1.1 Last updated: 28-11-2022...
-
Page 2: Before You Start
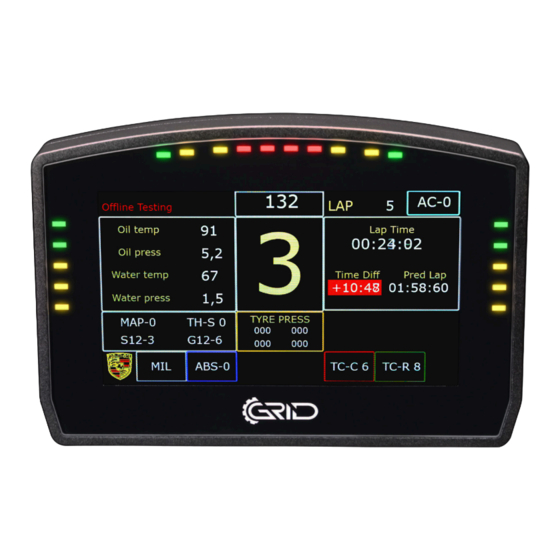
BEFORE YOU START: Thank you for your purchase. In this manual we will provide you with the means to get started using your new dash! GRID DDU5 Features: 5” 854x480 VOCORE LCD 20 full RGB leds Up to 30 FPS... - Page 3 Mounting the dash To be able to mount the dash on the hardware of your choice, we provide several mounting brackets. Which ones you have received may depend on your purchase and may be different from the following ones we show. However, mounting is all more of the same.
- Page 4 OSW/SC1/VRS Remove the existing upper bolts which hold the motor in place. Re-use these bolts and washers to fix the mounting bracket to the front mount. 4 20...
- Page 5 Fanatec DD1/DD2 Locate the accessory mounting holes on your Fanatec hardware and use the two bolts (A4) and washers (A6) from our supplied hardware kit. 5 20...
-
Page 6: Installing Drivers
Installing drivers To make the display part of the dash functional, specific drivers are needed. Drivers can be downloaded from the product page. Vocore drivers download: Installation To install the display drivers, run the downloaded package and specify the location where to install the drivers: Press ‘Next’. - Page 7 Specify the name of the start menu folder: Press ‘Next’. Review the settings before installation: Press ‘Install’. 7 20...
- Page 8 The drivers will install now. Sometimes this can take longer than expected. This usually means a system restore point is being made and should not hinder installation. If it does, unplug the USB cable to the Dash in case it is connected and try again. Make sure you have administrator rights on your system.
- Page 9 SimHub installation To control the LEDs of the dash, SimHub can be used. Download the lastest version of SimHub from https://simhubdash.com Installation Unzip the downloaded file and run the setup file: Press ‘Next’. 9 20...
- Page 10 Specify the location where to install the software: Press ‘Next’. Make sure all options are checked: Press ‘Next’. 10 20...
- Page 11 Press ‘Install’. After installation press ‘Finish’. 11 20...
- Page 12 SimHub configuration If you haven’t connected the dash with the supplied USB cable to your computer, this is required from this point forward. Activation To use the display with SimHub, it needs to be added as a device: Press ‘Devices’ (1) and ‘ A dd device’ (2) when you see are adding a device for the first time.
- Page 13 Press ‘Generic Vocore Screen’ (1). Confirm by pressing ‘Ok’ (2). 13 20...
- Page 14 In the top-right part of the screen, check ‘Enable display’ (1). The icon should show up in green and the ‘Connected’ indicator will appear just below it. When more devices with a Vocore screen are connected to your PC, it doesn’t hurt to rename them according to their product name in SimHub.
- Page 15 Controlling the LEDs A sample LED profile can be downloaded from the product page. LED profile download: First navigate to ‘ A rduino’ (1) on the left side of the screen. To configure, first press ‘My Hardware’ (2). If you only have the DDU5 connected, select ‘Single aduino’...
- Page 16 To be able to load our LED-profile, we first need to make sure SimHub can communicate with the LED section of the DDU5. When you have completed the steps on the previous page, you should find a ‘Connected’ (4) indicator, on the GE DDU5 line. After we have confirmed the connection, press ‘RGB Leds’...
- Page 17 Here we can manage LED profiles. Press the ‘Profiles manager’ (1) option and proceed to the next page in this manual. 17 20...
- Page 18 Press the import profile icon (2). Browse to the location where you stored the LED profile, select it and press ‘Open’. The load the profile, make sure it is selected (GRID x DDU5 UNIVERSAL) and press ‘Load’ (3). 18 20...
- Page 19 Changing the LEDs’ functions. To change the LED effects you need to know the LED numbering of the dash. The numbering starts at the bottom left and continues clockwise to the bottom right. See the image below for reference: There should be enough info in the sample profile to be able to adjust to your liking. Just keep in mind, you mostly need two values.
-
Page 20: Bill Of Materials
They can be reached at: support@sim-lab.eu Alternatively, we now have Discord servers where you can hang out or ask for help. www.sim-lab.eu/discord www.gridbysimlab.com/discord Product page on the GRID by Sim-Lab website: 20 20...
Need help?
Do you have a question about the GRID DDU5 and is the answer not in the manual?
Questions and answers