
Related Manuals for Beko BBIC12000XD


Summary of Contents for Beko BBIC12000XD
- Page 1 Built-in Oven User Manual BBIC12000XD 385.4402.79/R.AD/24.03.2021/ 4-1 7780388306...
- Page 2 Dear Customer, Please read this manual before using the product. Beko thank you for choosing the product. We want your product, manufactured with high quality and technology, to offer you the best efficiency. To do this, carefully read this manual and any other documentation provided before using the product and keep it as a reference.
-
Page 3: Table Of Contents
First use Safety instructions First cleaning ......... 19 Purpose of usage ........4 Child, vulnerable person and pet safety ..4 How to operate the oven 20 Electrical safety ........5 Transportation safety ....... 7 General information on oven usage ..20 lnstallation safety ........ -
Page 4: I] Safety Instructions
• Do not perform technica! • This section contains safety instructions that will help modifications on the product. prevent any risks of personal À Purpose of usage injuries or material damage. • This product is designed for • lf the product is transferred to home use. -
Page 5: Electrical Safety
older, and people who are product are hot. Keep underdeveloped in physical, children away trom the sensory or mental skills, or product. lack of experience and • Keep the packaging materials out of the reach of children. knowledge, as long as they are supervised or trained There is a hazard of injury about the safe use and... - Page 6 of the stove). lf this is not The power cord should not possible, there should be a be bent, crushed, and come mechanism (fuse, switch, into contact with any heat switch, etc.) on the electrical source. installation to which the •...
-
Page 7: Transportation Safety
product is damaged, do not À Transportation safety install it. • Disconnect the product trom • Do not install the product the mains before transporting near heat sources (radiators, the product. stoves, etc.). • The product is heavy, carry • Keep all ventilation ducts the product with at least two open around the product. -
Page 8: Temperature Warnings
• Flammable objects kept in hot compartments, the the cooking area may catch interior parts of the oven, the fire. Never store flammable heating elements, etc. objects in the cooking area. • When placing food in the hot • The oven handle is not a oven, removing the food, etc. -
Page 9: Maintenance And Cleaning Safety
and after cooking. Otherwise • Close the oven door during it may cause food poisoning grilling. Hot surfaces may or diseases. cause burns! • Do not heat closed tin cans • Food not suitable for grilling and glass jars. Built up carries a fire hazard. -
Page 10: Waste Regulation
Waste regulation Package information Compliance with the WEEE • Packaging materials of the product Directive and Disposing of the are manufactured from recyclable Waste Product materials in accordance with our National Environment Regulations. Do This product complies with not dispose of the packaging materials EU WEEE Directive together with the domestic or other (2012/19/EU). -
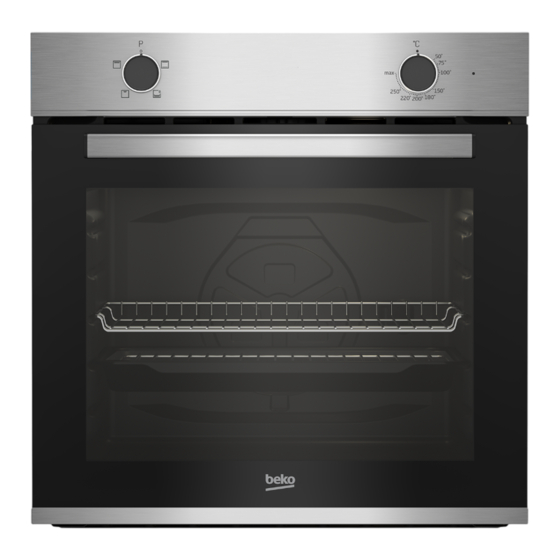
Page 11: E] Your Product
Product introduction 1 Control panel lt depends on the model. Your product may not have a lamp, or 2 Lamp* the type and location of the lamp 3 Wire shelves** may differ from the illustration. 4 Door ** lt depends on the model. Your 5 Handle product may be without wire 6 Bottom heater (bottom steel plate) -
Page 12: Product Control Panel Introduction And Usage
Product control panel introduction and usage In this section, you can find the overview and basic uses of the product's control panel. There may be differences in images and some features depending on the type of product. Oven control 1 Function selection knob Temperature knob 2 Temperature knob You can select the temperature you... -
Page 13: Oven Operating Functions
Oven operating functions On the function table; the operating functions you can use in your oven and the highest and lowest temperatures that can be set for these functions are shown. The order of the operating modes shown here may differ from the arrangement on your product. -
Page 14: Product Accessories
Product accessories There are various accessories in your product. In this section, the description of the accessories and the descriptions of the correct usage are available. Depending on the product model, the supplied accessory varies. All accessories described in the user guide may not be available in your product. -
Page 15: Use Of Product Accessories
Use of product accessories Cooking shelves There are 5 levels of shelf position in the cooking area. You can also see the order of the shelves in the numbers on the front frame of the oven. Models with wire shelves Models without wire shelves: lt is crucial to place the wire grill on the side shelves properly. - Page 16 Models w i thout w i re shelves: lt is also crucial to place the trays on the side shelves properly. The tray has one direction when placing it on the shelf. While placing the tray on the desired shelf, its side designed for holding must be on the front.
- Page 17 Proper placement of the wire grill and tray on the telescopic rails Models with wire shelves and telescopic rails Thanks to telescopic rails, trays or the wire grill can be easily installed and removed. When using trays and wire grills with the telescopic rail, care should be taken that the pins, on the front and back of the telescopic rails, rest against the edges of the grill and the tray (shown...
-
Page 18: Technica! Specifications
Technical specifications Product external dimensions 595 mm/594 mm/567 mm (height/width/depth) Oven installation dimensions 590 or 600 mm/560 mm/min. 550 mm (height/width/depth) Voltage / freguency 220-240 V - 50 Hz Cable type and cross section used / min. H05W-FG 3 x 1,5 mm suitable for use in the product Total power consumption 2.3 kW... -
Page 19: I] First Use
Before you start using your product, it is Before using the accessories; recommended to do the following in the Clean the accessories you remove trom following sections. the oven with detergent water and a soft First cleaning cleaning sponge. 1 . Remove all packaging materials. NOTICE The surface might get 2.Remove all accessories trom the oven... -
Page 20: General Information On Oven Usage
Turning off the oven General information on oven You can turn the oven off by turning the usage function selection knob and temperature Cooling fan knob to the off (up) position. Your product has a cooling fan. The Selecting the temperature and cooling fan is activated automatically oven operating function when necessary and cools both the... -
Page 21: General Information About
This section describes tips on preparing • Cut the greaseproof paper you will use and cooking your food. in your cooking in suitable sizes to the In addition, you can also find some of container you will cook. Greaseproof papers that are overflowing trom the the foods tested as producers and the most appropriate settings for these container can create a risk of burns... - Page 22 Tips for cooking pastries • The values specified in the cooking tables are determined as a result of • lf the pastry is too dry, increase the the tests carried out in our laboratories. temperature by 10 ° C and shorten Values suitable for you may differ trom the cooking time.
-
Page 23: Meat, Fish And Poultry
n_ g Te m perature Accesso:!11' Operiitln g Shelf � ooki Tray a m o u n t to bi!! u se d f un cti on p os iti on t(: ��: 4) Glass / metal Top and rectangular 30 ... -
Page 24: Grill
Grill The key points of the grill • Prepare foods of similar thickness and Red meat, fish and poultry meat will weight as much as possible for the quickly turn brown when grilled, hold a grill. beautiful crust and do not dry out. Fillet •... -
Page 25: Test Foods
Test foods to facilitate testing of the product for control institutes. Foods in this cooking table are prepared according to the EN 60350-1 standard Cooking table for test foods Shortbread Top and (sweet Single tray Standard tray• bottom 20 ... 30 cookie heatin Top and... -
Page 26: Maintenance And Care
• Stainless or inox surface may change General cleaning colour in time. This is normal. After information each operation, clean with a detergent General warnings suitable for the stainless or inox • Wait for the product to cool before surface. cleaning the product. -
Page 27: Cleaning The Accessories
when the surface is saturated with oil, Otherwise, corrosion may occur on these joints. in this case it is recommended to replace the parts. Cleaning the accessories Glass surfaces Unless otherwise stated in the user • When cleaning glass surfaces, do not manual, do not wash the product use hard metal scrapers and abrasive accessories in the dishwasher. -
Page 28: Easy Steam Cleaning
cleaning information" section according to the side wall surface type. To remove the side racks: 1 . Remove the front of the side rack by pulling it on the side wall in the opposite direction. 2.Pull the side rack towards you to remove it com letel . -
Page 29: Cleaning The Oven Door
Cleaning the oven door A Do not use harsh abrasive Hinge loek - open position V cleaners, metal scrapers, wire wool or bleach materials to clean 3.Get the oven door to a half-open the oven door and glass. osition. You can remove your oven door and door glasses to clean them. -
Page 30: Cleaning The Oven Lamp
slot. (lf your product has an inner glass). Inner glass (2) must be attached to the plastic slot closest to the innermost glass (1). 6.While reassembling the innermost glass (1), pay attention to place the printed side of the glass on the inner glass. - Page 31 • The lamps used in this product must lf your oven has a square lamp, withstand extreme physical conditions 1 . Disconnect the product trom the such as temperatures above 50 ° C. electricity. 2.Remove the wire shelves according to lf your oven has a round lamp, the descri tion.
-
Page 32: Troubleshooting
Arcelik A.S. Karaagaç Caddesi No:2-6 Sütlüce, 34445, Turkey Made in TURKEY lmporter in Russia: «BEKO LLC» Address: Selskaya street, 49, Fedorovskoe village, Pershinskoe rural settlement, Kirzhach district, Vladimir region, Russian Federation 601021 The manufacture date is included in the serial number of a product specified on rating label, which is located on a product, namely: first two figures of serial number indicate the year of manufacture, and last two - the month.
Need help?
Do you have a question about the BBIC12000XD and is the answer not in the manual?
Questions and answers