
Related Manuals for DITEC PWR50 H


Summary of Contents for DITEC PWR50 H
- Page 1 IP2393EN • 2021-10-26 Ditec PWR50 H/HR/HV/AC Technical Manual Automation for swing gates (Translation of the original instructions) www.ditecautomations.com...
-
Page 2: Table Of Contents
4.4 Installing the gear motor 4.5 Adjusting the end stops and limit switches 4.5.1 Mechanical end stops Adjusting the limit switch with microswitch for opening and closure (optional for Ditec 4.5.2 PWR50AC) Adjusting the magnetic limit switches (optional for Ditec PWR50H/HR, standard on Ditec 4.5.3... -
Page 3: General Safety Precautions
General safety precautions ATTENTION! Important safety instructions. Please follow these instructions carefully. Failure to observe the information given in this manual may lead to severe personal injury or damage to the equipment. Keep these instructions for future reference. This manual and those for any accessories can be downloaded from www.ditecautomations.com. - Page 4 laws and directives, Good Working Methods, installation premises, system operating logic and the forces developed by the motorized door or gate • The safety devices must protect against crushing, cutting, trapping and general danger areas of the motorized door or gate.
-
Page 5: Declaration Of Incorporation Of Partly Completed Machinery
Sweden Declare under our sole responsibility that the types of equipment with names: Ditec PWR50H Irreversible automation for swing gates with mechanical limit switches Ditec PWR50HV Irreversible automation for swing gates with magnetic limit switches Ditec PWR50HR Reversible automation for swing gates with mechanical limit switches... -
Page 6: Technical Specifications
1. Technical specifications Tab. 1.0 Ditec PWR50AC Ditec PWR50H Ditec PWR50HV Ditec PWR50HR Type Irreversible / Reversible Irreversible Irreversible Reversible Stroke control Mechanical end stop (on Mechanical end Magnetic limit Mechanical (limit switch) opening) stops switches end stops Power supply... - Page 7 >4m Solid gate wing Windy area VA/VC/PO/PC speed setting higher than the default values R1/R2 force setting higher than the default values Chart 1.1 Product lifespan - Ditec PWR50AC/H/HV Product lifespan - Ditec PWR50HR 600.000 600.000 550.000 550.000 500.000 500.000 450.000...
- Page 8 The chart below shows an example of an operating unit lifespan calculation: Tab. 1.2 Example of lifespan calculation - Ditec Example of lifespan calculation - Ditec PWR50HR PWR50AC/H/HV Gate wing weight = 300kg Gate wing weight = 300kg Gate wing width = 4.5m Gate wing width = 4.5m...
-
Page 9: Standard Installation
2. Standard installation Ref. Description Cable Transmitter Flashing light 2 x 1mm² Aerial (integrated in the flashing light) coaxial 58Ω Key-operated selector switch 4 x 0.5mm² Wireless keypad with digital combination Actuator 4 x 1.5mm² Photocells 4 x 0.5mm² Control panel 3G x 1.5mm²... -
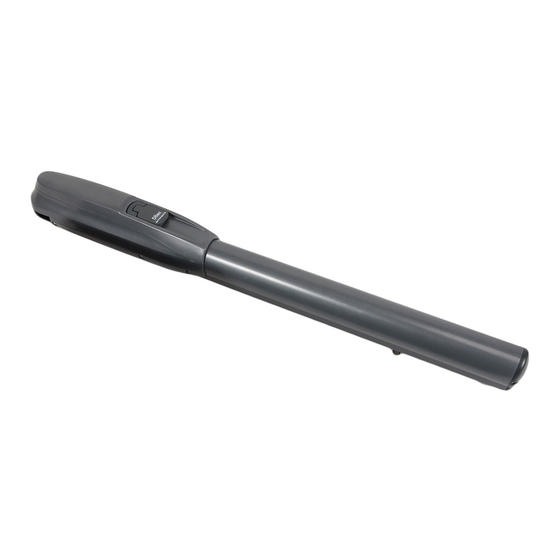
Page 10: Gearmotor Dimensions And References
3. Dimensions and gear motor references 1044 PWR50AC Fig. 3.1... - Page 11 PWR50H/HR Fig. 3.2 PWR50HV Fig. 3.3 Ref. Description Ref. Description Rear cover Mechanical end stops Release lock hatch Magnetic limit switches Screw for fastening the rear cover Drive screw Screw for fastening the front cover Split nut + magnet Front cover Split nut Protective brushes...
-
Page 12: Installation
4. Installation The given operating and performance features can only be guaranteed with the use of DITEC ac- cessories and safety devices. Unless otherwise specified, all measurements are expressed in mm. 4.1 Preliminary checks Make sure the gate structure is sturdy and the hinges are lubricated and smooth. -
Page 13: Bracket Fastening
4.2 Fastening the brackets After selecting the most suitable point for fastening the front bracket [18] to the gate wing, to establish its height you must first size, position and fasten the rear bracket [17]. If necessary, shorten the rear bracket [17] following the indications given in Tab. 4.1. - Once you have fastened the rear bracket [17] following the measurements given on page 9, fasten the front bracket [18] to the gate. -
Page 14: Using The Mounting Tool
Ø9 Ø9 Ø22 Ø14 4.3 Using the mounting tool During installation, the bracket positioning operation can be greatly simplified by using the mounting tool (PWRMI - optional accessory), which allows you to ascertain the correct fastening position of the brackets and the distance between them. This avoids positioning errors and incor- rect fastening hole alignment, thanks also to the built-in spirit-level. -
Page 15: Installing The Gear Motor
4.4 Installing the gear motor • Open the lock hatch [8], loosen the 3.9x22mm screw [9] and remove the rear cover [7]. Loosen the screw M4 x 8mm [10] and take out the front cover [11] as shown in the figure. Release the motor by inserting the key [23] in the relative lock [24] and turning it clockwise (see the USER INSTRUCTIONS). -
Page 16: Adjusting The End Stops And Limit Switches
4.5 Adjusting the end stops and limit switches 4.5.1 Mechanical end stops Bring the wing to its fully open (or closed - PWR50H-HR) position, then loosen the mechanical end stop with a 5mm Allen spanner just enough so it can slide along the drive screw. Bring it up against the split nut, then tighten the screws with the 5mm Allen spanner and fix the 3mm lockscrew. -
Page 17: Adjusting The Limit Switch With Microswitch For Opening And Closure (Optional For Ditec Pwr50Ac)
(just enough so they can slide along the guide), then bring them above the split nut [17] until the sensor is activated. Fix them in place. PWR50AC 4.5.3 Adjusting the magnetic limit switches (optional for Ditec PWR50H/HR, standard on Ditec PWR50HV) NOTE: not available for PWR50AC. -
Page 18: Electrical Connections
To increase the protection of the motor cable, a corrugated flexible tube can be used. PWR50AC PWR50H-HR-HV Fig. 4.6a Fig. 4.6b Fig. 4.6c 4.6.1 Ditec PWR50AC connection diagram Fig. 4.6d PWR50AC Gear motor with delay Motoriduttore con ritardo in apertura... -
Page 19: Motor Connection Diagram (Pwr50Ac)
4.6.1a Ditec PWR50AC motor connection diagram Fig. 4.7e motore freno Motor 6μF S2 Brake 4.6.2 Ditec PWR50H/HR/HV connection diagram Fig. 4.7f PWR50H/HR/HV Gear motor 24V with Motoriduttore 24V ritardo in apertura delay during opening 33/36 32/35 31/34 Gear motor 24V... -
Page 20: Reversible Mode
5. Reversible mode 5.1 Mode change for Ditec PWR50AC The motor is supplied in irreversible mode. To make the motor reversible, insert the pin [M]. NOTE: this operation must be carried out with the motor activated. When the pin [M] is removed, the motor becomes irreversible. -
Page 21: Reversible Mode For Ditec Pwr50Hr: Connecting The Pwr50Kr Protection Relay
5.2 Reversible mode for Ditec PWR50HR: connecting the PWR50KR protection relay The Ditec PWR50HR motor is reversible, but the PWR50KR protection relay must be installed as shown below: LCU40H 30 2 3 4 9 13 36 35 34 33 32 31... -
Page 22: Routine Maintenance Plan
6. Routine maintenance plan Carry out the following tasks every 6 months, or every 36,000 cycles Disconnect the 230V~ power supply and batteries (if present): - Clean the gate rotation pins, hinges and drive screw and lubricate them with neutral grease. - Check the state of wear of the brushes (12), and replace them if necessary.
Need help?
Do you have a question about the PWR50 H and is the answer not in the manual?
Questions and answers