
Related Manuals for DITEC ION4


Summary of Contents for DITEC ION4
- Page 1 Last version of this manual IP2282EN•2023-09-07 Ditec ION4-ION6 Technical manual Sliding gates (translation of the original instructions) www.ditecautomations.com...
-
Page 2: Table Of Contents
5.6.1 Magnetic limit switches ..............................13 Electrical connections ............................. 14 LCU48 card ............................... 15 ION4-6 parallel installation layout .......................... 16 Using of the menus ............................17 Switching the display ON and OFF .......................... 17 Navigation keys ................................ 17 Menu map ................................. 18 Product start-up .............................. -
Page 3: General Safety Precautions
General safety precautions ATTENTION! Important safety instructions.Please follow these instructions carefully. Failure to observe the information given in this manual may lead to severe personal injury or damage to the equipment.Keep these instructions for future reference. This manual and those for any accessories can be downloaded from www.ditecautomations.com This installation manual is intended for qualified personnel only •... -
Page 4: Declaration Of Incorporation Of Partly Completed Machinery
SE-261 44 Landskrona Sweden, declare, under our sole responsibility, that the type of equipment with the name: Ditec ION4-6 automation for swing gates Complies with the following directives and their amendments: 2006/42/EC Machinery Directive (MD), regarding the following essential health and safety require- ments: 1.1.2, 1.1.3, 1.2.1, 1.2.2, 1.2.3, 1.2.4.2, 1.2.6, 1.3.9, 1.4.3, 1.7.2, 1.7.3, 1.7.4, 1.7.4.1,... -
Page 5: Declaration Of Conformity
Lodjursgatan 10 SE-261 44 Landskrona Sweden Declare under our sole responsibility that the types of equipment with names: Ditec ION4-6 automation for swing gates Complies with the following directives and their amendments: • Supply of Machinery (Safety) Regulations 2016 • Electromagnetic Compatibility Regulations 2016 •... -
Page 6: Caractéristiques Techniques
Noise level L ≤70 dB (A) Indicative cycles considering a 6 m wing and factory settings (default speed of 20 cm/s). ION4 / ION6 allows a maximum speed of 30 cm/s (configurable). A cycle is considered an opening followed by a closing. -
Page 7: Operating Instructions
10.000 Safety edge installed R1/R2 > default VA/VC > default indice di gravosità Index of conditioning factors OC/CB < default 150.000 Example of lifespan calculation for ION4 140.000 130.000 Gate wing weight>150Kg 120.000 Gate wing width> 4.5m 110.000 100.000 Dust 90.000... -
Page 8: Standard Installation
Ref. Code Description Cable 1 Ditec ION4 - ION6 Actuator ION with control panel 3G x 1.5 mm² Connect the power supply to a type-approved omnipolar switch, with a contact opening distance of at least 3mm (not supplied). See chapter 6. -
Page 9: Dimensions
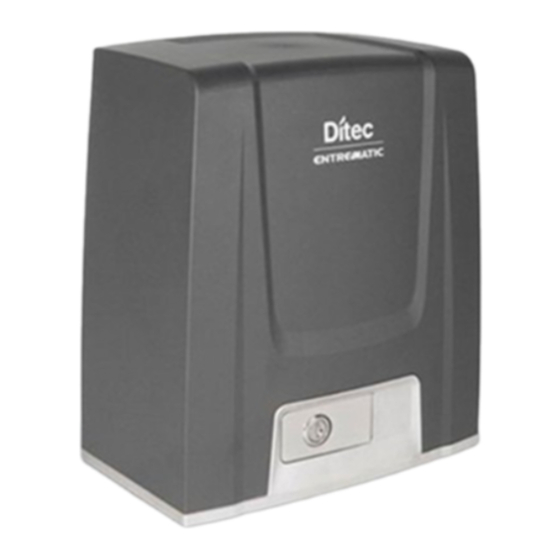
3. Dimensions 4. Main components Ref. Descripción Motor Control panel Key release Pinion Cable inlet Power supply terminal and fuse... -
Page 10: Installation
5. Installation The given operating and performance features can only be guaranteed with the use of DITEC ac- cessories and safety devices. Unless otherwise specified, all measurements are expressed in mm. 5.1 Preliminary checks Check the stability of the wing (derailing and lateral falls) and the sliding wheels and that the upper guides do not cause any friction. -
Page 11: Gearmotor Installation
5.3 Gearmotor installation -5 +20 - Release the gearmotor [1] (see OPERATING INSTRUCTIONS). Loosen the front screw [2] and remove the casing by pressing on its sides [3-4]. - Place the gearmotor on the base plate. - Adjust the gearmotor horizontally by sliding it along the slots of the gearmotor base and vertically with four levelling screws [A]. -
Page 12: Rack Installation
Manually check that the gate slides evenly and without friction. 5.5 Operation with virtual encoder ION4-ION6 gearmotors do not require limit switches because they have a virtual encoder. Mechanical opening and closing end stops must be installed. The gate automatically slows when approaching the end stops. -
Page 13: Installation Of Optional Accessories
5.6 Installation of optional accessories 5.6.1 Magnetic limit switches The limit switch kit is used to stop the gate before it reaches the opening and closing mechanical stops. With a limit switch installed, slowdown is carried out at regulated power to overcome possible friction. -
Page 14: Electrical Connections
6. Electrical connections Before connecting the power supply, make sure that the data on the plate correspond to the electricity distribution network data. Provide an omnipolar switch/disconnector on the power network with a contact opening distance of 3 mm or more. Check that there is a suitable residual-current device and surge protector upstream of the electrical system. -
Page 15: Lcu48 Card
7. LCU48 card CARICA BATTERY BATTERIE CHARGER (SBU) (SBU) Alimentazione Power supply 24V~ Microswitch Release di sblocco microswitch Finecorsa Limit switch NES100FCM NES100FCM... -
Page 16: Ion4-6 Parallel Installation Layout
7.1 ION4-6 parallel installation layout OPENING OPENING BIXR2 BIXPR2 M 24 V M 24 V limit switch limit switch NES100FCM NES100FCM release release microswitches microswitches MOD= OFF CHN= CH1 24V~ 24V~ OUT2 POWER POWER BATTERY BATTERY CHARGE CHARGE (SBU) (SBU) -
Page 17: Using Of The Menus
8. Using of the menus NOTE: pressure on the keys may be quick (less than 2 s) or prolonged (longer than 2 s). Unless specified otherwise, quick pressure is intended. To confirm the setting of a parameter, prolonged pressing is necessary. 8.1 Switching the display ON and OFF The procedure to switch on the display is as follows: •... -
Page 18: Menu Map
8.3 Menu map Opening direction RT= right Thrust adjustment on LF= left obstacles and closure current Automatic closure Contact 1-5 command enabling operation Automation status Automatic closure at switch-on Obstacle recognition enabling time adjustment Reversal safety Automatic clos- operation Start-up time ing time adjustment Activation of anti-... - Page 19 Selection of device con- Maximum number of Alarm reset nected to terminals 1-6 remote controls that can and 1-8 be stored in the integrated memory Motor current visu- alisation Display mode Menu navigation via remote control keypad Visualisation of maximum and minimum tempera- Partial opening com- tures recorded...
-
Page 20: Product Start-Up
The selected value sets parameters R1 and R2 to adjust the maximum thrust current of the motor. • LG: up to 200 kg → (R1=R2=30%) • MG: between 200 kg and 300 kg for ION4 and ION4J, between 200 kg and 400 kg for ION6 and ION6J → (R1=R2=50%) (default) •... - Page 21 VC - Selection of closing speed • LO: 15 cm/s • ME: 20 cm/s (default) • HI: 25 cm/s D6 - Selection of device connected to terminals 1-6 • NO: none • PH: photocells (default) For other options, see the specific menu. D8 - Selection of device connected to terminals 1-8 •...
-
Page 22: Commands
10. Commands You are advised to read paragraph 13 for all the details about the possible adjust- ments. WARNING: terminal 30 (common positive for commands) has the same functions as terminal 1, so the commands visualised on the display are indicated with 1-5, 1-3, etc. It is different from terminal 1, however, because of the maximum current that can be dispensed and it is also active when the control panel is in standby →... -
Page 23: Sofa1-Sofa2 Or Gopavrs Self-Controlled Safety Edge
10.1 SOFA1-SOFA2 or GOPAVRS self-controlled safety edge Command Function Description Insert the SOFA1-SOFA2 or GOPAVRS device in the slot SOFA1-SOFA2 for plug-in boards AUX1 or AUX2. GOPAV SAFETY TEST If the test fails, an alarm message appears on the display. When selecting →... -
Page 24: Jumper Setting
Value of Output Description accessories COM - This allows the functioning configurations to be saved using the function → The saved configurations can be recalled using the function → COM - The storage module allows the remote controls to be stored. If the BIXMR2 control panel is replaced, the storage module being used can be inserted in the new control panel. -
Page 25: Adjustments
13. Adjustments NOTE: depending on the type of automation and control panel, some menus may not be available. 13.1 Main menu Display Description WZ - Wizard Quick configuration menu AT - Automatic Configurations The menu allows you to manage the automatic configurations of the control panel. BC - Basic Configurations The menu allows you to display and modify the main settings of the control panel. -
Page 26: Second Level Menu - At (Automatic Configurations)
13.2 Second level menu - AT (Automatic Configurations) Selections Display Description available DM - Direction mode RT-opens to the right LF-open to the left H0 - Predefined setting, residential use 0 This selection loads predefined values for certain standard parameters: AC - enabling of automatic closing : 1-2 C5 - step-by-step/opening command operation... -
Page 27: Second Level Menu - Bc (Basic Configurations)
13.3 Second level menu - BC (Basic Configurations) Selections Display Description available AC - Enabling of automatic closure ON - Enabled OF - Disabled 1-2 - Dependent on input 1-2 SS - Selection of automation status at start OP - Open CL - Closed Indicates how the control panel considers the automation at the time of switch-on, or after a POWER RESET command. -
Page 28: Additional Bc Level Parameters That Can Be Configured (Available With → Enabled)
13.3.1 Additional BC level parameters that can be configured (available with → enabled) Selections Display Description available HR - Enabling of "operator present" function ON - Enabled OF - Disabled NOTE: Set → only if → → WARNING: • If the OPERATOR PRESENT function is activated, make sure that no-one is near the automation when an opening or closing command is given. -
Page 29: Second Level Menu - Ba (Basic Adjustment)
13.4 Second level menu - BA (Basic Adjustment) Selections Display Description available TC - Setting of automatic closing time [s] It is set with different intervals of sensitivity. • from 0” to 59” with intervals of 1 second • from 1’ to 2’ with intervals of 10 seconds 1’00”... -
Page 30: Additional Ba Level Parameters That Can Be Configured (Available With → Enabled)
13.4.1 Additional BA level parameters that can be configured (available with → enabled) Selections Display Description available DT - Adjustment of obstacle recognition time [s/100] 10 - Minimum 60 - Maximum NOTE: the parameter is adjusted in hundredths of a second. ST - Adjustment of start time [s] 0.5 - Minimum 3.0 - Maximum... - Page 31 Selections Display Description available OO - Obstacle detection limit during opening [cm] Indicates the distance from the opening stop at which disengagement is deactivated. NOTE: not active if → → or if → → OC - Obstacle detection limit during closure [cm] Indicates the distance from the closure stop at which reversal is deactivated.
-
Page 32: Second Level Menu - Ro (Radio Operations)
13.5 Second level menu - RO (Radio Operations) Display Description SR - Remote control storage You can directly access the Remote control storage menu even with the display turned off, but only with the Display visualisation mode option set to 00 or 03: •... -
Page 33: Additional Ro Level Parameters That Can Be Configured (Available With → Enabled)
Selections Display Description available RK - Menu navigation using remote control keyboard ON - Enabled OF - Disabled 3 3 3 3 With the display turned off, quickly type in the sequence of keys 2 2 4 4 1 1 from the stored remote control you want to use. -
Page 34: Second Level Menu - Sf (Special Functions)
Selections Display Description available EA - Total memory deletion → → → 2” 2” RE - Setting memory opening from remote control OF - Disabled ON - Enabled When enabled (ON), the remote programming is activated. To store new remote controls without using the control panel, refer to the remote control instructions. -
Page 35: Additional Sf Level Parameters That Can Be Configured (Available With → Enabled)
13.6.1 Additional SF level parameters that can be configured (available with → enabled) Display Description SP - Setting the pass word → → → → → 2” [esempio] (example) NOTE: this can only be selected when the password is not set. Setting the password prevents unauthorised personnel from accessing selections and adjust- ments. -
Page 36: Second Level Menu - Cc (Cycles Counter)
Display Description UP - Firmware update Activates the card bootloader in order to update the firmware. Use USBPROG and AMIGO software, following the procedure: AMIGO CONTROL PANEL AMIGO → → → → USBPROG 2” 13.7 Second level menu - CC (Cycles Counter) Display Description CV - Display of total operations counter... -
Page 37: Additional Cc Level Parameters That Can Be Configured (Available With → Enabled)
13.7.1 Additional CC level parameters that can be configured (available with → enabled) Selections Display Description available CA - Setting the maintenance alarm (factory setting - alarm deactivated: 0.0 00. 00) You can set the required number of operations (regarding the partial operations counter) for signalling the maintenance alarm. -
Page 38: Additional Em Level Parameters That Can Be Configured (Available With → Enabled)
13.8.1 Additional EM level parameters that can be configured (available with → enabled) Selections Display Description available LL - Voltage threshold for indicating that batteries are almost flat (V) 17 - Minimum 24 - Maximum NOTE: it is set with an interval of sensitivity of 0.5 V shown when the decimal point on the right lights up. - Page 39 Selections Display Description available 68 - Selection of the device simultaneously connected to terminals 1-6 and 1-8 NO - None SE - Safety edge S41 - Safety edge with safety test If different from NO, the simultaneous opening of inputs 1-6 and 1-8 causes: •...
-
Page 40: Additional Ap Level Parameters That Can Be Configured (Available With → Enabled)
13.9.1 Additional AP level parameters that can be configured (available with → enabled) Selections Display Description available 20 - Partial opening command of terminal 1-20 P3 - Partial opening command 1-2 - Enabling of automatic closure 1-9 - Stop input LU - Setting the courtesy light switch-on time (s) To enable the parameter, set the selection →... - Page 41 Selections Display Description available OT - Selection of type of obstacle identification 00 - Overcurrent or gate stopped 01 - Overcurrent 02 - Door stopped NOTE: the obstacle identification for “door stopped” is faster but more sensitive. CR - Stroke estimate correction [%] DO NOT USE (diagnostic purposes only) SM - Selection of operating mode of device connected to terminals 1-6 00 - During the operation, the opening of the safety contact stops the...
-
Page 42: Signals Visualised On The Display
Selections Display Description available WC - Setting of pre-flashing time on closing [s] Adjustment of the lead time for the switch-on of the flashing light, in relation to the start of the closing operation from a voluntary command. 00’’ 00 - Minimum 05 - Maximum TS - Setting of renewal of automatic closing time after PH safety device release [%]... - Page 43 Display Description Automation closed Automation closed Release door open Automation open Automation open Release door open Automation stopped in intermediate position Automation stopped in intermediate position Release door open Automation closing Automation that slows down during closing. Automation opening Automation that slows down during opening.
-
Page 44: Display Of Safety Devices And Commands
14.2 Display of safety devices and commands NOTE: the safety device and command display mode is only visible with Display visuali- sation mode set at 01 or 03. Display Description Display Description 1-2 - Automatic closing activation com- 68 - Selection of the device simultaneous- mand ly connected to terminals 1-6 and 1-8 1-3 - Opening command... -
Page 45: Visualisation Of Alarms And Faults
14.3 Visualisation of alarms and faults WARNING: the visualisation of alarms and faults is possible with any visualisation selec- tion. The signalling of alarm messages takes priority over all other displays. Type of Display Description Operation alarm Check the mechanical parts. M3 - Automation blocked Check connection of motor. - Page 46 Type of Display Description Operation alarm Check there is no short circuit in connec- I5 - No voltage 0-1 (faulty voltage regulator tion 0-1. or short-circuit on accessories) If the problem persists, replace the control panel. Replace the control panel. I6 - Excessive voltage 0-1 (faulty voltage regulator) Reset.
- Page 47 Type of Display Description Operation alarm To save the system configurations on the R0 - Insertion of a storage module contain- storage module, delete any stored remote ing over 100 stored remote controls controls and bring the total to less than 100. WARNING: the →...
-
Page 48: Troubleshooting
15. Troubleshooting Alarm Problem Possible cause Operation signalling The control panel No power supply. Check the power supply cable and the does not switch on relative wiring automation No power. Check power supply cable. does not open or close. Short circuited accessories Disconnect all accessories from termi- nals 0-1 (a voltage of 24V= must be pre- sent) and reconnect them one at a time. - Page 49 Alarm Problem Possible cause Operation signalling The remote control The radio transmission is im- Install the antenna outside. has limited range peded by metal structures and and does not work reinforced concrete walls. Replace the transmitter batteries. with auto- mation moving.
- Page 50 All the rights concerning this material are the exclusive property of ASSA ABLOY Entrance Systems AB. Although the contents of this publication have been drawn up with the greatest care, ASSA ABLOY Entrance Systems AB cannot be held responsible in any way for any damage caused by mistakes or omissions in this publication. We reserve the right to make changes without prior notice.
Need help?
Do you have a question about the ION4 and is the answer not in the manual?
Questions and answers