Table of Contents
Advertisement
Quick Links
Advertisement
Table of Contents
Troubleshooting

Related Manuals for Datavideo iCast 10NDI


Summary of Contents for Datavideo iCast 10NDI
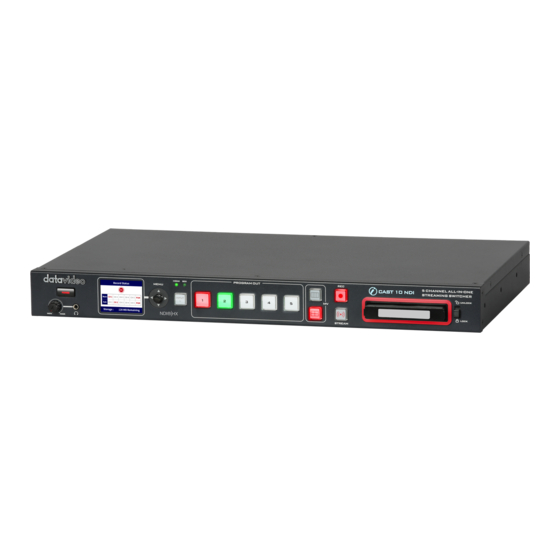
- Page 1 5 CHANNEL ALL-IN-ONE STREAMING SWITCHER iCast 10NDI Instruction Manual...
-
Page 2: Table Of Contents
Table of Contents FCC COMPLIANCE STATEMENT..................6 WARNINGS AND PRECAUTIONS ..................6 WARRANTY ........................7 ......................... 7 TANDARD ARRANTY ....................... 7 HREE ARRANTY DISPOSAL ......................... 8 CHAPTER 1 INTRODUCTION .................... 9 ........................9 EATURES ......................10 YSTEM IAGRAM CHAPTER 2 CONNECTIONS AND CONTROLS ..............12 ........................ - Page 3 ......................27 ENERAL ETTINGS Channel 1 .......................... 27 Channel 2 .......................... 28 Channel 3 .......................... 29 Channel 4 .......................... 30 Channel 5 .......................... 30 Program ..........................31 CHAPTER 5 WEB USER INTERFACE ................33 ..............33 ETWORK ONNECTION AND EVICE EARCH Default Fixed IP .........................
- Page 4 News ..........................56 Graphic ..........................57 Logo ..........................58 Animation ......................... 59 ........................60 ULTIVIEW PGM ........................... 61 Quad View......................... 61 Scale ............................62 Background Color ........................62 Full Screen ......................... 62 Window 01 Location X/Y ......................63 Window 01 Width/Height ......................63 Scale ............................
- Page 5 SERVICE AND SUPPORT ....................96 Disclaimer of Product & Services The information offered in this instruction manual is intended as a guide only. At all times, Datavideo Technologies will try to give correct, complete and suitable information. However, Datavideo Technologies cannot exclude that some information in this manual, from time to time, may not be correct or may be incomplete.
-
Page 6: Fcc Compliance Statement
AC adapter. If you are not sure of the type of power available, consult your Datavideo dealer or your local power company. 8. Do not allow anything to rest on the power cord. Do not locate this unit where the power cord will be walked on, rolled over, or otherwise stressed. -
Page 7: Warranty
The product warranty period begins on the purchase date. If the purchase date is unknown, the product warranty period begins on the thirtieth day after shipment from a Datavideo office. All non-Datavideo manufactured products (product without Datavideo logo) have only one year warranty from the date of purchase. -
Page 8: Disposal
Disposal For EU Customers only - WEEE Marking This symbol on the product or on its packaging indicates that this product must not be disposed of with your other household waste. Instead, it is your responsibility to dispose of your waste equipment by handing it over to a designated collection point for the recycling of waste electrical and electronic equipment. -
Page 9: Chapter 1 Introduction
SDI and four HDMI video inputs as well as a USB port for connecting a document camera. External audio sources can be delivered to iCast 10NDI via the XLR balanced or RCA unbalanced audio ports. In addition, it can be used as a video IP switcher allowing you to operate the device from a remote location. -
Page 10: System Diagram
1.2 System Diagram... -
Page 12: Chapter 2 Connections And Controls
Chapter 2 Connections and Controls In this chapter, we will discuss various port connections at the rear of the device, button functions and securing a 2.5” SSD/HDD in a disk enclosure. 2.1 Rear Panel DC IN (12V) SDI loop out Power switch Program out Ground... - Page 13 6. LAN Port The LAN port allows you to connect your iCast 10NDI to any networks. The LAN port is a bidirectional stream port capable of accepting video streams from multiple video...
- Page 14 10. Multiview OUT The Multiview OUT port allows you to connect an HDMI monitor for displaying a Multiview of input video channels. The iCast 10NDI offers four different Multiview layouts, see Section 5.7 PGM for more information about selecting and setting these layouts.
-
Page 15: Front Panel
2.2 Front Panel Power button Multiview layout selection buttons Headphone jack Record button LCD screen / menu browsing knob Stream button Input 1 button Hard disk drive slot Channel buttons for program OUT 1. Power Button Press the power button to enable the button functions after you’ve turned on the power switch which can be found on the rear panel. - Page 16 5. Channel Buttons for Program OUT Depending on your program layout, press the channel buttons to select your program video sources. Note: The available program layouts are Quad View, Full Screen, POP, Side by Side and PIP, which can be selected using the OSD menu. 6.
-
Page 17: Disk Assembly
2.3 Disk Assembly Instructions to assemble a 2.5” SSD/HDD in a disk enclosure will be detailed in this section. 1. Lift the cover of the disk enclosure. 2. Reassemble the disk enclosure after placing the SSD/HDD in the enclosure tray. Insert the screws into the holes found on the two sides as shown in the diagram on the left. -
Page 18: Chapter 3 Preparations
MENU. 3.1 Power 1. Connect the supplied 12V PSU to the DC Power Input on the rear of the iCast 10NDI. The connection can be secured by screwing the outer fastening ring of the DC In plug to the socket. -
Page 19: Connecting Output Devices
The Program OUT displays the channel video (Channels 1 – 5) selected on the front panel of the iCast 10NDI. The Program OUT can also be set to other viewing modes such as quad view, POP, PIP and side by side; see Section 4.5 Program Layout... -
Page 20: Multiview
3.5 Multiview The iCast 10NDI Multiview is supplied from the input connections on the rear panel and displayed on the HDMI monitor connected to the Multiview OUT port. The Datavideo TLM-170L/V/K/F monitors could be used. The iCast 10NDI offers two Multiview layouts. You can press the corresponding buttons on the front panel to select either a 2x2 or 4x1 Multiview layout depicted below. -
Page 21: Chapter 4 Osd Menu
OSD menu. As you turn on the power switch located at the rear of the iCast 10NDI, the following device information will be displayed on the 2” LCD screen after the device boots up. - Page 22 Main Menu Level 1 Level 2 Level 3 Logo ON/OFF Animation ON/OFF Program output FPS Program layout Quad View Full Screen Side by Side General Settings Channel 1 Video Source HDMI IP Stream Audio Source Embed Line In Audio Setting Record &...
-
Page 23: System
Network Settings The iCast 10NDI can be accessed over an existing TCP/IP LAN type network. In Network Settings, you will be allowed to gain direct access to the DHCP and Static IP modes. -
Page 24: Factory Default
MB Remaining Tap [Left] to Back 4.3 Program CG The iCast 10NDI allows you to place multiple textual or graphic layer on top of the video. In Program CG, You can enable/disable these CG layers listed as follows: Text: textual layer ... -
Page 25: Program Output Fps
30p and 25p. 4.5 Program Layout The iCast 10NDI’s Program OUT is supplied from the input connections on the rear panel. Since a variety of multi-image layouts is available, the HDMI PGM OUT can also be used to monitor video and audio in a number of different configurations. -
Page 26: Full Screen
Full Screen By selecting the full screen mode, only the selected channel video will be displayed on the monitor and the corresponding channel button on the front panel should illuminate red. Unselected channel buttons should illuminate white. You can press the channel buttons on the front panel to switch the program view. -
Page 27: Pip
The PIP Multiview layout is shown below. Push the channel buttons to switch between video channels. 4.6 General Settings This option gives you quick access to basic settings of input and program channels. Channel 1 Video Source Select the video source from the list below: ... -
Page 28: Channel 2
Audio Setting 0000 Note: See Section 5.8 Mixer for adjusting audio delay using the web UI. Record & Stream Setting Status Select the channel recorder or streaming server from the list below: Main Record Sub Record Main Streaming ... -
Page 29: Channel 3
Record & Stream Setting Status Select the channel recorder or streaming server from the list below: Main Record Sub Record Main Streaming Sub Streaming Section 5.3 Encoder, Section 5.4 Record Section 5.5 Streaming for configurations of the respective recorders and streaming servers. -
Page 30: Channel 4
Channel 4 Video Source Select the video source from the list below: HDMI: HDMI 4 IP Stream/NDI: LAN Audio Source Select the audio source from the list below: Embed: Embedded audio of HDMI 4 Line In: RCA unbalanced audio ... -
Page 31: Program
Line In: RCA unbalanced audio XLR: XLR balanced audio Audio Setting The Audio Setting adjusts the audio delay. Tap the menu browsing knob up to increase or down to decrease the delay. Audio Setting 0000 Note: See Section 5.8 Mixer for adjusting audio delay using the web UI. - Page 32 Record & Stream Setting Status Select the channel recorder or streaming server from the list below: Main Record Sub Record Main Streaming Sub Streaming Section 5.3 Encoder, Section 5.4 Record Section 5.5 Streaming for configurations of the respective recorders and streaming servers.
-
Page 33: Chapter 5 Web User Interface
5.1 Network Connection and Device Search To use the web user interface, you will have to first connect iCast 10NDI to a network via the LAN port. This section shows you how to connect iCast 10NDI to the network with or without a DHCP server, and describes ways to acquire the device’s IP address. - Page 34 3. Turn on the iCast 10NDI’s power and the device should be turned ON in Static IP mode by default 192.168.1.201 4. On the laptop, double click the DVIP Network Configuration Tool icon to open the utility interface. 5. Click the SCAN icon at the top left corner to search for the connected iCast 10NDI.
- Page 35 7. Enter the login credentials (Username: admin/Password: 000000) to log in to the web UI shown below.
-
Page 36: Connecting To A Dhcp Network
The maximum total frame rate usage is 300 frames. Click the tabs to gain access to various functionalities of iCast 10NDI. Brief descriptions of the tabs are provided as follows:... -
Page 37: Connecting To A Non-Dhcp Network (Static Ip)
5. Click the SCAN icon at the top left corner to start searching for the connected iCast 10NDI. into the address bar of a browser on your PC 6. Manually enter the iCast 10NDI’s IP address then hit the ENTER button. -
Page 38: Troubleshooting The Network Connection
Troubleshooting the Network Connection Connect the iCast 10NDI to the network then use the IP Finder utility program to scan for the device. If not found, it is possible that your network is not assigning IP addresses. Reasons of this are outlined as follows: ... - Page 39 Make sure no other devices are connected to the LAN (wired or wireless) because this may result in IP conflicts. 3. After trying all methods and if the problem is still not solved, the iCast 10NDI’s video streaming server offers the fixed IP feature that allows you to establish point-to-point connection to gain access to the device without a DHCP server.
-
Page 40: Advanced Troubleshooting
Advanced Troubleshooting Try the following if you still are unable to connect: Use the ARP table to search for iCast 10NDI’s MAC address; the MAC address can be found on the print label at the bottom of your device. ... -
Page 41: Sdi
The SDI Source page is shown below. Please note that the SDI video source type is only available on input video channel 1. -
Page 42: Hdmi
HDMI For HDMI sources, you will be allowed to adjust the source video’s brightness, contrast, hue and saturation by dragging the corresponding sliders as shown in the diagram below. Please note that the HDMI video source type is available across input video channels 1 – 4. -
Page 43: Ip Stream
IP Stream In IP Stream, enter the URL of your video source as well as the source’s account name and password if necessary. Please note that only up to three input video channels can be set to the IP stream video source type. -
Page 44: Ndi
If your video is delivered from NDI cameras, simply select the source from the Group drop-down menu then set the delay duration. Please note that NDI cameras and iCast 10NDI must be on the same network and only up to three input video channels can be set to the NDI video source type. -
Page 45: Webrtc
WebRTC The WebRTC allows you to establish peer-to-peer or P2P streaming. Select WebRTC if your video is streamed directly from another WebRTC device. Then enter the receiving iCast 10NDI’s IP address and leave the rest of the fields blank. When setting the encoder, please note that the maximum allowable video resolution is 1280 x 720... -
Page 46: Uvc
The UVC 5 or USB 3.0 port is designed for connecting a document camera. Simply select a device from the device list. -
Page 47: Encoder
5.3 Encoder The iCast 10NDI has two video encoding engines allowing you to concurrently stream and record to multiple destinations over different protocols. The configurable encoder settings are Encoder Type, Resolution, Frame Rate, Profile, Level, Entropy, GOP, Video Bitrate (bps) and Audio Bitrate (bps) which will be detailed in this section. -
Page 48: Resolution
Before setting your encoder, make sure you have sufficient bandwidth. See the table below for the required bandwidth for H.264 video streaming at various resolutions. Resolution H.264/AVC Bandwidth Required 480p 1.5 Mbps 720p 3 Mbps 1080p 6 Mbps Resolution Once you’ve chosen your encoder, the first step of encoder setup is to adjust the image size. It is best to either match your original video source or scale it down. -
Page 49: Level
However, depending on the decoder used when viewing the stream, such as with mobiles devices, a Main or Baseline profile may be required. High Main Baseline Level Levels specify the size of the video a decoder must be able to handle. They specify a maximum bit- rate for the video and a maximum number of macroblocks per second. -
Page 50: Video Bitrate (Bps)
When iCast 10NDI streams and records simultaneously, sum of the stream and record video bitrates should not exceed 12Mbps. Audio Bitrate (bps) iCast 10NDI offers the user the following audio bitrates at which you may want to stream the audio. It is recommended to select 128Kbps or higher. ... -
Page 51: Record
5.4 Record The Record page allows you to set the two built-in recorders on iCast 10NDI. First select an encoder configured previously on the Encoder page then enter the record file name, select the file type and set the record duration. -
Page 52: Rtsp (Real Time Streaming Protocol)
Please note that each input video channel is equipped with two built-in encoders so you can deliver the channel video to two destinations using two different streaming protocols at the same time. In addition, you can also borrow encoders from other input video channels. For example, you can assign Main Encoder of Channel 3 to stream Channel 1 video via the configured streaming protocol. -
Page 53: Rtmp (Real-Time Messaging Protocol)
Enter RTMP URL obtained from any live streaming platform such as Ustream. Note: The iCast 10NDI supports RTMP Publish only and not RTMP Local. Stream Name: Enter a stream name or key from any live streaming platform such as Ustream. -
Page 54: Ndi (Network Device Interface)
NDI (Network Device Interface) If you’ve selected NDI, make sure the NDI video players and the iCast 10NDI are on the same network. Please also note that only one encoder (main or sub) will be enabled for the input video channel if NDI is chosen. - Page 55 SRTPassword: Enter a password to encrypt the SRT stream. Channel Name: Enter an arbitrary name of the video channel streamed to DV Cloud. Model Name: Name of the iCast 10NDI After entering all information, click the Start Stream button to view your video channel on DV Cloud...
-
Page 56: News
News News allows you to place the scrolling text over the video. First pre-enter the scrolling text content into a text file then upload the text file to iCast 10NDI. Lastly, customize the following text properties. Note: You can only enter up to 15 lines of text into the text file only and for Chinese text, please set the font type to UTF-8. -
Page 57: Graphic
After you’ve entered and configured the scrolling text, you may enable them on the video using one of the three ways described below: Click “AUTO” to play the scrolling text and change lines for every 6 seconds. Click “Start Playlist” to play the scrolling text and change lines only when the space key is pressed. At the 15 line (last line), press the space key to return to the first line. -
Page 58: Logo
Logo You can also add a logo to the video. You will be required to select a jpg, jpeg, bmp, png or gif file from your local hard disk. Click Select to browse the hard drive for your logo file then click Update to start the upload. -
Page 59: Animation
Animation You can also add an animation to the video. You will be required to select a jpg, jpeg, bmp, png or gif file from your local hard disk. Click Select to browse the hard drive for your animation file then click Update to start the upload. -
Page 60: Multiview
5.7 Multiview Connect an HDMI monitor to the Multiview port then select a layout for the Multiview screen. -
Page 61: Pgm
5.8 PGM The PGM page allows you to set the Program OUT screen layout. The available layout options are Quad View, Full Screen, POP, Side By Side and PIP. Quad View In Quad View mode, the Program OUT screen will be switched to either a 2x2 or 4x1 Multiview layout. -
Page 62: Scale
Scale The PGM OUT window can also be scaled. Click the “Scale” drop-down menu and select a scale from the list below: Stretch Full Background Color You may either enter the RGB values or select a color from the color spectrum to set the screen’s background color. -
Page 63: Window 01 Location X/Y
Window 01 Location X/Y You can set the position of the PGM OUT window by setting the X/Y coordinates. Window 01 Width/Height Enter the appropriate width and height to set the size of the PGM OUT window. Scale The PGM OUT window can also be scaled by clicking a scale from the “Scale” drop-down menu below. -
Page 64: Background Color
Background Color You may either enter the RGB values or select a color from the color spectrum to set the screen’s background color. Then fine tune the selected color by dragging the circle cursor on the palette. Click the color wheel button at the bottom right corner to confirm the selection. R: Red H: Hue G: Green... -
Page 65: Window 01/02/03/04 Location X/Y
Window 01/02/03/04 Location X/Y You can set positions of the PGM OUT windows by setting the X/Y coordinates. Window 01/02/03/04 Width/Height Enter the appropriate width and height to set the size for each PGM OUT window. -
Page 66: Scale
Scale The PGM OUT window can also be scaled by clicking a scale from the “Scale” drop-down menu below. Stretch Full Background Color You may either enter the RGB values or select a color from the color spectrum to set the screen’s background color. -
Page 67: Window 01/02 Location X/Y
Window 01/02 Location X/Y You can set positions of the PGM OUT windows by setting the X/Y coordinates. Window 01/02 Width/Height Enter the appropriate width and height to set the size for each PGM OUT window. Scale The PGM OUT window can also be scaled by clicking a scale from the “Scale” drop-down menu below. -
Page 68: Background Color
Full Background Color You may either enter the RGB values or select a color from the color spectrum to set the screen’s background color. Then fine tune the selected color by dragging the circle cursor on the palette. Click the color wheel button at the bottom right corner to confirm the selection. -
Page 69: Window 01/02 Location X/Y
Window 01/02 Location X/Y You can set positions of the PGM OUT windows by setting the X/Y coordinates. Window 01/02 Width/Height Enter the appropriate width and height to set the size for each PGM OUT window. Scale The PGM OUT window can also be scaled by clicking a scale from the “Scale” drop-down menu below. -
Page 70: Background Color
Full Background Color You may either enter the RGB values or select a color from the color spectrum to set the screen’s background color. Then fine tune the selected color by dragging the circle cursor on the palette. Click the color wheel button at the bottom right corner to confirm the selection. -
Page 71: Volume
There is an extra Stereo/Mono button for LINE-IN external audio input. When switched to mono, iCast 10NDI will automatically synchronize the left audio channel to the right. You can assign an audio channel from four input video channels to the IP stream. Click the Set button and select from the list that opens. -
Page 72: Monitor
5.10 Monitor HDMI 1 sets the frame rate of the HDMI Program output as well as the audio volume. HDMI 2 sets the volume of the HDMI Multiview output. 5.11 System The system page allows the user to configure several network and system related settings. The network settings are DHCP enable/disable, static IP address, subnet mask, default gateway, primary and secondary DNS, and etc. -
Page 74: Network Setting
Network Setting In network settings, you can either manually enter the IP address or set the device to DHCP mode allowing the router to automatically assign the IP address to iCast 10NDI. LAN Port Select the Ethernet port from the list below: ... -
Page 75: Time Setting
Time Setting In time setting, you are allowed to select the reference time source for the iCast 10NDI. Type In this drop-down menu, you can either select to allow the device to retrieve the time automatically from the Network Time Protocol (NTP) server by selecting “Automatically from the Internet” or locally by selecting “Manual”. -
Page 76: Disk Information
5.12 Status The status page shows Input, Record, Stream and Disk information as depicted in the diagram below. Note: The iCast 10NDI web UI does not update automatically so to learn the latest device status, please refresh the page manually. - Page 77 While monitoring streaming and recording, please update the page periodically regardless of how you operate the device (using the device’s physical buttons only or using the device’s physical buttons along with the web UI). This ensures the page is always displaying the most up-to-date information.
-
Page 78: Advanced
5.13 Advanced In Advanced, you will be allowed to select up to 10 separate streams for an input channel. First select the input video channel from the Video Source drop-down menu then check the stream servers that you would like to use to deliver the channel video to your viewers. Stream 1 corresponds to main and sub stream servers of input video channel 1, stream 2 corresponds to main and sub stream servers of input video channel 2, and so forth. -
Page 79: Chapter 6 Video Streaming And Recording
Chapter 6 Video Streaming and Recording The iCast 10NDI five channel all-in-one streaming switcher allows the user to stream and record your program at the same time. From any SDI/HDMI input sources, the video streaming server generates an H.264 encoded stream that is compliant with RTSP or RTMP protocols. While encoding the video at bit rates appropriate for live streaming, the video streaming server concurrently records a high- quality MP4 file to a 2.5”... - Page 80 6. To view the RTSP video stream, enter the RTSP URL into the client device. 7. Open VLC then click Open Network Stream (shown in the diagram below). 8. As shown in the diagram below, enter the stream URL then click Play to start streaming.
- Page 81 Follow the steps below to obtain the TS URL: On the web UI, click the “Streaming” tab to open the stream settings page. Select a stream engine then the encoder from the Encoder Source drop-down menu. See Section 5.3 Encoder for setup of main and sub encoders.
- Page 82 As shown in the diagram below, enter the stream URL then click Play to start streaming. Follow the steps below to obtain the HLS URL: 1. On the web UI, click the “Streaming” tab to open the stream settings page. 2.
- Page 83 8. As shown in the diagram below, enter the stream URL then click Play to start streaming. 9. You can also play .m3u8 stream URL using the devices listed as follows: iPhone, iPad and MacBook: Use Safari to open the .m3u8 stream URL. ...
-
Page 84: Rtmp
RTMP In the RTMP mode, the iCast 10NDI can send up to two data streams to multiple CDNs or media servers that support the Real-Time Messaging Protocol. Examples of the RTMP media server are USTREAM and Youtube. Note: The iCast 10NDI does not support RTMP local. -
Page 85: Srt
12. At this point, you should be able to view your stream video on Youtube. 13. To stop live streaming, simply click the Stop Stream button. When setting up an SRT stream on iCast 10NDI, you can configure it as an SRT source encoder (caller mode) or an SRT destination decoder (listener mode). -
Page 86: Ndi
Before streaming to any NDI destination devices, you will need to first make sure the NDI video players and the iCast 10NDI are on the same network. Please also note that only one encoder (main or sub) will be enabled for the input video channel if NDI is chosen. -
Page 87: Record/Stream Buttons
4. Click the Start Stream button to start the NDI stream. 6.2 Record/Stream Buttons The RECORD and STREAM buttons on the front panel of the iCast 10NDI give the user certain controls of the record and stream functions. In this section, we will cover operations of these two buttons in detail. -
Page 88: Chapter 7 Appendices
Chapter 7 Appendices Appendix 1 RS-232 Pinout The camera can be connected to the iCast 10NDI through the RS-232 interface using a custom Ethernet cable. The RS-232 connection wiring scheme is shown below. iCast 10NDI 5 Channel All-In-One PTZ Camera... -
Page 89: Appendix 2 Firmware Upgrade
Firmware Upgrade Datavideo usually releases new firmware containing new features or reported bug fixes from time to time. Customers can either download the iCast 10NDI firmware as they wish or contact their local dealer or reseller for assistance. This section outlines the firmware upgrade process which should take approximately 10 minutes to complete. -
Page 90: Appendix 3 Frequently-Asked Questions
Appendix 3 Frequently-Asked Questions This section describes problems that you may encounter while using iCast 10NDI. If you have any questions, please refer to related sections and follow the suggested solutions. If problem still exists, please contact your distributor or the service center. -
Page 91: Appendix 4 Dimensions
Appendix 4 Dimensions All measurements in millimeters (mm) - Page 92 Appendix 5 Specifications Model Name iCast 10NDI Product Name 5 Channel All-In-One Streaming Switcher Video Standard HD & SD Input: 1080p: 60/59.94/50/30/29.97/25/24/23.98 1080i: 60/59.94/50 720p: 60/59.94/50 480i59.94, 576i50 Video Format Output: 1080p60/59.94/50→1080p60/59.94/50 1080p30/29.97/25/24/23.98→1080p30/29.97/25/24/23.98 1080i60/59.94/50→1080p30/29.97/25 720p60/59.94/50→720p60/59.94/50 480i59.94, 576i50→480p29.97, 576p25 (not supporting interlace)
- Page 93 Picture in Picture Yes (PGM) Logo Insertion Still Store Effects Transition Preview Sync/Reference In/Out Tally Output Web UI for configuration and control PC Remote Control Serial Port Control: RS-232 (RJ-45) Camera Control Built-in Audio Mixer Storage SATA (6 Gb/s) Recording File System FAT-32, NTFS, exFAT Recording File Format Video Encode...
- Page 94 Notes...
- Page 95 Notes...
-
Page 96: Service And Support
Service and Support www.datavideo.com/product/iCast 10NDI Sep-30.2022 Datavideo Technologies Co., Ltd. All rights reserved 2020 Version E1...
Need help?
Do you have a question about the iCast 10NDI and is the answer not in the manual?
Questions and answers