
Related Manuals for Electrolux Professional 914535316


Summary of Contents for Electrolux Professional 914535316
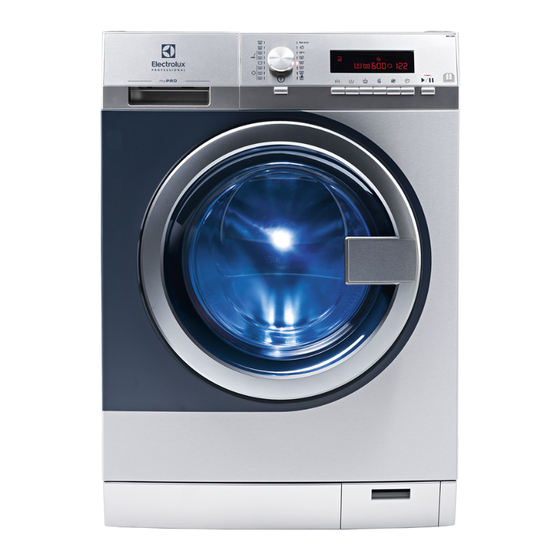
- Page 1 User manual Washer extractor WE170P PNC 914535316 157034071/EN Original instructions 2024.04.18...
-
Page 3: Table Of Contents
Contents Contents 1 Safety Information ..........................5 Children and vulnerable people safety ..................5 Installation..........................6 Electrical connection ........................6 Water connection ........................7 Use............................7 Care and cleaning........................7 Internal lighting ..........................7 Service .............................8 Disposal............................8 2 Warranty terms and exclusions......................9 3 Product description..........................10 4 Accessories ............................11 Stacking kit..........................12 Pedestal with the drawer ......................12 Anchoring kit ...........................12... - Page 4 Contents 12.7 Cleaning the drum........................28 12.8 Cleaning the detergent dispenser....................28 12.9 Cleaning the drain filter......................29 12.10 Cleaning the inlet hoses and the valve filters ................29 12.11 Emergency drain ........................29 12.12 Frost precautions ........................30 13 Trouble shooting ..........................31 13.1 Alarm Codes and Possible failures ....................31 14 Emergency door opening ........................33 15 Technical data...........................34 15.1 Electrical connection ........................34...
-
Page 5: Safety Information
User manual 1 Safety Information Before beginning the installation and use of this appliance, carefully read the supplied instructions. The manufacturer is not responsible for any injuries or damage that are the result of incorrect installation or usage. Always keep the in- structions in a safe and accessible location for future reference. -
Page 6: Installation
User manual 1.2 Installation • This appliance is for household and commercial use. • Follow the installation instructions supplied with the appliance. • Remove all the packaging and the transit bolts. • Keep the transit bolts in a safe place. If the appliance is to be moved in the future they must be reattached to lock the drum to prevent an internal damage. -
Page 7: Water Connection
User manual 1.4 Water connection • Do not cause damage to the water hoses. • The appliance is to be connected to the water mains using the new supplied hose-sets. Old hose sets must not be reused. • Before connection to new pipes, pipes not used for a long time, where repair work has been carried out or new devices fitted (water meters, etc.), let the water flow until it is clean and clear. -
Page 8: Service
User manual 1.8 Service • To repair the appliance, contact the Authorized Service Centre. • Only authorized spare parts, accessories and consumables shall be used. • Please note that self-repair or non-professional repair can have safety consequences and might void the guarantee. •... -
Page 9: Warranty Terms And Exclusions
Warranty will be applicable where the customer has used only genuine spare parts and has performed maintenance in accordance with Electrolux Professional user and maintenance documentation made available in paper or elec- tronic format. Electrolux Professional strongly recommends using Electrolux Professional approved cleaning, rinse and descaling agents to obtain optimal results and maintain product efficiency over time. -
Page 10: Product Description
User manual 3 Product description fig.X02928 Worktop Detergent dispenser Control panel Door handle Internal light Rating plate Drain pump filter and emergency door opening Feet for levelling the appliance The rating plate reports the model name (A), product number (B), electrical ratings (C) and serial number (D). Mod. -
Page 11: Accessories
User manual 4 Accessories fig.X02930 Spanner To remove the transit bolts. Plastic hose guide To connect the drain hose on the edge of a sink. Plastic caps To close the holes on the rear side of the cabinet after the removal of the transit bolts. Inlet hoses To connect the appliance to the cold and hot water tap: blue cap hose for cold water and red cap hose for hot water. -
Page 12: Stacking Kit
User manual 4.1 Stacking kit It is available from your authorized vendor. Stacking kit can be used only with the tumble dryers specified in the leaflet. See the leaflet attached. Read carefully the instructions supplied with the accessory. fig.X02238 4.2 Pedestal with the drawer It is available from your authorized vendor. -
Page 13: External Detergent Dispenser
User manual 4.4 External detergent dispenser It is available from your authorized vendor. The liquid detergent can be loaded automatically from an external dispenser. Read carefully the instructions supplied with the accessory. fig.X02932 4.5 The inlet hoses Nur für Deutschland Stellen Sie gemäß der Deutschen Trinkwasserverordnung sicher, dass Sie beim Anschluss des Wasserzulaufschlauches eine Sicherheitsvorrichtung anbringen (gemäß... - Page 14 User manual The appliance has two connections for the inlet hoses on the back side, one for the hot water and the other for the cold water. 1. Connect the COLD water inlet hose to the appropriate connection (A) on the back of the appliance. 2.
-
Page 15: Control Panel
User manual 5 Control panel fig.X02986 Auto Off button Program knob Display Start/Pause button Delay start button No softener button Spin time button Extra rinse button Pre wash button Sluice button... -
Page 16: Display
User manual 5.1 Display fig.X02935 Symbol on the display Symbol description The child safety lock is activated. The child safety lock is deactivated. Extra rinse symbol. is the symbol indicating the rinse phase and “ + “ lights up when the Extra rinse is selected. -
Page 17: Before First Use
User manual 6 Before first use 1. Make sure that all transit bolts are removed. 2. Make sure that the electrical and water connection are available. 3. Put 2 liters of water in the detergent compartment for washing phase. This activates the drain system. 4. -
Page 18: Programs
User manual 7 Programs The following table shows the available programs and a short description of those: Program Maximum load Reference spin Spin Time Description speed Temperature range Eco 40-60 8.0 kg 1400 rpm 540 – 5 seconds White cotton and fast-coloured cotton. Normally soiled items. -
Page 19: Options
User manual 8 Options 8.1 Sluice Press this button to add a pre rinse phase without detergent before washing. The display shows the related indicator 8.2 Pre wash With this option you can add a prewash phase to a program. Use this option for heavy soil. -
Page 20: Settings
User manual 9 Settings 9.1 Acoustic signals The acoustic signals operate when: • You activate the appliance. • You select a program. • You deactivate the appliance. • You press the buttons. • The program is completed. • The appliance has a malfunction. To deactivate/activate the acoustic signals, press at the same time for 6 seconds. -
Page 21: Daily Use
User manual 10 Daily use Warning Please refer to the “Safety information” sections. 10.1 Loading the laundry 1. Pull the handle to open the door. 2. Shake the items before you put them in the appliance. 3. Put the laundry in the drum, one item at a time. Make sure not to put too much laundry in the drum. 4. -
Page 22: Using Detergent And Additives
User manual 10.3 Using detergent and additives 1. Measure out the detergent and the fabric conditioner. 2. Put the detergent and the fabric conditioner into the compartments. 3. Carefully close the detergent dispenser. fig.X03523 10.4 Detergent compartments Caution Use only specified detergents for washer extractors. Always obey the instructions that you find on the packaging of the detergent products. -
Page 23: Setting A Program
User manual 10.7 Setting a program 1. Turn the program knob and set the program: • The related program indicator comes on. A tune sounds (if it is activated). • The indicator of Start/Pause button flashes. • The display shows the program duration and the indicators of the program phases. 2. -
Page 24: Cancelling A Running Program
User manual 10.12Cancelling a running program 1. Press the button for some seconds to cancel the program and to deactivate the appliance. Warning If the appliance has already uploaded water, the door remains locked. 2. Press the same button again to activate the appliance. Now, you can set a new program. Before starting the new program the appliance could drain the water. -
Page 25: Hints And Tips
User manual 11 Hints and tips Warning Please refer to the “Safety information” sections. 11.1 The laundry load • Divide the laundry in: white, coloured, synthetics, delicates and wool. • Obey the washing instructions that are on the laundry care labels. •... -
Page 26: Detergent Type And Quantity
User manual 11.3 Detergent type and quantity The choice of detergent and use of correct quantities not only affects your wash performance, but also helps to avoid waste and protect the environment: • Use only detergents and other treatments specially made for washer extractors. First, follow these generic rules: –... -
Page 27: Care And Cleaning
User manual 12 Care and cleaning Warning Please refer to the “Safety information” sections. 12.1 Periodic cleaning schedule Periodic cleaning helps to extend the life of your appliance. After each cycle, keep the door and the detergent dispenser slightly open to get air circulation and dry the humidity inside the appliance: this will prevent mildew and odours. -
Page 28: Door Seal
User manual 12.6 Door seal Regularly examine the seal and remove all objects from the inner part. fig.X02965 12.7 Cleaning the drum Regularly examine the drum to prevent limescale and rust particles. Only use special products to remove rust par- ticles from the drum. -
Page 29: Cleaning The Drain Filter
User manual 12.9 Cleaning the drain filter Do not clean the drain filter if the water in the appliance is hot. Regularly check the drain pump filter and make sure that it is clean. Repeat the steps 2 and 3 until the water stops flowing out. 180°... -
Page 30: Frost Precautions
User manual 12.12Frost precautions If the appliance is installed in an area where the temperature can be less than 0°C, remove the remaining water from the inlet hose and the drain pump. 1. Disconnect the mains plug from the mains socket. 2. -
Page 31: Trouble Shooting
User manual 13 Trouble shooting Warning Please refer to the “Safety information” sections. 13.1 Alarm Codes and Possible failures If the appliance does not start or it stops during operation; first try to find a solution to the problem (refer to the follow- ing tables). - Page 32 User manual If the display shows other alarm codes, deactivate and activate the appliance. If the problem continues, contact the Authorized Service Centre. In case of different problem with the washer extractor check the table below for possible solutions. Problem Possible solution The program does not start •...
-
Page 33: Emergency Door Opening
User manual 14 Emergency door opening In case of power failure or appliance failure the appliance door remains locked. The program continues, when the power is restored. If the door remains locked in case of failure, it is possible to open it using the emergency unlock feature. -
Page 34: Technical Data
User manual 15 Technical data Dimension Width x Height x Total depth 59.7 cm / 84.7 cm / 64.6 cm Electrical connection Voltage 230 V Overall power 2200 W Fuse 10 A Frequency 50 Hz Level of protection against ingress of solid particles and moisture ensured by the protective cover, IPX4 except where the low voltage equipment has no protection against moisture Water supply pressure... -
Page 35: Disposal Information
User manual 16 Disposal information 16.1 Disposal of appliance at end of life Before disposing of the machine, make sure to carefully check its physical condition, and in particular any parts of the structure that can give or break during scrapping. The machine’s parts must be disposed of in a differentiated way, according to their different characteristics (e.g. - Page 36 Electrolux Professional AB 341 80 Ljungby, Sweden www.electroluxprofessional.com...
Need help?
Do you have a question about the 914535316 and is the answer not in the manual?
Questions and answers