Table of Contents
Advertisement
Quick Links
Advertisement
Table of Contents

Subscribe to Our Youtube Channel
Related Manuals for Dahua DHI-VTO3211D-P2-S2


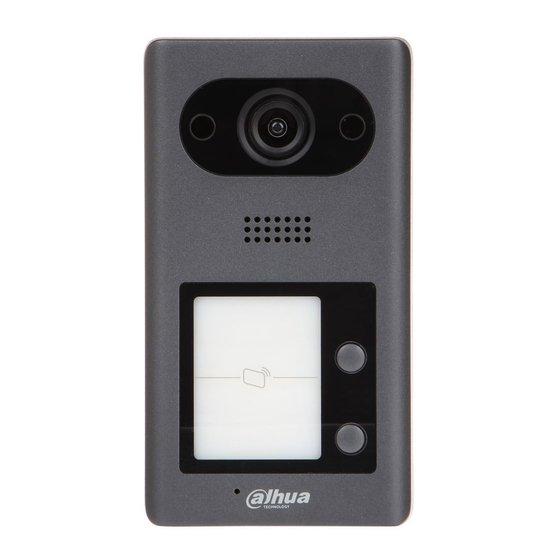
Summary of Contents for Dahua DHI-VTO3211D-P2-S2
- Page 1 Villa VTO User’s Manual V1.0.1...
-
Page 2: Foreword
Foreword General This manual introduces the installation, functions and operations of the villa door station bassline (hereinafter referred to as "the VTO"). Read carefully before using the device, and keep the manual safe for future reference. Safety Instructions The following categorized signal words with defined meaning might appear in the manual. Signal Words Meaning Indicates a high potential hazard which, if not avoided, will result in... - Page 3 There might be errors in the print or deviations in the description of the functions, operations and technical data. If there is any doubt or dispute, we reserve the right of final explanation. Upgrade the reader software or try other mainstream reader software if the manual (in PDF ...
-
Page 4: Important Safeguards And Warnings
Important Safeguards and Warnings This section introduces content covering the proper handling of the device, hazard prevention, and prevention of property damage. Read carefully before using the device, and comply with the guidelines when using it. Operation Requirements ● Check whether the power supply is correct before use. ●... -
Page 5: Table Of Contents
Table of Contents Foreword ................................I Important Safeguards and Warnings ......................III 1 Initialization ..............................1 2 Login Page ..............................2 Login ....................................... 2 Resetting Password ................................... 2 3 Home Page ..............................4 4 Local Setting ..............................5 Basic ........................................ 5 4.1.1 Device Properties &... -
Page 6: Initialization
Initialization For first-time login, you need to initialize the VTO. Power on the VTO. Go to the default IP address (192.168.1.108) of the VTO, and then press Enter. Make sure that the IP address of your PC is on the same network segment as the VTO. Device initialization Enter and confirm the password, and then click Next. -
Page 7: Login Page
Login Page Login Before login, make sure that the PC and VTO are on the same network segment. Enter the VTO IP address in the browser address bar, and then press Enter. Login interface Enter admin as username, then enter the password you set during initialization, and then click Login. - Page 8 Reset the password (2/3) Scan the QR code on the web interface to obtain the security code in your mailbox, and then enter the security code in the input box. If you did not configure email during initialization, contact the supplier or customer ...
-
Page 9: Home Page
Home Page Log in to the web page of the VTO, and then the home page is displayed. Home page Table 3-1 Home page introduction Function Description Click to change the password and your email address. Click to go to the home page. General function Click to log out, reboot the VTO or restore the VTO to... -
Page 10: Local Setting
Local Setting This chapter introduces how to configure VTO type, VTO No., video and audio, access password, system time, and security function. General operations: After configuration, click Confirm to save, and click Refresh to view the latest change. If you click Default, all the configurations in the current page would be restored to the default, ... -
Page 11: Facade Layout (Only For Vto3211D)
Parameter Description Fence station is normally used when other servers work as SIP server. Configure the number of the management centre, and you can call the Centre Call No. management centre on every VTO or VTH in the network. The default number is 888888. -
Page 12: Video & Audio
Video & Audio This section introduces how to configure the format and quality of video that captured by VTO, and the audio control settings. On the home page, select Local Setting > Video & Audio. Video & audio Configure parameters, and these configurations will take effect immediately. Table 4-2 Video parameter description Parameter Description... -
Page 13: Access Control
Parameter Description You can select from the following modes: Disabled: No back light. BLC: The camera gets clearer image of the dark areas on the target when shooting against light. BackLight Mode WDR: The system dims bright areas and compensates dark areas to ensure the clarity of all the area. -
Page 14: Local
4.3.1 Local On the home page, select Local Setting > Access Control > Local. Local Configure parameters. Table 4-3 Local access control parameter description Parameter Description Unlock Responding The time interval to unlock again after the previous unlock, and the unit Interval is second. -
Page 15: System
RS-485 System This section introduces how to configure the date format, time format, and the NTP server. On the home page, select Local Setting > System. System Configure parameters. Table 4-4 System parameter description Parameter Description Date Format You can select from Year-Month-Day, Month-Day-Year, and Day-Month-Year. Configure the time format, and you can select from 12-Hour or 24-Hour. -
Page 16: Security
Parameter Description NTP Server Enter the domain name of the NTP server. Port The port number of the NTP server. The time interval that the VTO syncs time with the NTP server, and it is 30 min Update Cycle at most. Select the day and time for the auto maintenance, and the VTO will restart Maintenance then. -
Page 17: Onvif User
Parameter Description systems to control streaming media servers. The protocol is used for establishing and controlling media sessions between end points. Outbound Service After it is enabled, service password information cannot be sent to others. Information Multicast/Broadcast If you have disabled this, VDP configure tools cannot find this device. Search Authentification There are two modes: Security Mode (Recommended) and compatible... -
Page 18: Household Setting
Household Setting This chapter is about configurations to the door stations (VTO) that work as SIP servers (see 6.2 SIP Server). You will know how to add, modify, and delete VTO, VTH, VTS, and IPC devices, and how to send messages from the SIP server to other VTO and VTH devices. -
Page 19: Modifying Vto Information
Add VTO Configure the parameters. Table 5-1 Add VTO configuration Parameter Description The VTO number you configured for the target VTO. See the details in Rec No. "Table 4-1. " Register Password Keep default value. Build No. Available only when other servers work as SIP server. Unit No. -
Page 20: Deleting Vto
Modify VTO You can modify the Rec No., Username, and Password. Click Save. 5.1.3 Deleting VTO The VTO that is in use cannot be modified or deleted. On the VTO No. Management page, click to delete VTO one by one; and click Clear to delete all the VTO. - Page 21 Room No. Management Add room numbers. Click Add. Add room numbers Configure room information. Table 5-2 Room information Parameter Description First Name Last Name Enter the information that helps to differentiate each room. Nick Name Room No. The room number you planned. Register Type Select public, and local is reserved for future use.
-
Page 22: Modifying Room Number
5.2.2 Modifying Room Number On the Room No. Management page, click Modify room number You can modify the names for the room. Click Save. 5.2.3 Issuing Access Card You can issue card to a room, and can also set the card as the main card, or set the card to the lost state. Main cards are used to issue cards for other rooms. -
Page 23: Vts Management
Enter a username, click Save, and then click Confirm Send Card at the countdown notice. Issued access card You can modify card information. Click to set it to the main card, and then the icon turns into . The main card can ... -
Page 24: Status
Add VTS Configure the parameters, and for the detailed description. Table 5-3 Add VTS configuration Parameter Description VTS No. The VTS number you configured for the target VTS. Register Password Keep default value. IP Address The IP address of the target VTS. Click Save, and then the added VTS is displayed. -
Page 25: Network Setting
Network Setting This chapter introduces how to configure IP address, SIP server, DDNS, and UPnP. Basic 6.1.1 TCP/IP You can modify the IP address and port number of the VTO. Select Network Setting > Basic. TCP/IP and port Enter the network parameters and port number, and then click Save. The VTO will restart, and you need to modify the IP address of your PC to the same network segment as the VTO to log in again. -
Page 26: Https
6.1.2.2 Downloading Root Certificate Click Download Root Certificate. Select a path to save the certificate on the Save File dialog box. Double-click Root Certificate that you have downloaded to install the certificate. Install the certificate by following the onscreen instructions. 6.1.3 HTTPS Select the Enable check box at HTTPS Port, and then the VTO will reboot. -
Page 27: Firewall
SIP server Select the server type you need. If the VTO you are visiting works as SIP server Select the Enable check box at SIP Server, and then click Save. The VTO will reboot, and after rebooting, you can then add VTO and VTH devices to this VTO. - Page 28 Firewall...
-
Page 29: Log Management
Log Management You can view call history, alarm records, unlock records and system logs. Call You can view call logs, including call types, room numbers, start time, talk time, and end state. Call Click Export Data to export the records to your PC. Alarm You can view and export alarm logs. -
Page 30: Log
Unlock Click Export Data to export the records to your PC. You can search, view, and view logs of events in specific periods. -
Page 31: Cybersecurity Recommendations
Cybersecurity Recommendations Mandatory actions to be taken for basic device network security: Use Strong Passwords Please refer to the following suggestions to set passwords: The length should not be less than 8 characters; Include at least two types of characters; character types include upper and lower case ... - Page 32 Assign Accounts and Privileges Reasonably According to business and management requirements, reasonably add users and assign a minimum set of permissions to them. Disable Unnecessary Services and Choose Secure Modes If not needed, we recommend turning off some services such as SNMP, SMTP, UPnP, etc., to reduce risks.
Need help?
Do you have a question about the DHI-VTO3211D-P2-S2 and is the answer not in the manual?
Questions and answers