Table of Contents
Advertisement
Quick Links
Advertisement
Table of Contents

Subscribe to Our Youtube Channel
Related Manuals for Morningstar ProStar MPPT Series


Summary of Contents for Morningstar ProStar MPPT Series
- Page 1 ProStar MPPT Solar Charging System Controller Installation, Operation and Maintenance Manual For the most recent manual revision, see the version at: www.morningstarcorp.com www.morningstarcorp.com MODELS PS-MPPT-25 PS-MPPT-25M PS-MPPT-40 MAXIMUM POWER POINT TRACKING PS-MPPT-40M...
-
Page 2: Table Of Contents
DIMENSIONS [inches (centimeters)] TABLE OF CONTENTS 7.88 ( 20.0 ) 1.0 Important Safety Instructions ......1 6.69 ( 17.0 ) 2.0 General Information ..........10 Overview ...............10 Regulatory Information........11 7.62 Versions and Ratings..........13 4.92 ( 19.4 ) 6.69 ( 12.5 ) ( 17.0 ) Features ..............14 Optional Accessories ..........16... - Page 3 4.7.5 Lighting Control / Programming Overview....56 IMPORTANT SAFETY INSTRUCTIONS 4.7.6 Lighting Programming Using Meter Display..... 57 4.7.7 Low Temperature Foldback........57 SAVE THESE INSTRUCTIONS. Inspection and Maintenance........58 This manual contains important safety, installation, operating 5.0 Troubleshooting........... and maintenance instructions for the ProStar MPPT solar LED Fault Indications..........
- Page 4 Safety Information AVERTISSEMENT: Risque De Choc Électrique. NON ALIMENTATION OU AUX BORNES • Read all of the instructions and cautions in the manual D'ACCESSOIRES SONT ISOLÉS ÉLECTRIQUEMENT DE before beginning installation. L'ENTRÉE DE C.C ET DOIT ÊTRE ALIMENTÉS À UNE TENSION •...
- Page 5 • The battery bank must be comprised of batteries of same permanent, reliable earth ground must be established type, make, and age. with connection to the ProStar MPPT ground terminal. • UL/IEC 62109 certified for use in negative ground or The grounding conductor must be secured against any floating systems only.
- Page 6 • Ce contrôleur de charge ne doit être connecté qu’à WARNING: Risk of Explosion. Proper disposal of batteries is required. Do not des circuits en courant continu. Ces connexions CC sont dispose of batteries in fire. Refer to local identifiées par le symbole ci-dessous: regulations or codes for requirements.
- Page 7 • Determine if battery is inadvertently grounded. If so, • Débrancher la source de charge avant de brancher ou remove the source of contact with ground. Contact with dis-reliant les bornes de la batterie. any part of a grounded battery can result in electrical •...
-
Page 8: General Information
The controller also features eight (8) Changes or modifications not expressly approved adjustable settings switches, several communication ports, by Morningstar for compliance could void the user’s and terminals for remote battery temperature and voltage authority to operate the equipment. -
Page 9: Versions And Ratings
• Re-orient or relocate the receiving antenna. 2.3 Versions and Ratings • Increase the separation between the equipment and receiver. • Connect the equipment into an outlet on a circuit PS-MPPT-25 different from that to which the receiver is connected. •... -
Page 10: Features
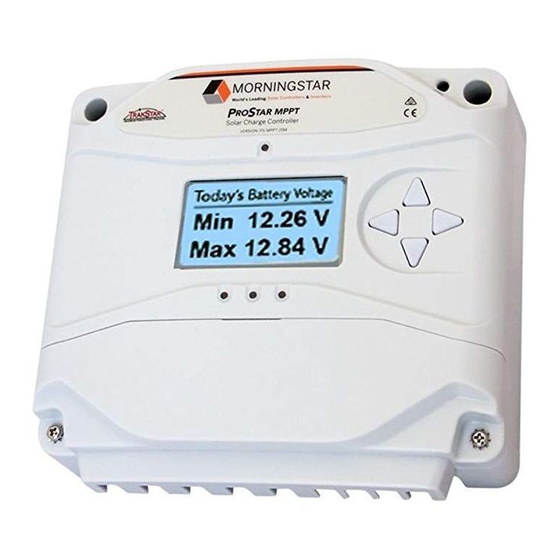
13 - Battery Sense Terminals Connection points for battery voltage sensing wires 14 - Remote Temperature Sensor Terminals (RTS) Connection points for a Morningstar RTS to remotely monitor battery Figure 2-1. PS-MPPT Features temperature 15 - Wire Box for ProStar-MPPT... -
Page 11: Optional Accessories
A-B computer cable, and an RJ-11 plug to connect with a read and large buttons make navigating the meter menus Morningstar controller's MeterBus port, for monitoring and easy. Additionally, a status LED and three (3) battery SOC programming using MSView PC software. -
Page 12: Installation
• Do not install in locations where water can enter the INSTALLATION INSTRUCTIONS controller. • Loose power connections and /or corroded wires 3.1 General Installation Notes may result in resistive connections that melt wire • Read through the entire installation section first before insulation, burn surrounding materials, or even cause beginning installation. -
Page 13: Configuration
conductor free out of the connection screw, and WARNING: Minimum over-current protection possible contact with the metal enclosure. device interrupt ratings must be 2000A for 12V systems, and 4000A for 24V systems. • (3) ferrite chokes are included for individual installation around an RTS cable, a Meterbus cable and a heat- AVERTISSEMENT: Protection contre les sink ground wire, if used. -
Page 14: Mounting
Switch 7: Battery Equalization system voltage Settings Switches are set to Auto-detect, battery voltage over 15.5V will be detected as a 24V nominal battery, and the unit will charge accordingly. The 12/24V auto selection is Mode Switch 7 only done at start-up, and the detected system voltage will never Manual Equalization change during operation. -
Page 15: Wiring
3.4 Wiring 6 in (15 cm) S - S+ S+ S+ S+ 2 in (5 cm) 6 in (15 cm) To battery (+) and (-) terminals for voltage sensing Figure 3-2. Proper Clearances for Passive Cooling To load (+) To battery (+) To battery for and (-) and (-) - Page 16 STEP 1: Check Controller Limitations Generally accepted wiring practice is to limit voltage drops between the charger and the battery to 2%. Even Verify that the highest temperature compensated solar array properly sized wiring with 2% drop can result in a 0.3 volt open-circuit voltage (Voc), and load current do not exceed drop for 14.4V charging.
- Page 17 Connecting the voltage sense wires to the RTS terminal will Tighten the connector screws to 5 in-lb (0.56 Nm) of torque. cause an alarm. Separate installation instructions are provided inside the RTS bag. NOTE: If the battery input voltage is greater than 5 volts WARNING: Equipment Damage different than the Battery Sense, due to voltage drops or Never place the temperature sensor inside a battery cell.
- Page 18 NOTE: AVERTISSEMENT : Risque d’incendie Depending on the country of installation, conductors NE LIEZ PAS le côté négatif du système à la mise à identified by the color green, or a combination la terre au niveau du contrôleur. Selon les exigences of green/yellow, shall only be used for earthing par le code local ou les références, le côté...
- Page 19 If load control is required, contact Morningstar (disconnected) before installing the system wires. Tech Support for assistance.
- Page 20 Turn the loads off, and connect the load wires to the load If the load does not turn on, it could be for various reasons: terminals. DO NOT CLOSE THE BREAKER AT THIS TIME. • the ProStar MPPT is in LVD (red LED on) •...
-
Page 21: Operation
A 12 volt battery bank can be charged with a 12, 24, 36 or 48V nominal off-grid solar array. Certain The ProStar MPPT utilizes Morningstar’s TrakStar Maxi- grid-tie solar modules may also be used as long as the... -
Page 22: Battery Charging Information
4.2 Battery Charging The battery must remain in the Absorption charging stage for a cumulative 150-180 minutes, depending on battery type, before transition to the Float stage will occur. 4-Stage Charging However, Absorption time will be extended by 30 minutes The ProStar MPPT has a 4-stage battery charging algorithm if the battery discharges below 12.50 volts (12V system) the for rapid, efficient, and safe battery charging. - Page 23 Equalization Stage the battery voltage above the standard absorption voltage so that the electrolyte gases. The green SOC LED will blink rapidly two (2) times per second during equalization WARNING: Risk of Explosion charging. The duration of the equalize charge is determined Equalizing vented batteries produces explosive gases.
- Page 24 Only a long controlled overcharge, or equalization, at a charging (12V battery). Many VRLA batteries, including higher voltage can reverse the hardening of sulfate crystals. AGM and gel, have charging requirements up to 14.4V (12V battery). Depending on the battery manufacturer’s When to Equalize? recommendation, the “boost”...
- Page 25 If battery voltage discharges below 12.50 volts (25.00 Shared Settings Value Units volts @ 24V) the previous night, Absorption charging will Absorption Extension Voltage 12.50 Volts be extended on the next charge cycle as shown in figure Absorption Extension Time Absorption Time + 30 minutes 4-3 above.
- Page 26 Float Cancel Voltage Equalize Time-out Bulk Equalize Float Bulk Absorption Equalize V Absorp. V Float cancelled this charge cycle Equalize timeout 12.0 V Float Cancel Voltage time (hrs) time (hrs) 1:00 2:00 3:00 4:00 5:00 6:00 1:00 2:00 3:00 4:00 5:00 6:00 Figure 4.5.
-
Page 27: Load Control Information
25 or 30A, depending on the ProStar MPPT model in use. la batterie. Si le régulateur de charge est nécessaire, contacter le Equal current sharing cannot be assured and an over-load Support technique de Morningstar d’assistance. condition will likely occur on one or more controllers. Current Compensation: Exercise caution when connecting loads with specific All LVD and LVR set-points are current compensated. -
Page 28: Led Indications
4.4 LED Indications NOTES: 1) R flashing is generally a user addressable fault / error KEY: 2) R charging status LED ON with heartbeat blink OFF G = green G - Y - R = flashing sequencially every 5 secs is a critical fault that generally requires service. Y = yellow G / Y = flashing together... -
Page 29: Alarms
The heatsink temperature sensor is damaged. Return the solar array will not operate at peak power. The solar array controller to an authorized Morningstar dealer for service. should be less than the ProStar MPPT nominal max. input Battery Sense Out of Range / Disconnected (only alarm power rating for optimal performance. -
Page 30: Custom Settings
4.7 Custom Settings 4.7.2 Programming in MSView Beyond the preset DIP switch options, the Prostar MPPT's 4.7.1 Programming with the Meter Display charging profile and all other settings are customizable using MSView PC software available at: The ProStar MPPT is available in metered and non-metered versions. -
Page 31: Adjusting The Meter Display
a valid direction in the map. The current location is With DIP 1 OFF (down), all lighting control functions are indicated on the display with a column heading, and a bold disabled. descriptor. Using either MSView or the meter display, four channels are available for setting timers that can work separately, or 4.7.3.2 Adjusting the Meter Display in combination. -
Page 32: Inspection And Maintenance
Advanced Custom Settings options are available with Schedule Maintenance Items ProStar MPPT built-in meter models (PS-MPPT-25M and PS-MPPT-40M). Re-tighten power terminal The High Limit defines the lowest temperature at which the 2 weeks after installation connections to specified torque values. controller will deliver 100% of the controller’s rated output charging current. -
Page 33: Troubleshooting
disconnected. A small overload could take a few minutes to TROUBLESHOOTING disconnect. The ProStar MPPT will attempt to reconnect the load two (2) times. Each attempt is approximately 10 WARNING: RISK OF ELECTRICAL SHOCK. seconds apart. If the overload remains after two (2) NO POWER OR ACCESSORY TERMINALS ARE ELEC- attempts, the load will remain disconnected until power is TRICALLY ISOLATED FROM DC INPUT, AND MAY BE ENER-... - Page 34 A metered model, an RM-1 meter, or MSView PC software, than the controller can regulate, and it shuts off to protect can be used to determine if the RTS is working properly. the circuitry. The controller will automatically re-start in 10 seconds.
-
Page 35: Battery Charging And Performance Issues
No LED indications, controller does not appear to be Verify that nothing has been mis-wired. If not, the error is powered likely critical. Contact an authorized Morningstar dealer for Solution: support. With a multi-meter, check the voltage at the battery terminals on the ProStar MPPT. -
Page 36: Warranty And Policies
Warranty on replaced units, or field-replaced components, will be limited only to the duration of the original product coverage. MORNINGSTAR TECHNICAL SUPPORT POLICIES Morningstar will, at its option, repair or replace any such defective units. CLAIM PROCEDURE: Morningstar’s Technical Support Group is dedicated to Before requesting warranty service, check the Operator’s Manual to... - Page 37 - are available to assist in these areas. warranty issues quickly. Morningstar can help refer customers to a nearby authorized 3. If supplier is unable to address the issue, please contact distributor, dealer, or installer if assistance is required in Morningstar by e-mail (support@morningstarcorp.com) with:...
-
Page 38: Technical Specifications
Battery Charging Set-points (@ 25°C) TECHNICAL SPECIFICATIONS [multiply voltages by (2) for 24 volt systems] PS-MPPT-25 PS-MPPT-40 Absorp. Float Equalize Absorp. Equalize Equalize Equalize PS-MPPT-25M PS-MPPT-40M Switch Battery Stage Stage Stage Time Time Timeout Interval Settings Type Electrical: (volts) (volts) (volts) (mins) (mins) -
Page 39: Appendix A - Efficiency
APPENDIX A - Efficiency Graphs Lighting Timer Setting Dusk-Dawn (default) Lighting Test Timer 10 minutes Data & Communications: Communication Port MeterBus Comm. Protocols Morningstar MeterBus; MODBUS Datalogging 6-8 months, daily records PC Software MSView Digital Meter: Resolution 128 x 64... -
Page 40: Appendix B - De-Rating Graphs
APPENDIX B - De-rating Graphs Battery Current vs. Array Voltage PS-MPPT 40A Charging Current vs. Array Voltage Charging Current (Amps) Array Voltage (Volts) Battery Current vs. Array Voltage PS-MPPT 40 (mounted vertically on wall) Charging Current vs. Ambient Temp. PS-40 31 VMP 12 &... -
Page 41: Appendix C - Wire Sizing Charts
APPENDIX C - Wire Sizing Charts PS-MPPT 25A (mounted vertically on wall) 2% Voltage Drop Charts for 75°C Stranded Copper Wire Charging Current vs. Ambient Temp. 1-Way Wire Distance (feet), 12 Volt System Wire Size (AWG) PS-25 31 VMP 2/0 * 33.6 38.4 44.8... - Page 42 *Wires sizes larger than 2 AWG (35 mm ) must be terminated at a splicer 2% Voltage Drop Charts for 75°C Solid Copper Wire block located outside of the ProStar MPPT wiring box. Use 2 AWG (35 mm ) or smaller wire to connect to the ProStar MPPT to the splicer 1-Way Wire Distance (feet), 12 Volt System block.
- Page 43 2% Voltage Drop Charts for 90°C Stranded Copper Wire 2% Voltage Drop Charts for 90°C Solid Copper Wire 1-Way Wire Distance (feet), 12 Volt System 1-Way Wire Distance (feet), 12 Volt System Wire Size Wire Size (AWG) (AWG) 2/0 * 33.6 38.4 44.8...
- Page 44 (buried) - Per 2011 NEC ProStar MPPT , MeterBus are trademarks of Morningstar Corporation. MODBUS and MODBUS TCP/IP are trademarks of Modbus IDA. ©2022 Morningstar Corporation. All rights reserved. MS-001537 v3.5 Appendices Certifications...
- Page 45 EDITION, REVISION THROUGH AND INCLUDING SEP 07, 2016 CSA C22.2#107.1-01 POWER CONVERSION EQUIPMENT UL121201/CSA C22.2 #213 Non-incendive Electrical Morningstar Corporation Equipment for Use in Class I, Division 2 Hazardous 8 Pheasant Run, Newtown, PA 18940 USA (Classified) Locations, Groups A,B,C,D, Temperature Group: T4, T5 (see product manual environmental specifications) 10611 Iron Bridge Road, Ste.
Need help?
Do you have a question about the ProStar MPPT Series and is the answer not in the manual?
Questions and answers