Morningstar Professional ProStar PS-15 Installation, Operation And Maintenance Manual
Solar charging system controller
Hide thumbs
Also See for Professional ProStar PS-15:
- Installation, operation and maintenance manual (25 pages) ,
- Operator's manual (17 pages) ,
- Operator's manual (17 pages)

Related Manuals for Morningstar Professional ProStar PS-15


Summary of Contents for Morningstar Professional ProStar PS-15
- Page 1 ProStar Solar Charging System Controller Installation, Operation, and Maintenance Manual For the most recent manual revision, see the version at: www.morningstarcorp.com www.morningstarcorp.com MODELS PS-15 PS-30 PS-15M PS-30M...
-
Page 2: Table Of Contents
DIMENSIONS [inches (millimeters)] TABLE OF CONTENTS 1.0 Important Safety Instructions ......2.0 General Information ........2.1 Overview ............2.2 Regulatory Information ....... 2.3 Features ............16 2.4 Optional Accessories ........18 3.0 Installation ............. 3.1 General Installation Notes ......3.2 Configuration........... 23 3.3 Mounting.......... - Page 3 TABLE OF CONTENTS (Cont.) 1.0 IMPORTANT SAFETY INSTRUCTIONS 4.5.3 Meter Display Operation........61 SAVE THESE INSTRUCTIONS. 4.5.3.1 Directional Key Use and Operation / Navigating the Meter Map......61 This manual contains important safety, installation, 4.5.3.2 Adjusting the Meter Display......62 operating and maintenance instructions for the ProStar solar controller.
-
Page 4: Important Safety Instructions
des consignes importantes de sécurité. WARNING: THE COMMUNICATIONS PORT IS CONSIDERED TO BE DVC B. AN Indique une condition AVERTISSEMENT : EXTERNAL ISOLATOR IS REQUIRED IF IT IS potentiellement dangereuse. Faites preuve TO BE CONNECTED TO A DVC A CIRCUIT. d’une prudence extrême lors de la réalisation •... - Page 5 UN DVC UN CIRCUIT. floating systems only. • External solaire et la batterie se déconnecte sont • Do not smoke near the battery bank. nécessaires • Power connections must remain tight to avoid ex- • Déconnectez toutes les sources d’alimentation du cessive heating from a loose connection.
- Page 6 technician in accordance with the electrical regulations batteries. • Évitez le port de bijoux pendant l’installation. of the country of installation. • Le groupe de batteries doit être constitué de A means of disconnecting all power supply poles must batteries du même type, fabricant et âge. be provided.
- Page 7 pays d'installation électriques. VERTISSEMENT : Risque d'Explosion. Au rebut des piles est nécessaire. Ne Un moyen de déconnexion de tous les poteaux pas jeter les piles dans le feu. Se référer d'alimentation doit être fourni. Ceux-ci se déconnecte aux réglementations locales ou des codes pour les doit être intégrée dans le câblage fixe.
- Page 8 • Use tools with insulated handles and avoid placing • Recycle the battery when it is replaced. tools or metal objects on top of batteries. • Disconnect charging source prior to connecting or disconnecting battery terminals. • Entretien des batteries devrait être effectué ou su- •...
-
Page 9: General Information
• Lisez attentivement les instructions du fabricant de GENERAL INFORMATION la batterie avant d'installer / connexion à ou retrait des batteries du ProStar. 2.1 Overview • Veillez à ne pas court-circuiter les câbles connectés à la batterie. Thank you for choosing the ProStar solar charge •... -
Page 10: Regulatory Information
Changes or modifications not expressly connected. approved by Morningstar, for compliance, • Consult the dealer, or an experienced radio/TV could void the user’s authority to operate technician for help. -
Page 11: Features
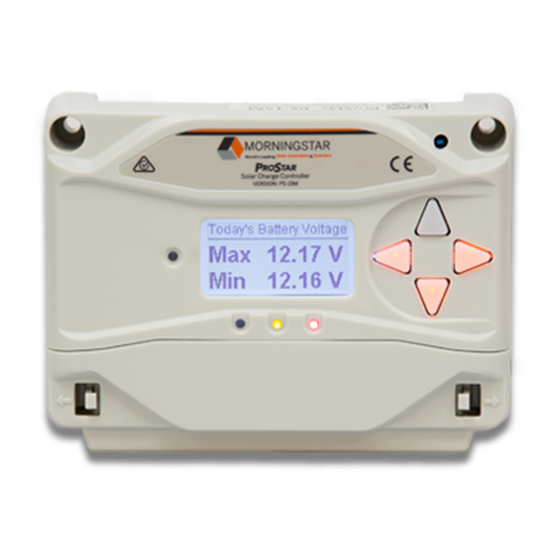
1 - Charging Status / Error LED 2.3 Features Shows charging current and error condition statuses. The features of the ProStar are shown in Figures 2-1, 2 - Heatsink 2.2 and 2.3 below. An explanation of each feature Aluminum heatsink (underneath) to dissipate follows. -
Page 12: Optional Accessories
Connection points for battery voltage sensing wires RM-1 Meter 13 - Remote Temperature Sensor Terminals (RTS) Connection points for a Morningstar RTS to remotely A remote meter for monitoring system variables, for use through the ProStar Meterbus port. monitor battery temperature... - Page 13 USB A-B computer cable, and an RJ-11 cause fire. Ensure tight connections and use cable plug to connect with a Morningstar controller’s clamps to secure cables and prevent them from MeterBus port, for monitoring and programming swaying in mobile applications.
-
Page 14: Installation
• The ProStar prevents reverse current leakage at WARNING: All breakers must be properly night, so a blocking diode is not required in the rated for wire ampacity, which may require less system. than the maximum breaker sizes referenced above. •... - Page 15 Switch 1: Load / Lighting Switches 4, 5, 6: Battery Type Selection Preset ProStar battery charging options are shown in table 3-1 below. All voltage settings listed are for Mode Switch 1 nominal 12 Volt batteries. Multiply the voltage settings Normal by two (2) for 24 Volt systems.
-
Page 16: Mounting
Switch 8: Current Switching Mode Switch 8 PWM switching 6 in / 150 mm Slow switching The default (PWM) switching setting (OFF / down) operates at 300Hz. If load or system noise is an issue, DIP 8 can be set (ON-up) for slow switching at 1Hz. -
Page 17: Wiring
3.4 Wiring STEP 1: Check Controller Limitations Verify that the highest temperature compensated solar array open-circuit voltage (Voc), and load current do not exceed the ratings of the ProStar version being installed. Multiple controllers can be installed in parallel on the same battery bank to achieve greater total charging current. - Page 18 Battery voltage Sense connection enables the ProStar terminals. A 2-position terminal (see Figure 3.3) is to measure the battery terminal voltage precisely used for the battery sense connection. A twisted pair with small gauge wires that carry very little current, cable is recommended but not required.
- Page 19 STEP 3: Remote Temperature Sensor Connect the RTS to the 2-position terminal located to the left of the (+) Load terminal (see Figure 3.3). WARNING: Risk of Fire. The RTS is supplied with 33 ft (10 m) of 22 AWG (0.34 If no Remote Temperature Sensor (RTS) is mm2) cable.
- Page 20 STEP 4: Grounding STEP 5: Battery Connections NOTE: Depending on the country of installation, conductors identified by the color green, or a combination of green /yellow, shall only be used as earthing conductors. For safety, and effective lightning protection, it is recommended, and may be locally required, that the negative conductor of the charging system be properly grounded.
- Page 21 STEP 6: Solar Connections WARNING: Shock Hazard The solar PV array can produce open- NOTE: For design purposes, array circuit voltages of up to 60 Vdc when should be nominal 12V for 12V battery, and nominal 24V for 24V in sunlight, and this DC voltage is battery.
- Page 22 If load control is required, STEP 8: Power-Up and Verify System Operation contact Morningstar Tech Support for assistance. Close the battery disconnect to start the processor, and activate the controller’s protections. Watch the ATTENTION : Dommages matériels charging status, and then the three battery state- Ne connectez aucun onduleur CA à...
-
Page 23: Operation
OPERATION STEP 9: To Power Down 4.1 Battery Charging Information CAUTION: Risk of Damage ONLY disconnect the battery from the ProStar AFTER the solar input has been disconnected. 4-Stage Charging Damage to the controller may result if the battery is The ProStar has a 4-stage battery charging algorithm removed while the ProStar is charging. - Page 24 The green SOC LED will blink once every two (2) Absorption Stage seconds during Float charging. When the battery has recharged to the Absorption Once in Float stage, loads can continue to draw voltage set-point, constant voltage regulation is power from the battery. In the event that the system used to maintain battery voltage at the Absorption load(s) exceed the solar charge current, the controller set-point.
- Page 25 des plaques. Une égalisation trop élevée ou trop AVERTISSEMENT: Risque d'explosion longue peut être dommageable. Passez en revue les L'égalisation des batteries ventilées produit conditions requises pour la batterie particulière utili- des gaz explosifs. Le parc de batteries doit être sée dans votre système.
- Page 26 Why Equalize? five to ten deep discharges. Some batteries, such as the L-16 group, will need more frequent equaliza- Routine equalization cycles are often vital to the tions. performance and life of a battery - particularly in a solar system. During battery discharge, sulfuric acid The difference between the highest cell and is consumed and soft lead sulfate crystals form on the lowest cell in a battery can also indicate the need for...
- Page 27 settings with an Equalization cycles. These are These standard charging settings are suitable for minimal "boost” cycles to level individual cells. This is lead-acid batteries ranging from sealed (gel, AGM, not an equalization, and will not vent gas from sealed maintenance-free) to Flooded and L-16 cells.
- Page 28 Absorption Extension Float Time-out Bulk Absorption Absorption Float Bulk Extended Absorption Bulk Absorption Float Float V 60 mins. below Float Voltage 12.50 V time (hrs) Absorption Extension Voltage 1:00 2:00 3:00 4:00 5:00 6:00 time (hrs) 1:00 2:00 3:00 4:00 5:00 6:00 Figure 4-3.
- Page 29 However, because the Float exit timer is cumulative, Equalize Time-out multiple momentary load events that pull the battery voltage below Float voltage for a combined sixty Bulk Equalize Float minute duration will also force an exit from Float stage. Equalize V Float Cancel voltage Absorp.
-
Page 30: Load Control Information
4.2 Load Control Information LVD Warning: As the battery discharges the Battery Status LEDs will The primary purpose of the load control function transition from green to yellow and then from yellow is to disconnect system loads when the battery has to flashing red. -
Page 31: Led Indications
4.3 LED Indications Color Indication Operating State None Off (with heartbeat¹) Night KEY: On Solid Green Charging G = green G - Y - R = flashing sequentially ( with heartbeat² ) Y = yellow G / Y = flashing together Flashing Error R = red... -
Page 32: Push-Button Use In Non-Metered Versions
• Regardless of the DIP 7 setting, press and hold Condition Indication the push-button for 5 seconds to initiate an Absorption G flash - every sec Equalization (EQ). G flash - every 2 secs Float Lighting Control Mode (DIP 1 ON) Equalize G flash - 2 / sec •... -
Page 33: Programming In Msview
• Custom programming, including lighting programs, For metered models, see the included complete directly from the unit. meter map insert, also available in the ProStar support Display Screens and Programming Models: documents at: • Extensive settings adjustment and information as PS-15M shown partially in Figure 4-6 below. -
Page 34: Adjusting The Meter Display
display with a column heading, and a bold descriptor. lighting control functions are disabled. Using either MSView or the meter display, four 4.5.3.2 Adjusting the Meter Display channels are available for setting timers that can work The display setting options, as seen in Figure 4-6, are separately, or in combination. -
Page 35: Low Temperature Foldback
4.6 Inspection and Maintenance both timers’ settings match (AND); for either timers’ settings (OR). Table 4-6 below, lists the recommended maintenance 4.5.7 Low Temperature Foldback schedule to keep your ProStar performing optimally. The ProStar has a Low Temperature Foldback option Schedule Maintenance Items which can be used to protect lithium batteries from... -
Page 36: Troubleshooting
Use of the RTS is recommended for proper battery charging. Heatsink Temperature Sensor Open or Shorted The heatsink temperature sensor is damaged. Return the controller to an authorized Morningstar dealer for service. Battery Sense Out of Range / Disconnected (only alarm with LED indications) Battery status LEDs: R/Y - G/Y sequencing. -
Page 37: Led Fault Indications
(10) seconds apart. If The controller was not factory calibrated. Return the the overload remains after two (2) attempts, the load controller to an authorized Morningstar dealer for will remain disconnected until power is removed and service. - Page 38 Remote Temperature Sensor (RTS) Recovery occurs at HVD re-connect threshold, if programmed, and the fault will clear automatically. Error status LED: Flashing red. Battery status LEDs: R/Y - G/Y sequencing. A bad RTS connection or a High Heatsink Temperature severed RTS wire has disconnected the temperature Error status LED: Flashing red.
-
Page 39: Battery Charging And Performance Issues
Error status LED: Solid red. Battery status LEDs: R-Y-G sequencing. The processor supply voltage is not Custom Settings Edit R-Y-G sequencing correct. Contact your Morningstar dealer for service. DIP Switch Change R-Y-G sequencing SOLID CHARGING STATUS LED with SELF-TEST (R-Y-G) SOC FAULTS 5.3 Battery Charging and Performance Issues... -
Page 40: Warranty And Policies
Warranty on charging will begin. replaced units, or field-replaced components, will be limited only to the duration of the original product coverage. Morningstar will, at its option, repair or replace any such Problem: defective units. Controller makes buzzing and humming noises. - Page 41 - are available to assist in these areas. PURPOSE. No Morningstar distributor, agent or employee Morningstar can help refer customers to a nearby authorized is authorized to make any modification or extension to this distributor, dealer, or installer if assistance is required in warranty.
-
Page 42: Technical Specifications
4-Stage Charging: Bulk, Absorption, Float, Equalize considered for the original or future cases. Temperature compensation NOTE: An RMA number must be issued by Morningstar Coefficient: -30mV / ºC / 12 Volt prior to return of any unit(s) under this warranty. Please Temperature compensated do not return units without an RMA or case number. - Page 43 3 - Sealed* 14.30 13.50 14.60 Communication Port MeterBus (RJ-11) off-on-on 4- AGM/Flooded 14.40 13.50 15.10 Comm. Protocols Morningstar MeterBus; on-off-off 5 - Flooded 14.60 13.50 15.30 MODBUS on-off-on 6 - Flooded 14.70 13.50 15.40 Data-logging 6-8 months, daily records on-on-off 7 - L-16 15.40...
-
Page 44: Appendix A - Derating
APPENDIX A - DERATING Protections Thermal Derate Power-up against any active faults Reverse Polarity - battery and array Solar Short-circuit Solar Over-current High Solar Voltage Disconnect High Heatsink Temperature - Current de-rating High Heatsink Temperature - Load disconnect Load Short-circuit Load Over-current Ambient Temperature (◦C) Heatsink Temperature Limit... -
Page 45: Appendix B - Wire Sizing
ProStar and MeterBus are trademarks of Morningstar Corporation MODBUS and MODBUS TCP/IP are trademarks of Modbus IDA. www.modbus-ida.org © 2020 Morningstar Corporation. All rights reserved. MS-001533 v3.3 ° 3% voltage drop, Annealed copper wire at 20 Technical Specifications Certifications...
Need help?
Do you have a question about the Professional ProStar PS-15 and is the answer not in the manual?
Questions and answers