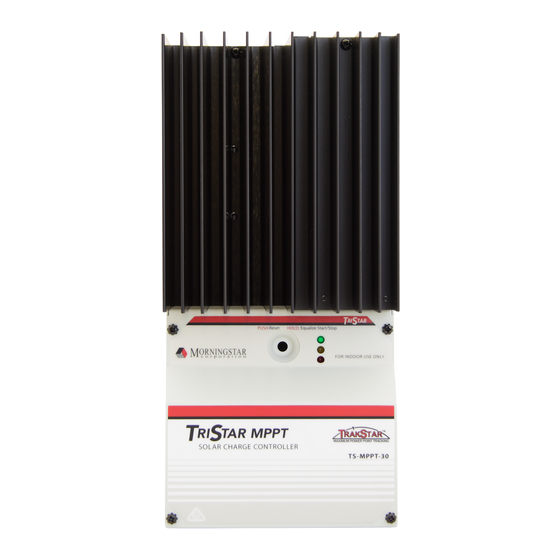
Morningstar TS-MPPT-30 Installation And Operation Manual
Tristar mppt 150v
solar - wind charging system controller
Hide thumbs
Also See for TS-MPPT-30:
- Installation, operation and maintenance manual (38 pages) ,
- Installation and operation manual (68 pages) ,
- Installation, operation and maintenance manual (38 pages)
Table of Contents

Subscribe to Our Youtube Channel
Related Manuals for Morningstar TS-MPPT-30


Summary of Contents for Morningstar TS-MPPT-30
- Page 1 TAR MPPT 150V Solar - Wind Charging System Controller Installation and Operation Manual Solar-Wind Battery Charger With TrakStar Maximum Power Point Tracking Technology www.morningstarcorp.com Models: TS-MPPT-30 TS-MPPT-45 TS-MPPT-60...
- Page 2 Dimensions in Inches [Millimeters]...
-
Page 3: Table Of Contents
4.3 Push-button 4.4 LED Indications 4.5 Protections, Faults & Alarms 4.6 Inspection and Maintenance 5.0 Networking and Communication 5.1 Introduction 5.2 Morningstar MeterBus 5.3 Serial RS-232 5.4 EIA-485 (formerly RS-485) 5.5 Ethernet 6.0 Troubleshooting 7.0 Warranty and Claim Procedure 8.0 Specifications... -
Page 4: Important Safety Instructions
1.0 Important Safety Instructions Save These Instructions This manual contains important safety, installation and operating instructions for the TriStar MPPT 150V solar controller. The following symbols are used throughout this manual to indicate potentially dangerous condi- tions or mark important safety instructions: WARNING: Indicates a potentially dangerous condition. - Page 5 Installation Safety Precautions WARNING: This unit is not provided with a GFDI device. This charge controller must be used with an external GFDI device as required by the Article 690 of the National Electrical Code for the installation location. • Mount the TriStar MPPT 150V indoors. Prevent exposure to the elements and do not allow water to enter the controller.
- Page 6 AVERTISSEMENT : L’appareil n’est pas fourni avec un dispositif GFDI. Ce contrôleur de charge doit être utilisé avec un dispositif GFDI externe tel que requis par l’Article 690 du Code électrique national de l’emplacement de l’installation. • Montez le TriStar MPPT 150V 150V 150V à l’intérieur. Empêchez l’exposition aux élé- ments et la pénétration d’eau dans le contrôleur.
- Page 7 WARNING: A battery can present a risk of electrical shock or burn from large amounts of short-circuit current, fire, or explosion from vented gases. Observe proper precautions. CAUTION: When replacing batteries, use properly specified sizes, types, and ratings based on application and system design. CAUTION: Proper disposal of batteries is required. Refer to local regulations or codes for requirements AVERTISSEMENT: Une batterie peut présenter a risque de choc électrique ou de brûlure de grandes quantités de court-circuit curlouer, incendie ou explosion de ventilé...
-
Page 8: Getting Started
125% of the solar array’s short circuit current output (Isc). Therefore, the maximum allowable solar array input to the TriStar MPPT 150V controller for compliance with the NEC is: TS-MPPT-30: 24 amps Isc* TS-MPPT-45: 36 amps Isc* TS-MPPT-60: 48 amps Isc* *Solar array Isc @ STC TriStar MPPT Operator’s Manual... -
Page 9: Features
2.3 Features The features of the TriStar MPPT 150V are shown in Figure 2-1 below. An explanation of each feature is provided. Figure 2-1. TriStar MPPT 150V features TriStar MPPT Operator’s Manual... - Page 10 Power connection for Battery (+) 5 - Remote Temperature Sensor Terminals Connection point for a Morningstar RTS (optional) to remotely monitor battery temperature 6 - LED Indicators Three state of charge (SOC) LED indicators show charging status and controller faults...
-
Page 11: Regulatory Information
This device complies with Part 15 of the FCC rules. Operation is subject to the following two conditions: (1) This device may not cause harmful interference, and (2) this device must accept any interference received, including interference that may cause undesired operation. Changes or modifications not expressly approved by Morningstar for compliance could void the user’s authority to operate the equipment. Note: This equipment has been tested and found to comply with the limits for a Class B digital device, pursuant to Part 15 of the FCC rules. -
Page 12: Optional Accessories
• DIN rail compatible or surface mount For more information on the Relay Driver, visit our website at www.morningstarcorp.com or in- quire with your local Morningstar dealer. EIA-485 / RS-232 Communications Adapter (RSC-1) Connect one or more TriStar MPPT 150V controllers to a PC or to other serial devices using the RSC-1 EIA-485 adapter. -
Page 13: Installation
Installation 3.1 General Information The mounting location is important to the performance and operating life of the controller. The environment must be dry and protected from water ingress. If required, the controller may be installed in a ventilated enclosure with sufficient air flow. Never install the TriStar MPPT 150V in a sealed enclosure. The controller may be mounted in an enclosure with sealed batteries, but never with vented/flooded batteries. Battery fumes from vented batteries will corrode and destroy the TriStar MPPT 150V circuits. - Page 14 Recommended Tools: • Wire strippers • Wire cutters • #2 & #0 Phillips screwdriver • slotted screwdrivers • Pliers • Drill • 3/32” (2.5 mm) drill bit • Level • hack saw (cutting conduit) Installation...
-
Page 15: Controller Installation
3.2 Controller Installation Step 1 - Remove the wiring box cover CAUTION: Shock Hazard Disconnect all power sources to the controller before removing the wiring box cover. Never remove the cover when voltage exists on any of the TriStar MPPT 150V power connections. PRUDENCE : Risque de décharge électrique Déconnectez toutes les sources d’alimentation du contrôleur avant d’enlever le couvercle du boîtier de câblage. - Page 16 Step 2 - Remove the Knock-Outs Knockouts are provided for routing cables through conduit or wire glands. Table 3-1 below pro- vides the knockout sizes and quantity on the TriStar MPPT 150V wiring box. Knockout locations and dimensions are on the inside front cover. Quantity Trade Size Hole Dimension...
- Page 17 Step 3 - Mount to a Vertical Surface CAUTION: Risk of Burns Install the TriStar MPPT 150V in a location that prevents casual contact. The TriStar MPPT 150V heatsink can become very hot during operation. M6 Screw Mounting Hanger Figure 3-2. Attaching the mounting hanger 1.
- Page 18 3. Place a mark on the mounting surface at the top of the keyhole. 4. Remove the controller and drill a 3/32” (2.5 mm) hole at the drill mark. 5. Insert a #10 screw (included) into the top pilot hole. Do not tighten the screw completely. Leave a 1/4”...
- Page 19 Switches 4, 5, & 6: Battery Charging Settings It is important to select the battery type that matches the system battery to ensure proper charg- ing and long battery life. Refer to the specifications provided by the battery manufacturer and choose a setting that best fits the recommended charging profile. Settings Battery Absorp. Float Equalize Equalize Switches Type Stage Stage Stage Interval 4 - 5 - 6 (Volts) (Volts) (Volts)
- Page 20 In both settings (auto and manual), the push-button can be used to start and stop battery equal- ization. If the selected battery charging setting does not have an equalization stage an equaliza- tion will never occur, even if requested manually. Equalize Switch 7 manual...
- Page 21 Step 5 - Remote Temperature Sensor The included Remote Temperature Sensor (RTS) is recommended for effective temperature com- pensated charging. Connect the RTS to the 2-position terminal located between the battery (+) terminal lug and the LED stack (see figure 2-1). The RTS is supplied with 33 ft (10 m) of 22 AWG (0.34 mm ) cable. There is no polarity, so either wire (+ or -) can be connected to either screw terminal.
- Page 22 (and only one) location. The grounding point may be located in the solar circuit or the battery circuit. Per NEC 690.45 (A) and NEC Table 250.122, minimum sizes for copper grounding wire are: • TS-MPPT-30 10 AWG (5 mm • TS-MPPT-45 10 AWG (5 mm • TS-MPPT-60...
- Page 23 Step 7 - Battery Voltage Sense The voltage at the battery connection on the TriStar MPPT 150V may differ slightly from the volt- age directly at the battery bank terminals due to connection and cable resistance. The Battery Voltage Sense connection enables the TriStar MPPT 150V to measure the battery terminal volt- age precisely with small gauge wires that carry very little current, and thus have no voltage drop.
- Page 24 AVERTISSEMENT : Risque de décharge électrique N’utilisez qu’un câble de communication 300 V homologué UL. Connect the appropriate network cables to the TriStar MPPT 150V at this time. Access to the network ports is easier before the power cables are attached. The ports are located inside the conduit wiring box on the lower circuit board as shown in figure 3-5.
- Page 25 RS-232 Connection The serial RS-232 port is a standard 9-pin (DB9) female connector. A low-profile serial connector is recommended to save room in the wiring box. NOTE: The RS-232 and EIA-485 ports share hardware. Both ports cannot be used simultaneously. REMARQUE : Les ports RS-232 et EIA-485 partagent le matériel. Ils ne peuvent pas être utilisés simultanément. Ethernet Connection The RJ-45 Ethernet jack features two (2) indicator LEDs for connection status and network traf- fic. Use CAT-5 or CAT-5e twisted pair cable and RJ-45 plugs. If possible, pull the network cable...
- Page 26 (30, 45 or 60 amps). Wire types rated for 75°C and 90°C are included. Minimum wire sizes for ambient temperatures to 45°C are provided in table 3-2 below: Model Wire Type 75°C Wire 90°C Wire TS-MPPT-30 Copper 8 AWG (8mm 10 AWG (5 mm TS-MPPT-30 Aluminum...
- Page 27 The minimum fuse/breaker rating allowed for use with each TriStar MPPT 150V model is listed in table 3-3. Model Minimum battery circuit fuse/breaker rating TS-MPPT-30 1.25 x 30 Amps = 37.5 amps TS-MPPT-45 1.25 x 45 Amps = 56.3 amps TS-MPPT-60 1.25 x 60 Amps = 75.0 amps...
- Page 28 Solar + Solar - Battery + Battery - (Common Negative) Figure 3-7. Power terminal locations Connect the four (4) power conductors shown in figure 3-7 above in the following steps: 1. Confirm that the system input and output disconnect switches are both turned off before connecting the power wires to the controller. There are no disconnect switches inside the TriStar MPPT 150V. 2. Provide for strain relief if the bottom knockouts are used and conduit is not used. 3.
- Page 29 AVERTISSEMENT : Risque d’endommagement Assurez-vous que la connexion solaire est effectuée avec la polarité correcte. Activez le coupe- circuit/interrupteur de réseau solaire et mesure la tension sur les câbles ouverts AVANT la connexion au TriStar MPPT 150V. Déconnectez le coupe-circuit/interrupteur solaire avant le câblage sur le contrôleur.
-
Page 30: Operation
TriStar MPPT 150V as described in this section. 4.1 TrakStar MPPT Technology The TriStar MPPT 150V utilizes Morningstar’s TrakStar Maximum Power Point Tracking (MPPT) technology to extract maximum power from the solar array. The tracking algorithm is fully automatic and does not require user adjustment. - Page 31 An Advantage Over Traditional Controllers Traditional controllers connect the solar module directly to the battery when recharging. This re- quires that the solar module operate in a voltage range that is usually below the module’s V . In a 12 Volt system for example, the battery voltage may range from 10 - 15 Vdc, but the module’s is typically around 16 or 17 Volts.
-
Page 32: Battery Charging Information
4.2 Battery Charging Information 4-Stage Charging The TriStar MPPT 150V has a 4-stage battery charging algorithm for rapid, efficient, and safe battery charging. Figure 4-2 shows the sequence of the stages. BULK NIGHT FLOAT ABSORPTION NIGHT CHARGE TIME Figure 4-2. TriStar MPPT 150V Charging Algorithm Bulk Charge Stage In Bulk charging stage, the battery is not at 100% state of charge and battery voltage has not yet charged to the Absorption voltage set-point. - Page 33 Float Stage After the battery is fully charged in the Absorption stage, the TriStar MPPT 150V reduces the battery voltage to the Float voltage set-point. When the battery is fully recharged, there can be no more chemical reactions and all the charging current is turned into heat and gassing. The float stage provides a very low rate of maintenance charging while reducing the heating and gassing of a fully charged battery. The purpose of float is to protect the battery from long-term over- charge.
- Page 34 Certain battery types benefit from a periodic boost charge to stir the electrolyte, level the cell volt- ages, and complete the chemical reactions. Equalize charging raises the battery voltage above the standard absorption voltage so that the electrolyte gasses. The green SOC LED will blink rapidly two (2) times per second during equalization charging. The duration of the equalize charge is determined by the selected battery type. See table 4-1 in this section for more details.
- Page 35 Preparation for Equalization First, confirm that all of the system loads are rated for the equalization voltage. Consider that at 0°C (32°F) the equalization voltage will reach 16.75 Volts for 12 Volt L-16 batteries (67.0 Volts for 48 Volt systems) with a temperature sensor installed. Disconnect any loads at risk of damage due to the high input voltage. If Hydrocaps are used, be sure to remove them before starting an equalization.
- Page 36 Shared Settings Value Units Absorption Extension Voltage 12.50 Volts Absorption Extension Time Absorption Time + 30 minutes Float Exit Timeout minutes Float Cancel Voltage 12.30 Volts Equalize Timeout Equalize Time + 60 minutes Temperature Compensation Coefficient* °C / cell millivolts / * 25°C reference Table 4-2.
- Page 37 Sub- Bulk Absorption Float Bulk Absorption Float Float V 60 mins. below Float time (hrs) 1:00 2:00 3:00 4:00 5:00 6:00 Float Time-out Figure 4-4. Float exit time-out charging profile After entering Float stage, the controller will only exit Float if the battery voltage remains below Float voltage for 60 cumulative minutes. In figure 4-4, a system load turns on at 4:00 hrs when the controller is in Float stage, runs for one hour, and turns off at 5:00 hrs.
- Page 38 Equalize Timeout Bulk Equalize Float Equalize V Absorp. V Equalize timeout time (hrs) 1:00 2:00 3:00 4:00 5:00 6:00 Figure 4-6. Equalize timeout charging profile The charging profile in figure 4-6 shows an Equalize Timeout event. The timeout timer begins as soon as battery voltage exceeds the Absorption voltage setpoint. If there is insufficient charging current or system loads are too large, the battery voltage may not reach the Equalize setpoint. Equalize Timeout is a safety feature that prevents high battery voltage for extended periods of time which may damage the battery.
-
Page 39: Push-Button
Generally accepted wiring practice is to limit voltage drops between the charger and the battery to 2%. Even properly sized wiring with 2% drop can result in a 0.29 Volt drop for 14.4V charg- ing (or 1.15 Volt for a 48 Volt nominal system). Voltage drops will cause some undercharging of the battery. -
Page 40: Led Indications
NOTE: For multiple TriStar MPPT 150V controllers on a MeterBus network, initialize a battery equalization using the TriStar meter so that all controllers are synchronized. REMARQUE : Avec plusieurs contrôleurs TriStar MPPT 150V sur un réseau MeterBusTM, initialisez une compensation de batteries à l’aide de l’outil de mesure TriStar afin de synchroniser tous les contrôleurs. - Page 41 Faults & Alarms • Over-temperature Y / R sequencing • High voltage disconnect G / R sequencing • DIP switch fault R / Y / G sequencing • Self-test faults R / Y / G sequencing • Remote Temperature Sensor (RTS) G+Y / Y+R sequencing • Battery voltage sense G+Y / Y+R sequencing...
-
Page 42: Protections, Faults & Alarms
4.5 Protections, Faults & Alarms The TriStar MPPT 150V protections and automatic recovery are important features that ensure the safe operation of the system. Additionally, the TriStar MPPT 150V features real-time self diagnostics that report Fault and Alarm conditions as they occur. Faults are events or conditions that require the TriStar MPPT 150V to cease operation. - Page 43 Battery Voltage Sense Failure (R+Y / G+Y) If a fault in the battery sense connection (such as a short circuit, open circuit or loose terminal) occurs after the battery sense has been working, the LEDs will indicate a failure. If the control- ler is restarted with the failure still present, the controller may not detect that the battery sense is connected and the LEDs will not indicate a fault.
- Page 44 The Remote Temperature Sensor is not connected to the controller. Use of the RTS is recom- mended for proper battery charging. Heatsink Temperature Sensor Open / Shorted The heatsink temperature sensor is damaged. Return the controller to an authorized Morningstar dealer for service. Battery Sense Out of Range / Disconnected A battery sense wire is disconnected.
-
Page 45: Inspection And Maintenance
4.6 Inspection and Maintenance The following inspections are recommended two times per year for best long-term performance. System Inspection • Confirm the controller is securely mounted in a clean and dry environment. • Confirm that the air flow around the controller is not blocked. Clean the heat sink of any dirt or debris. • Inspect all exposed conductors for insulation damage due to sun damage, rubbing on nearby objects, dry rot, insects, or rodents. -
Page 46: Networking And Communication
MODBUS TCP/IP protocols for RS-232, EIA-485, and ethernet networks. Addition- ally, HTTP, SMTP, and SNMP are supported for web page, email, and network message support. Morningstar’s MSView PC software provides system monitoring and logging capabilities via RS-232, EIA-485, and ethernet. MSView PC software is available for free on our website at: http://www.morningstarcorp.com. -
Page 47: Morningstar Meterbus
• communicate with a Relay Driver or other compatible Morningstar accessories (see sec- tion 2.5 for more details) **A Morningstar MeterBus Hub (HUB-1) and either a TriStar Digital Meter 2 (TS-M-2) or TriStar Remote Meter 2 (TS-RM-2) are required, not included. -
Page 48: Serial Rs-232
5.3 Serial RS-232 The serial port connection on the TriStar MPPT 150V is a standard 9-pin isolated RS-232 port. See figure 3-5 for the port location.The TriStar MPPT 150V communicates through the serial port via the open standard MODBUS protocol. Connect the TriStar MPPT 150V to the serial port on a PC to: • program custom charge settings with MSView PC software • view real-time data with MSView PC software... - Page 49 The serial connection is not typically used for multi-controller networking. However, networking is possible using a USB hub and USB-Serial cables. For more information, refer to the “Morningstar Communications Document” on our website at: HTTP://www.morningstarcorp.com/ TriStar MPPT Operator’s Manual...
-
Page 50: Eia-485 (Formerly Rs-485)
• program each controller on the network with custom charge settings using MSView software • connect the TriStar MPPT 150V to other Morningstar controllers with the RSC-1 Serial to EIA-485 Adapter (sold separately) • bridge an Ethernet connection through a TriStar MPPT 150V to an EIA-485 network The EIA-485 port has four (4) connections: Power, Data A, Data B, and Ground. -
Page 51: Ethernet
• send an email or text message if a fault, alarm, or user-defined event occurs • monitor and receive messages on an SNMP network This section provides a summary of each of the features. For detailed information about Ethernet connectivity and networking, refer to the “Morningstar Communications Document” on our web- site at: HTTP://www.morningstarcorp.com/... - Page 52 The TriStar MPPT 150V Setup Wizard in MSView provides an interface to adjust all operating parameters. Morningstar’s MSView PC software can connect to any TriStar MPPT 150V on the Ethernet network or through a RS-232 serial connection. Refer to the help documentation includ- ed with MSView for more information.
- Page 53 Email & SMS Alerts The email and SMS alerts feature sends notification to an email address or mobile phone if one of the following occurs: • TriStar MPPT 150V self diagnostics fault condition • TriStar MPPT 150V self diagnostics alarm condition • User-defined event (e.g. battery voltage is less than 46 Volts) Up to four email and SMS alerts can be configured from the network settings web page in the MSView TriStar MPPT 150V wizard. View Logged Data The TriStar MPPT 150V logs up to 200 days* of daily data. The controller always logs the stan- dard values listed below. Using MSView, the controller can be configured to log additional option- al values each day.
-
Page 54: Troubleshooting
8 Vdc or greater. If the voltage on the battery terminals of the controller is be- tween 8 and 72 Vdc and no LEDs are lit, contact your authorized Morningstar dealer for service. If no voltage is measured, check wiring connections, fuses, and breakers. - Page 55 • A serial cross-over (Null Modem) cable is used for the connection between the PC and the Morningstar RSC-1 485 Adapter. A straight-through serial cable will not work. • Power is supplied to the 4-wire bus on the Power/Ground lines. The bus requires voltage in the range: 8 - 16 Vdc.
-
Page 56: Warranty And Claim Procedure
LIMITED WARRANTY Morningstar Solar Controllers and Inverters All of Morningstar’s products except the SureSine™ inverter and SHS™ controller are warranted to be free from defects in material and workmanship for a period of FIVE (5) years from the date of shipment to the original end user. - Page 57 WARRANTY CLAIM PROCEDURE 1. Before proceeding, please refer to product manual, including troubleshooting section. 2. Contacting your authorized Morningstar distributor or dealer from whom you purchased the unit is the first step in the warranty process. Local dealers can often address warranty issues quickly. 3. If supplier is unable to address the issue, please contact Morningstar by e-mail (support@morn- ingstarcorp.com) with:...
-
Page 58: Specifications
8.0 Specifications Electrical TS-MPPT-30 TS-MPPT-45 TS-MPPT-60 Nominal System Voltage All: 12, 24, 36, or 48 Volts dc Maximum Battery Current 30 Amps 45 Amps 60 Amps Maximum Solar Input Voltage All: 150 Volts dc Battery Operating Voltage Range All: 8 - 72 Volts dc... - Page 59 Battery Charging Status LEDs LED Indication Battery Charging Status Green Flashing (fast) - 2.5 times per second Equalize charging stage Green Flashing - 1/2 sec on, 1/2 sec off Absorption charging stage Green Flashing (slow) - 1 sec on, 1 sec off Float charging stage 13.3 Volts ≤ Vbattery Green...
- Page 60 De-ratings Battery Current vs. Array Voltage Array Voltage (Volts) Figure 8-7. Battery Current vs. Array Voltage Battery Current vs. Heatsink Temperature Figure 8-8. Battery Current vs. Heatsink Temperature Specifications...
- Page 61 E ciency TriStar MPPT 12 Volt Efficiency 13 Vmp 16.5 Vmp 66 Vmp 98 Vmp output power (Watts) Battery @ 12.8 V, 25 C ambient, firmware ver. 08 or later TriStar MPPT 24 Volt Efficiency 26 Vmp 33 Vmp 66 Vmp 98 Vmp 1000 1100 1200 1300 1400 1500 output power (Watts) Battery @ 25.6 V, 25 C ambient, firmware ver. 08 or later TriStar MPPT Operator’s Manual...
- Page 62 TriStar MPPT 48 Volt Efficiency 52 Vmp 66 Vmp 83 Vmp 98 Vmp 1000 1200 1400 1600 1800 2000 2200 2400 2600 2800 3000 output power (Watts) Battery @ 51.2 V, 25 C ambient, firmware ver. 08 or later Specifications...
- Page 63 Certi cations RoHS UL1741 INVERTERS, CONVERTERS, AND CONTROLLERS AND INTERCONNECTION SYSTEM EQUIPMENT FOR USE WITH DISTRIBUTED ENERGY SOURCES, FIRST EDITION, REVISION THROUGH AND Compliant INCLUDING NOV 7, 2005 2002/95/EC CSA C22.2 No. 107.1-01 3094762 EMC Directives • Immunity: EN61000-6-2:1999 • Emissions: EN55022:1994 with A1 and A3 Class B1 • Safety: EN60335-1 and EN60335-2-29 (battery chargers) TriStar MPPT Operator’s Manual...
- Page 64 2% Voltage Drop Charts for 75°C Stranded Copper Wire 1-Way Wire Distance (feet), 12 Volt System Wire Size (AWG) Amps Amps Amps Amps Amps Amps Amps Amps Amps Amps 2/0 ** 22.4 24.4 26.9 29.9 33.6 38.4 44.8 53.8 67.2 89.6 1/0 ** 17.8...
- Page 65 2% Voltage Drop Charts for 75°C Solid Copper Wire 1-Way Wire Distance (feet), 12 Volt System Wire Size (AWG) Amps Amps Amps Amps Amps Amps Amps Amps Amps Amps 2/0 ** 27.8 30.3 33.4 37.1 41.7 47.7 55.6 66.7 83.4 111.2 1/0 ** 22.0...
- Page 66 2% Voltage Drop Charts for 90°C Stranded Copper Wire 1-Way Wire Distance (feet), 12 Volt System Wire Size (AWG) Amps Amps Amps Amps Amps Amps Amps Amps Amps Amps 2/0 ** 22.4 24.4 26.9 29.9 33.6 38.4 44.8 53.8 67.2 89.6 1/0 ** 17.8...
- Page 67 2% Voltage Drop Charts for 90°C Solid Copper Wire 1-Way Wire Distance (feet), 12 Volt System Wire Size (AWG) Amps Amps Amps Amps Amps Amps Amps Amps Amps Amps 2/0 ** 27.8 30.3 33.4 37.1 41.7 47.7 55.6 66.7 83.4 111.2 1/0 ** 22.0...
- Page 68 TriStar , TriStar MPPT 150V , MeterBus are trademarks of Morningstar Corporation MODBUS and MODBUS TCP/IP are trademarks of Modbus IDA. www.modbus-ida.org RoHS © 2010 Morningstar Corporation. All rights reserved. MS-000946 v05.2...
Need help?
Do you have a question about the TS-MPPT-30 and is the answer not in the manual?
Questions and answers