Table of Contents
Advertisement
Quick Links
Advertisement
Table of Contents

Related Manuals for Cambium Networks cnWave


Summary of Contents for Cambium Networks cnWave
- Page 1 USER GUIDE 60 GHz cnWave™ System Release 1.2.2...
- Page 2 Cambium recommends reviewing the Cambium Networks website for the latest changes and updates to products. Cambium does not assume any liability arising out of the application or use of any product, software, or circuit described herein;...
-
Page 3: Table Of Contents
Repair and service Hardware warranty Security advice Warnings, cautions, and notes Caring for the environment In the UK and EU countries In non-EU countries Product Description Introduction Frequency bands Characteristics 802.11ay Standards and advantages Terragraph Overview of cnWave family Contents... - Page 4 Features Wireless operation Wireless topology Modulation Synchronization Time-division duplexing access mechanism Wireless encryption Designing wireless networks TDD synchronization System management Management agent Network management IPv6 System logging Software upgrade System Hardware Wireless nodes V1000 Client Node (CN) V2000 Client Node (CN) V3000 Client Node (CN) V5000 Distribution Node (DN) Radio mounting brackets...
- Page 5 V3000/V5000 - PoE PSU Specifications Ethernet and DC cables Maximum cable lengths Outdoor copper CAT6A Ethernet cable Cable accessories SFP Module kits Optical cable and connectors System Planning Site planning Grounding and lightning protection Lightning protection zones Site grounding system ODU location Drop cable grounding points ODU wind loading...
- Page 6 Avoiding the straight line interference When two V5000 devices are co-located at a site Polarity Link Adaptation and Transmit Power Control (LATPC) Radio spectrum planning General wireless specifications Regulatory limits Link planning LINKPlanner Range and obstacles Path loss Data network planning Point to Point-based single link Ethernet bridge IPv4/L2 based PMP and mesh network planning Support for dual networking (IPv4 and IPv6)
- Page 7 Minimum separation distances Grounding and lightning protection requirements Grounding cable installation methods Siting radios 60 GHz cnWave radios and mounting bracket options Installing the cnWave radio nodes ODU Interface with LPU on the pole Attach ground cables to the radio...
- Page 8 Logging into the web interface Enabling internal E2E Controller Topology Configuration Operation Software upgrade Diagnostics Statistics Links Ethernet Radio Performance Prefix zone Statistics Border Gateway Protocol (BGP) Maps Tools Factory reset Field diags Antenna alignment Show SFP power details Ping Quick PTP setup cnMaestro support for Onboard Controller Auto Manage IPv6 Routes (External E2E Controller)
- Page 9 Compliance with radio regulations Type approvals Federal Communications Commission (FCC) compliance Innovation, Science and Economic Development Canada (ISEDC) compliance 60 GHz cnWave example product labels Troubleshooting Field diagnostics logs Setup issues in IPv4 tunneling Link is not established PoP not online from E2E or cnMaestro UI...
-
Page 10: About This User Guide
It is intended for system designers, system installers, and system administrators. Purpose The 60 GHz cnWave product documents are intended to instruct and assist personnel in operation, installation, and maintenance of the equipment and ancillary devices. It is recommended that all personnel engaged in such activities must be properly trained. - Page 11 European specific information Cambium Networks 60 GHz cnWave products are compliant with applicable European Directives required for CE marking: 2014/53/EU of the European Parliament and of the Council of 16 April 2014 on the harmonisation of the laws of the Member States relating to the making available on the market of radio equipment and repealing Directive 1999/5/EC;...
-
Page 12: Application Firmware
(RoHS Directive). EU Declaration of conformity Hereby, Cambium Networks declares that the Cambium Networks 60 GHz cnWave Series of Wireless Ethernet Bridge complies with the essential requirements and other relevant provisions of Directive 2014/53/EU. -
Page 13: Specific Expertise And Training For Professional Installers
Specific expertise and training for professional installers To ensure that the 60 GHz cnWave Series is installed and configured in compliance with the requirements of the EU, ISEDC and the FCC, installers must have the radio engineering skills and training described in this section. -
Page 14: Security Advice
Warnings, cautions, and notes The following describes how warnings and cautions are used in this document and all Cambium Networks document sets: Warnings Warnings precede instructions that contain potentially hazardous situations. -
Page 15: In The Uk And Eu Countries
In the UK and EU countries The following information is provided to enable regulatory compliance with the European Union (EU) directives and UK regulations identified and any amendments made to these directives and regulations when using Cambium equipment in the UK or EU countries: Disposal of Cambium equipment European Union (EU) Directive 2012/19/EU Waste Electrical and Electronic Equipment (WEEE) and UK Statutory Instrument The Waste Electrical and Electronic Equipment Regulations 2013 No. -
Page 16: Product Description
Introduction The 60 GHz cnWave products support a wide spectrum of up to 9 GHz (57-66 GHz) that is typically divided into channels of 2 GHz each. The 60 GHz band is largely uncongested when compared to 2.5 GHz and 5 GHz public bands, which are currently used for Wi-Fi. -
Page 17: Characteristics
802.11ad, it is possible to get a 5 Gbps PHY rate. With 802.11ay, it is possible to get a 10 Gbps PHY rate. 60 GHz cnWave products are capable of providing 15 Gbps Ethernet rates with channel bonding enabled. For channel bonding (CB2), MCS13 is supported and this has a PHY rate of 7.7 Gbps. -
Page 18: 802.11Ay Standards And Advantages
Drizzle - 0.25 mm/hr; Light rain - 2.5 mm/hr; Medium rain - 12.5 mm/hr; Heavy rain - 25 mm/hr. Short range The range of a 60 GHz cnWave link can be limited due to oxygen absorption and rain fade which needs to be factored in for link planning. One advantage of a shorter range is frequency re- usability and security (since the signal does not travel long distances). - Page 19 802.11ay supports 15 client nodes per sector. Advantages 802.11ay product, Terragraph certified The 60 GHz cnWave is an 802.11ay product and Terragraph certified. Highest capacity It has highest the capacity in the industry, up to 5.4 Gbps per sector. Low total cost ownership cnWave V5000 is 280-degree coverage with dual-sector.
-
Page 20: Terragraph
V1000, V2000, and V3000 meet various range challenges. Using beam forming, the V3000 has a super long range. cnMaestro panel is used for device management. cnHeat and LINKPlanner helps for easy planning. Unlicensed and interference-free This spectrum spans 57 - 66 GHz and is widely available, especially when compared to the 2.4 and 5 GHz bands. -
Page 21: Overview Of Cnwave Family
It also monitors and maintains Syslog, alarms, and Firmware upgrades. Overview of cnWave family The 60 GHz cnWave solution (from Cambium Networks) provides easy, fast, and cost-effective wireless Gigabit connectivity for edge access and/or high-capacity backhaul for edge access solutions at a significantly lower cost than fiber infrastructure. -
Page 22: Features
30 client nodes. V5000 can be used for PTP, PMP, and Mesh configurations. Figure 5: 60 GHz cnWave products Features This section lists the features of each product of 60 GHz cnWave. V1000 CN Supports modulations BPSK to 16 QAM (MCS1 to MCS12) Integrated antenna with beam forming... - Page 23 802.3at POE (2-pair or 4-pair for higher wattage) or a Passive PoE Supports Aux PoE out (802.3af/at PoE) IP66/67 V3000 CN Supports modulations BPSK to 16 QAM (MCS1 to MCS12) 44.5 dBi ultra-high gain antenna with beam forming 60.5 dBm EIRP 40.5 dBi ultra-high gain antenna with beam forming 54.5 dBm EIRP 10 Gigabit Ethernet Supports 10G SFP+ or 1G SFP...
-
Page 24: Wireless Operation
Wireless operation This section describes how the 60 GHz cnWave is operated, including topology, modulation modes, power control, and security. Wireless topology 60 GHz cnWave supports operation in three topologies: Point to point (PTP) Point to Multipoint (PMP) Mesh The PTP topology provides a point-to-point link using V1000, V2000, and V3000. - Page 25 Figure 7: PMP Topology Mesh Mesh efficiently distributes capacity and improves availability, using Open/R based layer 3 IPv6 meshing. It allows for route diversity which provides high network availability and supports up to 15 hops away from a PoP node. Network bandwidth is reduced at each hop, and the total bandwidth available in the network is limited to a PoP node's network reappearance.
-
Page 26: Modulation
Modulation Following tables list modulation supported during L2 and L3 throughput: Table 3: Modulation and coding rate for CB1 Modulation Coding Rate L2 Throughput (Mb/s) DMG-CB1 (2.16 GHz Channel) π/2 BPSK π/2 BPSK π/2 BPSK π/2 QPSK 1256 π/2 QPSK 1600 π/2 QPSK 1828... -
Page 27: Synchronization
Link adaptation Link adaptation is performed independently for each link for data traffic, and it is closed-loop based. Adjusting the Tx modulation and coding scheme from MCS2 to MCS12 selected for transmission. It is adjusted based on the following: Packet Error Ratio (PER), SNR, local measurements of successful and unsuccessful frame transmissions (e.g. - Page 28 Figure 10: Odd and even polarities The MAC synchronizes its timers to an external, accurate time source, such as GPS or IEEE 1588. A timing pulse that resets the Timing Synchronization Function (TSF) on the DN is repeated once every second. This timing pulse occurs exactly at the turn of each second.
-
Page 29: Time-Division Duplexing Access Mechanism
Time-division duplexing access mechanism 60 GHz cnWave uses a Time Division Duplex (TDD) channel access mechanism. All cnWave nodes are time-synchronized and this is achieved through internal GPS, IEEE 1588(roadmap), or Cambium Sync (roadmap), and each sector of a node is assigned specific times during which it can transmit or receive. A timing pulse that resets the Timing Synchronization Function (TSF) on the DN is repeated once every second (1PPS). -
Page 30: Designing Wireless Networks
The use of AES encryption in 60 GHz cnWave is controlled by the AES license and enabled through the purchase of a capability upgrade. Note Encryption Algorithm cannot be configured as TLS RSA when Access Method is Link Name Access. In this case, only the TLS PSK algorithms are supported. -
Page 31: Ipv6
Discovery Protocol (NDP) is used with ICMPv6 to resolve the MAC address. IPV6 does not have broadcast but only has multicast. 60 GHz cnWave products get assigned with a unique IP in mesh, either from Controller (CPA) or PoP (DPA), known as loopback address (lo). In Layer 3 mode, nodes can also send Router Advertisement(RA) for all its downstream devices to acquire an IPv6 address. -
Page 32: System Hardware
System Hardware This topic provides information about the hardware of 60 GHz cnWave. Wireless nodes The 60 GHz cnWave solution includes three types of wireless nodes: V1000 Client Node V2000 Client Node V3000 (44.5 dBi and 40.5 dBi) Client Node... -
Page 33: V2000 Client Node (Cn)
60GHz cnWave V1000 Client Node with India Cord C600500C013A 60GHz cnWave V1000 Client Node with no Cord C600500C014A 60GHz cnWave V1000 Client Node with Israel cord - for Israel Only C600500C016A 60GHz cnWave V1000 Client Node with no Cord and no Power supply C600500C017A V2000 Client Node (CN) V2000 is an outdoor CN that can be connected to a DN. -
Page 34: V3000 Client Node (Cn)
60GHz cnWave V2000 Client Node 30W with India Cord C600500C028A 60GHz cnWave V2000 Client Node 30W with no Cord C600500C029A 60GHz cnWave V2000 Client Node no power supply, no power cord C600500C030A 60GHz cnWave V2000 Client Node 30W with US cord C600500C020A... -
Page 35: V5000 Distribution Node (Dn)
60 GHz cnWave V3000 CN radio only C600500C024A 60 GHz cnWave V3000 CN antenna assembly, 44.5 dBi C600500D001A 60 GHz cnWave V3000 CN antenna assembly, 40.5 dBi, 4 Pack C600500D002A 60 GHz cnWave V3000 CN antenna assembly, 44.5 dBi, 4 Pack C600500D003A 60 GHz cnWave V3000 CN Radio only –... -
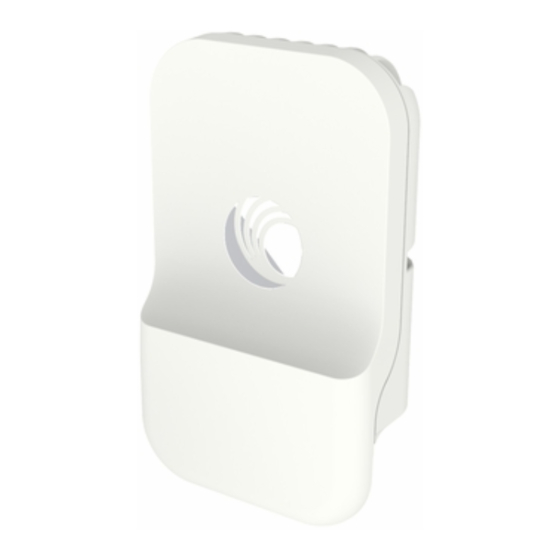
Page 36: Radio Mounting Brackets
V5000 Distribution Node front and rear views V5000 Part numbers Order the V5000 Distribution Node (DN) from Cambium Networks (as shown in below table). The V5000 DN is supplied without a mounting bracket or power supply. Table 8: V5000 DN part numbers... - Page 37 Figure 16: V1000 mounting plate and band clamp V1000 Adjustable pole mount (N000900L022A) The adjustable pole mount is used to provide elevation adjustment when a V1000 CN is mounted on a pole. The adjustable pole mount works with poles with diameters in the range of 25 mm to 70 mm (1 inch to 2.75 inches).
- Page 38 Figure 18: V2000 and pole mounting accessories The adjustable pole mount bracket (as shown in Figure 19) is used to mount the V2000 CN on a vertical pole with a diameter in the range of 25 mm to 70 mm (1 inch to 2.75 inches). The bracket provides a fine adjustment of up to +/-20°...
- Page 39 Figure 19: V2000 Adjustable pole mount V3000 Precision bracket (C000000L125A) The precision bracket (as shown in Figure 20) is used to mount the V3000 CN on a vertical pole with a diameter in the range of 25 mm to 70 mm (1 inch to 2.75 inches). It accepts band clamps for larger diameter poles.
- Page 40 Figure 20: Precision bracket Precision bracket components Figure 21: Azimuth arm Bracket body Bracket base Long (120 mm) M8 screws and flange nuts System Hardware...
- Page 41 V3000 mount 40 mm M8 screws, plain washers, and Nyloc nuts 28 mm M6 screws, M8 spacers, and pole mount clamp V3000 Tilt bracket (N000045L002A) The tilt bracket (as shown in Figure 22) is used to provide elevation adjustment when a V3000 CN or V5000 DN is mounted on a pole.
- Page 42 Figure 23: Pole mount V5000 Wall mount (C000000L136A) The wall mount (Wall mount figure below) is used to mount a V5000 DN on a vertical wall. It does not provide azimuth or elevation adjustment. The wall mount requires additional fixing hardware suitable for the type of wall.
-
Page 43: Radio Accessories
The telescope is temporarily mounted on the bracket using the telescope mounting kit for precision brackets. The telescope mounting kit consists of a mounting plate, a knurled screw, and two rubber O-rings. Order the telescope mounting kit from Cambium Networks. Figure 25: Telescope mounting kit Order a suitable telescope from a specialist supplier specifying the following details: Right angle, erecting, 9x50 mm alignment scope with 5°... - Page 44 It is Ideal for aligning a Point-to-Point link that spans up to 600 m. Alignment Tube Figure 27: For longer links up to 3 km, Cambium Networks suggests to use the telescopic mounting kit (C000000L139) and a finder scope. Note...
-
Page 45: Radio External Interfaces
Radio external interfaces V1000 CN Figure 28: External interfaces for V1000 CN Table 11: External interfaces V1000 CN Port name Connector Interface Description RJ45 PoE input Standard 802.3af/at PoE 100/1000 BASE-T Ethernet Data and management System Hardware... - Page 46 V2000 CN External interfaces for V2000 CN Figure 29: Table 12: External interfaces - V2000 CN Port Connector Interface Description name RJ45 POE Input Passive PoE or 802.3at (two pairs or four pairs for higher wattage) 100m/1000m/2.5G BASE-T Data and management Ethernet RJ45 POE Output...
- Page 47 V3000 CN External interfaces for V3000 CN Figure 30: Table 13: External interfaces V3000 CN Port Connector Interface Description name SFP+ 10G BASE-SR/10G BASE-LR/1G Base-SX Data and management using optional SFP+/SFP optical or copper module SFP-1G-SX / SFP-1G-LX using optional SFP optical or copper module RJ45 PoE input...
- Page 48 V5000 DN External interfaces for V5000 DN Figure 31: Table 14: External interfaces V5000 DN Port Connector Interface Description name SFP+ 10G BASE-SR/10G BASE-LR/1G Base-SX Data and management using optional SFP+/SFP optical or copper module SFP-1G-SX / SFP-1G-LX using optional SFP optical or copper module RJ45 PoE input...
-
Page 49: Radio Specifications
Radio specifications The 60 GHz cnWave Radios conform to the specifications listed in Radio node specifications. Table 15: Radio node specifications Category Specification Dimensions V1000 Client Node 169 mm × 100 mm × 54 mm (6.6 in × 3.9 in ×... -
Page 50: Theory Of Operation
IEEE 802.11ay WLAN standard and use 60GHz frequency band for wider spectrum and higher capacity. cnWave devices can provide multi-gigabit throughput from 100 M to 1.5 KM. Deployment of the devices uses Open/R based layer3/IPv6 mesh for efficient distribution of traffic between the nodes and higher availability of the traffic. -
Page 51: Power Supply Units (Psu)
Figure 32: Deployment scenario Power supply units (PSU) PSU Options Order PSUs from Cambium Networks. The power supply component and the part numbers are described in the following table. Table 16: Power supply component part numbers Product description Radio node... - Page 52 Product description Radio node Cambium part number Supply and V5000 PoE, 60W, 56V, 10GbE DC Injector, Indoor, Energy Level 6 V2000, V3000, C000000L141A Supply and V5000 PoE, 30W, 56V, 5GbE DC Injector, Indoor, Energy Level 6 V1000 and N000000L034B Supply V2000 PoE Gigabit DC Injector, 15W Output at 56V, Energy Level 6, 0C V1000...
-
Page 53: V1000 - Power Over Ethernet (Poe)
7,8 ------------- DC V- 5,6 ------------- DC V+ Note The Gigabit power injector is supplied with the cnWave V1000 CN. Order part N000900L017A to obtain spares. Warning Always use an appropriately rated and approved AC supply cord-set in accordance with the regulations of the country of use. -
Page 54: V2000 - Poe
V2000 - PoE The V2000 CN is always powered using POE at a nominal 56V using 5GbE POE Injector, which is optional (Cambium part number: N000000L034B), or using an IEEE 802.3at POE output from an Ethernet Switch. Figure 34: PoE power supply to V2000 Figure 35: Power supply to V1000 or V2000 System Hardware... -
Page 55: V3000/V5000 - Poe
Table 18: PoE, 30W 56V, 5GbE DC injector (N000000L034B) Category Specification Dimensions 140 mm (5.5 in) x 53 mm (2.08 in) x 35 mm (1.37 in) Weight 0.24 Kg (0.5 lbs) Temperature 0°C (32°F) to +50°C (140°F) Humidity 10% to 95 % non-condensing AC Input 90-264 V AC, 47-63 Hz DC Output voltage... - Page 56 Figure 37: 10 GbE PoE (C000000L141A) System Hardware...
- Page 57 Table 19: PoE, 60W, 56V, 10 GbE DC injector (C000000L141A) Category Specification Dimensions 140 mm (5.5 in) x 53 mm (2.08 in) x 35 mm (1.37 in) Weight 0.24 Kg (0.5 lbs) Temperature 0°C (32°F) to +50°C (140°F) Humidity 10% to 95 % non-condensing AC Input 90-264 V AC, 47-63 Hz DC Output voltage...
- Page 58 V3000/V5000 - Outdoor AC/DC power supply unit DC power supply to V3000 or V5000 Figure 38: The outdoor PSU can be installed indoors, in an outdoor cabinet, or inside street furniture. Figure 39: Outdoor AC/DC PSU, 60 W, 54 VDC System Hardware...
- Page 59 Figure 40: Outdoor AC/DC PSU, 100 W, 54V DC (N000000L179B) Table 20: Outdoor AC/DC PSU, 54V DC Category Specification Part number and N000000L178A (60W) 171 mm (6.7 in) x 62 mm (2.4 in) x 37 mm Dimensions (1.5 in) N000000L179B(100W) 220 mm (8.7 in) x 68 mm (2.7 in) x 39 mm (1.5 in) Power...
-
Page 60: Psu Specifications
Ethernet and DC cables Maximum cable lengths Ethernet For all cnWave radios, the maximum cable length for data transmission over copper Ethernet (100BASE- TX, 1000BASE-T, 2.5GBASE-T, 5GBASE-T, 10GBASE-T) is 100 m (328 ft) from the radio to the connected equipment. - Page 61 For installations where the auxiliary device is powered using ODU Aux POE port, refer to the Maximum cable lengths supported table. The maximum cable length for fiber Ethernet (10GBASE-SR, 10GBASE-LR) connections depends on the fiber used. See SFP module kits on page 19 for details of the Ethernet standards supported and maximum permitted cable lengths.
-
Page 62: Outdoor Copper Cat6A Ethernet Cable
Radio Cable length Maximum Aux PoE output V5000 0m to 5m 23.1 W 22.6W 22.1W 21.6W 20.6W 19.6W 100m 18.6W Using AC/DC PSU with a DC power feed The maximum length for supplying power over a CAT6A Ethernet cable is shown in the Maximum cable length for DC power table. -
Page 63: Cable Accessories
This section provides information about the required cable accessories. Figure 43: Standard cable gland Figure 44: Long cable gland (C000000L124A) Cable accessories available from Cambium Networks are listed in the Cable accessory part numbers table below. Table 25: Cable accessory part numbers... -
Page 64: Sfp Module Kits
Note One cable gland for 6-9mm cable size is included with each cnWave radio. Order additional cable glands as spares, where smaller cable size is to be used, or where the V3000 or V5000 Aux port is to be used. - Page 65 Figure 45: DAC Cable Note Cambium Networks recommends using the cable gland (part number: C000000L176A - Standard cable gland for 6 mm cable, M25, Qty 10) with the DAC cable for V3000 and V5000 products. This topic covers the following sections:...
- Page 66 V3000-to-V3000 backhauled link connectivity using a DAC cable Figure 46: Connecting a V5000 device backhauled by a V3000 device When setting up point-to-multipoint links with the V5000 device as a distribution node (DN), if the fiber PoP is not available near the V5000 device node, a V3000 to V3000 backhaul point-to-point link is setup.
-
Page 67: Optical Cable And Connectors
V5000 backhauled by V3000 using a DAC cable Figure 47: Key points to install the DAC cable To install the DAC cable, perform the following actions: 1. Ensure that the distance between the two devices (V3000 and V5000 or V3000 and V3000) is less than two metres. - Page 68 Figure 48: Optical optic cable and connector specification Table 27: Optical cable part numbers Cambium description Cambium part number Optical CABLE,MM, 1m N000082L215A Optical CABLE,MM, 2.2m N000082L191A Optical CABLE,MM, 10m N000082L192A Optical CABLE,MM, 20m N000082L193A Optical CABLE,MM, 30m N000082L194A Optical CABLE,MM, 50m N000082L195A Optical CABLE,MM, 80m N000082L196A...
- Page 69 Cambium description Cambium part number Optical CABLE,SM, 30m N000082L139A Optical CABLE,SM, 50m N000082L140A Optical CABLE,SM, 80m N000082L141A Optical CABLE,SM, 100m N000082L142A Optical CABLE,SM, 150m N000082L143A Optical CABLE,SM, 200m N000082L189A Optical CABLE,SM, 300m N000082L190A System Hardware...
-
Page 70: System Planning
The actual degree of protection required depends on local conditions and applicable local regulations. To adequately protect a 60 GHz cnWave installation, both ground bonding and transient voltage surge suppression are required. -
Page 71: Site Grounding System
Warning Never mount equipment in Zone A. Mounting in Zone A may put equipment, structures and life at risk. Site grounding system Ensure that the site has a correctly installed grounding system on a common ground ring with access points for grounding ODU. If the outdoor equipment is to be installed on the roof of a high building, refer to the Installation section. -
Page 72: Odu Wind Loading
” is the drag coefficient = 1.385. The drag co-efficient has been measured when the cover plate or antenna is perpendicular to the air flow. Applying these formulae to the cnWave ODU at different wind speeds, the resulting wind loadings are shown in the following... -
Page 73: Psu Dc Power Supply
** Worst case setup with the product in -30° tilt position. PSU DC power supply Use Cambium Networks recommended DC PSU for wireless nodes and ensure the power cords and cables are appropriately rated and in accordance with the regulations of the country of use. -
Page 74: Lightning Surge Protection Units (Lpu)
The PSU shall be connected to ODU drop cable using cable joiner and appropriately rated cables should be used. Lightning Surge Protection Units (LPU) All drop cables connected to the ODU (e.g. PSU and AUX drop cables) requires their own Lighting Protection Unit (LPU) or Gigabit Surge Suppressor installed close to the ODU and close to the enclosure/building entry point. -
Page 75: Deployment Considerations
Link Adaptation and Transmit Power Control (LATPC) Key deployment guidelines Following are some of the key guidelines that you must consider for the deployment of 60 GHz cnWave series of products: Mounting accuracy: Cambium Networks has three different Stock Keeping Units (SKUs). These... -
Page 76: Sector And Alignment
(UI) to allow this. Deployment frequency range: 60 GHz cnWave products support the use of CH1 to CH4 (channels). Deployment in these channels depends on the allowed channels in that region. Each channel is 2.16 GHz wide and the raster frequencies supported are - 58.32 GHz, 60.48 GHz, 62.64 GHz, and 64.8... -
Page 77: Minimum Cn Spacing
Avoid sticking any metallic labels on the radome. The 60 GHz cnWave antenna tiles are located on the four marked faces. The GPS antenna is located at the middle of the top face of the radome that is pointed to the sky. -
Page 78: Near-Far Radio
Figure 52: Minimum CN spacing Near-far radio Near-far ratio for links from different sectors on the same pole is based on the following factors: Scenario: One wireless link on DN sector 1 at long range, link 2 One wireless link on DN sector 2 at short range, link 1 Narrow angular separation between link1 and link2 (less than 20 degrees) Configured for the same channel Problem:... -
Page 79: Early Weak Interference
Perform traffic test on one link at a time and then simultaneously. If the simultaneous traffic results show degradation along with transmit power that is railed high to maximum, consider the following tasks: Setting the two sectors on different channels or Capping the maximum power of the short range link. -
Page 80: Avoiding The Tight Angle Deployment
Avoiding the tight angle deployment Avoid tight P2MP angles in the deployment for the following reasons: Figure 54 (shown as an example), a downlink data transmission from the DN1 to CN1 can interfere with the uplink data reception at CN2 to DN2. This interference can be both down to main lobe in very tight angles or sidelobes with up to 20 degrees delta between two CNs. -
Page 81: When Two V5000 Devices Are Co-Located At A Site
Figure 56: Assigning Golay codes When two V5000 devices are co-located at a site When two V5000 devices are co-located at the same site, it is recommended that one must use different channels on the two V5000 devices to start with. Evaluate the issues specific to near-far radio and Tight Angle deployment. -
Page 82: Polarity
Polarity 60 GHz CnWave uses TDD, which is synchronized across the network. As one sector is in the transmit phase, the neighbor sector is in the receive phase. The transmit and receive phases of the sectors are determined by the EVEN or ODD polarity. -
Page 83: Radio Spectrum Planning
Radio spectrum planning General wireless specifications The following 60 GHz cnWave wireless specifications (all variants) table lists the wireless specifications that apply to all 60 GHz cnWave frequency bands: Table 31: 60 GHz cnWave wireless specifications (all variants) Item Specification Channel... -
Page 84: Regulatory Limits
Regulatory limits Many countries impose EIRP limits (allowed EIRP) on products operating in the bands used by the 60 GHz cnWave. These are commonly identified by limitations on conducted transmit power or by antenna gain. For example: Table 32: ERC recommendation (70-03) -
Page 85: Path Loss
60 GHz cnWave radios are designed to operate in Line-of-Sight (LoS) environments. The 60 GHz cnWave radios operate at ranges from 15 m (49 ft) to 2000 m (1.2 miles). The operation of the system depends on the frequency channel chosen. -
Page 86: Point To Point-Based Single Link Ethernet Bridge
Point to Point-based single link Ethernet bridge A Point to Point cnWave link can be configured to work as an Ethernet bridge. The operator needs to configure one end as PoP DN, and the other end as CN. -
Page 87: Support For Dual Networking (Ipv4 And Ipv6)
IPv6 is encapsulated in the GRE tunnel. The IPv6 user traffic is passed through the cnWave network in the GRE tunnel so that it does not be routed by the cnWave radios, but rather by an external IPv6 router. -
Page 88: Ipv6 Mode Network Planning
Figure 61: Example of an IPv4 and IPv6 supported network The operator can choose certain of the radio Ethernet port to be SLAAC based port or (CPE interface), user traffic from this port is only IPv6 based and does not be encapsulated into the GRE Layer 2 bridge when transmitted over the wireless network. -
Page 89: Ipv6 Network Design Consideration
There are two sets of networks while designing the IPv6 network. one set is for the OpenR subnets (e.g. prefix of 56 bits and partition into multiple 64 bits subnet). Each cnWave node is assigned with a subnet. Each PoP node, besides being part of the OpenR mesh network, has a subnet assigned to it and has an IPv6 address assigned to it as PoP interface IPv6 address. -
Page 90: Reserved Ipv6 Address Space
While the E2E and cnMaestro are two separate entities, they can be hosted on separate computers or the same computer. While the E2E communicates with the cnMaestro using IPv4, the E2E communicates with the cnWave radios using IPv6. Ethernet bridging... - Page 91 Prefix allocation Layer 2 domain All cnWave PoP nodes must be connected to the same Layer 2 broadcast domain. PoP nodes learn about other PoP nodes using IPv6 multicast packets, which do not cross broadcast domain. This allows cnWave PoP nodes to forward traffic to other cnWave PoP nodes via a wired connection when the routing path of the other PoP node is closer to the traffic’s destination.
-
Page 92: Layer 2 Control Protocols
The prefix allocation options Layer 2 control protocols 60 GHz cnWave identifies layer 2 control protocols (L2CPs) from the Ethernet destination address or Ethertype of bridged frames. The QoS classification can be separately configured for these protocols. Ethernet port allocation... -
Page 93: Ip Interface
IP Interface Select the IP version for the IP interface of the ODU management agent. 60 GHz cnWave can operate in IPv4 mode (via L2 tunneling), IPv6 mode. Choose one IPv4 address and/or one IPv6 address for the IP interface of the ODU management agent. -
Page 94: Installation
Always use an appropriately rated and approved AC supply cord-set in accordance with the regulations of the country of use. Powering down before servicing Before servicing 60 GHz cnWave equipment, always switch off the power supply and unplug it from the PSU. Installation... -
Page 95: Primary Disconnect Device
Do not disconnect the RJ45 drop cable connectors from the radio while the PSU is connected to the power supply. Always remove the AC or DC input power from the PSU. Primary disconnect device The primary disconnect device is the main power supply. External cables Safety may be compromised if outdoor rated cables are not used for connections that are exposed to the outdoor environment. -
Page 96: Siting Radios
60 GHz cnWave radios and mounting bracket options The 60 GHz cnWave series supports eight mounting bracket options. Select the optimum mounting bracket arrangement based on the ODU type and the choice of wall or pole mounting. The wall mount plate for V1000 and V5000 are included with the ODU. - Page 97 Typical installation V1000 Consider the following key points when installing V1000: 1. Use the recommended grounding and surge suppressor connections. 2. Use the recommended cables for interfacing ODU (refer to the supported power supply and cable length details in the Power supply units (PSU) section).
- Page 98 V2000 Consider the following key points when installing V2000: 1. Use the recommended grounding and LPU connections. 2. Use the recommended cables for interfacing ODU (refer to the supported power supply and cable length details in the Power supply units (PSU) section).
- Page 99 V3000 Consider the following key points when installing V3000: 1. Use the recommended grounding and LPU connections. 2. Use the recommended cables for interfacing ODU (refer to the supported power supply and cable length details in the Power supply units (PSU) section).
- Page 100 Power supply units (PSU) section). 3. Always install the ODU 0.5 meters below the tip of the pole. Figure 70 shows a typical installation of cnWave DN on a mast and powered through outdoor AC/DC PSU. Typical installation - V5000 DN Figure 70:...
-
Page 101: Odu Interface With Lpu On The Pole
ODU Interface with LPU on the pole V1000: You can install the V1000 CN on a pole. During the installation, use the 56V Gigabit Surge Suppressor for lightning protection. Ensure that the cable glands and grounding connections are made, as shown in Figure Installing the V1000 CN on a pole Figure 71:... - Page 102 V2000: During the installation of V2000 CN on a pole, use the 56V Gigabit surge suppressor for lightning protection. Ensure that the cable glands and grounding connections are made, as shown in Figure Figure 72: Installing the V2000 CN on a pole Installation...
- Page 103 V3000: You can install the V3000 CN on a pole using a precision bracket. During the installation, Use a recommended LPU for surge protection. Ensure glands and grounding connections are made, as shown Figure Installing the V3000 CN on a pole Figure 73: Installation...
- Page 104 V5000: You can install the V5000 DN on a pole using a tilt bracket. During the installation, use the recommended LPU for surge protection. Ensure glands and grounding connections are made, as shown in Figure Figure 74: Installing the V5000 DN on a pole Installation...
-
Page 105: Attach Ground Cables To The Radio
Attach ground cables to the radio 1. Fasten the ground cable to the radio grounding point using the M6 lug. Radio grounding point Figure 75: 2. Tighten the ODU grounding bolt to a torque of 5 Nm (3.9 lb-ft). Mounting the ODU Select the most appropriate bracket mounting arrangement from the options listed in the Mounting bracket... - Page 106 Inserting the hose clamps Figure 76: 2. Insert the radio into the mounting plate on the pole. Figure 77: Inserting the radio V1000 Wall mount Follow the below instructions to mount V1000 on the wall: 1. Fix the mounting plate (supplied with the V1000 ODU) securely to a vertical wall, using suitable fixings.
- Page 107 Fixing the mounting plate and the spring clip Figure 78: V1000 Adjustable pole mount Follow the below instructions to mount V1000 to the adjustable pole: 1. Insert the hose clamps through the adjustable pole mount bracket and clamp to the pole by applying 3.0 Nm torque.
- Page 108 Fixing the radio on the pole Figure 80: The adjustment can me bade up to maximum +/- 30 degrees and each serration movement is 5 degrees. V1000 Alignment The V1000 CN requires minimal effort to align as the internal antenna can beam steer +/- 40 degrees in azimuth and +/- 20 degrees in elevation from boresight.
- Page 109 Fixing V2000 to a pole Figure 81: 2. Align the device by viewing through the eye piece and the notch on radome, as shown in Figure Figure 82: Aligning the V2000 device 3. Use the bracket knob (as shown in Figure 84) to rotate fine adjustable bracket until the alignment is complete in the elevation plane.
- Page 110 The adjustable bracket supports the fine adjustment of up to +/-20° in elevation for an accurate alignment of the V2000 device. Figure 83: Aligning V2000 Figure 84: Using the adjustable bracket knob for alignment V2000 Antenna alignment The V2000 CN requires minimal effort to align as the internal antenna can beam steer +/-10 degrees in azimuth and +/-4.5 degrees in elevation from boresight.
- Page 111 V3000 Precision bracket The precision bracket is used to mount the cnWave V3000 CN on a vertical pole, providing fine adjustment up to 18° in azimuth and +/-30° in elevation for accurate alignment of the V3000. The precision bracket is compatible with pole diameters in the range of 25 mm to 70 mm (1 inch to 2.75...
- Page 112 2. Fit two flanged M8 nuts to the long screws on the back of the bracket. Tighten using a 13 mm spanner. Figure 87: Two MB nuts on the back of bracket 3. Insert the three medium-length (40 mm) M8 screws through the bracket base and the V3000 mount.
- Page 113 The pivot pin in the circular hole of mount Figure 89: 4. Fit plain washers and M8 Nyloc nuts to the screws on the back of the bracket base. Tighten using a 13 mm spanner. Plain washers and M8 Nyloc nuts on the back of the bracket Figure 90: 5.
- Page 114 MB Screws located in the slots in the bracket body Figure 91: You must ensure that the pivot pin in the azimuth adjuster is located in the circular hole in the bracket body. Figure 92: The pivot pin in the circular hole of bracket body 6.
- Page 115 Fixing pacers, plain washers and M8 Nyloc nuts Figure 93: 7. Attach the V3000 mount to the radio using the four short M6 bolts. Tighten the four bolts to a torque setting of 5.0 Nm (3.7 lb-ft) using a 13 mm spanner or socket. Figure 94: Attaching the V3000 mount 8.
- Page 116 Attaching the precision bracket Figure 95: 9. Lock the antenna alignment by tightening the five Nyloc nuts (see step 5 step 8) to 10 Nm (7.4 lb-ft) using a 13 mm spanner or socket. Figure 96: Locking the antenna alignment Note Visit the Cambium Learning website...
- Page 117 Three Nyloc screws on the unit Figure 97: 2. Ensure the two Nyloc screws for securing the bracket in the azimuth are loose. Figure 98: Two Nyloc screws in the azimuth 3. Before starting the mechanical alignment, move the fine elevation adjuster 2/3 of the way across the screw until the unit is sitting at approximately 0 degrees in elevation.
- Page 118 Moving the elevation adjuster Figure 99: 4. Move the fine azimuth adjuster to approximately the center of the available range and lock in position. Figure 100: Moving the azimuth adjuster 5. Loosen the clamp which attaches the bracket to the pole until there is enough freedom to rotate the unit in azimuth.
- Page 119 Locking the fine elevation adjuster Figure 101: You can use the alignment tube for adjustment, as described in Fixing the alignment tube. 8. While looking for the far node through the site, rotate the fine azimuth adjuster until the alignment is complete in the azimuth plane.
- Page 120 Attaching the telescope Figure 102: 3. If a telescope with a smaller body is used, shorten the O-rings by twisting. 4. Following the previously described precision bracket alignment method, align the radio starting with the site, and fine-tune using the scope for increased accuracy. Installation...
- Page 121 Fixing the alignment tube for V3000 Perform the following steps to fix the alignment tube for V3000: 1. Slide the alignment tube through the alignment slot, as shown in Figure 103. Figure 103: Sliding the alignment tube 2. Tighten the screw to fix the alignment tube in place, as shown in Figure 104.
- Page 122 Aligning the device Figure 105: V3000 Tilt bracket assembly 1. Fix the mounting plate of the tilt bracket to the back of the radio using four of the short bolts, ensuring that the arrow in the plate points towards the top of the radio. Tighten the four bolts to a torque setting of 5.0 Nm (3.7 lb-ft) using a 13 mm spanner or socket.
- Page 123 Fixing two long and short bolts Figure 107: 3. Thread two of the nuts to the long bolts and tighten against the bracket body using a 13 mm spanner. Fit the bracket strap and thread the remaining nuts onto the long bolts. Figure 108: Fixing the bracket strap 4.
- Page 124 Fixing the assembled bracket body Figure 109: 5. Fit the mounting plate to the bracket body by positioning the open- ended slots over the short bolts. Insert the remaining short bolts through the longer curved slots into the threaded holes in the bracket body.
- Page 125 Fixing the mounting plate of bracket body and adjusting the elevation angle Figure 111: V5000 Pole mount bracket 1. Pass the long screws through the bracket body. The screws are located in the recess in the bracket. 2. Fit two flanged nuts to the long screws on the back of the bracket. Tighten using a 13 mm spanner. 3.
- Page 126 Fixing the V5000 pole mount bracket Figure 112: V5000 Alignment The V5000 distribution node has two sectors, situated side by side, each covering a 140-degree range in azimuth, giving a combined coverage of 280 degrees. In elevation, the antenna can beam steer in a +/- 20-degree range.
- Page 127 Figure 113: V5000 alignment - Top view V5000 Wall mount bracket 1. Install the mounting plate of the wall mount bracket securely on a vertical wall, using suitable fixing hardware. Note Fixing hardware is not supplied with the wall mount bracket. 2.
-
Page 128: Connect To The Psu Port Of The Radio
Fixing the V5000 wall mount bracket Figure 114: Connect to the PSU port of the radio Using power over Ethernet (PoE) 1. Disassemble the gland and thread each part onto the cable (the rubber bung is split). Assemble the spring clip and the rubber bung. Figure 115: Assembling the spring clip and the rubber bung 2. - Page 129 Fixing the gland nut Figure 116: 3. Connect the RJ45 plug into the main PSU port of the ODU (which can be either V1000, V2000, V3000, or V5000). Figure 117: Connecting the RJ45 plug 4. Rotate the gland clock wise to tightly fit the gland on the PSU port. Warning Ensure that the cable clamp is not attached/ tightened at this stage, this may cause damage to the RJ45 or PCB.
- Page 130 Rotating the gland Figure 118: 5. Tighten the gland (cap or nut), this must be done last. Otherwise, it may damage the RJ45 or PCB. Disconnecting drop cable from the radio 1. Loosen and remove the cable clamp by rotating anti-clockwise from the PSU port. Figure 119: Removing the cable clamp Warning...
- Page 131 2. Remove the gland. Removing the gland Figure 120: 3. Press tab on RJ45 plug to remove the cable from PSU port. 4. Remove the latch of the RJ45 plug to remove the cable from the PSU port. Figure 121: Removing the latch of the RJ45 plug Installation...
-
Page 132: Using Ac/Dc Psu
Using AC/DC PSU Cable joiner A cable joiner is used to connect the wires. Insert the wires into the cable joiner by loosening the screws on the joiner. Cable joining parts Figure 122: Connecting the mini adapter Figure 123: Mini adapter connections Installation... - Page 133 Fitting the long cable gland The long cable gland Figure 124: Connecting the mini adapter to ODU 1. Plug and connect the input side of the AC/DC PSU to the AC power line and tighten the gland. Tighten the cable clamp cap. Connecting the input side of AC/DC PSU Figure 125: 2.
-
Page 134: Install The Psu
Install one of the following types of PSU: Installing the 60W DC power injector Installing the AC/DC PSU Installing 15W or 30W power injector Table 36: Details of PoE injector to be used for cnWave 60 GHz products Product Without AUX POE Enabled With AUx... -
Page 135: Installing The 60W Dc Power Injector
Attention Do not plug any device other than a 60 GHz cnWave ODU into the ODU port of the PSU. Other devices may be damaged due to the non-standard techniques employed to inject DC power into the Ethernet connection between the PSU and the ODU. - Page 136 Connecting the power injector to ODU drop cable Figure 128: Installation...
-
Page 137: Installing The Ac/Dc Psu
Installing the AC/DC PSU 1. Connect the input side of the AC/DC PSU to the AC power line. 2. Connect output side of DC PSU to ODU through cable joiner and DC mini adapter. Refer to the Cable joiner section for connecting, installing cable joiner and mini adapter. Figure 129: AC/DC PSU (N000000L179B) Figure 130:... -
Page 138: Installing 15W Or 30W Power Injector
Installing 15W or 30W power injector 1. Connect the 56V Gigabit Data and power port to ODU (which can be either V1000 or V2000) V1000 Power injector V2000 Power injector Figure 134: Figure 135: Note 30 W (N000000L034B) supports up to 5 GbE. V1000 or V2000 Powering diagram Figure 136: Installation... -
Page 139: Connecting To The Sfp+ Optical Module Or Sfp+ To The Copper Module To Odu
Connecting the V1000 Power Connecting the V2000 power Figure 137: Figure 138: injector injector 2. Connect the Gigabit data port to the network equipment. Connecting to the SFP+ optical module or SFP+ to the copper module to ODU When ODU is powered through AC/DC PSU, an optical or copper Cat6A Ethernet interface can be connected to the SFP port of the ODU for the data interface. - Page 140 1. Disassemble the long cable gland used for the optical SFP interface. Disassembling the long cable gland - optical SFP interface Figure 139: You must also disassemble the long cable gland used for the copper SFP interface. Disassembling the long cable gland - copper SFP interface Figure 140: 2.
- Page 141 1. Remove the blanking plug from the SFP port of the ODU. Removing the blanking plug from the SFP port Figure 143: 2. Insert the SFP module into the SFP receptacle with the label on the bottom. Figure 144: Inserting the SFP module 3.
- Page 142 Pushing the module home Figure 145: 4. Rotate the latch to the locked position. Figure 146: Rotating the latch Connecting the cable Attention The Fiber optic cable assembly is very delicate. To avoid damage, handle it with extreme care. Ensure that the fiber optic cable does not twist during assembly, especially when fitting and tightening the weatherproofing gland.
- Page 143 1. Remove the LC connector dust caps from the ODU end (optical cable only). Removing the LC connector dust caps Figure 147: 2. Plug the connector into the SFP module, ensuring that it snaps home. Plugging the connector into the SFP module Figure 148: Installation...
- Page 144 Fitting the gland 1. Fit the gland body to the SFP port and tighten it to a torque of 5.5 Nm (4.3 lb-ft). Figure 149: Fitting the land body 2. Fit the gland nut and tighten until the rubber seal closes on the cable. Do not over-tighten the gland nut, as there is a risk of damage to its internal components.
-
Page 145: Removing The Cable And Sfp Module
Fitting the gland nut Figure 150: 3. Fit the gland nut to the rubble seal on the gland body and tighten it to a torque of 5.5 Nm (4.3 lb- ft). Figure 151: Fitting the gland nut to the rubble seal Removing the cable and SFP module Do not attempt to remove the module without disconnecting the cable, otherwise, the locking mechanism in the ODU will be damaged. - Page 146 1. Remove the cable connector by pressing its release tab before pulling it out. Removing the cable connector Figure 152: 2. Pull the bale clasp (latch) to the unlocked position. Extract the module by using a screwdriver. Figure 153: Pulling the bale clasp (latch) Installation...
-
Page 147: Configuring 60 Ghz Cnwave
Configuring 60 GHz cnWave™ Nodes deployment The configuration of cnWave nodes is handled automatically by the E2E service. However, the first PoP node must be configured manually since connectivity to the E2E controller has not yet been established. After establishing communication with the E2E controller, the nodes report a hash of their local configuration file and the controller automatically pushes configuration changes to the nodes upon seeing any mismatches. - Page 148 Internet > Network Connections > Local Area Connection. 2. Select Internet Protocol Version 4 (TCP/IPv4). Figure 155: The Ethernet Properties dialog box 3. Click Properties. 4. Enter an IP address that is valid for the 169.254.X.X/16 network, avoiding 169.254.1.1 (for example: 169.254.1.3). Configuring 60 GHz cnWave™...
-
Page 149: Connecting To The Pc And Powering Up
4. When prompted, enter admin/admin to login to the GUI and complete the configuration. Using the web interface This section describes how to log into the 60 GHz cnWave web interface and use its menus. Logging into the web interface Use this procedure to log into the web interface as a system administrator. - Page 150 3. Type the username and password as admin and admin. Click Sign In. The Dashboard page appears. Configuring 60 GHz cnWave™...
- Page 151 Displays the total running time of the device. Links Displays the total number of active links which are connected to the 60 GHz cnWave™ device. Channels Displays the total number of channels (Sector 1, Sector 2, etc.,) which are connected to the 60 GHz cnWave™...
- Page 152 Displays the connection status of the E2E controller. MAC address Displays the MAC address of the 60 GHz cnWave device. Serial Number Displays the serial number of the 60 GHz cnWave device Model Displays the model of the 60 GHz cnWave device. The models are: Configuring 60 GHz cnWave™...
- Page 153 Description V1000 V2000 V3000 V5000 Software version Displays the software version used in 60 GHz cnWave device. Firmware version Displays the Firmware version used in 60 GHz cnWave device. Wireless security Displays the security type. The types are: Disabled 802.1X Layer 2 Bridge Displays bridge status.
- Page 154 Displays the speed of Ethernet ports RX Packets Number of packets received TX Packets Number of packets transmitted RX Throughput Displays the RX Throughput of the Ethernet TX Throughput Displays the TX Throughput of the Ethernet Configuring 60 GHz cnWave™...
-
Page 155: Enabling Internal E2E Controller
(refer E2E User Guide ) . Currently, the internal E2E controller is restricted to 31 nodes. 1. Click the E2E Controller option on the left pane of the Dashboard. 2. Click Enable E2E. The Enable Onboard E2E dialog box appears. Configuring 60 GHz cnWave™... - Page 156 3. Enter the required details and click Enable. 4. After enabling E2E Controller, the dashboard displays the links which are connected to the device. Configuring 60 GHz cnWave™...
-
Page 157: Topology
To add sites, nodes and links, perform the following steps: 1. In the main dashboard page, click Topology on the left navigation pane. The Topology page appears. By default, the Sites tab is selected, as shown below: Configuring 60 GHz cnWave™... - Page 158 The Add Site dialog box appears, as shown below: Figure 163: The Add Site dialog box 3. Enter the Name, Latitude, Longitude, Altitude, Accuracy information, and click Save. The new DN site information gets added to the topology, as shown below: Configuring 60 GHz cnWave™...
- Page 159 4. To add a DN node, click on the Nodes tab in the Topology page. The Nodes page appears, as shown below: Figure 165: The Nodes page 5. Click Add New and provide values in the Add Node dialog box, as shown below: Configuring 60 GHz cnWave™...
- Page 160 The DN node gets added to the topology. 7. To add a link, click on the Links tab in the Topology page. The Links page appears. 8. Click Add New and provide values in the Add Link dialog box, as shown below: Configuring 60 GHz cnWave™...
- Page 161 1. From the dashboard page, navigate to Topology > Nodes. 2. Select the required node and click in the corresponding row. Then, select Edit Node. The Edit Node dialog box appears with information for the selected node. 3. Rename the node, as shown below: Configuring 60 GHz cnWave™...
-
Page 162: Configuration
Basic, Management, Security and Advanced options for the configuration. Settings under Network apply to all the nodes in the network. Some apply to the E2E Controller. Enter the required information and click Submit to configure the network. Configuring 60 GHz cnWave™... - Page 163 Figure 170: The Network page with multiple tabs The Network page contains the following tabs: Basic tab Management tab Security tab Advanced tab Configuring 60 GHz cnWave™...
- Page 164 Basic tab 1. By default, cnWave is an IPv6-only network. By selecting this checkbox, Layer 2 network bridging is enabled (via automatically created tunnels) across all nodes connected to a PoP. This facilitates the bridging of IPv4 traffic across the wireless networks.
- Page 165 The Prefix Allocation section Figure 172: Seed Prefix The prefix of the entire cnWave network, is given in CIDR notation. 3. Select Prefix Length, Country, Channels, DNS Servers, and Time zone from the drop-down. Prefix Length Specifies the bit-length of prefixes allocated to each node.
- Page 166 Figure 173: The Wireless Scans section The 60 GHz cnWave products can align the wireless link within an azimuth/elevation range by selecting from a number of fixed beams. A normal scan without Scheduled Beam Adjustment does the following operations: Beam selection occurs only on wireless link acquisition.
- Page 167 An operator wants CPE Address to be in different ranges than Seed Prefix. Therefore, the user traffic can be distinguished from the traffic generated by the cnWave nodes. Customized CPE prefix is used with the range 3001:0:0:00XY::/64, where X contains values from 1 to 3.
- Page 168 1. Navigate to Network > Basic from the home page. The Basic page appears. The Summarized CPE Prefix text box is available in the CPE Prefix Zoning section, as shown in Figure 175. Figure 175: The Summarized CPE Prefix text box Configuring 60 GHz cnWave™...
- Page 169 Enable SNMP - Statistics can be read from the nodes using SNMP. This setting enables SNMP. System Contact - Sets the contact name as the System.sysContact.0 MIB-II variable. System Location - Sets the location name as the System.sysLocation.0 MIB-II variable. SNMPv2c Settings: Configuring 60 GHz cnWave™...
- Page 170 Installer User Password - A password that you can set for the required installers. Monitor User Password - A read-only password that you set for the monitoring purposes. Security tab Security tab contains Disabled, PSK, and RADIUS Server options for Wireless Security. Select the required option. Configuring 60 GHz cnWave™...
- Page 171 RADIUS server shared secret - The shared secret of a radius server. Advanced tab These settings are for advanced users only. Displays the merged configuration off all layers for a particular node. Caution The users are not recommended to do these settings. Configuring 60 GHz cnWave™...
- Page 172 These settings apply to individual nodes selected in the left side panel. Select the required options for Transmit Power, Adaptive Modulation, Sector 1, Sector 2 from the drop-down. Enable Force GPS Disable to establish the link between indoor nodes. Configuring 60 GHz cnWave™...
- Page 173 IBF Transmit power - Transmit power using during initial beam forming. When all the links are in short-range, high transmit power can cause interference. Selecting short-range optimized will prevent this. Post beam forming, automatic power control will make sure the radio transmits at optimal power. Configuring 60 GHz cnWave™...
- Page 174 GPS. Caution 60 GHz cnWave V1000 and V3000 devices has only Sector 1. V3000 Small dish support The software allows the selection of smaller 40.5 dBi antenna dish. To select V3000 small dish, navigate to Configuration > Nodes >...
- Page 175 Figure 180: The Antenna section Caution Small dish is supported only for 60 GHz cnWave V3000. Networking tab When you navigate to Nodes > Networking from the home page, the Networking page appears. In the Networking page, perform the following steps: 1.
- Page 176 The wired interface on which PoP communicates to an upstream router or switch Interface when the L2 bridge is enabled. IPv6 address on the interface that the PoP node uses to communicate with the Interface upstream router. IP Address Configuring 60 GHz cnWave™...
- Page 177 Should be specified when BGP is used. Otherwise, optional. IPv6 CPE Interface IPv6 SLAAC provides IP prefix to downstream CPE devices. Keep it disabled when L2 Bridge is active. 4. Select the required BGP configuration. Figure 183: The BGP Configuration section Configuring 60 GHz cnWave™...
- Page 178 6. Select the required options for Layer 2 Bridge, IPv6 Layer 3 CPE, AuX PoE (enable to power on AuX port), and Multi-PoP / Relay Port. By default, this option is disabled and PoP floods any unknown unicast ingress packets on all the L2GRE tunnels. When the option is enabled, PoP drops such packets. Configuring 60 GHz cnWave™...
- Page 179 Following options are supported: Main Disabled Enabling the DHCP Option 82 feature When the DHCP Option 82 feature is enabled, 60 GHz cnWave intercepts DHCPv4 REQUEST and DISCOVER packets and inserts option 82 fields. Configuring 60 GHz cnWave™...
- Page 180 The DHCP Option 82 feature The enabled status of DHCP Option 82 implies that the feature is activated. 2. Type appropriate values in Circuit ID and Remote ID text boxes. 3. To save the configuration, click Submit. Configuring 60 GHz cnWave™...
- Page 181 PoP. A separate IPv4 address should be configured by bypassing the Management VLAN. Navigate to Configuration > Nodes > Networking > OOB and select the required option. Enter the IPv4 address and Subnet Mask to access the device. Configuring 60 GHz cnWave™...
- Page 182 PoP, Relay, or Out of Band (OOB) interface. This feature does not support V1000 (which contains only one port). Figure 189 shows how a 60 GHz cnWave PTP link is backed up with a PTP450 link. You can consider the 60 GHz link (as shown in Figure 189) as the primary link and 5 GHz link as the secondary link.
- Page 183 Scenario 2: Whenever a 60 GHz link is up or active, traffic flows through the 60 GHz cnWave link. When the 60 GHz link is down, traffic fails over (shifts) to the 5 GHz link (PTP450). When the 60 GHz link is back (up), the traffic shifts instantly over to the 60 GHz cnWave link.
- Page 184 (for example, PTP450 or ePMP). This IP address must be in a different subnet other than node IP address or seed prefix. The IP address can be either IPv4 or IPv6. However, ensure that external failover devices have IPv6 enabled. Configuring 60 GHz cnWave™...
- Page 185 Remote external failover node address: Configure the remote external failover node address. You can access the external failover device UI using http://<cnwave node IP>:50080/ or https://<cnwave node IP>:50443/. To configure the external failover link feature using the cnMaestro UI, perform the following steps: 1.
- Page 186 There are no statistics available on the external failover link. No other UI or cnMaestro used for configuring the external failover interface and address. This feature can be configured only through the Configuration > Nodes > Advanced page. Configuring 60 GHz cnWave™...
- Page 187 Port Type Figure 194: The port types Transparent By default, the Ethernet port is in transparent mode. Packets will be transparently bridged without any 802.1Q processing. Q mode allows adding a single C-VLAN tag to untagged packets. Configuring 60 GHz cnWave™...
- Page 188 This option allows dropping untagged packets. Native VLAN properties are not necessary to fill when untagged packets are dropped. QinQ QinQ mode allows adding a double tag to untagged packets and outer S-VLAN to single-tagged packets. Native C-VLAN ID and priority Figure 198: Configuring 60 GHz cnWave™...
- Page 189 VLAN fields are not necessary only when dropping single-tagged packets. Native S-VLAN fields are not necessary when dropping untagged and single tagged packets. Figure 201: Allowed VLANs Allow only the listed range of VLAN IDs. VLAN ID of the outer tag is used for this check. Figure 202: QinQ EtherType Configuring 60 GHz cnWave™...
- Page 190 Priority field in the (outer) VLAN tag of ingress packet can be overwritten using this option. VLAN Priority Override Figure 204: Priority field in the (outer) VLAN tag of ingress packet can be overwritten using this option. Configuring 60 GHz cnWave™...
- Page 191 A Single tag or double tag can be added to Management traffic. The Management section Figure 205: Security tab In the Security tab, enter Private key password and Radius user password. Private key password Radius user password Configuring 60 GHz cnWave™...
- Page 192 This Controller GUI configuration to be made on each DN. Figure 207: Elements specific to Controller configuration Node UI configuration You can configure the Security page for a single node. The Security page is available on the single node Configuring 60 GHz cnWave™...
- Page 193 Server certificate is signed by CA uploaded in node configuration. 3. Set the CA certificate which signed the client certificate installed on each node. Advanced tab These settings are for advanced users only. Caution Users are not recommended to do these settings. Configuring 60 GHz cnWave™...
- Page 194 Configuration options under Network > Advanced and Node > Advanced are for advanced users who understand the cnWave configuration model well. It is not recommended to use these options. Shows the merged configuration from the Base layer to the Network override layer.
-
Page 195: Operation
Operation Software upgrade The Software Upgrade page is used to upgrade the installed software. This page contains the following three tabs: Node Upgrade - to upgrade the node Images - to upgrade the software images Node Upgrade Status - displays the upgrade status To upgrade a node, perform the following steps: 1. -
Page 196: Diagnostics
You can also set additional options, if required, such as Upgrade Timeout, Download options, and Download Timeout. 4. Click Commit to upgrade the node. 5. To upgrade the software image, click on the Images tab in the Software Upgrade page. The Images page appears, as shown below: The Images page Figure 210:... - Page 197 Events DA Logs Engineering logs Events The Events page displays the running and competed tasks list and these events can be exported. To export the event list click Export. DA Logs Operation...
-
Page 198: Statistics
Engineering logs Statistics The Statistics menu contains the following options: Links Ethernet Radio Performance Prefix Zone Statistics Border Gateway Protocol (BGP) Links The Links page has Uplink and Downlink statistical data. It displays TX and RX data of the nodes from A to Z and Z to A. - Page 199 Figure 212: The Links page The Links page displays the following elements: Table 47: Elements in the Links page Elements Description Link Name Link name A-Node Initiator Node Z-Node Responder Node RSSI Receiver Signal Strength Indicator Link Fade The statistic value (in dB) available for each RF link Margin The Link Fade Margin statistic values help operators to quickly assess any additional system gain or low marginal RF links (if any), which must be addressed.
-
Page 200: Ethernet
Elements Description TX Scan Transmitter scan beam index Beams RX Errors Receiver errors RX Frames Receiver frames TX Errors Transmitter errors TX Frames Transmitter frames Ethernet The Ethernet page displays Transmitting and receiving data of the nodes. Figure 213: The Ethernet page The following elements are displayed in the Ethernet page: Table 48: Elements in the Ethernet page Elements... -
Page 201: Gps
Elements Description TX Dropped Transmitter dropped RX PPS Receiver Packets Per Second TX PPS Transmitter Packets Per Second RX Throughput Receiver throughput TX Throughput Transmitter throughput The GPS page displays geographical data of the nodes. Figure 214: The GPS page The following elements are displayed in the GPS page: Table 49: Elements in the GPS page Elements Description... -
Page 202: Radio
Radio The Radio page displays the radio data of the nodes. Figure 215: The Radio page The Radio page has the following elements: Table 50: Elements in the Radio page Elements Description Device Name Name of the device MAC Address MAC address of the device Sync Mode GPS sync:... -
Page 203: Performance
Elements Description RX Throughput Receiver throughput TX Throughput Transmitter throughput Performance The Performance page displays the performance graph. The Performance page Figure 216: The Performance page contains the following graphs: Table 51: Elements in the Performance page Elements Description RSSI Receiver Signal Strength Indicator. It is a measurement of the power present in a received radio signal Transmit Transmitting power... - Page 204 Elements Description Frames Transferred The number of frames transferred from the node. Frames RSSI graph Figure 217: RSSI graph Transmit Power graph Figure 218: Transmit Power graph Operation...
- Page 205 SNR graph Figure 219: SNR graph MCS Index graph MCS Index graph Figure 220: Operation...
- Page 206 Packet Error Ratio graph Figure 221: Packet Error Ratio graph Received Frames graph Figure 222: Received Frames graph Operation...
-
Page 207: Prefix Zone Statistics
Transferred Frames graph Figure 223: Transferred Frames graph Prefix zone Statistics In the multi-PoP deployments, the mesh is divided into prefix zones. Prefix zone statistics are available on the Statistics > Prefix Zone page. Note You can view the prefix zone statistics only when Deterministic prefix (DPA) is enabled. With CPA enabled, the Prefix Zone tab is not visible on the Statistics page. -
Page 208: Maps
PoPs to their peers and the routes received by the peers. Figure 225: The BGP page Maps The Maps page displays the topology and location/sites of the deployed nodes in the cnWave network. Click the Maps icon on the left panel to display the nodes. Figure 226: The Map page... -
Page 209: Tools
Tools The Tools page contains the following tabs: Factory Reset Field Diags Antenna Alignment Remote Command Ping Quick PTP Setup Factory reset The Factory Reset page is used to set the default settings. Figure 227: The Factory Reset page Warning Factory reset is followed immediately by a system reboot. -
Page 210: Antenna Alignment
Figure 228: The Field Diags page To download the logs for self node, click Download Logs at the bottom and save the log file. Figure 229: Saving log files Antenna alignment The Antenna Alignment tool assists in optimizing the alignment of V3000 to V3000, V5000, V2000, or V1000. - Page 211 Complete a Link Plan with the help of a Link Planner from Cambium Networks. This prerequisite task provides the information on the RSSI expected for the PTP link. This must be used as target while using the antenna alignment tool.
- Page 212 Note If the alignment is initiated from a CN, ensure that the operating channel is set on the radio (before alignment). If the channel is not set, you must set the required channel in the Configuration page of the V3000 single node UI. 2.
- Page 213 The RSSI time series Figure 232: Following details explain about the RSSI time series that populates in the Antenna Alignment page: The Local Node section (located at the left side of the Antenna Alignment page) displays the direction of arrival angle with respect to the local (PoP) device. The Remote Node section (located at the right side of the Antenna Alignment page) displays the direction of arrival angle with respect to the remote device.
- Page 214 4. Adjust the optimal RSSI that must be reached when the beams are close to the central region, as shown in Figure 233. Figure 233: The optional RSSI alignment The RSSI time series must be close to the Link planner's predicted RSSI (the receive level when aligning, as shown in Figure 234), with an error of +/-5dB.
- Page 215 Figure 234: An example of the receive level when aligning - Link planner 5. Make use of the direction of arrival information (if there is any elevation or azimuth mismatch) to physically align the radio antennas. When there is an elevation mismatch (as shown in Figure 235): Figure 235:...
- Page 216 Figure 236: On correcting the elevation mismatch When there is an azimuth mismatch (as shown in Figure 237): Figure 237: Example of the azimuth mismatch Figure 237, the angles are exaggerated to show the point. In this example, consider that the radio has been misaligned in azimuth by 2 degrees to the right behind the unit (from an installer’s view side).
- Page 217 On correcting the azimuth mismatch Figure 238: 6. When you achieve the desired alignment and RSSI, click the End Alignment button located at the top left side of the Antenna Alignment page. If you do not click the End Alignment button, the alignment cycle ends automatically after 15 minutes.
-
Page 218: Show Sfp Power Details
Show SFP power details Show SFP Power Details is a remote command that is available on the Tools page. When you execute this remote command from the Onboard Controller UI or the node CLI, the command provides the SFP power details (as an output) for the required SFP ports and interfaces. - Page 219 Output Parameter Description If the Status field does not contain OK, it implies that only the Status field is valid. In such cases, the Status field provides the reason for not being able to read the laser powers. CalibrationType Indicates the measurement type that is calibrated over the criteria, such as the following (for example): Specified transceiver temperature, Transceiver supply voltage,...
-
Page 220: Ping
Figure 241: The CLI supported output - SFP Power details Ping The Ping tool provides information that is used to identify the reachability between the required node and another nodes or destination (for IPv4 and IPv6). The ping tool is useful in troubleshooting the radio links. -
Page 221: Quick Ptp Setup
Parameter Description Number of times that a packet is transmitted to find the reachability. Default value: 3 Number of Packets (-c) This parameter supports values between 1 (minimum) and 10 (maximum). Type an appropriate value in the text box. Size (in bytes) of the packet. Default value: 56 Buffer Size (-s) This parameter supports values between 1 (minimum) and... - Page 222 With the Quick PTP Setup option, you can skip the long process of creating a PTP link that involves the following actions: 1. Enabling Onboard Controller on the required node that can also act as a PoP node. 2. Adding a site for the CN node. 3.
-
Page 223: Cnmaestro Support For Onboard Controller
cnMaestro support for Onboard Controller From System Release 1.0.1 onwards, The Onboard E2E controller can be managed by cnMaestro 2.5.0 (on-premises) for network management. 1. After the Onboard E2E controller is enabled from UI, enter the cnMaestro URL. If Cambium ID based authentication option is enabled in cnMaestro, then enter the Cambium ID and onboarding key. - Page 224 4. Click Enable. 5. A new E2E Network appears in cnMaestro. Click Approve to manage it. Figure 246: Information on the new E2E network 6. The Network Onboard window appears and provides an option to edit the network name. 7. Click Save. Operation...
-
Page 225: Auto Manage Ipv6 Routes (External E2E Controller)
After the successful onboarding of the E2E Network, it can be managed through cnMaestro. Figure 248: The Onboard 60 GHZ cnWave E2E dashboard page Auto Manage IPv6 Routes (External E2E Controller) E2E Controller communicates with all nodes over IPv6. PoP nodes use IPv6 address of the statically configured interface to communicate with E2E Controller. - Page 226 Single PoP network When the feature is disabled, you must add the IPv6 route by performing the following steps: 1. From the landing page of the device UI, navigate to Tools > Settings > IPv6 Routes > Add new. The Add Route page appears, as shown in the Figure 249.
- Page 227 When the Auto Manage Routes feature is enabled, it performs the following functions in a multi-PoP network: Understands the network topology of 60 GHz cnWave, Keeps a track of aliveness of PoPs, and Dynamically builds and manages the routing table.
-
Page 228: Unconnected Pops
Figure 252: Diagrammatic representation of IPv6 routes and traffic control Unconnected PoPs In a multi-PoP network, PoPs must be able to exchange openR packets either on wired or wireless path. Otherwise, DNs might not receive the IPv6 address allocation and do not onboard to E2E Controller. This is due to when Controller sends the Prefix Allocation message to one of the PoPs and expects the message to reach other PoPs through openR. - Page 229 You must set this parameter's flag to false when there is a wired or wireless path between PoPs. You can modify the flags.enable_pop_prefix_broadcast parameter in the UI of 60 GHz cnWave. To configure the parameter, perform the following steps: 1. From the landing page of the device UI, navigate to Configuration > E2E Controller.
-
Page 230: Regulatory Information
Europe EN 62368-1, EN 60950-22 International CB certified IEC 62368-1 Edition 2 IEC 60950 -22 Electromagnetic Compatibility (EMC) compliance The EMC specification type approvals that are granted for 60 GHz cnWave platform family are listed in following table. Regulatory Information... -
Page 231: Human Exposure To Radio Frequency Energy
Exposure to Time-Varying Electric, Magnetic, and Electromagnetic Fields. Power density exposure limit Install the radios for the 60 GHz cnWave platform family of wireless solutions to provide and maintain the minimum separation distances from all persons. The applicable FCC power density exposure limit for RF energy in the 57 – 66 GHz frequency bands is 10 . - Page 232 Note Les tableaux suivants indiquent les distances de séparation recommandées calculées pour le cnWave ™ 60 GHz pour l'Europe, les États-Unis et le Canada. Ce sont des distances prudentes qui incluent des marges de conformité. At these and greater separation distances, the power density from the RF field is below generally accepted limits for the general population.
-
Page 233: Compliance With Radio Regulations
Les calculs ci-dessus sont basés sur la PIRE maximale de la plate-forme et le pire des cas, un cycle de service de 100%. Compliance with radio regulations This section describes how the 60 GHz cnWave platform family complies with the radio regulations that are in force in various countries. Caution... -
Page 234: Type Approvals
109AO-60V2000 109AO-60V3000 109AO-60V5000 Federal Communications Commission (FCC) compliance The 60 GHz cnWave V1000, V2000, V3000 and V5000 comply with the regulations that are in force in the USA. Caution If this equipment does cause interference to radio or television reception. -
Page 235: Innovation, Science And Economic Development Canada (Isedc) Compliance
Innovation, Science and Economic Development Canada (ISEDC) compliance The 60 GHz cnWave V1000, V2000, V3000 and V5000 comply with the regulations that are in force in Canada. Caution If this equipment does cause interference to radio or television reception. Attention Si cet équipement cause des interférences à... - Page 236 Figure 256: 60 GHz cnWave™ V3000 Client Node Radio only Figure 257: 60 GHz cnWave™ V2000 Client Node with no power cord Regulatory Information...
- Page 237 60 GHz cnWave™ V5000 Distribution Node V5000 C6000500A004A 60 GHz cnWave™ V3000 Client Node radio only V3000 C600500C024A 60GHz cnWave V2000 Client Node no power supply, no power V2000 C600500C030A cord 60 GHz cnWave™ V1000 Client Node with no cord V1000 C600500C14A 60 GHz cnWave™...
-
Page 238: Troubleshooting
Troubleshooting This section describes the troubleshooting steps and addresses frequently asked questions related to 60 GHz cnWave product deployment. Field diagnostics logs Setup issues in IPv4 tunneling Link is not established PoP not online Link is not coming up Link is not having expected throughput performance... - Page 239 Figure 261: Downloading the logs To download the logs for a self node, click Download Logs at the bottom and save the log file. Troubleshooting...
-
Page 240: Setup Issues In Ipv4 Tunneling
Setup issues in IPv4 tunneling In IPv4 tunneling, if setup issues occur then perform the below steps: 1. Click Configuration on the left pane, navigate to Network > Basic > Layer 2 Bridge and verify Enable Layer 2 bridge is selected. Troubleshooting... - Page 241 2. On the same page under Configuration Management, verify E2E Managed Config is selected. 3. Click Configuration > Nodes > PoP DN > Networking > Layer 2 Bridge and verify Disable Broadcast Flood and Disable IPv6 are disabled. Troubleshooting...
-
Page 242: Link Is Not Established
4. Ensure that PoP DN and DNs are in the same subnet and verify gateway is correct. Link is not established If link is not established between the nodes, then verify the below options: 1. Click Configuration on the left navigation pane of the home UI page. 2. - Page 243 The Sector 2 section in the Radio page Figure 262: 3. Select DN > Networking > Ethernet Ports and ensure that specific Ethernet ports are enabled. Figure 263: The Ethernet Ports section in the Networking page 4. From the left navigation pane, navigate to Topology > Nodes and verify the Status is Online Initiator.
- Page 244 Status of nodes in the Topology page Figure 264: 5. From the left navigation pane, go to Statistics > Links and verify RSSI, MCS, and TX Power Index. Figure 265: Link details in the Statistics page 6. Go to Performance and verify the graphs. Figure 266: Graphs in the Performance page Troubleshooting...
-
Page 245: Pop Not Online From E2E Or Cnmaestro Ui
7. Go to Radio and monitor the throughput capacity. Monitoring the throughput in the Radio page Figure 267: 8. If internal GPS is used, then verify Configuration > Nodes > Radio > GPS > Force GPS Disable is enabled. Figure 268: Verifying the Force GPS Disable check box PoP not online from E2E or cnMaestro UI This usually means that the PoP node is not able to talk to the E2E controller. -
Page 246: Link Does Not Come Up After Some Configuration Change
4. Ensure that both ends of the link has the same software version. 5. Ensure to configure country code on the E2E GUI. 6. Ensure that the two ends of the link use opposite polarity and Golay codes that matches each other. - Page 247 Warning Factory reset is followed immediately by a system reboot. You must carefully configure the factory reset settings as the device comes up with the default settings. All the existingconfigurations are lost when the system comes up. 2. Click Factory Reset and Reboot. The Confirm message box appears, as shown in the following figure: 3.
-
Page 248: Cambium Networks
Devon, TQ13 7UP United Kingdom www.cambiumnetworks.com Cambium Networks and the stylized circular logo are trademarks of Cambium Networks, Ltd. All other trademarks are the property of their respective owners. © Copyright 2022 Cambium Networks, Ltd. All rights reserved. Cambium Networks...
Need help?
Do you have a question about the cnWave and is the answer not in the manual?
Questions and answers