Advertisement
Quick Links
Page 1 of 14
Touch Potentiometer Hookup Guide
Introduction
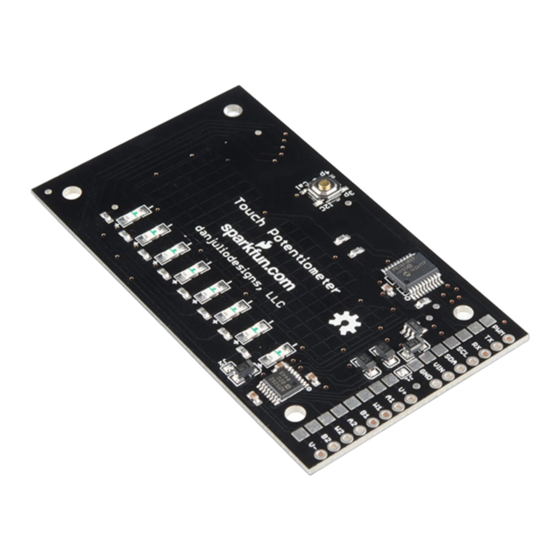
The Touch Potentiometer, or Touch Pot for short, is an intelligent, linear
capacitive touch sensor that implements potentiometer functionality with
256 positions. It can operate as a peripheral to a computer, embedded
microcontroller or in a stand-alone capacity. The Touch Potentiometer
provides both a dual-channel analog and PWM output for direct control of
other circuitry. Configurable analog and PWM transfer functions support a
wide variety of applications.
The SparkFun Touch Potentiometer front and back
Note: This product is a collaboration with danjuliodesigns. A portion of each
sales goes back to them for product support and continued development.
Recommended Materials
This tutorial will go over numerous examples of how to us the Touch
Potentiometer. The materials needed to follow along with each example will
be listed at the beginning of that example's section.
Suggested Reading/Viewing
First and foremost, Dan Julio of danjuliodesigns has written an amazing
user manual for the Touch Potentiometer. Most of the information you need
to know about the Touch Pot can be found in that document including
maximum power ratings, dimensional drawing, and very detailed
operational instructions. You can download the manual via the link below or
you can always grab the most up-to-date version from his website.
TOUC H POTE NT IOME TE R USE R MANUAL
Advertisement

Related Manuals for sparkfun PRT-13144


Summary of Contents for sparkfun PRT-13144
- Page 1 Configurable analog and PWM transfer functions support a wide variety of applications. The SparkFun Touch Potentiometer front and back Note: This product is a collaboration with danjuliodesigns. A portion of each sales goes back to them for product support and continued development.
-
Page 2: Board Overview
Page 2 of 14 To better understand the Touch Potentiometer and how it functions, it will help to have a good understanding of the following concepts. If there’s any you are unfamiliar with, visit the corresponding tutorial first, then head on back. -
Page 3: Serial Communication
Page 3 of 14 simultaneously. The serial interface operates at 9600 baud. The I C interfaces is a 7-bit slave with a maximum clock rate of 100 kHz. It does not support General Call or 10-bit addressing. Pin Label Function Ground +5-12 Volt power input I C SDA (Data) -
Page 4: Pulse-Width Modulation
Page 4 of 14 Pulse-width Modulation The PWM output generates a signal with a duty-cycle that is proportional to the current Touch Potentiometer value. A value of zero results in a PWM output of 0% duty cycle (off). A value of 255 (full-scale) results in a PWM output of nearly 100% duty cycle (on). - Page 5 Page 5 of 14 passing through the potentiometer. A power supply connected to V- and V+ may require additional filtering to eliminate this noise. Calibration/Configuration Button The Touch Pot has a button located on the backside that allows the user to change both the I C address on the fly as well as calibrate the capacitive touch sensor on the fly.
-
Page 6: Hardware Hookup
Page 6 of 14 Checking the Jabber check box will display the current value of the senor. Sliding your finger along the sensor will change this value in real time. Other setting such as LED behavior can be altered here. The PWM output can be set to linear or non-linear for lighting systems. - Page 7 Page 7 of 14 The Touch Pot works best as a lighting dimmer control when the PWM output set to Non-linear. This can be accomplished in the tputil app mentioned in the previous section. Connecting the Touch Pot to the PicoBuck only requires two wires. Ground needs to connect to ground on the opposite board.
- Page 8 Touch Pot to control both the left and right volume for an audio amplifier. This example will be using the SparkFun Audio Amplifier Kit. The same hookup could be used with the SparkFun Mono Audio Amp Breakout as well.
- Page 9 Page 9 of 14 Once both volume channels are connected, we’ll need to provide power to the Amp and the Touch Pot. Since the Touch Pot has a 5V LDO voltage regulator, we can use the same power supply to power both the Amp and the Touch Pot.
- Page 10 Page 10 of 14 Hardware Hookup This example uses a Pro Micro 5V to communicate with the Touch Pot over I C. The connections between the two are as follows: You should end up with something that looks like this: Note: The white and blue wires are connected to the serial interface to allow the Pro Micro to talk to the tputil as well using a different sketch, tp_test_sketch, found on danjuliodesign.com.
- Page 11 Page 11 of 14 Once the Pro Micro is setup in the Arduino IDE, select the correct board (Pro Micro) and serial port. Then, upload the following code to the Pro Micro:...
- Page 12 Page 12 of 14 /* * Simple Touch Potentiometer Example with Arduino * * Reads the pot value and controls the brightness of the Ardu ino LED on * Digital Pin 13. Also logs new values to the serial port. Utilizes * both the direct and indirect command interface forms. * * Assumes Touch Pot is at I2C Address 8 * * Released into the public domain by Dan Julio. This softwar e is supplied on an asis * basis and no warranty as to its suitability for any particu lar purpose is either made * or implied. danjuliodesigns, LLC. will not accept any clai m for damages howsoever * arising as a result of use or failure of this software. */ #include "Wire.h" int i2cAddr = 8; // Direct access at i2cAddr, indirect registe rs at i2cAddr+1 uint8_t prevValue; uint8_t curValue; void setup() { Serial.begin(115200); Wire.begin(); pinMode(13, OUTPUT); // Demonstrate access to Touch Potentiometer registers WriteTpReg(1, 128); // set to 50% by writing to register 1 curValue = ReadTpReg(1); // read back value just set // Set Arduino LED PWM to match analogWrite(13, curValue);...
- Page 13 Page 13 of 14 uint8_t ReadTpValue() { Wire.requestFrom(i2cAddr, 1); if (Wire.available()) { return Wire.read(); } else { return 0; } } // Read a Touch Potentiometer register uint8_t ReadTpReg(uint8_t addr) { Wire.beginTransmission(i2cAddr+1); Wire.write('R'); Wire.write(addr); Wire.endTransmission(); Wire.requestFrom(i2cAddr+1, 1); if (Wire.available()) { return Wire.read(); } else { return 0; } } Once that is uploaded, open your favorite Serial Terminal at 115200 baud. As you slide your finger along the capacitive touch strip ion the Touch Pot, you should see the current PWM value print out on the terminal.
- Page 14 • Touch Potentiometer User Manual • Touch Pot Utility Application • Digital Potentiometer AD5262BRU Datsheet • Touch Potentiometer GitHub Repository For more Capacitive Touch fun, check out the other great SparkFun tutorials. MPR121 Hookup Guide AT42QT1010 Capacitive Touch Breakout Hookup...
Need help?
Do you have a question about the PRT-13144 and is the answer not in the manual?
Questions and answers