Advertisement
Quick Links
ProtoShield Quickstart Guide
Skill Level: Beginner
by Jimb0 | June 24, 2010 |
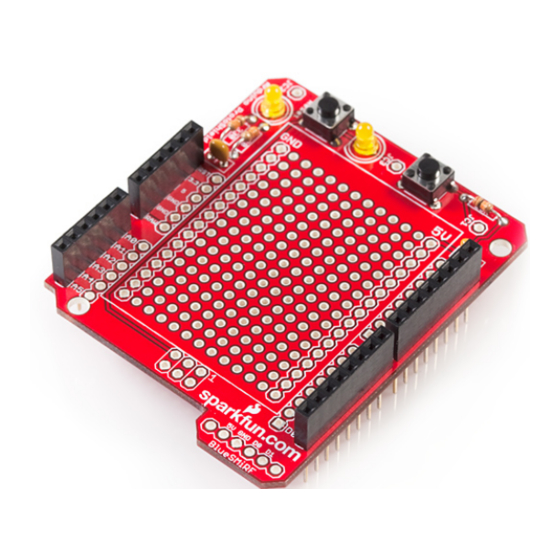
Arduino ProtoShield
You've got a project idea, you have an Arduino, now what you really need is a
platform to actually build your new project onto. You need something that will easily
connect your Arduino to all the external bits and pieces your project requires. Enter,
the Arduino ProtoShield.
Advertisement

Subscribe to Our Youtube Channel
Related Manuals for sparkfun ProtoShield


Summary of Contents for sparkfun ProtoShield
- Page 1 ProtoShield Quickstart Guide Skill Level: Beginner by Jimb0 | June 24, 2010 | Arduino ProtoShield You've got a project idea, you have an Arduino, now what you really need is a platform to actually build your new project onto. You need something that will easily connect your Arduino to all the external bits and pieces your project requires.
- Page 2 Arduino, extending the functionality of the popular microprocessor platform. How do I assemble it? The ProtoShield is shipped in kit form - as a box of parts and a PCB. We've written a step-by-step assembly tutorial to guide you in building your new shield. Don't worry if...
- Page 3 How do I use it? Well, that's mostly up to you! There are a few things I will point out, though: Using the LEDs As the assembly guide points out, you have to wire the LEDs to whichever Arduino pin you'd like. Once you've done that, you can program your Arduino to run the ever- important 'Blink' sketch (in Arduino, go to File->Examples->Digital->Blink):...
- Page 4 int ledPin = void setup() pinMode(ledPin, OUTPUT); void loop() digitalWrite(ledPin, HIGH); delay(1000); digitalWrite(ledPin, LOW); delay(1000); Make sure you change the value of 'ledPin' to whatever digital pin your LED is connected to; in the above example it is tied to pin 13. That sketch should turn the LED on for a second, off for a second, on for a second, off for a second, and so on.
- Page 5 const int buttonPin = 2; const int ledPin = int buttonState = 0; void setup() { pinMode(ledPin, OUTPUT); pinMode(buttonPin, INPUT); void loop(){ buttonState = digitalRead(buttonPin); if (buttonState == HIGH) { digitalWrite(ledPin, HIGH); else { digitalWrite(ledPin, LOW); Make sure you change 'buttonPin' and 'ledPin' according to how you've wired them, the example assumes they're connected to digital pins 2 and 13, respectively.
- Page 6 The button on the ProtoShield is 'pulled high', meaning one side of the button is connected, through a resistor, to +5V and also to 'JC1' (which should then be connected to an Arduino pin of your choice). The other end of the button is simply connected to ground.
- Page 7 You can use the standard 'Serial.print' and 'Serial.read' commands to send and receive serial data. Here's an example that builds on the previous code, adding serial communication:...
- Page 8 int ledPin = 13; int buttonPin = 2; int buttonState = LOW; int oldButtonState = HIGH; char serInput; void setup() { pinMode(ledPin, OUTPUT); pinMode(buttonPin, INPUT); digitalWrite(ledPin, HIGH); Serial.begin(115200); } void loop() { buttonState = digitalRead(buttonPin); if (Serial.available() > 0) { serInput = Serial.read(); Serial.println("Miny, Moe."); } if (buttonState != oldButtonState) { if (buttonState == HIGH) { digitalWrite(ledPin, HIGH); Serial.print("Meeny, "); } else { digitalWrite(ledPin, LOW); Serial.print("Eeny, "); } } oldButtonState = buttonState; This example will actually work with both the standard USB serial connection, or a BlueSMiRF.
- Page 9 USB module; another, more advanced, option is the USB BlueDongle. How have others used the shield? The ProtoShield can be used to prototype just about any Arduino project you could imagine. As examples of the huge variety of projects the shield has been used for, check out these links: •...
Need help?
Do you have a question about the ProtoShield and is the answer not in the manual?
Questions and answers