Table of Contents
Advertisement
Quick Links
MAG3110 Magnetometer Hookup Guide
CONTRIBUTORS:
AGLASS0FMILK
FAVORITE
0
Introduction
The SparkFun MAG3110 Triple Axis Magnetometer is a breakout board for the 3-axis magnetometer from NXP/Freescale. It is a low power (1.95V to 3.6V) device
that communicates over I2C. It outputs data in two's complement with values ranging from -30,000 to +30,000 and has a full-scale range of ±1000µT.
This sensor allows you to quickly detect surrounding magnetic fields. This data can be used to create a digital compass or even sense strong magnetic fields from
transformers!
We will explore the functions of the MAG3110 sensor and get up and running using the SparkFun MAG3110 Arduino library and example code.
Required Materials
The required materials varies depending on how you want to use the sensor. You will notice this sensor's supply can only go up to 3.6V. If you try to communicate
with this sensor using a 5V Arduino or similar platform you could permanently damage the chip! To use this with 5V logic devices, you must use a bi-directional logic
level converter.
Fortunately, SparkFun offers a few inexpensive options. This part is recommended.
Please note you will also need a low voltage source to power this sensor if your Arduino does not have an on-board regulator. You may want to use something like
this 3.3V Low-Dropout Regulator (LDO)
For the rest of the items you will need, see the wish list below.
MAG3110 Hookup Guide
SparkFun Wish List
SparkFun Logic Level Converter - Bi-Directional
BOB-12009
If you've ever tried to connect a 3.3V device to a 5V system, you know what a challenge it can be. The SparkFun bi-directional logic level converter i...
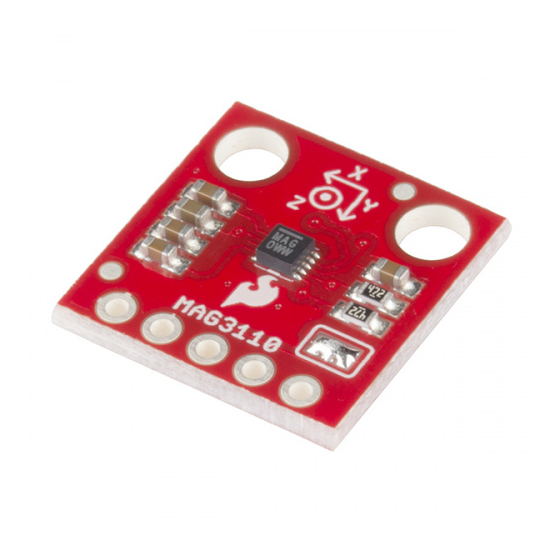
SparkFun Triple Axis Magnetometer Breakout - MAG3110
SEN-12670
Freescale's MAG3110 is a small, low-power, digital 3-axis magnetometer. The device can be used in conjunction with a 3-axis accelerometer to produce...
Break Away Headers - Straight
PRT-00116
A row of headers - break to fit. 40 pins that can be cut to any size. Used with custom PCBs or general custom headers.**Features: *** Pin Style: Squar...
Jumper Wires - Connected 6" (M/M, 20 pack)
PRT-12795
These are 6" long jumper wires with male connectors on both ends. Use these to jumper from any female header on any board, to any other female header....
Breadboard - Self-Adhesive (White)
PRT-12002
This is your tried and true white solderless breadboard. It has 2 power buses, 10 columns, and 30 rows - a total of 400 tie in points. All pins are sp...
SparkFun RedBoard - Programmed with Arduino
DEV-12757
At SparkFun we use many Arduinos and we're always looking for the simplest, most stable one. Each board is a bit different and no one board has everyt...
Suggested Reading
Before embarking upon this guide, you may want to familiarize with any of the topics below.
I2C
SparkFun Triple Axis Magnetometer Breakout -
MAG3110
SEN-12670
$14.95
2
Advertisement
Table of Contents

Related Manuals for sparkfun MAG3110


Summary of Contents for sparkfun MAG3110
- Page 1 SparkFun Logic Level Converter - Bi-Directional BOB-12009 If you've ever tried to connect a 3.3V device to a 5V system, you know what a challenge it can be. The SparkFun bi-directional logic level converter i… SparkFun Triple Axis Magnetometer Breakout - MAG3110 SEN-12670 Freescale’s MAG3110 is a small, low-power, digital 3-axis magnetometer.
- Page 2 Interrupt pin -- high when new data is ready You may notice there is one last pin – the INT pin. This stands for INTerrupt. Inside the MAG3110 there is a register that can tell you if the sensor has new data for you to read.
- Page 3 20 (SDA), 21 (SCL), SDA1, SCL1 SparkFun MAG3110 Library SparkFun has created a library to make it easier to get readings from the MAG3110 sensor. It also has code to calibrate the sensor and obtain magnetic north headings! Note: The calibration and magnetic north readings only work if the magnetometer is oriented level with the z axis pointing up or down! Obtaining magnetic north independent of orientation requires the use of an accelerometer to know which way is down and more complex math.
- Page 4 Arduino was unable to talk to the mag.initialize() mag.error MAG3110! When initialized, the magnetometer is set to standby mode with all offsets set to 0. To put the magnetometer in active mode and start sampling, simply write mag.start() You can check whether any new data is ready using the function.
- Page 5 MAG3110 will provide in one second. For example, an output data rate of 80 (the default) will give you 80 new readings per second. The over- sampling ratio tells the MAG3110 how many samples to average together for one reading. For example, with an OSR of 16 the MAG3110 will take 16 measurements, average the results together, and give you one averaged result.
- Page 6 SparkFun-MAG3110-Calibration.ino When you run the sketch, you will see unadjusted readings in the Serial output for the first 5 to 10 seconds. During this period, you must rotate the MAG3110 360 degrees while keeping it level!. This allows our sketch to get its bearings.
- Page 7 0, the x-axis is pointing towards magnetic north (see the diagram from before). As mentioned before, if you want to manually calibrate the MAG3110 using previously obtained calibration values, you need to do a few things: Save the offsets using , and save the scaling floats, .
- Page 8 This is a nifty little sensor for orientation, but you may want to go beyond the simple compass that this library allows. You can use an accelerometer in conjunction with this device to create a tilt-compensated compass. SparkFun has a variety of accelerometers available, including the ADXL345.
Need help?
Do you have a question about the MAG3110 and is the answer not in the manual?
Questions and answers