
Subscribe to Our Youtube Channel
Related Manuals for SMC Networks AR20S 02E-Y 15V Series


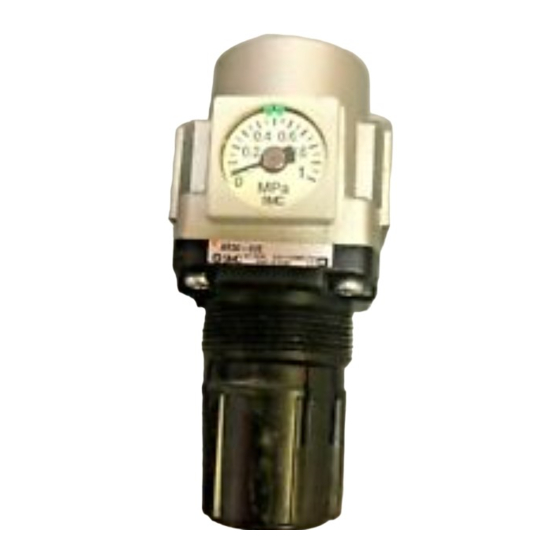
Summary of Contents for SMC Networks AR20S 02E-Y 15V Series
- Page 1 Doc. No. DOC1018957 PRODUCT NAME Standby Regulator MODEL / Series / Product Number AR20S-(F,N)02E-Y(Z)-15V(E) AR30S-(F,N)03E-Y(Z)-15V(E) AR40S-(F,N)04E-Y(Z)-15V(E) AR50S-(F,N)10E-Y(Z)-15V(E)
-
Page 2: Table Of Contents
Contents Page 1. Safety Instructions 2. Application 3. Standard Specifications 4. How to Order 5. Structural Drawing and Replacement Parts 6. Operation and Adjustment 13-14 7. Trouble Shooting 8. How to Replace the Components 16-19 8-1. Diaphragm Assembly Replacement 8-2. Valve Guide Assembly and Valve Assembly Replacement 8-3. -
Page 3: Safety Instructions
Safety Instructions These safety instructions are intended to prevent hazardous situations and/or equipment damage. These instructions indicate the level of potential hazard with the labels of “Caution,” “Warning” or “Danger.” They are all important notes for safety and must be followed in addition to International Standards (ISO/IEC) , and other safety regulations. - Page 4 Safety Instructions Caution The product is provided for use in manufacturing industries. The product herein described is basically provided for peaceful use in manufacturing industries. If considering using the product in other industries, consult SMC beforehand and exchange specifications or a contract if necessary. If anything is unclear, contact your nearest sales branch.
- Page 5 Design Warning 1. Provide ventilation when using a valve in a confined area, such as in a closed control panel. For example, install a ventilation opening etc. in order to prevent pressure from increasing inside of the confined area and to release the heat generated by the valve. 2.
- Page 6 Mounting Warning 1. Mount and operate the product after reading the manual carefully and understanding its contents. Also, keep the manual in a place where it can be referred to as necessary. 2. Install with enough space around the regulator to perform regular maintenance and operation. Refer to section [10.Dimensions] (p.
- Page 7 Mounting Warning 1. Before piping is connected, it should be thoroughly blown out with air (flushing) or washed to remove chips, cutting oil and solid foreign material from inside the pipe. Contamination of piping may cause damage or malfunction. 2. When screwing together pipes and fittings, etc., be certain that chips from the pipe threads and sealant do not get inside the pipe.
- Page 8 Wiring Warning 1. When electric power is connected to a solenoid valve, be careful to apply the proper voltage. Improper voltage may cause malfunction or coil damage. 2. Excessive force applied to the cable connector may cause disconnection. Do not apply repetitive bending, tensile, or heavy loads to the cable.
- Page 9 Maintenance Warning 1. Release the pressure in the product to the atmosphere when replacing parts or removing piping. 2. Maintenance and checks should be done by following the procedure in this operation manual. Incorrect handling of the product may cause breakage or operation failure of the equipment or device.
- Page 10 Maintenance Caution <For DC> M12 Connector With light/surge voltage suppressor (WOZ) ・Connect correctly the lead wires to + (positive) and – (negative) indications on the connector. Solenoid valve side pin wiring diagram - 9 -...
-
Page 11: Application
2. Application 本器は、空気圧システムの稼働時のエアと休止時の低圧エアとを切り替えることのできる製品で、 This unit is capable of switching between operating pressure, when the pneumatic system is in operation, and low-pressure air when the system is idle. It is intended to reduce air consumption in facilites. 3. Standard Specifications Model AR20S AR30S AR40S... -
Page 12: How To Order
4. How to Order 30 S ❶ ❷ ❸ ❺ ❹ ➊ Symbol Description Body size Rc ● ● ● ● ❷ Thread type N NPT ● ● ● ● F G ● ● ● ● + 02 1/4 ● -... -
Page 13: Structural Drawing And Replacement Parts
5. Structural Drawing and Replacement Parts Construction/ Common replacement parts ※ Adapter assembly * In oder to maintain product quality, the adapter assembly part cannot be replaced by parts. If a defect occurs, please replace the product. Replacement parts Part No. Semi-standard Part name specification... -
Page 14: Operation And Adjustment
6. Operation and Adjustment 6-1. Pressure regulation Knob Orange mark Pilot valve Turn on the power to the pilot valve and supply (1) Pull the knob in the arrow direction pressure to the IN side of the product. for unlocking, revealing an orange Then, turning the handle clockwise in the unlocked mark. - Page 15 6. Operation and Adjustment 6-2. Indicator adjustment of the square embedded type pressure gauge Opening of transparent cover Indicator (green) (2) Open the transparent cover as (1) Pull the opening of the (3) Close the transparent in the drawing and adjust the transparent cover to cover after adjusting indicator to the upper and...
-
Page 16: Trouble Shooting
7. Trouble Shooting Refer to sections [8. How to Replace the Components] (P16-19) and [9. Disassembly Drawing] (P20-21). Trouble Page for Possible cause Countermeasure reference Category Failure The pressure 1. Air pressure is not supplied to the inlet. Check the supply pressure. Ensure that can not be the supply side ball valve is opened. -
Page 17: How To Replace The Components
8. How to Replace the Components ! Warning Before replacement, make sure that no pressure remains in the epuipment. Also, make sure to loosen the knob of the regulator so that the set pressure is zero. After replacement, confirm that the product satisfies specific functions and no external leakage occurs before operating it. 8-1. -
Page 18: Valve Guide Assembly And Valve Assembly Replacement
8-2. Valve Guide Assembly and Valve Assembly Replacement Applicable Work Procedure Tool Criteria model category AR20S Disassembly 1) Remove the cap. AR30S Insert a precision screwdriver (-) Precision - AR40S between the body and cap to lift the screwdriver (-) AR50S cap. -
Page 19: Square Embedded Type Pressure Gauge Replacement
8-3. Square Embedded Type Pressure Gauge Replacement Applicable Work Procedure Tool Criteria model category AR20S Disassembly 1) Remove the pressure gauge cover. AR30S Rotate the pressure gauge cover 15 - - AR40S degrees in the arrow direction AR50S (counterclockwise) and pull it out. 2)... -
Page 20: Blanking Plate Assembly Replacement
8-4. Blanking Plate Assembly Replacement Applicable Work Procedure Tool Criteria model category AR20S Disassembly 1) Remove the blanking plate. AR30S Remove the 2 mounting screws and Phillips - AR40S remove the blanking plate. screwdriver AR50S Assembly 2) Confirm that the O-ring is mounted onto the blanking plate. -
Page 21: Disassembly Drawing
9. Disassembly Drawing 9-1. AR20S/ AR30S / AR40S / AR50S Dissasembly Drawing of part Cross recessed round head screws (4 pcs.) (3) Valve assembly Valve spring Bonnet (5) Valve guide assembly Washer (Protrusion on Cover (only for 50 sizes) IN side) Pressure regulating screw assembly Pressure regulating spring... - Page 22 9-2. Disassembly Drawing of the Preassure Gauge Port Blanking plate O-ring Mounting screws (2 pcs.) O-ring Pressure Mounting screws gauge (2 pcs.) (2) Pressure gauge cover assembly (6) Blanking plate assembly Product (1) Square embedded type pressure gauge - When swapping (1) Square embedded type pressure gauge, tighten them with 0.85+/-0.05N・m. Tighten others with 0.6±0.05N・m.
-
Page 23: Dimensions
10. Dimensions Dimensions Model AR20S 66.8 17.5 26.5 56.7 55.6 AR30S 86.5 31.5 32.5 21.5 30.5 26.5 62.7 69.1 AR40S 91.5 40.5 41.5 25.5 35.5 66.7 86.6 AR50S 90.5 74.2 The dimension of B is the length when the regulator knob is unlocked. - 22 -... - Page 24 Revision history 4-14-1, Sotokanda, Chiyoda-ku, Tokyo 101-0021 JAPAN Tel: + 81 3 5207 8249 Fax: +81 3 5298 5362 https://www.smcworld.com Note: Specifications are subject to change without prior notice and any obligation on the part of the manufacturer. © 2022 SMC Corporation All Rights Reserved...
Need help?
Do you have a question about the AR20S 02E-Y 15V Series and is the answer not in the manual?
Questions and answers