Table of Contents
Advertisement
Quick Links
Advertisement
Table of Contents

Subscribe to Our Youtube Channel
Related Manuals for Bizerba GSP H


Summary of Contents for Bizerba GSP H
- Page 1 Slicer GSP H GSP HD Instruction manual 38107010002 en...
- Page 2 Alle Rechte vorbehalten All rights reserved Tous droits réservés Reservados todos los derechos Tutti i diritti riservati Bizerba SE & Co. KG, 72336 Balingen Postfach 10 01 64 72301 Balingen, Germany Telephone (+49 7433) 12-0, Fax (+49 7433) 12-2696 E-mail: marketing@bizerba.com Internet: www.bizerba.com...
-
Page 3: Table Of Contents
Switching the machine off.............. Decommissioning ................. Machine and operating elements............... Membrane keyboard GSP H .............. 5.1.1 HMI touchscreen GSP H W.............. Membrane keyboard GSP HD.............. 5.2.1 HMI touchscreen GSP HD.............. 5.2.2 Membrane keyboard GSP HD W with HMI touchscreen...... ... - Page 4 Care of machine, servicing, maintenance .......... Technical data...................... Dimensions GSP H with a carriage inclination of 0°...... Dimensions GSP H with a carriage inclination of 18°...... Dimensions GSP H with a carriage inclination of 25°...... ...
- Page 5 Instruction manual GSP Table of Contents Dimensions of GSP HD with carriage inclination 18° ...... Dimensions of GSP HD with carriage inclination 25° ...... Dimensions GSP HD W................ Power supply .................. 9.10 Ambient conditions ................ Attachment......................
-
Page 6: About These Instructions
The minimum age of the operating personnel by German law is 14. Other age limits may ap- ply according to the corresponding national regulations. Therefore the operating company must check the legislation at the place of machine installation. Installation, maintenance and repair works must be performed by Bizerba authorized special- ists only. Symbols used Various symbols are used in these instructions. -
Page 7: Warnings
Instruction manual GSP About these instructions Information This information is intended for better understanding. Warnings Warnings are divided into danger levels by the signal word above the warning symbol. Structure of warnings and meaning of signal words are described in these instructions as fol- lows. -
Page 8: About This Machine
Note: If cheese is the main product being sliced, we recommend using a special cheese blade. Slicing of other materials requires prior written approval by Bizerba product management. Non-permitted product The following may not be sliced due to risk of injury and damage: –... -
Page 9: Machine Description
The blade drive can be switched on/off via the membrane keyboard. [} 30] to [} 33] Keys green = <I>, red = <O> have a signal lamp for activation control (GSP H, GSP HD). For the red key a reduced operating force is needed reacting at a slight touch. - Page 10 The total vibration of the items, which get into contact with hand and arm is below 2.5 m/s and therefore below the required limited value. Work place-related emission noise level value GSP H: L = 55 dB (A) GSP HD: L = 61 dB (A) The value takes into consideration an instable measuring of 3 dB.
- Page 11 Instruction manual GSP About this machine 38107010002 en-US 11 / 92...
-
Page 12: Components Of The Manual Slicer
Slice thickness adjustment Lifting device Rubber base ON / OFF buttons with signal lamp (GSP H, GSP H Flex) Membrane keyboard with HMI touchscreen (GSP H W) Weighing module (GSP H W, GSP H Flex) Load platter (GSP H W, GSP H Flex) - Page 13 Instruction manual GSP About this machine Names of components GSP H Fig. 1: GSP H with carriage inclination 18° Names of components GSP H W Fig. 2: GSP H W 38107010002 en-US 13 / 92...
- Page 14 About this machine Instruction manual GSP Names of components GSP H Flex Fig. 3: GSP H Flex 14 / 92 38107010002 en-US...
- Page 15 Instruction manual GSP About this machine 38107010002 en-US 15 / 92...
-
Page 16: Components Of The Automatic Slicer
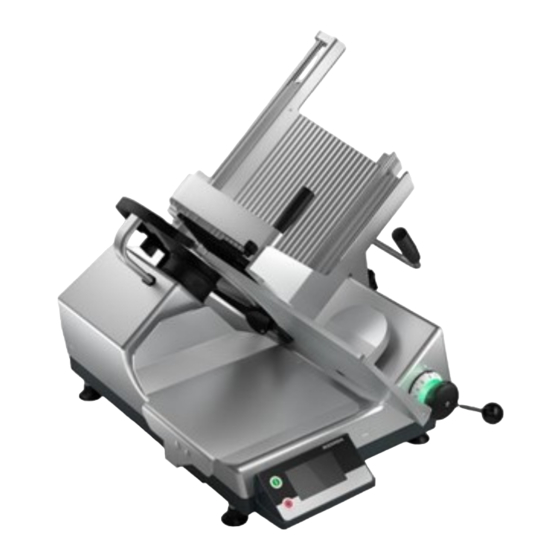
About this machine Instruction manual GSP 2.2.2 Components of the automatic slicer Blade cover Blade Blade guard ring Handle for product holder Guard plate Clamp handle for remnant holder plate Remnant holder plate Product fixation device Carriage Carriage handle Rear wall Star knob screw on carriage foot Identification plate / CE mark Slice thickness adjustment... - Page 17 Instruction manual GSP About this machine Names of components GSP HD Fig. 4: GSP HD with carriage inclination 18° Names of components GSP HD with HMI Fig. 5: GSP HD with HMI 38107010002 en-US 17 / 92...
-
Page 18: Accessories
Accessories For the machines we offer a wide range of accessories for different application areas. Only use the original Bizerba spare parts and accessories in order to en- sure safe and trouble-free operations. If cheese is the main product being sliced, we recommend using a special cheese blade. -
Page 19: Directives
To ensure that the machine is recycled environmentally friendly, return the machine to the manufacturer or the dealer after intended use has expired. Naturally, Bizerba and its dealers will take back free of charge old machines no longer in op- eration. -
Page 20: Safety Instructions
– Protective devices may not be removed, modified or bypassed. DANGER Open the electrical installation area! danger to life due to electric current – The electrical installation area may only be opened by Bizerba Ser- vice. – Pull power plug before moving the machine. WARNING Unauthorized persons! Serious injuries to fingers and hands and damage to health. -
Page 21: Safety Instructions For Transport And Installation
– Do not connect the machine to the power supply if the power supply data does not correspond to the machine's connection values. Mains data must be identical. – Inform Bizerba Customer Service. Safety instructions during operation, slicing WARNING Rotating blade! Cut injuries. -
Page 22: Safety Instructions For Sharpening, Cleaning
– Check if the machine is complete before it is re-started. – Check if components are positioned correctly and firmly. – Only use original Bizerba spare parts and accessories. Protective and safety devices – Blade guard ring, stationary, cannot be removed –... -
Page 23: Plates On Machine
Instruction manual GSP Safety instructions Remaining risks that cannot be excluded by technical measures: – Risk of tripping/slipping if the work area is not kept tidy. – Risk of injury if the required personal protective clothing is not worn. Plates on machine Only use and service after the instruction manual has been read Fig. 7: Plate Observe documentation... -
Page 24: Installation
The lifting straps must only be used for machine handling before unpack- ing. They must not be used as load-carrying equipment. When installing slicer GSP H Flex with scale to be connected, make sure that weighing range is visible to the customer. -
Page 25: Electrical Connection
X-.. IP rating IP33 Electrical data see identification plate Manufacturer's address Bizerba SE & Co. KG Wilhelm-Kraut-Straße 65 72336 Balingen, Germany WARNING Incorrect supply voltage! Destruction of electric components, fire hazard. – Do not connect the machine to the power supply if the power supply data does not correspond to the machine's connection values. -
Page 26: Leveling
With severely contaminated mains supplies (e.g. when "thyristor-controlled systems" are used) measures must be taken on-site to suppress interferences, e.g.: – A separate supply line must be planned for Bizerba machines. – In problem cases, install capacitively decoupled isolating transformers or other suppres- sors into the supply mains prior to Bizerba machines. -
Page 27: Attaching Product Feed For Tomatoes
Fig. 12: Vegetable hopper with stomper Start-up Putting into operation, as well as instructing in operation, cleaning, maintenance and servic- ing is carried out by the relevant Bizerba customer services office or the Bizerba specialist. 38107010002 en-US 27 / 92... -
Page 28: Switching The Slicer On
Signal lamp (white) lights up as soon as mains voltage is applied. Blade starts running automatically, if op- tion blade start [} 34] is activated. GSP H W, GSP HD W: Press <I> (green). Blade starts running automatically, if op- tion blade start [} 34] is activated. -
Page 29: Decommissioning
Instruction manual GSP Installation Decommissioning If the machine is not going to be used for a longer period of time: Switch off machine. Pull out power plug. Clean machine as per cleaning instructions. 38107010002 en-US 29 / 92... -
Page 30: Machine And Operating Elements
The blade symbol on the touch screen ro- tates as soon as the blade motor rotates. Display of current number of slices Fig. 16: HMI touchscreen GSP H W Using your finger, wipe from right to left on the touchscreen. The following adjacent im- age comes up. -
Page 31: Membrane Keyboard Gsp Hd
Instruction manual GSP Machine and operating elements Screen saver Display goes into stand-by mode when machine is not in use: – Blade is at a standstill – Scale not used – Touchscreen not used Display leaves the stand-by mode: – Switch-on of blade –... -
Page 32: Hmi Touchscreen Gsp Hd
Machine and operating elements Instruction manual GSP 5.2.1 HMI touchscreen GSP HD Fig. 19: HMI touchscreen GSP HD Toggling between manual operation and automatic operation Stroke width selection Selection of number of carriage strokes Direct selection keys for number of target slices Increasing / reducing the number of slices by 5 Number of slices (target) Number of slices (current) -
Page 33: Membrane Keyboard Gsp Hd W With Hmi Touchscreen
Instruction manual GSP Machine and operating elements 5.2.2 Membrane keyboard GSP HD W with HMI touchscreen Fig. 21: Membrane keyboard GSP HD W <I> (green) voltage is present at the drives <O> (red) The drives will be switched off (reduced operating force) Toggling between manual operation and automatic operation Stroke width selection Selection of number of carriage strokes... -
Page 34: Slice Thickness Adjustment
Options The options need to be selected when ordering a machine. Only the Bizerba customer service can set them at a later point of time. Option Blade start After switching on <I> of the machine the blade starts running automatically. -
Page 35: Product Holder
The prod- uct is moved towards the blade by means of its own weight. Fig. 23: GSP H, example GSP HD: In order to position the product, the product holder is moved outwards and up and locked in its final position. -
Page 36: Product Fixation Device / Product Guide
The product fixation device is irreversibly self-locking on its shaft and is moveable across the full width of the carriage. This way, it can be positioned on any product di- mension. Fig. 28: Product clamping GSP H 36 / 92 38107010002 en-US... -
Page 37: Lifting Device
The area underneath the machine is now easy to clean. Hold the machine via the thickness knob and pull the lifting device back into its ini- tial position. Fig. 30: Lifting device GSP H 38107010002 en-US 37 / 92... -
Page 38: Connected Scale At Gsp H Flex
Machine and operating elements Instruction manual GSP Fig. 31: Lifting device GSP HD Connected scale at GSP H Flex The device and operating elements of the in- dividual components are described in detail in the KF II operating instructions, chapter 5. -
Page 39: Operation
Instruction manual GSP Operation Operation Working with the manual slicer WARNING Rotating blade! Cut injuries. – Do not allow yourself to become distracted. Concentrate on the task in hand and avoid time pressure. – When slicing, the carriage may only be moved by the handle. –... -
Page 40: Slicing Product Ends
Operation Instruction manual GSP Place product on carriage rear wall and move to gauge plate. Position the product fixation device or product guide against the product. Turn in product holder and position on the product. Switch on machine . Set slice thickness at knob. Fig. 34: Load the product Using the handle, move carriage uni- formly forth and back. -
Page 41: Weighing Operation With Gsp H W
Switch off machine. Fig. 38: Slice product 6.1.3 Weighing operation with GSP H W The portion scale is not metrologically approved and cannot be used for legal for trade appli- cations. During start-up the portion scale is calibrated by the customer service at the place of installa- tion. - Page 42 Operation Instruction manual GSP Press <T>. The weight display goes to zero. The scale is ready for operation for net weighing. Delete tare Unload scale. Tare is automatically deleted, weight display changes to zero. Select a blade speed By pressing the button of the blade speed you may choose between 3 preset blade speeds (illuminated bars).
-
Page 43: Weighing Operation With Gsp H Flex
Instruction manual GSP Operation 6.1.4 Weighing operation with GSP H Flex Slicer GSP H Flex with connected metrologi- cally approved scale allows sliced product to be weighed at the same time. The operation of individual components is described in detail in the KF II operating in- structions, chapter 6. -
Page 44: Slicing Long Product
Operation Instruction manual GSP 6.2.1 Slicing long product Move carriage towards operator. Using handle, pull product holder out- wards, swivel it upwards and lock it in end position. Fig. 44: Preparation of machine Place product on carriage rear wall and move to gauge plate. Position the product fixation device or product guide against the product. -
Page 45: Slicing Product Ends
Instruction manual GSP Operation Start carriage motor. Slices drop on depositing area. Stop carriage motor. The carriage runs towards the operator, the blade is on hold. Once the slicing process is completed set slice thickness to "0". Switch off machine. Fig. 46: Slice product Extra care must be taken due to additional risk of injury if product holder is not used and positioned underneath the carriage. -
Page 46: Manual Carriage Guide With Servo Support
Operation Instruction manual GSP For tied product ends to be cut by hand. Place product end against the rear wall, making sure that the original cut surface faces the remnant holder plate. Position the product fixation device against the product. Using handle, swivel in and hold product holder. -
Page 47: Weighing Operation With Gsp Hd W
Instruction manual GSP Operation Stroke width and number of carriage strokes have no effect. Switch on machine. Blade starts running automatically, if op- tion blade start is activated. If the option blade start is not active, switch on <Blade drive>. Set slice thickness at knob. - Page 48 Operation Instruction manual GSP Slicing to target weight In manual mode Switch to manual mode by tapping the lower left button Switch to slicing to target weight by tap- ping the lower right button Select the blade speed by tapping button Select a target weight via the direct se- Fig. 52: Manual operation to target weight lection keys...
- Page 49 Instruction manual GSP Operation Slicing to number of target slices In manual mode Switch to manual mode by tapping the lower left button Switch to slicing to number of slices by tapping the lower right button Select the blade speed by tapping button Select a number of slices via the direct selection keys or via the numeric key-...
- Page 50 Operation Instruction manual GSP Tare The complete weighing range can be used for tare. The tared value is subtracted from the entire weighing range. Apply tare, wait until scale comes to a standstill. Fig. 57: Apply a tare Press <T>. The weight display goes to zero. The scale is ready for operation for net weighing.
- Page 51 Instruction manual GSP Operation The value can be changed by moving the control knob in the desired direction. To adopt the value press <Enter>. To cancel the action press <X>. Fig. 60: Change of preset parameter values The changed values are saved with <En- ter>.
- Page 52 Operation Instruction manual GSP The value can be changed by moving the control knob in the desired direction. To adopt the value press <Enter>. To cancel the action press <X>. Fig. 64: Change of preset parameter values The changed values are saved with <En- ter>.
-
Page 53: Slicing With Product Feed For Tomatoes
Instruction manual GSP Operation The changed values are saved with <En- ter>. Press the upper right icon to exit the menu without saving. Fig. 68: Number of carriage strokes Slicing with product feed for tomatoes The product feed for tomatoes allows double slicing of tomatoes or similar vegetable to be sliced. - Page 54 Operation Instruction manual GSP Load product into vegetable hopper. Place stomper in vegetable hopper be- hind product. Using handle, swivel in product holder and position it on vegetable hopper. Switch on machine. Set slice thickness at knob. Using the handle, move carriage uni- formly forth and back.
-
Page 55: Troubleshooting
Switch off machine immediately if untypical noises are heard or if there is a suspected risk of injury. Inform your respective Customer Services if you cannot remove the fault yourself. Please provide the Bizerba customer service with the following information: – Machine type (see identification plate), – Machine number (see identification plate), –... -
Page 56: Maintenance
Maintenance Instruction manual GSP Maintenance Preparation for cleaning Clean thoroughly: – before putting into operation – depending on use and application frequency – depending on the product – depending on the ambient temperature – if extremely soiled, several times a day –... -
Page 57: Removing Components
Instruction manual GSP Maintenance GSP H, GSP H W, GSP H Flex: Switch off machine. Remove the AC power plug. Set slice thickness below "0" (black marking). Fig. 72: Slice thickness below "0" Removing components Do not place parts on top of each other to avoid mechanical damage. - Page 58 Fig. 75: Remnant holder plate Product fixation device Pull the product fixation device as far as it will go towards the operator and pull off the guide shaft, moving it to the right. Fig. 76: Product clamping GSP H 58 / 92 38107010002 en-US...
- Page 59 Instruction manual GSP Maintenance Fig. 77: Product clamping GSP HD Product carriage Loosen handle on guide element. Remove support plate in an upward di- rection. Fig. 78: Support plate GSP HD Vegetable hopper Remove the stomper from the vegetable hopper. Release the star knob and remove the vegetable hopper from the carriage in an upwards direction.
- Page 60 Fig. 81: Blade cover Load platter GSP H W, GSP HD W, GSP H Flex Pull load platter towards operator until guide bolts come loose from the holes of the lateral support and remove.
-
Page 61: Cleaning
Instruction manual GSP Maintenance Deflector Move deflector in a downwards direction away from the blade. Fig. 83: Deflector GSP H Remove deflector from magnet lock and swivel it upwards. Fig. 84: Deflector GSP HD Now the machine is ready for cleaning. Cleaning Do not clean the machine using a high-pressure cleaner. - Page 62 Maintenance Instruction manual GSP Press a wet disposable cloth against the blade surface and slowly wipe away from the center. Clean the back of the blade in the same manner. After this process, repeat using a dry dis- posable cloth. Fig. 85: Blade cleaning Thread a moist disposable cloth from the front between blade and guard ring.
- Page 63 Instruction manual GSP Maintenance Cleaning, rinsing and disinfecting all sur- faces as per cleaning plan. Fig. 88: Fixed machine parts Wipe off gauge plate in the direction away from blade. Never wipe towards the blade. Fig. 89: Gauge plate Wipe off the carriage. Leave surfaces dry in the air.
-
Page 64: Cleaning Plan For Slicers
Maintenance Instruction manual GSP Cleaning plan for slicers Work steps Recom- Procedure Cleaning devices Notes mended clean- ing agents Preparatory Close slice thick- measures ness, switch off machine, pull out power plug Disassemble according to in- all removable struction manual parts Rough clean- Remove any... - Page 65 If cleaning agents are used that have not been recommended by the man- ufacturer, damage can be caused to the machine, which is no longer pro- tected by guarantee. The following cleaning agents can be acquired from the Bizerba customer service: Designation Order no.
-
Page 66: Preparing The Machine For Operation
Fig. 92: Deflector GSP HD Load platter GSP H W, GSP HD W, GSP H Flex Fasten load platter in holes of lateral support by means of the guide bolts and move it towards the back as far as it will Fig. 93: Load platter... - Page 67 Instruction manual GSP Maintenance The scale must be dry to avoid a force shunt during operation. Blade cover Hold blade cover at handle with your right hand, tilt towards blade and fix into position with the stud. Fasten the catch behind the blade guard ring with the left hand.
- Page 68 On the operator side of the carriage (see arrow), place product fixation device hor- izontally into the guide shaft and push it onto the guide shaft. Fig. 96: Product clamping GSP H Fig. 97: Product clamping GSP HD Remnant holder plate Insert the remnant holder plate in to the pusher guard, taking the attachments into account.
-
Page 69: Blade Sharpening
– Check if the machine is complete before it is re-started. – Check if components are positioned correctly and firmly. – Only use original Bizerba spare parts and accessories. Blade sharpening Re-sharpening is necessary if the slicing result is unsatisfactory. -
Page 70: Sharpening Device
Before sharpening, clean with brush and solving detergent. If sharpening stones are worn, replace stones. Replacement parts are supplied by Bizerba customer services. When replacing, do not confuse sharpening and honing stones. 8.6.2 Preparation for sharpening Remove parts and clean machine. -
Page 71: Attaching The Sharpener
Instruction manual GSP Maintenance 8.6.3 Attaching the sharpener WARNING Unprotected blade! Coming in contact with the sharp blade can lead to serious injuries. – Wear cut-proof gloves when cleaning and sharpening. – Do not clean the blades when operating the machine. Set slice thickness knob to "24"... -
Page 72: Honing
Maintenance Instruction manual GSP Switch on machine. Set marking to "1". The sharpening stone is engaged. Sharpen until right blade edge shows a burr. Set marking to "0". Switch machine off, wait until blade stops rotating. Fig. 104: Marking Checking burr: Using a pen or pencil, touch the right edge of the blade while moving the pen from inside to outside. -
Page 73: Removing Sharpener
Instruction manual GSP Maintenance 8.6.6 Removing sharpener Pull sharpener back after loosening the star grip screw and remove to the top. Set slice thickness immediately to "0". Fig. 106: Removing sharpener 8.6.7 Removing sharpening dust - Slice thickness to "0" - Power plug disconnected - Wear cut-resistant gloves - Blade cover removed Press a dry disposable cloth against the... -
Page 74: Care Of Machine, Servicing, Maintenance
– Check if the machine is complete before it is re-started. – Check if components are positioned correctly and firmly. – Only use original Bizerba spare parts and accessories. Care of machine, servicing, maintenance The entire machine must be thoroughly cleaned. [} 56]... - Page 75 Re-sharpen blade if necessary. [} 69] When necessary, clean or exchange the grinding discs. Caution. Please, note! Left- handed thread! Use a small amount of Bizerba machine oil and lubricate the product holder guide shaft once a week. WARNING Changing the blade! Severe injuries and damage to property.
-
Page 76: Technical Data
Technical data Instruction manual GSP Technical data Dimensions GSP H with a carriage inclination of 0° The machines are available in different versions. Figures show examples. Fig. 110: GSP H 0° Dimensions Notes Installation area (L x W) 532 x 478 mm / 20.9" x 18.8"... -
Page 77: Dimensions Gsp H With A Carriage Inclination Of 18
50 kg / 110.2 Ib with packaging Types of current, voltages, See identification plate power consumption Dimensions GSP H with a carriage inclination of 18° Fig. 111: GSP H 18° L Dimensions Notes Installation area (L x W) 532 x 478 mm / 20.9" x 18.8"... -
Page 78: Dimensions Gsp H With A Carriage Inclination Of 25
50 kg / 110.2 Ib with packaging Types of current, voltages, See identification plate power consumption Dimensions GSP H with a carriage inclination of 25° Fig. 112: GSP H 25° L Dimensions Notes Installation area (L x W) 532 x 478 mm / 20.9" x 18.8"... - Page 79 Instruction manual GSP Technical data Dimensions Notes Product size Height: 160 mm / 6.3" GSP 25° L Width: 290 mm / 11.4" Round: Ø 228 mm / 9.0" Height: 126 mm / 5.0" GSP 25° H Width: 290 mm / 11.4" Round: Ø...
-
Page 80: Dimensions Gsp H W
Technical data Instruction manual GSP Dimensions GSP H W Fig. 113: GSP H W 25° H Dimensions Notes Installation area (L x W) 532 x 478 mm / 20.9" x 18.8" Maximum dimensions 806 mm x 911 mm x 627 GSP 25° L mm / 31.7"... -
Page 81: Dimensions Gsp H Flex
50 kg / 110.2 Ib with packaging Types of current, voltages, See identification plate power consumption Dimensions GSP H Flex Fig. 114: GSP H 18° L Flex Dimensions Notes Installation area (L x W) 536 x 482 mm / 21.1" x 19.0" 38107010002 en-US... -
Page 82: Dimensions Of Gsp Hd With Carriage Inclination 18
330 mm / 13.0" GSP H 18°L, GSP H 25° L, GSP H 25° H Blade speed 319 rpm GSP H 25° H, GSP H 25° L 255 rpm GSP H 18° L 266 rpm GSP H 0° Blade position 40°... - Page 83 Instruction manual GSP Technical data Fig. 115: GSP HD 18° L Dimensions Notes Installation area (L x W) 532 x 444 mm / 20.9" x 17.5" Maximum dimensions 801 x 776 x 601mm / 31.5" x The work area of the ma- 30.6"...
-
Page 84: Dimensions Of Gsp Hd With Carriage Inclination 25
Technical data Instruction manual GSP Dimensions Notes Weight Approx. 50 kg / 110.2 lb approx. 57 kg / 125.7 Ib with packaging Types of current, voltages, See identification plate power consumption Dimensions of GSP HD with carriage inclination 25° Fig. 116: GSP HD 25° L Dimensions Notes Installation area (L x W) -
Page 85: Dimensions Gsp Hd W
Instruction manual GSP Technical data Dimensions Notes Depositing height 62 mm GSP 25° L 95 mm GSP 25° H Slice thickness 0 - 24 mm / 0 - 0.9" Infinitely adjustable 0 - 3 mm / 0 - 0.1" Fine adjustment Blade diameter 330 mm / 13.0"... - Page 86 Technical data Instruction manual GSP Dimensions Notes Maximum dimensions 806 mm x 911 mm x 627 GSP 25° L mm / 31.7" x 35.9" x 24.7" (L x W x H) The work area of the ma- chine includes the area within the max.
-
Page 87: Power Supply
Instruction manual GSP Technical data Power supply Technical data of power supply – Mains supply Single-phase alternating current, see identification plate. – Permissible mains voltage tolerance (static) normal At 100 to 240 V: +6% to -10% of nominal value – Mains frequency: 50 (60) Hz Permissible tolerance of mains frequency: +2% to -2% of nominal value Admissible distortion factor of mains voltage: less than or equal to 5 % 9.10... -
Page 88: Attachment
Attachment Instruction manual GSP Attachment 88 / 92 38107010002 en-US... -
Page 89: Declaration Of Conformity Gsp
EN 61000-6-4:2007 + A1:2011 Responsible for technical documentation: Bizerba SE & Co. KG, Balingen. The basis for the declaration of conformity is the contract documents (Bizerba purchase order documents). In the event of a modification to a machine of the above description that is not coordinated with Bizerba or not carried out by Bizerba, this declaration looses its validity. -
Page 90: Declaration Of Conformity For Materials Getting In Direct Contact With Food Gsp
Bizerba SE & Co. KG Wilhelm-Kraut-Straße 65 72336 Balingen, Germany Declaration of conformity for plastic materials with direct food contact We herewith declare that the materials used in the following machine Device type: Slicer Model: GSP H GSP HD are in conformance with the general requirements and guidelines of the following directives and laws in the valid version at the time of issuance of this declaration: –... -
Page 91: Checklist Installation And Start-Up
For machines which are provided with a permanently connected power supply by the factory a suitable supply circuit disconnect is provided for each machine. The supply circuit disconnect is accessible to the Bizerba service technician at any time and w/o tools (ladder etc.). - Page 92 Attachment Instruction manual GSP Signature service technician: Signature customer: 92 / 92 38107010002 en-US...
Need help?
Do you have a question about the GSP H and is the answer not in the manual?
Questions and answers