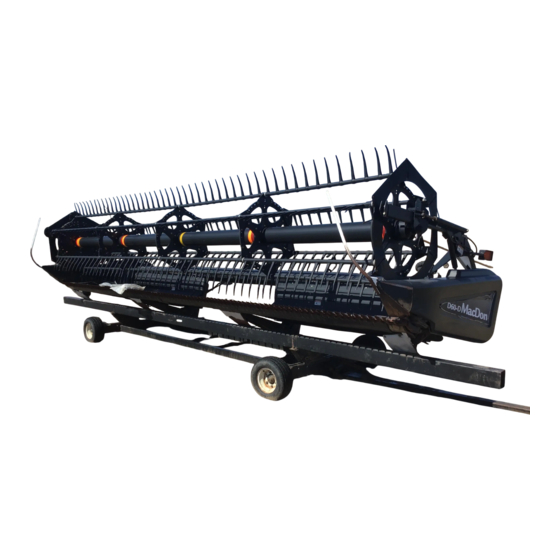
MacDon FEEDSTORM D60 Operator's Manual
Hide thumbs
Also See for FEEDSTORM D60:
- Operator's manual (298 pages) ,
- Unloading and assembly instructions (49 pages) ,
- Installation manual (49 pages)
Table of Contents
Advertisement
Quick Links
Advertisement
Table of Contents

Related Manuals for MacDon FEEDSTORM D60


Summary of Contents for MacDon FEEDSTORM D60
- Page 1 MACDON D60/D65/D1 OPERATORS MANUAL...
- Page 2 Published September 2021, by Primary Sales Australia Pty. Ltd. Revision: D Last Revised: 05/08/2022 The instructions contained in this operator’s manual are strictly for the MacDon FeedStorm. SERIAL NUMBER: _________________ DATE OF MANUFACTURE: _________________...
-
Page 3: Table Of Contents
CONTENTS SAFETY WARNING ........................... 4 FEEDSTORM KIT CONTENTS ........................5 INSTALLATION ............................10 MECHANICAL FITMENT ........................10 HYDRAULIC FITMENT ........................18 ELECTRICAL FITMENT ........................22 ADDITIONAL FITMENT NOTES ......................24 PERMANENT FIXTURE ........................25 OPERATION ............................27 ACTUATOR PROCEDURES ........................27 Reset Procedure .......................... -
Page 4: Safety Warning
SAFETY WARNING The installation and operation instructions contained in this manual must be complied with at ALL times. Failure to comply with these instructions may result in compromised machinery operation, possibly causing ineffective operation and machinery damage. Failure to comply with these instructions may result in compromised personal safety and the safety of others, possibly causing injury or death. -
Page 5: Feedstorm Kit Contents
FEEDSTORM KIT CONTENTS REF. DESCRIPTION QTY. REFERENCE IMAGE (NOT TO SCALE) Bracket Assembly Left Hand Side Weld on Bracket Mount L.H.S. 40FT Brace 45FT Brace L.H.S. Bracket Assembly Right Hand Side Weld on Bracket Mount R.H.S. - Page 6 40FT Brace 45FT Brace R.H.S. Auger Barrel & Barrel Universal Joint Left Hand Cover Side Subassembly Assembly Hydraulic Motor Subassembly Auger Barrel Assembly Centre Auger Barrel & Barrel Universal Joint Assembly Cover Right Hand Subassembly Side Universal Joint Assembly Adjustable Actuator Arm Assembly Left Hand Side Adjustable Actuator Arm...
- Page 7 Hydraulic Flow Controller Assembly Subassembly Hydraulic Hoses (4 hoses) Loose Fittings Pack (3 fittings) Hose Clamp Kit (2 clamps)
- Page 8 Electrical Actuators Assembly Electrical Harness, Long and Short Voltage Converter & Controller Subassembly Remote Controller Subassembly...
- Page 9 Actuator Reset Tool Electrical Harness Plug Mount...
-
Page 10: Installation
INSTALLATION MECHANICAL FITMENT These instructions refer to the diagram attached titled Mechanical Fitment Diagram, use for reference upon installation. Refer to the attached drawing UCA-MCD-ASM as support to the detailed instructions for further information. Note: Installation process is minimum a two-person task. •... - Page 11 Prepare immediate surfaces of the header front in the proposed fixture locations, by grinding away surface finish and rust until the bare metal surface is visible. Prepare the bracketry of the FeedStorm kit, Parts 8 and 9, by grinding off any protective coatings on the underside of the brackets, and 10mm around the edges, where foreseeably welding.
- Page 12 IF the end plate bracket mounts, Parts 1B and 2B are not preexisting in the marked locations on the header front, align the supplied brackets as depicted in drawing UCA-MCD-ASM. IF REQUIRED: Tack weld Parts 1B and 2B mounting brackets to the header front as a short-term fixture.
- Page 13 For 40ft, the left and right end bracket braces, Parts 1C and 2C, are supplied overlength. For each brace, drill the bolt hole in the required location for fastening to the header front and cut off excess length. Touch up end of brace with black paint.
- Page 14 Mount a universal joint assembly, Part 7, onto the inside facing end of the left-hand side auger barrel, Part 3. Align the grease nipple with the access hole in the shroud. For longevity of the adjustable fitment, coat the spline with an anti- seize product prior to inserting.
- Page 15 Insert Part 5, the Auger Barrel Assembly Center piece, into the arms and bearing units of Parts 8 and 9. Lift into location and fasten to the ‘fore and aft’ actuators. Ensure the auger flighting is the correct orientation, to feed inwards and downwards from the front orientation, towards the center barrel of the header front when in...
- Page 16 Mount a universal joint assembly, Part 7, into the inside facing end of the Right-Hand Side Auger Barrel, Part 6. Align the grease nipple with the access hole in the shroud. For longevity of the adjustable fitment, coat the spline with an anti- seize product prior to inserting.
- Page 17 Once positioned appropriately, tighten the clamp of both Universal Joints, Part 7. Fasten the two grub screws of the Mount bracket Assemblies, Parts 1A and 2A, to the shaft of the Left- and Right-Hand Side Auger Barrel shafts, Part 3 and 6. Fasten the two grub screws on the hydraulic motor shaft housing, Part 4, to the shaft.
-
Page 18: Hydraulic Fitment
HYDRAULIC FITMENT Refer to the attached drawing UCA-H01 as support to the detailed instructions for further information. STEP INSTRUCTION REFERENCE IMAGE To mount the Flow Controller Subassembly, Part 10A, to the rear of the header front, on the left-hand side, between the draper belt hydraulics and FeedStorm hydraulic motor, prepare the surface, by removing paint coating in location... - Page 19 Connect other end of H4 to the Flow Controller inlet, labelled “IN”. Fasten the hydraulic motor fittings if supplied loose, 10C, to the hydraulic motor. Connect hydraulic line, H2, to the inlet of the Hydraulic Motor, the port closest to the flange face as pictured.
- Page 20 Connect hydraulic line, H1, to the other hydraulic motor fitting; the outlet. Connect the other end of the hydraulic line, H1, to the tee at the exhaust flow “EF” labelled outlet of the Flow Controller. Connect hydraulic line, H3, to the other end of the tee, at the exhaust flow “EF”...
- Page 21 Ensure all connections are sealed and secure. Use thread sealant on hydraulic connections where necessary. Fasten any loose hydraulic lines to the header front to prevent wear and reduce catchment points, using the weld-on hose clamp kit, 10D, supplied. Reference images for overall hydraulic assembly.
-
Page 22: Electrical Fitment
ELECTRICAL FITMENT Refer to the attached drawing UCA-E01 as support to the detailed instructions for further information. STEP INSTRUCTION REFERENCE IMAGE Connect the shorter portion of Electrical Wiring Harness, 11B to the four Actuators, 11A. The slightly shorter (by approx. 100mm) cables plug into the “RAISE AND LOWER”... - Page 23 For permanent fitment, bring the electrical harness into the cab in the desired manner. Sheath the 4 Molex plugs if feeding through a narrow cavity, to protect from possible catchment and damage. Plug the longer portion of the Electrical Wiring Harness, Part 11B, into the Voltage Converter Box, Part 11C.
-
Page 24: Additional Fitment Notes
ADDITIONAL FITMENT NOTES • Once completed the temporary installation of the FeedStorm Kit, trial the actuators with caution, using the Remote controller unit from the cabin. Ensure the range achievable is at the optimum intended. • When content with the range abilities and overall positioning of the FeedStorm on the header front, proceed to completing the welding operation. -
Page 25: Permanent Fixture
PERMANENT FIXTURE WELDING AND FITTING STEP INSTRUCTION Unplug Electrical and Hydraulic cables and hosing within the immediate surrounds of the welding locations. Remove excess bolted components of weld on bracketry of Parts 1a, 2a, 8 and 9 assemblies. Cover the immediate surrounds of the welding locations with fire retardant protective material to protect the surface finishes of the FeedStorm and header front from welding splatter. - Page 26 SETTING ACTUATOR LIMITS Once completely assembled, complete the Reset Procedure for the actuators, using the remote controller, 11D. Ensure all actuators are completely retracted with no errors once the procedure is complete. Set the limits required in the following steps, using the Inner and Outer Limits Procedure.
-
Page 27: Operation
OPERATION ACTUATOR PROCEDURES Reset Procedure Reset the actuators upon initial use and in the case of an error. 1. Press and hold the DOWN Arrow button on the Remote Control until the LED display flashes "RST". 2. Release the DOWN Arrow button for 1 second and press and hold the DOWN Arrow button once more until the actuators retract completely then slightly extend before coming to a stop, displaying “0.01”. -
Page 28: Saved Positions Procedure
Saved Positions Procedure Saved positions are an optional feature, providing the ability to program the actuators to preferred configurations, to maximise effectiveness during harvest. 1. Move the actuators to the desired location. 2. Press the “M” button followed by a numbered button of choice. 3. -
Page 29: Maintenance
MAINTENANCE • The recommendation is to complete a routine check of the FeedStorm at regular intervals, after initial installation at the cautious discretion of the operator. The recommendation hereafter is to complete a routine check every day / 12 hours of operation. -
Page 30: Troubleshooting
TROUBLESHOOTING Remote Control Error Code Actuators do not work, after completing the Reset Procedure, an error code appears on the remote-control LED display. Error Codes E01 to E04: Actuator Overload Error 1. Ensure no excessive weight is on the FeedStorm actuators, friction on the actuator brackets, or force required by the actuators to overcome an unforeseen obstacle or a mechanical clash point. -
Page 31: Reference Documents
REFERENCE DOCUMENTS Diagrams Attached: o Mechanical Fitment Diagram Drawings Attached: o FeedStorm MacDon Assembly & Fitment Drawing: UCA-MCD-ASM o FeedStorm MacDon Hydraulics Diagram Drawing: UCA-H01 o FeedStorm MacDon Electrical Wiring Diagram Drawing: UCA-E01... - Page 33 ...
- Page 34 QUANTITY ITEM NO. PART NO. REF. NO. DESCRIPTION HYDRAULIC MOTOR, 80CC, M+S HYD-MP80COD MP80 COD HYD-FCV-FC51-34 FC51-3/4-50 HYDRAULIC FLOW CONTROL VALVE - BRAND FC51-3/4 RCD-22 HOSE MOUNTING CLAMP ASSEMBLY, DOUBLE, 22MM ...
- Page 35 ...
Need help?
Do you have a question about the FEEDSTORM D60 and is the answer not in the manual?
Questions and answers