Advertisement
Quick Links
Setting the switching point
The relationship between air velocity and impedance change is non linear. In the lower range of flow velocity, the change of
impedance is very large. In the upper range of flow velocity, identical changes in flow velocity result in increasingly smaller
impedance changes. If the switching point is set, it is important to note what change is to be monitored because different settings
have certain disadvantages.
Note the following requirements
Small flow change in high flow velocity range: The switching point must be selected very close to the normal flow reading
since flow changes only lead to a very small change in the measured value. Since temperature compensation takes place with certain
delay after the actual temperature change has occurred, this switching point setting is only suitable for the applications which have
slow temperature changes in the medium.
Small flow change in low flow velocity range: The switching point can be selected at a greater interval from the normal flow
reading because a change in flow velocity causes a very large change in the measured value. A temperature change has no effect on
switching behaviour.
Large change in flow rate:
A Yes/NO statement is usually required here (e.g. fan running or fan stationary). You can therefore select a safety clearance which is
so large that neither temperature changes nor turbulence may have an affect on switching behaviour.
Assembly
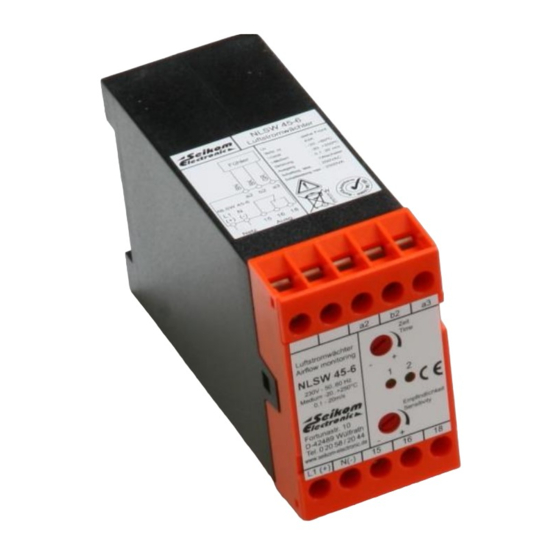
The NLSW45-6 can be mounted on a top-hat rail to DIN EN 50022-35 using bolts or a quick-release clamp.
If the unit is exposed to major vibrations, it is advisable to mount it on a rubber-metal vibration damper.
Commissioning
Connection and commissioning has to be done by appropriate personnel! Please attend the following steps during assembling and
connecting:
1.
Connect the appropriate sensor to the appliance.
Set the "Sensitivity" potentiometer to minimum sensitivity.
2.
Set the "start-up break" potentiometer to the needed time (approx. 5-60s)
3.
4.
Connect the power supply; the appliance is operational within 2 seconds. The green LED lights up.
5.
The yellow LED lights up briefly and turns off after the start-up break time.
6.
Switch on the flow generator.
7.
Slowly turn the "Sensitivity" potentiometer to maximum until the yellow LED has just lightened up. To attain stable
switching behaviour, turn the potentiometer slightly past this switching point. Do not make this adjustment until the
yellow LED has gone out!
8.
To check the monitoring device, turn off the flow. The yellow LED turns off and the relay connects.
Attention: Pay attention to the connection diagram and be aware of using the correct voltage!
What to do if the monitoring device does not work properly
Problem
device does not work in any way
no or wrong suplly voltage
device does not recognice flow
sensor is not installed properly
flow is out of range
device reacts in a different way
sensor is highly polluted
device reacts in fast media tepmerature
temperature gradient is out
changes
If you have any other questions, feel free to contact us.
cause
sollution
check supply voltage and connection
check the sensor's installation
change the tube's diameter
maintain the sensor
check the temp. Gradient of your
of range
installation
Airflow monitoring
Installation and operating instruction
NLSW45-6 and NLSW45-6.1
Our products correspond to the requirements of the European guidelines
WEEE 2012/19/EU - RoHS 2011/65/EU
Mistakes and misprints are not to be excluded. All information „without guarantee".
03/2022
Advertisement

Summary of Contents for Seikom Electronic NLSW45-6
- Page 1 Assembly The NLSW45-6 can be mounted on a top-hat rail to DIN EN 50022-35 using bolts or a quick-release clamp. If the unit is exposed to major vibrations, it is advisable to mount it on a rubber-metal vibration damper.
- Page 2 General Information The NLSW45-6 monitors gaseous media with tamperatures in the range of -20 to 250°C and up to 400°C with F8/400. The sensor is watched for short-circuit and loss of connection. The start-up delay and the switching point is settable step- Installation Instruction less.


Need help?
Do you have a question about the NLSW45-6 and is the answer not in the manual?
Questions and answers