
Related Manuals for Iget HOMEGUARD HGNVK85304


Summary of Contents for Iget HOMEGUARD HGNVK85304
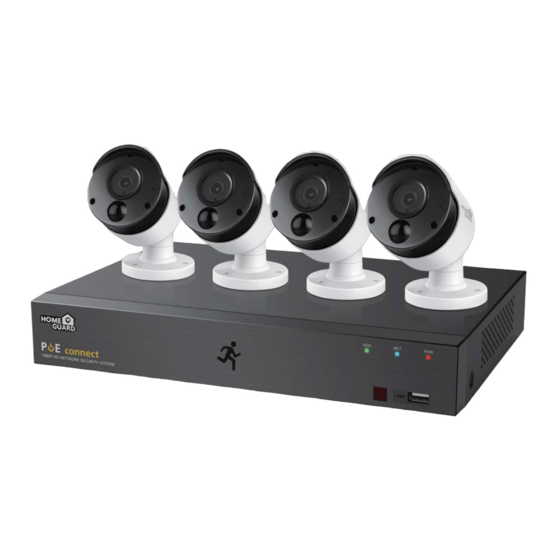
- Page 1 SMART DETECTION MOTION & HEAT TRIGGER ACCURATE ALERTS Professional HD Security Kit Instruction Manual For the latest, up-to-date manual, please visit www.iget.eu...
-
Page 2: Table Of Contents
Contents Contents Safety Instruction 1 Product Overview 1.1 Rear Panel 1.2 Front Panel 1.3 Remote Controller (For Reference Only) 2 NVR Installation & Connection 2.1 HDD Installation 2.2 Connection Diagram 3 NVR Common Operations 3.1 Using the Supplied Mouse 3.2 Using the Virtual Keyboard 3.3 Password 4 NVR Starting up 4.1 Start Wizard... - Page 3 5.2.2 Record 5.2.2.1 Record 5.2.2.2 Record Schedule 5.2.3 Capture 5.2.3.1 Capture 5.2.3.2 Capture Schedule 5.3 Alarm 5.3.1 Motion 5.3.2 PIR 5.3.3 Intelligent 5.3.4 PTZ Linkage 5.3.5 Exception 5.4 Network 5.4.1 General 5.4.4.1 PPPoE 5.4.1.3 Port Configuration 5.4.2 DDNS 5.4.3 Email 5.4.3.1 Email Configuration 5.4.3.2 Email Schedule 5.4.4 FTP...
- Page 4 5.6.6 System Information 5.6.6.1 Information 5.6.6.2 Channel Information 5.6.6.3 Record Information 5.6.6.4 Network State 6 Search, Playback & Backup 6.1 Using Search Function 6.1.1 Search & Play Video in General 6.1.1.1 Video Clip Backup 6.1.2 Event Search, Playback & Backup 6.1.2.1 Event Playback Control 6.1.3 Sub-periods Playback 6.1.4 Smart Search &...
-
Page 5: Safety Instruction
Safety Instruction Please carefully read the following safety instruction so as to avoid personal injuries and prevent the equipment and other connection devices from being damaged. 1. Power sources (note: please use the power supply attached or specified by the manufacturer) Never operate the equipment by using unspecified power supply. -
Page 6: Product Overview
1 Product Overview 1.1 Rear Panel 4CH NVR NVR Kits Model: HGNVK-45302 / 45304 CAUTION RISK OF ELECTRIC SHOCK DO NOT OPEN LAN3 LAN1 CAUTION : TO REDUCE THE RISK OF ELECTRICAL SHOCK DO NOT OPEN COVERS. NO USER SERVICEABLE PARTS INSIDE. -
Page 7: Front Panel
1.2 Front Panel Items Part Names Functions HDD LED Flashes when the HDD is in use Network LED Flashes when the internet is connected Power LED Indicates the NVR is turned ON when lit IR Receiver Receives the signal from the remote control USB Ports For USB mouse and external storage 1.3 Remote Controller (For Reference Only) -
Page 8: Nvr Installation & Connection
2 NVR Installation & Connection 2.1 HDD Installation The system may not include hard disk depending on the kit you selected. The NVR works with most 3.5” or 2.5” SATA HDD. CAUTION: DO NOT install or remove the hard disk drive while the device power is turned ON. When power supply is disconnected, remove the screws at both sides with screwdriver, then remove the screws on the rear board,... -
Page 9: Connection Diagram
2.2 Connection Diagram CAUTION RISK OF ELECTRIC SHOCK LAN7 LAN5 LAN3 LAN3 DO NOT OPEN CAUTION : TO REDUCE THE RISK OF ELECTRICAL SHOCK DO NOT OPEN COVERS. NO USER SERVICEABLE PARTS INSIDE. REFER SERVICING TO QUALIFIED SERVICE PERSONNEL. WARNING : TO PREVENT FIRE OR SHOCK HAZARD. DO NOT EXPOSE UNITS NOT SPECIFICALLY DESIGNED FOR OUTDOOR USE TO RAIN OR MOISTURE. -
Page 10: Nvr Common Operations
3 NVR Common Operations 3.1 Using the Supplied Mouse 1. Left Button: • Click to select menu options. • During live viewing in split-screen view, double-click on a channel to view it in full-screen. Double-click the channel again to return to split-screen viewing. •... -
Page 11: Password
3.3 Password For the first time when you run the NVR, you must be required to set your own password immediately in order to protect your privacy. Please be sure to record your user name and password and save them in a secure place. -
Page 12: Nvr Starting Up
4 NVR Starting up 4.1 Start Wizard Startup Wizard will help to configure the system and get the NVR works quickly. 4.1.1 Start Wizard Click the Start Wizard to proceed to the next step 4.1.2 Network Configuration If you connect to a router allows to use DHCP, please check the DHCP box. The router will assign automatically all the network parameters for your NVR. -
Page 13: Date/Time
Port Web Port: This is the port that you will use to log in remotely to the NVR (e.g. using the Web Client). If the default port 80 is already taken by other applications, please change it. Client Port: This is the port that the NVR will use to send information through (e.g. using the mobile app). If the default port 9000 is already taken by other applications, please change it. -
Page 14: Ip Camera
DST stands for Daylight Savings Time. DST: Enable if Daylight Saving Time (DST) is observed in your region Time Offset: Select the amount of time to offset for DST Time Mode: Choose to set the daylight saving time in weeks or in days Start Time/End Time: Set the start time and end time for daylight saving 4.1.4 IP Camera This menu allows you to add IP cameras to the NVR. -
Page 15: Disk
Click Search button to search IP cameras, and then click one of the IP camera in the device list. IP Address/Domain: IP address or domain name of the IP camera Alias: Name of the IP camera Position: Position to display the camera name on the screen. Port: Port of the IP camera Protocol: Choose the protocol of the IP camera from the drop down menu User Name: User Name of the IP camera... -
Page 16: Resolution
If the HDD is installed in the NVR for the first time, it must be formatted. Select the HDD and then click Format HDD button to format the HDD. Overwrite: Use this option to overwrite the old recordings on the HDD when the HDD is full. For example, if you choose the option 7 days then only the last 7 days recordings are kept on the HDD. -
Page 17: Live View Screen Overview
4.2 Live View Screen Overview Camera Title Status Icons Camera Quick Tool bar Start Menu Task Menu Bar System Date & Time Camera Title To display the camera title A-: This indicates that the camera connected is an AHD camera T-: This indicates that the camera connected is a TVI camera C-: This indicates that the camera connected is a CVI camera IP: This indicates that the camera connected is an IP camera... -
Page 18: Camera Quick Toolbar
4.2.1 Camera Quick Tool bar In live viewing, click the left button of your mouse on a connected camera to display the Camera Quick Tool bar. Click to manually record the channel immediately. If the manually recording is in process, the icon will be in red color. -
Page 19: Start Menu
4.2.3 Start Menu With the start menu, you can switch user, search & playback, enter system setup menu, lock & unlock the screen, shut down, reboot & logout the system. To switch user. To enable multi-user, please view on 5.6.3 Multi-user. Search &... -
Page 20: Nvr System Setup
5 NVR System Setup You are able to configure the NVR for Channel, Record, Alarm, Network, Device & System from Start Menu Setup. 5.1 Channel In this section, you are allowed to configure the camera, live view display, manage IP cameras, adjust IP camera’s image, PTZ setup, motion setup, convert mode, and more. -
Page 21: Protocol Manage
Click Search button to search IP cameras, and then click one of the IP camera in the device list. IP Address/Domain: IP address or domain name of the IP camera Alias: Name of the IP camera Position: Position to display the camera name on the screen. Port: Port of the IP camera Protocol: Choose the protocol of the IP camera from the dropdown menu User Name: User Name of the IP camera... -
Page 22: Live
5.1.2 Live To configure camera parameters. Channel: Display channel name. Setup: Click icon into the setup page. Choose a channel to configure Give a name to the camera Date format to display for the camera (for IP camera only) Time format to display for the camera (for IP camera only) Refresh Rate of the camera (for IP camera only) Choose a camera type (Auto, AHD, TVI, CVI) for analog camera Choose an AHD EQ (Enhanced Quality) level depends on your... -
Page 23: Video Cover
Channel: Channel name. Setup: Click icon into the setup page. Choose a channel to configure Select the desired built-in IR cut filter mode to ensure the camera works properly both in the day and night. Set the delay time of IR-CUT switching Check to enable lens flip and angle flip Set the flip angle To enable or disable Back light compensation... -
Page 24: Motion
5.1.5 Motion This menu allows you to configure motion parameters. When motion has been detected. by one or more cameras, your NVR will alert you to a potential threat at your home. It does this by sending you an email alert with an attached image from the camera to use as a reference (if this option is enabled) and/or sending push notifications via the mobile app. -
Page 25: Pir
Post Recording: You can set how long after an event occurs that the NVR will continue to record. The recommended recording length is 30 seconds but it can be set higher up to 5 minutes. Show Message: Check the box to display icon on the live view screen when the motion is detected. -
Page 26: Intelligent
Click Alarm button to configure the PIR detection alarm function: Buzzer: The NVR can use its internal buzzer to emit an alarm tone. You can set the buzzer duration in seconds when the PIR is detected. Alarm Out: Optional function. If your NVR support to connect to external alarm device, you can set to emit an alarm tone. -
Page 27: Record
Resolution: This parameter defines how large the recorded image will be. FPS: This parameter defines the number of frames per second the NVR will record. Video Encode Type: For IP camera only. NVR support H.264 IP camera only. If you choose H.265, live view screen of the IP channel will display “Decoding Failed”. -
Page 28: Capture
Channel: Select the channel to set its recording parameters. Normal: When the time slot is marked green, this indicates the channel performs normal recording for that time slot. Motion: When the time slot is marked yellow, this indicates the channel records only when a motion is detected during that time slot. -
Page 29: Capture Schedule
Enable Capture: Enable or disable automatic capturing on the channel. Stream Type: Select the image resolution by mainstream or substream. Normal Interval: Time interval to capture an image in normal recording. Alarm Interval: Time interval to capture an image when motion, IO alarm or PIR is triggered Manual Capture: Enable or disable manual capture in the channel 5.2.3.2 Capture Schedule Channel: Select the channel to set its capture parameters. -
Page 30: Ptz Linkage
5.3.4 PTZ Linkage If you had connected the PTZ cameras, you can set the linkage between PTZ cameras and Motion Alarm and/or PIR sensor alarm. With the linkage function, you can turn your PTZ cameras focus to the preset point when a motion or PIR alarm happens. Switch: Enable or disable the PTZ linkage function. -
Page 31: Network
5.4 Network This menu allows you to configure network parameters, such as PPPoE, DHCP. The most common types are DHCP. Most probably your network type is DHCP, unless the network is manually addressed. If you need an authentication user name and password to the Internet, then choose PPPoE. 5.4.1 General If you connect to a router allows to use DHCP, please check the DHCP box. -
Page 32: Port Configuration
5.4.1.2 Port Configuration Web Port: This is the port that you will use to log in remotely to the NVR (e.g. using the Web Client). If the default port 80 is already taken by other applications, please change it. Client Port: This is the port that the NVR will use to send information through. If the default port 9000 is already taken by other applications, please change it. -
Page 33: Email
User/Password: Enter the user name and password you obtained when creating an account on the DDNS service provider’s web page. After all parameters are entered, click Test DDNS to test the DDNS settings. If the test result is “Network is unreachable or DNS is incorrect”, please check whether the network works fine, or the DDNS information is correct or not. -
Page 34: Ftp
The color codes on email schedule have the following meanings: Green: Slot for Motion detection. Red: Slot for Exception (HDD full, HDD error, or Video Loss). Purple: Slot for PIR (optional). 5.4.4 FTP This menu allows you to enable FTP function to view and load captured snapshots from NVR to your storage device over FTP. -
Page 35: Device
5. 5 Device In this section, you can configure the internal HDD function. 5. 5.1 Disk This menu allows you to check & configure the internal HDD(s). You need to format the HDD only at the first startup and if you replace a new HDD. Format HDD: Select the HDD you want to format and then click Format HDD. -
Page 36: S.m.a.r.t
5.5.1.1 S.M.A.R.T This function can be used to display technical information on the hard drive installed inside your NVR. You can also perform a test (there are three types available) to evaluate and detect potential drive errors. Whole Evaluation not passed, continue to use the disk: If for some reason the hard drive has developed a fault (such as one or more bad sectors), you can instruct your NVR to continue saving to the drive. -
Page 37: Date And Time
5.6.1.1 Date and Time Date: Click the calendar icon to change the date. Time: Click the dialogue box to change the time. Date Format: Select the preferred date format. Time Format: Select the preferred time format. Time Zone: Select a time zone relevant to your region or city. 5.6.1.2 NTP Settings The NTP (Network Time Protocol) function allows your NVR to automatically sync its clock with a time server. -
Page 38: Output Configuration
Enable DST: If Daylight Saving applies to your time zone or region, check this option to enable. Time Offset: Select the amount of time that Daylight Saving has increased by in your time zone. This refers to the difference in minutes, between Coordinated Universal Time (UTC) and the local time. Enable DST: You can select how Daylight Saving starts and ends: Week: Select the month, a particular day and time when Daylight Saving starts and ends. -
Page 39: Multi-User
Choose LIVE-OUT from the Video Output drop-down menu. SEQ Mode: Select how many video channels you would like to display when your NVR is in sequence mode. SEQ Dwell Time: Enter in seconds the maximum length of time you would like to display a video channel in sequence mode before displaying the next video channel (300 seconds is the maximum). -
Page 40: Changing Password
The system supports the following account types: • ADMIN — System Administrator: The administrator has full control of the system, and can change both administrator and user passwords and enable/disable password protection. • USER — Normal User: Users only have access to live viewing, search, playback, and other functions. -
Page 41: Setting User Permissions
5.6.3.3 Setting User Permissions The administrator account is the only account that has full control of all system functions. You can enable or disable access to certain menus and functions of each user account. 1. Click the edit icon under Permission tab. 2. -
Page 42: Maintenance
5.6.4 Maintenance In this section, you will be able to search & view the system log, load default settings, upgrade the system, export & import system parameters and manager system auto reboot. 5.6.4.1 Log The system log shows you important system events, such as motion alarms and system warnings. You can easily create a backup file of the system log for a set time period to a USB flash drive. -
Page 43: Upgrade
5.6.4.3 Upgrade 1. Copy the firmware file (.sw file) to your USB drive, and insert the USB flash drive into the NVR’s USB port. 2. Click Select File button to choose the firmware file in your USB flash drive, then Click OK. 3. -
Page 44: Ip Camera Maintain
5.6.5 IP Camera Maintain This menu allows you to upgrade the IP camera’s firmware and restore default settings of IP camera. 5.6.5.1 Upgrade IP Camera 1. Choose one of the IP cameras you want to upgrade firmware. 2. Click Select File select the update file from your USB flash drive, then click OK. 3. -
Page 45: System Information
5.6.6 System Information This menu allows you to view the system information, channel information, record information & network status. 5.6.6.1 Information View system information such as device ID, device model name, IP address, MAC address, firmware version and more. If your NVR supports P2P function, you will find the P2P ID & P2P QR code in the information page. You can scan this QR cord with mobile app to remote view the NVR. -
Page 46: Network State
5.6.6.4 Network State View network information. Total Band Width: It shows the NVR’s total input band width for IP cameras. Used Band Width: It shows the used band width of IP cameras. -
Page 47: Search, Playback & Backup
6 Search, Playback & Backup The Search function gives you the ability to search for and play previously recorded videos as well as snapshots that are stored on your NVR’s hard drive. You have the choice of playing video that matches your recording schedule, manual recordings or motion events only. -
Page 48: Search & Play Video In General
7. Timeline: Continuous recordings are shown with colored bars to represent different types of recording (legend shown in the bottom-right corner of the display). Use the time frame options to view a smaller or larger time period. Different types of recording shown in different colors: Continuous Recording in Green color;... -
Page 49: Video Clip Backup
6.1.1.1 Video Clip Backup 1. Insert your USB flash drive to the NVR. 2. Start a video recording playback. 3. Click icon. 4. Check the channel(s) you want to make a video clip backup. 5. Move the mouse cursor to the timeline where you want to start the video clip. 6. -
Page 50: Event Search, Playback & Backup
6.1.2 Event Search, Playback & Backup Event search lets you view a list of video recordings with the channel, start and end time, and recording type conveniently summarized. You can also quickly back up events to a USB flash drive. To search, play &... -
Page 51: Event Playback Control
In the detailed view mode, you can lock the video events to keep events from being overwritten in the hard drive. Click the icon to lock or click to unlock the events. 9. When you click the left button of your mouse upon one of the event, system will show the event information on the left bottom corner of the screen. -
Page 52: Smart Search & Playback
To search & play video in sub-periods: 1. Choose the date & time you want to search. 2. Choose the split-screens you want the videos to be played in. 3. Check the recording types you want to search, or check Search Type to choose all. 4. -
Page 53: Smart Search Area
To start a smart search & playback: 1. Choose the date & time you want to search. 2. Check the recording types you want to search, or check Search Type to choose all. 3. Choose the channel you want to search, the motion recording in the selected channel will be searched automatically. -
Page 54: Picture Search & View
Smart Controls Bar Click this to define a full screen detection area Click this to delete all areas created. Click this to search and play video based on the areas defined. Click this to return to the playback interface. To define one or more specific areas, please do the following: 1. -
Page 55: Picture Preview Control
7. You can switch the view of list form in by clicking below icons which is show at the right bottom corner of the screen: Thumbnails view. You can view the snapshots of the events. List view. The events will be displayed in list. Detailed view. -
Page 56: Remote Access Via Web Client
7 Remote Access via Web Client Use the Web Client to remotely access your NVR at any time via a PC. Before you access the Web Client, you need to ensure that the internet settings of the NVR are configured properly. 7.1 Basic System Environment Requirements The minimum requirements for hardware and OS required to run Web Client are given as below. - Page 57 3. After installing the plug-in, close & launch again your browser and repeat step 1 to open the login page. Input your user name and password to login the web client. Note: If you use Google Chrome, please use Version V41 or below. If you use V42 to V44, you need to enable NPAPI plugins.
-
Page 58: Web Client Manager
2. Download the plug-in "SurveillanceClient.dmg", locate the downloaded file and double click it. 3. Click on “Continue” “Install”. Enter user name and password for Mac computer, Click on “Install Software” “Close” to finish installation. 4. Close Safari and open again to repeat step 1 to open the Web Client login page. 7.3 Web Client Manager The web client supports to fully control the NVR with administrator account. - Page 59 1. Channel List: Open the channel list for quick camera function Click button to display the Channel List. Click button to hide the Channel List. Turn the Live video stream on/off. The button is in blue color if the live video stream is on. Manual Recording buttons.
-
Page 60: Playback
Directional Arrows: Click to move the PTZ camera. Automatic line scan. PTZ Speed: Click to set the speed of the PTZ camera's movement. Zoom: Click –/+ to zoom in or out. Focus: Click –/+ to adjust focus. Iris: Click –/+ to adjust iris. Preset Point: Add, remove, or go to preset point. -
Page 61: Playback Control Buttons
To search recordings: 1. Click Playback in the top-right corner of the window. 2. Select a day on the calendar to search for recordings from. Days with recordings appear with a red underline. 3. Select the recording type to search for from the dropdown next to Type, or select All to search for all recordings. -
Page 62: Remote Setting
Choose the files you want to download, press Start Download button to begin, you will see the download status. Press Stop Download button to stop. Playback Speed. Click to choose the playing speed. Play All Channels: Click to play all channels you have chosen to searched. Only available when the Synchronous playback option is not checked. -
Page 63: Viewing Backed Up Video On Pc/Mac
8 Viewing Backed Up Video on PC/Mac This section will help you to play the backup files with the powerful video player which is attached in the CD. For Mac users, please install the app “VideoPlayer_x.x.xx_xxxx_xx_x.dmg”, for example: VideoPlayer_1.0.15_2017_01_6.dmg. For PC users, please install the software “VideoPlayer_x.x.xx_xxxx_xx_xx.exe”, for example: VideoPlayer_1.0.15_2017_01_06.exe. - Page 64 1. Play List Add files Remove files To choose play mode: play a single file and stop; play all listed files by sequence; repeat one file; repeat all files. Filter by file name Hide/Show Play list Click to open files or load a folder. 3.
-
Page 65: Remote Access Via Mobiel Devices
9 Remote Access via Mobiel Devices The NVR supports to remote access via mobile devices based on Android & iOS operating system. 1. Search Homeguardsafe from Google Play Store for android devices or App Store or iOS devices and install. 2. -
Page 66: Appendix
10 Appendix 10.1 Troubleshooting 1. Q: What can I do if the system does not detect the HDD? A: Check if the power supply system is properly connected and data & power ports of HDD are securely connected to motherboard, and if something wrong with the HDD interface. Or you may check if your HDD is supported by referring to the specifications or descriptions. -
Page 67: Usage Maintenance
13. Q: Why can’t I stop recording by pressing “STOP” button or click “Stop Recording” in context menu? A: Pressing Stop or Stop Recording can only stop manual record. If you want to stop Scheduled recording in certain time quantum, please change the setting to No Record. To stop Startup recording, please change record mode to scheduled recording or manual recording. - Page 68 Helpdesk / Technical Support https://helpdesk.intelek.cz HGNVK5300-4M-210619 © 2019 HOMEGUARD...
Need help?
Do you have a question about the HOMEGUARD HGNVK85304 and is the answer not in the manual?
Questions and answers