
Related Manuals for Iget HOME GUARD HGNVK85304


Summary of Contents for Iget HOME GUARD HGNVK85304
- Page 1 Helpdesk / Technical Support www.iget.eu/cs/helpdesk-centrum-cs https://helpdesk.intelek.cz/ Made in China...
- Page 2 SMART DETECTION MOTION & HEAT TRIGGER ACCURATE ALERTS Professional HD Security Kit Quick Start Guide - EN For the latest, up-to-date manual, please visit www.iget.eu...
- Page 3 CAUTION RISK OF ELECTRIC SHOCK DO NOT OPEN TO REDUCE THE RISK OF ELECTRIC SHOCK, DO NOT REMOVE THE COVER. NO USER SERVICABLE PARTS INSIDE. REFER SERVICING TO QUALIFIED PERSONNEL. The lightning flash with arrowhead symbol, within an equilateral triangle, is intended to alert the user to the presence of non-insulated “dangerous voltage”...
- Page 4 IMPORTANT SAFEGUARD RoHS All lead-free products offered by the company comply with the requirements of the European law of the Restriction of Hazardous Substances (RoHS) directive, which means conform our manufacturing processes and products are strictly “lead-free” and without the hazardous substances cited in the directive.
-
Page 5: Table Of Contents
CONTENTS CONNECTING YOUR SYSTEM Introduction Package Contents NVR Layout HDD Installation (Optional) Connecting the NVR Using Remote Control Using the Mouse BASIC OPERATION Start-up Wizard Main Interface PIR Setup Record Playback CONNECTING SMART DEVICE Before Start Get the App User Interface For iPhone For iPad For Android Phone... -
Page 6: Connecting Your System
CONNECTING YOUR SYSTEM... -
Page 7: Introduction
1.1 Introduction Congratulations on your purchase of this Homeguard PoE NVR. Homeguard offers a complete CCTV solution for home or office security, featuring high quality cameras, easy setup and configuration, motion detection and network connectivity. This system features: H.265 Video compression •... -
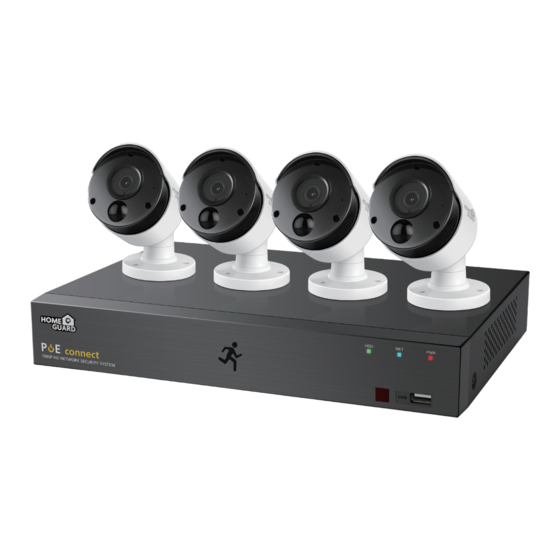
Page 8: Package Contents
1.2 Package Contents Please unwrap the product, and place the product on a flat place or in the place to be installed. Please check the following contents are included in addition to the main unit. The appearance of the components may differ from the image shown. •... -
Page 9: Nvr Layout
1.3 NVR Layout Rear Panel 4CH NVR Model: HGNVK-45302 / 45304 CAUTION RISK OF ELECTRIC SHOCK LAN3 LAN1 DO NOT OPEN CAUTION : TO REDUCE THE RISK OF ELECTRICAL SHOCK DO NOT OPEN COVERS. NO USER SERVICEABLE PARTS INSIDE. REFER SERVICING TO QUALIFIED SERVICE PERSONNEL. - Page 10 Items Part Names Functions LAN Port LAN network interface, support PoE, can supply power to the camera WAN Port Network input interface of the router USB Port For USB mouse and external storage HDMI Output For most modern TVs VGA Output Connect to VGA monitor, such as PC monitor Audio Output Audio signal output, RCA interface...
-
Page 11: Hdd Installation (Optional)
1.4 HDD Installation (Optional) The system may not include hard disk depending on the kit you selected. The NVR works with most 3.5” or 2.5” SATA HDD. CAUTION: DO NOT install or remove the hard disk drive while the device power is turned ON. When power supply is disconnected, remove the screws at both sides with screwdriver, then remove the screws on the rear board, and then... -
Page 12: Connecting The Nvr
1.5 Connecting the NVR CAUTION RISK OF ELECTRIC SHOCK LAN7 LAN5 LAN3 LAN3 DO NOT OPEN CAUTION : TO REDUCE THE RISK OF ELECTRICAL SHOCK DO NOT OPEN COVERS. NO USER SERVICEABLE PARTS INSIDE. REFER SERVICING TO QUALIFIED SERVICE PERSONNEL. WARNING : TO PREVENT FIRE OR SHOCK HAZARD. -
Page 13: Using Remote Control
1.6 Using Remote Control Part Names Functions Numeric keys. Press to display channel 1~8 9, 0 Numeric keys Press to display all channels. Multiple display mode Menu Press to enter or exit the Main Menu Mute Mute On/off Submenu Go to submenu ▲... -
Page 14: Using The Mouse
1.7 Using the Mouse Left Button: Click to select menu options. • During live viewing in split-screen view, double-click on a channel to view it in full-screen. Double-click the • channel again to return to split-screen viewing. Click upon a channel on Live Viewing screen to open Camera Quick Tool bar. •... -
Page 15: Basic Operation
BASIC OPERATION... -
Page 16: Start-Up Wizard
2.1 Start-up wizard Create a Password Please create a user name and password for your device. Password MUST be 8 characters long. Use the on-screen keyboard to input text, numbers and characters. Click change from lower-case to upper-case Start Wizard After NVR startup is completed, the start-up wizard will be displayed. - Page 17 Date / Time Set the date, time, NTP, DST. IP Camera This menu allows you to add IP cameras to the NVR. Disk New hard drive(s) connected must be formatted before use. Upon connection, it will indicate to format new hard drive. Click on "Select"...
- Page 18 Resolution Select the resolution for the VGA output or HDMI output of your monitor. Mobile If you scan a QR code using Homeguardsafe, the device ID displayed in the NVR will be automatically reflected in the Mobile Viewer ID, and you can use the Mobile Viewer immediately by entering the ID / password of the NVR.
-
Page 19: Main Interface
2.2 Main Interface 13 14 15 16 17 19 20 Items Part Names Functions Channel Name Display channel name This icon appears when the camera has PIR detection Motion Detection This icon appears when the camera has detected motion Manual Recording Enable or disable manual recording Manual Capture Make a snapshot of current video... - Page 20 Items Part Names Functions Main Menu Access the main menu 4-Channel Layout Display four channels of video More Layout Click to choose more layouts for live view Auto SEQ Press this button to switch the screen mode in sequence Play Replay video recorded Audio Click to adjust audio volume...
-
Page 21: Pir Setup
2.3 PIR Setup PIR is advanced motion detection that senses body heat and reduces false alarms. The PIR Technology takes your motion detection to the next level by greatly reducing inaccuracies and false motion alerts. Homeguard camera’s PIR sensor can detect changes in heat produced by humans, animals and vehicles. This new technology requires both changes in motion and heat be detected simultaneously. -
Page 22: Record
2.4 Record Access Main menu Setup Record Record Record Record Switch: Check to enable the recording in this channel. Stream Mode: Choose the recording quality. If you choose Dualstream, the system will record in both Mainstream & Substream. PreRecord: If this option is enabled, the NVR starts recording a few seconds before an alarm event occurs. -
Page 23: Playback
2.5 Playback Click Search button in the Main Menu to enter search / playback section. Items Part Names Functions The system provides various search & playback methods: General, Events, Search Options Sub-periods, Smart, Tag, External File & Pictures Search Date Search by a date to playback. -
Page 24: Connecting Smart Device
CONNECTING SMART DEVICE... -
Page 25: Before Start
3.1 Before Start Make sure you have a router and high-speed Internet access (not included). • Connect your NVR to your router using an Ethernet cable (see the Quick Connection • Guide for details). Upgrade your NVR firmware and client software or mobile app to the latest versions. •... -
Page 26: User Interface
3.3 User Interface Live View Playback Smart Detection Displays real-time footage of Play video that has been Access the Smart Detection your system. recorded on your NVR. notification list and to enable push notifications. -
Page 27: For Iphone
3.4 For iPhone Install the free Homeguardsafe app from the App Store. Tap the Homeguardsafe icon to open the app. After start app, tap to open the menu, to open device list page Tap “+” to scan QR code, then enter the password of NVR. -
Page 28: For Ipad
3.5 For iPad Install the free Homeguardsafe app from the App Store. Tap the Homeguardsafe icon to open the app. After start app, tap to open the menu, to open device list page Tap “+” to scan QR code, then enter the password of NVR. - Page 29 3.6 For Android Install the free Homeguardsafe app from the Google Play. Tap the Homeguardsafe icon to open the app. After start app, tap to open the menu, to open device list page Tap “+” to scan QR code, then enter the password of NVR.
-
Page 30: Connecting To Pc&Mac
CONNECTING TO PC&MAC... -
Page 31: Homeguardsafe Software For Pc & Mac
4.1 Homeguardsafe Software for PC & Mac Find the setup file of digital surveillance central management software named “Homeguardsafe” from CD, and install it. Double left click the icon to pop up [ LOGIN ] interface, Input your user name & password you like, and click “Login”... - Page 32 Click a NVR in the list and the added devices, IP address, port and channel number will be displayed. Click Add Selected Device to add. Note: If your NVR is not available in the list, click Exit and then click add Device to manually input the IP address of NVR.
- Page 33 Click Control Panel option. Then Click Main View. Click and drag the default group to the display window to access real-time footage of your system.
-
Page 34: Remote Access Via Web Client
4.2 Remote Access via Web Client For IE/Chrome/Firefox Launch the explorer on your PC and enter the NVR IP address or DDNS domain name (Host Name) you have set on NVR in the URL box. For the first time you run the web client, system will require to install the web client plugin. - Page 35 For Mac Safari Launch the Safari in your Mac, and enter the NVR IP address or DDNS domain name (Host Name) you have set on NVR in the URL box. Download the plug-in "SurveillanceClient.dmg", locate the downloaded file and double click it. Click on “Continue”...
- Page 36 Live Interface Items Functions Channel List Live Video Stream Options Main Menus Information: Hover over to see system details Exit Color Controls: Click to display or hide the color controls PTZ Controls: Click to display or hide the PTZ controls for using PTZ cameras PTZ Controls: PTZ control menu Live View Control Buttons Navigation: Shows current page number for the channels shown on screen.
-
Page 37: Cloud Access
4.3 Homeguard Cloud Access Open your browser, go to www.homeguardsafe.com Please sign up and login. Click Device Manager, input the device information and click save to add NVR. Click Live, Click ► to Displays real-time footage of your system. Click Playback, you can play video that has been recorded on your NVR. -
Page 38: Technical Support
TECHNICAL SUPPORT... -
Page 39: Technical Specifications
5.1 Technical Specifications Homeguard PoE NVR Compression H.265 Standard Compression Operating System Linux Smart Device Support Apple iOS(iPhone/iPad) and Android Phones and Tablets Dual Stream Yes, Set by Channel Image Quality 1024 × 768, 1920 × 1080, 2560 × 1440, 3840 × 2160 Frame Rate Recording 2Channel: 8MP @ 30fps total;... -
Page 40: Technical Q&A
5.2 Technical Q&A 1. Q: What can I do if the system does not detect the HDD? A: Check if the power supply system is properly connected and data & power ports of HDD are securely connected to motherboard, and if something wrong with the HDD interface. Or you may check if your HDD is supported by referring to the specifications or descriptions. -
Page 41: Warranty & Support
5.3 Warranty & Support All the products sold are covered by 24 months warranty from the date of invoice. Warranty instructions: 1. Please contact us when the product is caused by its own fault within 2 year warranty. 2. Please mail us your written warranty card as soon as possible after purchasing our products so that we can repair or replace this product to its original operation condition. -
Page 42: Camera Installation Template
5.4 Camera Installation Template To make camera installation easier, you can tear off this page and adhere it to the place you would like to install your cameras. TEMPLATE This template is used to install the camera on the wall CAMERA FRONT...
Need help?
Do you have a question about the HOME GUARD HGNVK85304 and is the answer not in the manual?
Questions and answers