Table of Contents
Advertisement
Quick Links
Advertisement
Table of Contents

Related Manuals for Vemer Dafne Wi-Fi


Summary of Contents for Vemer Dafne Wi-Fi
- Page 1 Digital chronothermostat Dafne Wi-Fi User manual...
- Page 3 Page Minimum and maximum values Page Summer time change Page Regulation type Page Timings: what they are Page Winter preset programs Page Summer preset programs Page Device reset Page Reference standards Page - 1 - Dafne Wi-Fi Chronothermostat User Manual...
- Page 4 Dafne Wi-Fi Access Point Cloud Vemer The device connects to the Vemer cloud to check if there are any changes to the configuration and schedule created using the app, and if so, adjusts the temperature according to the new configuration.
- Page 5 Android devices). • Flush mounting in three modules box (503 type) • Weekly programming with 3 settable temperature levels - 3 - Dafne Wi-Fi Chronothermostat User Manual...
-
Page 6: Safety Warnings
5) Before accessing the connection terminals, verify that the leads are not live. 6) In the electrical system of the building where the device must be installed, a protection device from the overcurrents must be present. CONNECTION DIAGRAMS 230V~ - 4 - Dafne Wi-Fi Chronothermostat User Manual... - Page 7 DAFNE WI-FI MOUNTING Bticino Living series, Light, Light Tech, Livinglight, Axolute Vimar Eikon series, Eikon Evo, Plana Ave S44 series – ABB Mylos series - 5 - Dafne Wi-Fi Chronothermostat User Manual...
- Page 8 DAFNE WI-FI MOUNTING ABB Chiara series Vimar Arké series - 6 - Dafne Wi-Fi Chronothermostat User Manual...
- Page 9 DAFNE WI-FI MOUNTING Remove the cogs Gewiss Chorus series - 7 - Dafne Wi-Fi Chronothermostat User Manual...
- Page 10 DAFNE WI-FI MOUNTING Remove the cogs Bticino Matix series - 8 - Dafne Wi-Fi Chronothermostat User Manual...
- Page 11 DAFNE WI-FI MOUNTING Vimar Idea series - 9 - Dafne Wi-Fi Chronothermostat User Manual...
- Page 12 * Note: if the box extension is not present (adapter which increases the depth of the flush-mounting box) we recommend you using the frame for Livinglight AIR installation Bticino Livinglight AIR series - 10 - Dafne Wi-Fi Chronothermostat User Manual...
- Page 13 DAFNE WI-FI MOUNTING AXO AIR AXO AIR mount not included in the package, purchasable as an accessory. Bticino Axolute AIR series - 11 - Dafne Wi-Fi Chronothermostat User Manual...
- Page 14 DAFNE WI-FI MOUNTING FRAME VEMER FRONT PANEL VEMER Vemer frame and front panel not included in the package, which can be purchased as accessories with dedicated mounting KIT. Bticino Living Now series - 12 - Dafne Wi-Fi Chronothermostat User Manual...
-
Page 15: Technical Characteristics
• Operating temperature: 0 ÷ 50 °C • Storage temperature: -20 ÷ 65 °C • Operating humidity: 20÷90% not condensing • Protection degree: IP40 • Insulation: reinforced among accessible parts (frontal) and all other terminals - 13 - Dafne Wi-Fi Chronothermostat User Manual... -
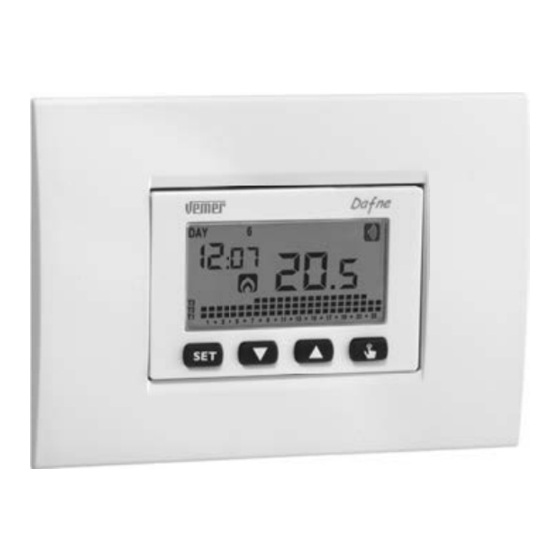
Page 16: Display And Keyboard
Programs modification (for automatic operation) Temperatures setting T1, T2, T3 Timings menu Advanced programming menu Synchronization with Vemer Cloud settings in progress Active Wi-Fi network connection ③ Time and minutes ④ Load activation in summer/cooling mode ⑤ Program on graphic for the current day (in automatic operation) ⑥... -
Page 17: Package Content
To clean the display use a soft, lint-free cloth, without using excess force. PACKAGE CONTENT covers mount A mount B plastic plastic elements elements mount AIR chronothermostat covers and plastic elements are available in white and grey anthracite colours - 15 - Dafne Wi-Fi Chronothermostat User Manual... -
Page 18: Installation And Setup
Preliminary operations If you intend to use the device with remote control, before proceeding with the installation and confi guration make sure you have a Vemer account available. To create a Vemer account, do the following: 1. Install and start the Clima Wi-Fi app on your smartphone (or tablet) 2. - Page 19 LCD display for about 3 seconds and the relay will perform the OFF-ON-OFF sequence, after which the screen will appear: • Proceed with the device confi guration described below. - 17 - Dafne Wi-Fi Chronothermostat User Manual...
-
Page 20: Remote Control Configuration
5. On the next screen, choose the home Wi-Fi network to connect the Dafne Wi-Fi to. Enter the password of the home Wi-Fi network and confirm. Important: before proceeding make sure that the icon on the device display is still on. - Page 21 Otherwise, access the Wi-Fi settings of the smartphone to manually reconnect to the “iwm ...” 6. Enter a name that identifies the Dafne Wi-Fi and choose an icon to help identify the device from those proposed. Confirm with “Save”.
-
Page 22: App Description
APP DESCRIPTION Thanks to the app you can control your Dafne Wi-Fi device remotely, easily and intuitively. Page “Login” Access using the access credentials (email, password) chosen during registration phase of your account. Page “Devices list” identifi es a device or created group... - Page 23 Main page This screen shows the “Dafne Wi-Fi” status: indicates the measured temperature (25.0°C), the operating mode (Heating), the system status: ( ) red = on ( ) gray = off indicates the set temperature and running program name: touch this area to access the program list...
- Page 24 It is also possible to set a switching delay by tapping on the desired time. Note: the image refers to the version of the app for smartphone. On the tablet the whole weekly programming is visible on a single screen. - 22 - Dafne Wi-Fi Chronothermostat User Manual...
- Page 25 Voice Assistant via the voice activated speaker. “Dafne Wi-Fi” settings set the name of “Dafne Wi-Fi” modify the icon that identifies it set the themperature values T0, T1, T2 and T3...
- Page 26 In this way the device does not check if there are new settings on the cloud and adjusts the temperature according to the settings entered from the keyboard (the programming and configuration on the cloud are not changed). - 24 - Dafne Wi-Fi Chronothermostat User Manual...
- Page 27 From the old user’s app, on the device list screen, long tap on the icon that identifies the device in question until the request for confirmation of deletion appears. 2. Perform the device configuration procedure with the new user account (see page 18). - 25 - Dafne Wi-Fi Chronothermostat User Manual...
- Page 28 NOTE: if the device has been confi gured without remote control and later you want to connect it to the home Wi-Fi network, follow the confi guration procedure with remote control described above. - 26 - Dafne Wi-Fi Chronothermostat User Manual...
- Page 29 fl ashing (12: 00). The chronothermostat remains in off operation condition until when the hour is not inserted, ensuring in this way the maintainance of the antifreeze temperature (6°C). - 27 - Dafne Wi-Fi Chronothermostat User Manual...
-
Page 30: Programming Menu
The procedure is described in a detailed way in the chapter time change. The procedure is described in a detailed way in the chapter “Summer time change” on page 42. “Summer time change” on page 42. - 28 - Dafne Wi-Fi Chronothermostat User Manual... - Page 31 On field (3) appears while on field (8) flashes the temperature level (T1, T2 or T3) - 29 - Dafne Wi-Fi Chronothermostat User Manual...
- Page 32 1. From the normal operation display, press for a long time the key until the symbol starts flashing on field (2) 2. Press briefly the key until the symbol flashes. Press the key to access the parameters modification. - 30 - Dafne Wi-Fi Chronothermostat User Manual...
- Page 33 In cooling mode T1 is not settable and equals off system. Defaults: Winter operation Summer operation Temperature °C Temperature °C 15.0 23.0 18.0 25.0 20.0 24.0 * Manual temperature (see Manual operation page 39) - 31 - Dafne Wi-Fi Chronothermostat User Manual...
- Page 34 (30 seconds about). If a timing is active, the display shows the symbol To interrupt a timing, access again the menu and set the value - 32 - Dafne Wi-Fi Chronothermostat User Manual...
- Page 35 3. At this point the first parameter of the menu starts flashing: press the keys to modify the parameter and the key to confirm and to move to the next parameter. To exit the parameters modification press the key - 33 - Dafne Wi-Fi Chronothermostat User Manual...
- Page 36 ) or proportional ( For further information about regulation type see the chapter “Regulation For further information about regulation type see the chapter “Regulation type” on page 44. type” on page 44. - 34 - Dafne Wi-Fi Chronothermostat User Manual...
- Page 37 Allowed values: -5°C ÷ 5 ° C. Factory value: 0°C. Note: the temperature value shown on the display during normal operation includes any adjustment made. - 35 - Dafne Wi-Fi Chronothermostat User Manual...
- Page 38 flashing: Wi-Fi network search in progress or test finished Note: the icon is always flashing during the first 20 seconds or so when this screen is displayed. - 36 - Dafne Wi-Fi Chronothermostat User Manual...
- Page 39 Tm can assume, in order to prevent incorrect settings by the user. • is the lower limit Allowed values: 2°C ÷ Factory value: 2°C • is the upper limit Allowed values: ÷ 50°C Factory value: 50°C - 37 - Dafne Wi-Fi Chronothermostat User Manual...
- Page 40 NOTE: The maximum storable value is 65535 hours (approximately 7 years). This data is stored in non-volatile memory (it is not reset when the device is reset) - 38 - Dafne Wi-Fi Chronothermostat User Manual...
-
Page 41: Manual Operation
2 and 3. To go back to the automatic operation press for a long time the key (3 seconds about). Automatic operation Manual setpoint (Tm) setting Manual operation - 39 - Dafne Wi-Fi Chronothermostat User Manual... - Page 42 To switch the device off press the key until the symbol is displayed (field (9)). To reactivate the regulation, returning to the operating (automatic or manual) preceding the switching off, press the key for about 3 seconds. - 40 - Dafne Wi-Fi Chronothermostat User Manual...
-
Page 43: Minimum And Maximum Values
During the display it is possible to reset these values by holding down the (maximum value ) or or (minimum value ) key until 2 dashes appear instead of the temperature. - 41 - Dafne Wi-Fi Chronothermostat User Manual... -
Page 44: Summer Time Change
At this point, during the modification of any parameter (seconds, minutes, hour, year, month or day) press for a long time the key until the display shows the writing on field (3) - 42 - Dafne Wi-Fi Chronothermostat User Manual... - Page 45 6. Once all parameters are set, to exit and go back to the programming menu, press for a short time the key To exit and go back to the normal operation press for a long time the key or wait for the time-out expiration (30 seconds about). - 43 - Dafne Wi-Fi Chronothermostat User Manual...
-
Page 46: Regulation Type
(if setpoint + band < measured temperature). • the regulation period which represents the duration of the regulation cycle (activation time + deactivation time of heating) and it can have values of 10, 20 or 30 minutes. - 44 - Dafne Wi-Fi Chronothermostat User Manual... - Page 47 In case of probe error, if the antifreeze function is not excluded, the device activates the load for 10 minutes every 4 hours. The display shows the writing fi eld (8). - 45 - Dafne Wi-Fi Chronothermostat User Manual...
- Page 48 Timed manual If you set a timing in manual status, this off status will be maintained until the end of the timing, operation will then switched to automatic mode. - 46 - Dafne Wi-Fi Chronothermostat User Manual...
- Page 49 - change of the operating logic from winter to summer (or viceversa) To set a timing, see chapter “Timing setting” on page 32. To set a timing, see chapter “Timing setting” on page 32. - 47 - Dafne Wi-Fi Chronothermostat User Manual...
- Page 50 0 1 2 3 4 5 6 7 8 9 10 11 12 13 14 15 16 17 18 19 20 21 22 23 0 1 2 3 4 5 6 7 8 9 10 11 12 13 14 15 16 17 18 19 20 21 22 23 - 48 - Dafne Wi-Fi Chronothermostat User Manual...
- Page 51 0 1 2 3 4 5 6 7 8 9 10 11 12 13 14 15 16 17 18 19 20 21 22 23 0 1 2 3 4 5 6 7 8 9 10 11 12 13 14 15 16 17 18 19 20 21 22 23 - 49 - Dafne Wi-Fi Chronothermostat User Manual...
-
Page 52: Device Reset
NOTE: The factory values of the temperatures are shown on page 31 REFERENCE STANDARDS EU DECLARATION OF CONFORMITY Vemer declares that the device complies with the EU directive 2014/53 / EU (RED) with reference to the following standards: EN 60730-2-7, EN 60730-2-9... - Page 53 An efficient sorted waste collection for the environmentally friendly disposal of the used device, or its subsequent recycling, helps avoid the potential negative effects on the environment and people’s health, and encourages the re-use and/or recycling of the construction materials. - 51 - Dafne Wi-Fi Chronothermostat User Manual...
- Page 56 Vemer S.p.A. I - 32032 Feltre (BL) Via Camp Lonc, 16 e-mail: info@vemer.it - web site: www.vemer.it 09-2022...
Need help?
Do you have a question about the Dafne Wi-Fi and is the answer not in the manual?
Questions and answers