
Related Manuals for Vemer Tuo Wi-Fi Batteria Bianco


Summary of Contents for Vemer Tuo Wi-Fi Batteria Bianco
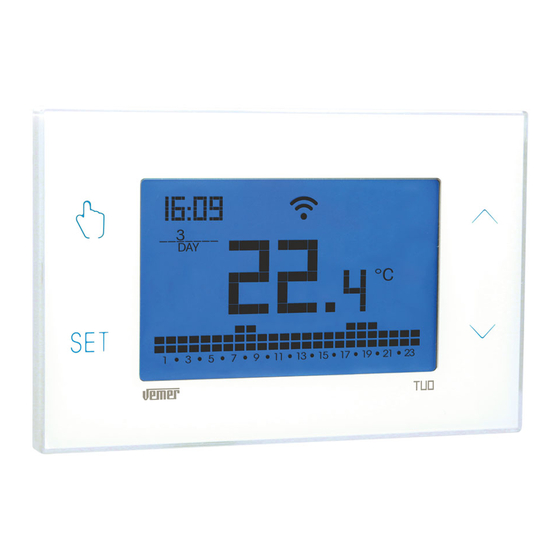
- Page 1 Cronotermostato Digitale TUO WI-FI BATTERIA Manuale d’Uso User Manual DIGITAL CHRONOTHERMOSTAT...
- Page 3 Index ■ Safety warnings Pagina 40 ■ Important usage notes Pagina 41 ■ Dimensions Pagina 42 ■ Connection diagram Pagina 42 ■ Device description Pagina 43 ■ Device installation and initial configuration Pagina 44 ■ App description Pagina 49 ■ Operating mode Pagina 53 ■...
-
Page 4: Safety Warnings
(heating mode) or on the control circuit of the air conditioner (air conditioning mode) in order to guarantee maintenance of the desired temperature. Thanks to the Vemer cloud service, you can access your device from anywhere in the world through the internet connection. Just connect the device to the home router and install the “Clima Wi-Fi”app, which can be downloaded from the iOS and Android... -
Page 5: Important Usage Notes
The “energy saving" function is useful for extending the life of the batteries because it allows you to set the frequency with which the device connects to the Vemer cloud to download any programming updates. The basic setting (factory configuration) requires the device to log in to the cloud: •... - Page 6 DIMENSIONS CONNECTION DIAGRAM NC NO C - 42 - Tuo Wi-Fi Batteria Chronothermostat User Manual...
-
Page 7: Device Description
CLOCK date and time Local active operation. In this status the device is disconnected from the Cloud Vemer and any change in operation must be made using the keys on the chronothermostat. Local operation can be disabled only by the app ... -
Page 8: Device Installation
Preliminary operations If you intend to use the device by remote control, before proceeding with the installation and configuration make sure you have a Vemer account available. To create a Vemer account, proceed as follows: 1. Install and start the Vemer “Clima Wi-Fi”... -
Page 9: Installing The Device
Installing the device. To install the device proceed as follows: 1. press the retaining hook (A) on the underside to disconnect the display from the base 2. unscrew the terminal block cover, pass the wires for connection to the boiler (or air conditioner) through the hole in the base and fix the latter to the wall (or to cover the 3-module recessed box) using the supplied screws (B) 3. - Page 10 Device configuration with remote control (for Android) To configure the device after the first power up or after a factory reset using an Android smartphone, proceed as follows: 1. while the screen shown is displayed in the figure on the side, press the keys to choose to confirm NET ON and press the key...
- Page 11 Device configuration with remote control (for iOS) To configure the device after the first power up or after a factory reset using an iPhone proceed as follows: 1. while the screen shown is displayed in the figure on the side, press the keys to choose to confirm NET ON and press the key...
- Page 12 Device configuration without remote control To use the device as a normal weekly chronothermostat with batteries (without Wi-Fi connection), proceed as follows: 1. when the screen shown in the figure on the side is displayed, press the keys to choose to confirm (a lack of NET OFF and press the key choice within 30 seconds is equivalent to choosing...
-
Page 13: App Description
APP DESCRIPTION Thanks to the app you can control your device remotely, easily and intuitively. "Programs List" page From this screen you can choose the device you want Thermostats list to control. Tuo casa Tuo montagna allows you to register a new device allows you to group several devices together. -
Page 14: Program Management
Program management Programs list create a new program HEATING WINTER DEFAULT my program 1 select, modify, delete or rename an existing program my program 2 o ce Note: WINTER DEFAULT cannot be changed or deleted. Modify a program To modify an existing program, select the profile program of the day to be modified. Created a program for a day, it's possible to copy it to any other day of the week (“Copy”... -
Page 15: Device Settings
Device settings From this screen it’s possible to modify: Save Tuo montagna NAME The name and the icon that identifies the device Tuo montagna The temperature values T0, T1, T2 and T3 ICON The advanced settings: • temperature alarm configuration TEMPERATURE VALUES •... - Page 16 Energy saving (battery management) 17:20 With this function you can set the frequency with Save Energy Saving which the device connects to the cloud BATTERY • "BASIC" setting: 78 % available 156 remaining days - from October 1st to April 30th : every 15 ENERGY MANAGEMENT minutes in the time slot from 6:00 to 24:00 BASE...
-
Page 17: Operating Mode
OPERATING MODE The device can operate according to the following 3 modes: Automatic mode It allows you to use the device as a chronothermostat and the temperature regulation follows the "profile" of the set program. program The program profile assigns one of the 3 profile temperatures T1, T2 or T3 to each hour of the day. -
Page 18: Automatic Operation
To switch from automatic to manual operation Automatic Manual Automatic Tm operation Manual operation operation operation Tm operation operation Automatic Manual Tm operation operation operation To switch from manual to automatic operation 3" 3" Manual Automatic 3" Manual Tm operation Automatic operation operation... -
Page 19: Configuration Menu Description
CONFIGURATION MENU DESCRIPTION The CLOCK menu allows you to set date and time. It also allows the configuration of the daylight saving time change. The PROG menu allows you to change the programming of the automatic operating mode. The SET menu allows you to modify of the values of the 3 temperatures of the automatic operation (T1, T2, T3). - Page 20 CLOCK MENU - DATE AND TIME SETTING When connected to the Wi-Fi network, the device acquires the date and time settings from the server and no settings are required. If instead the device is not connected to the Wi-Fi network, proceed as follows: Initial screen Configuration menu Set the seconds...
- Page 21 Configuration of the summer / winter time change You can configure the device to independently manage the summer time update. The factory setting includes: • the passage winter time → summer time (+1h) the last Sunday of March at 2:00 o'clock •...
- Page 22 PROG MENU - PROGRAMS SETTINGS Access the PROG menu to change the programming of the automatic operation. The factory setting includes: • the P1 program from Monday to Friday • the P2 program on Saturday and Sunday If this program is not suitable for your needs, you can: •...
- Page 23 How to customize the profile of a Px program Choose the Choose the temperature Choose the temperature PX program for the selected time for the next hour • starting from midnight 00:00, press the keys to assign to each hour of the day one of the 3 possible temperatures (T1, T2, T3) and the key to confirm and go to the next hour.
- Page 24 SET MENU - TEMPERATURES T1, T2, T3 SETTING Access the SET menu to change the values of the 3 temperatures used in automatic operation. The factory setting includes: • T1 = 5°C, T2 = 15°C, T3 = 18°C (heating/winter operation ) •...
- Page 25 TIMER MENU - TIMING SETTING Set a timing to prolong the current operation for the duration of the timing itself. There are 3 timings available: • Timed manual: set a time delay during manual operation to maintain this operation until timing has elapsed. At the end of the timing, the device activates the automatic operation.
- Page 26 ADV MENU - ADVANCED PARAMETERS SETTING x5 times Initial screen Configuration menu ADV menu In the ADV menu, the parameters related to the advanced configuration of the device are proposed in sequence. Press: • the keys to change the value of the selected parameter •...
- Page 27 Type of regulation (this menu is active only if operating mode = heating) Setting up: • to choose on/off regulation. • to choose proportional regulation. Factory value: (on/off). Note: the on/off regulation is suitable for most home situations. Therefore it is advisable to modify this parameter only in case of real need. For more information on the characteristics of the on/off and proportional regulation logic, see "Regulation types"...
-
Page 28: Antifreeze Temperature
Antifreeze temperature (this menu is active only if operating mode = heating) The antifreeze temperature avoids the risk of freezing of the system when on the chronothermostat is set the off operation Allowed values: --- (excluded), 1°C ÷ 50°C . Factory value: 6 °C. - Page 29 - CLd : failure to connect to the Vemer cloud. The problem resolves itself once the connection between the Vemer cloud and the device is restored. If this condition persists for more than 24 hours, do not carry out any operation and contact Vemer assistance..
- Page 30 Device address (this menu is active only if Net = ON) The signal strength ( ) and the MAC address ( ) are information visible only when the modem is turned on (NET = ON). To switch between display, press the keys •...
- Page 31 Minimum/Maximum settable temperature Under particular installation conditions, for example in public buildings, hotels, etc., it may be useful to limit the range of values that the temperatures T1 / T2 / T3 and Tm can assume, in order to prevent incorrect settings by the user. •...
-
Page 32: Battery Charge Level
Hour meter of system operation It displays the operating hours of the system (relay contacts on C-NA). The device has two counters (5-digit) independent for heating operation and for the conditioning operation, but is displayed only the counter of the selected operation mode. - Page 33 OTHER FUNCTIONS OF THE DEVICE Display of minimum/maximum daily temperature The device stores the maximum and minimum values of the temperature measured during the day. 3" Maximum values Maximum values Initial screen display resetting 3" Minimum values Minimum values Initial screen display resetting Keypad unlock...
-
Page 34: Device Reset
DEVICE RESET Perform a reset to cancel the settings made and bring the device back to the conditions in which it appears as soon as it has been removed from the packaging. To reset: 1. from the initial screen, press and hold the key to enter the configuration menu. - Page 35 REGULATION TYPES On/off regulation With the on/off regulation, the device activates the heating (air conditioner) until the measured temperature is lower (higher) than the set one. In order to avoid the oscillation straddling the set temperature which would cause the system to switch on and off continuously, a differential (or hysteresis) is introduced.
- Page 36 HOW TO TRANSFER THE DEVICE CONTROL FROM A USER (ACCOUNT) TO ANOTHER If it is necessary to assign the control of the device to another user (typical situation, for example when the device is installed in a rented house and tenants change), proceed as follows: 1.
-
Page 37: Technical Characteristics
EN 60730-2-7, EN 60730-2-9, ETSI EN 300 328, ETSI EN 301 489-1, ETSI EN 301 489-17 The full text of the EU Conformity Declaration is available at www.vemer.it address. - 73 - Tuo Wi-Fi Batteria Chronothermostat User Manual... -
Page 38: Winter Programs
WINTER PROGRAMS ■ ■ ■ ■ ■ ■ ■ T2 ■ ■ ■ ■ ■ ■ ■ ■ ■ ■ ■ ■ ■ ■ ■ ■ ■ ■ ■ ■ ■ ■ ■ ■ T1 ■ ■ ■ ■ ■ ■ ■ ■ ■ ■ ■ ■ ■ ■ ■ ■ ■ ■ ■ ■ ■ ■ ■ ■ 0 1 2 3 4 5 6 7 8 9 10 11 12 13 14 15 16 17 18 19 20 21 22 23 ■... -
Page 39: Summer Programs
SUMMER PROGRAMS T3 ■ ■ ■ ■ ■ ■ ■ ■ ■ ■ ■ ■ ■ ■ ■ ■ ■ T2 ■ ■ ■ ■ ■ ■ ■ ■ ■ ■ ■ ■ ■ ■ ■ ■ ■ ■ ■ ■ ■ ■ ■ ■ T1 ■... - Page 40 Vemer S.p.A. I - 32032 Feltre (BL) Via Camp Lonc, 16 Tel +39 0439 80638 Fax +39 0439 80619 e-mail: info@vemer.it - web site: www.vemer.it 07-2021...
Need help?
Do you have a question about the Tuo Wi-Fi Batteria Bianco and is the answer not in the manual?
Questions and answers