Table of Contents
Advertisement
Advertisement
Table of Contents

Related Manuals for Vemer Crono.X


Summary of Contents for Vemer Crono.X
- Page 1 ELECTRONIC PROGRAMMABLE THERMOSTAT Crono.X User Manual...
- Page 2 - 32 - User Manual - CRONO.X programmable thermostat...
-
Page 3: Table Of Contents
- Aantifreeze temperature pag. 58 - Unit of measurementage pag. 58 - External sensor pag. 59 - Control sensor pag. 59 - Enabling RS485 output (bus) pag. 59 - Memory address pag. 59 - 33 - User Manual - CRONO.X programmable thermostat... -
Page 4: Safety Instructions
61 Harmonized reference standards pag. 62 SAFETY INSTRUCTIONS The CRONO.X thermostat performs 1B-type actions and is aimed for household or similar premises, under a normal pollution degree. During product installation and operation, it is necessary to observe the following instructions: 1) The instrument must be installed by a qualifi... - Page 5 User Manual ELECTRONIC PROGRAMMABLE THERMOSTAT CRONO.X Read all the instructions carefully CRONO.X is a weekly programmable thermostat that unites ease of use with some innovational functions not featured by traditional household temperature controllers. More specifi cally, this device is singled out by 6 features: 1) It displays or controls the temperature in a room situated at a maximum distance of 40m by the use of an optional sensor (mod.
-
Page 6: Technical Specifi Cations
• Optional external sensor (X.TEMP code VN883500) for temperature control or reading (max 40 m; -40°C ÷ +60°C) • Remote control using a dedicated phone dialer by Vemer (X.CODE WAVE and X.CODE BUS) or by general-purpose phone dialer with a potential-free output contact •... -
Page 7: Installation And Assembly
fl ow. Installing the programmable thermostat about 150 cm from the fl oor is recommended. Mounting can be on a wall or on a 503 box. PLACEMENT REMOVAL - 37 - User Manual - CRONO.X programmable thermostat... -
Page 8: Dimensions
FRONT FLAP OPENING DIMENSIONS (mm) 123.0 33.5 - 38 - User Manual - CRONO.X programmable thermostat... -
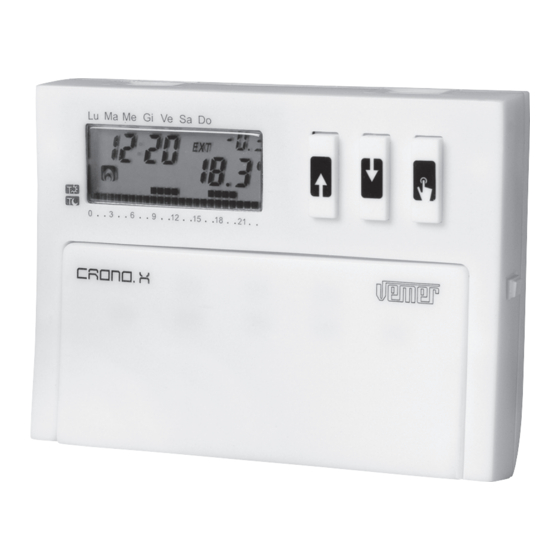
Page 9: Device Description
3 sec. to enter advanced programming To set the time and date; hold it down for 3 secs. to enable or change the solar/daylight saving time To confi rm the settings - 39 - User Manual - CRONO.X programmable thermostat... -
Page 10: Display
-HEATING MODE -AIR-CONDITIONING INITIAL STARTUP – TOTAL RESET This procedure enables correct operation of the CRONO.X on fi rst startup, or resets factory settings (Default settings). Revert to factory settings – TOTAL RESET • Place 2 alkaline batteries 1.5V – AA size, with correct polarity •... -
Page 11: Adjustment Of Time And Date
: the device will resume normal operation Note If no key is pressed for 45 seconds when in the time and date programming procedure, the programmable thermostat will store the changes effected and will resume normal operation. - 41 - User Manual - CRONO.X programmable thermostat... -
Page 12: Automatic Operation
4. Repeat steps 2 and 3 to select the hourly schedule to be assigned to the remaining days of the week 5. After the Sunday schedule is confi rmed the device exits programming and resumes normal operation - 42 - User Manual - CRONO.X programmable thermostat... -
Page 13: Program Customizing
12. Repeat steps 10 and 11 to select the hourly schedule to be assigned to the remaining days of the week 13. After the Sunday schedule is confi rmed the device exits the programming and resumes normal operation - 43 - User Manual - CRONO.X programmable thermostat... - Page 14 T2 (two “small squares”) for WINTER-HEATING mode min = T1; max = +35.0°C for SUMMER-AIR CONDITIONING mode min = T1; max = +35.0°C • Press to confi rm or else wait for 45 seconds - 44 - User Manual - CRONO.X programmable thermostat...
- Page 15 10 11 12 13 14 15 16 17 18 19 20 21 22 23 Note: Program 7 keeps temperature T0 all day long; no “small square” will be shown on the display - 45 - User Manual - CRONO.X programmable thermostat...
- Page 16 10 11 12 13 14 15 16 17 18 19 20 21 22 23 Note: Program 7 keeps temperature T0 all day long and the system is permanently off; no “small square” will be shown on the display - 46 - User Manual - CRONO.X programmable thermostat...
-
Page 17: Manual Operation
Automatic operation and set a different temperature. Then the temperature will not be governed by the program schedule, but by the manually selected temperature: In this case CRONO.X will behave as an ordinary thermostat. This status is indicated by the symbol on the display. -
Page 18: Device Off Mode
Automatic). WINTER-HEATING /SUMMER-AIR CONDITIONING OPERATION MODES CRONO.X controls both Heating and Air-conditioning systems. Depending on the selection, the device’s control mode is indicated by the fl ame icon for WINTER – HEATING or by the snowfl ake icon for SUMMER – AIR- CONDITIONING. -
Page 19: Timer-Controlled Operation
The Starting operating mode is AUTOMATIC and it is kept for a determined term (hours and days), after which the device switches back to the OFF mode. This is used to switch the CRONO.X off for a certain time or a day when nobody is going to be in. -
Page 20: Control By Telephone Dialler
CONTROL BY TELEPHONE DIALLER The CRONO.X programmable thermostat can be remote-controlled through a telephone. This feature is especially useful to control the heating in second homes, as this makes it possible to prepare a warm environment. - Page 21 CONFIGURATION FOR X.CODE WAVE (code VN782900), X.CODE BUS (code VE072500) and for PHONE DIALERS WITH CLEAN OUTPUT CONTACT After connectig the 2 OUT BUS terminals in the CRONO.X up to those marked as relay output contacts in the X.CODE WAVE, X.CODE BUS or other dialer for landline phone or GSM cell phone with a clean output contact.
-
Page 22: Other Available Functions
• Press to confi rm AUTOMATIC SOLAR/DAYLIGHT TIME SWITCHING CRONO.X changes the time from daylight saving to solar on the last Sunday in March at 02:00; from solar to daylight saving on the last Sunday in October at 03:00. This function too can be disabled, or else the date and hour in which the time switch occurs can be changed. - Page 23 All segments will be continuously lit • Solar time daylight saving time switching Press : the following reading will appear Follow the instructions from step 2) to 9) Press to confi rm and exit the settings - 53 - User Manual - CRONO.X programmable thermostat...
-
Page 24: Maximum And Minimum Daily Temperature
MAXIMUM AND MINIMUM DAILY TEMPERATURE CRONO.X stores the external and internal minimum and maximum values measured over the day (external temperature only if an external sensor is provided). • To view these values just press (for the minimum temperature) or... -
Page 25: Advanced Programming
YES = external sensor code VN883500 is connected (optional) Control sensor Int = internal ONLY when ESt=YES) ESt = external RS485 output enabled YES = enabled Phone-control output (Out Bus) n0 = disabled - 55 - User Manual - CRONO.X programmable thermostat... - Page 26 Proportional temperature control is preferable in premises with a high thermal drift (large rooms, fan-coil systems, cast-iron radiators, etc) The Proportional method can only be selected for the WINTER-HEATING mode. - 56 - User Manual - CRONO.X programmable thermostat...
- Page 27 ON for a time span that is proportional to the difference between the set-point and the temperature measured. At the end of every Control Period, CRONO.X reads the temperature measured and compares it with the set-point: based on the difference between the 2 values, it then keeps the output ON for a proportional time accordingly.
- Page 28 UNIT OF MEASUREMENT (dEG) To select the unit of measurement in degrees Celsius (C) or Fahrenheit (F). For degrees °C, the minimum increase is 0.1°C. For degrees °F, the minimum increase is 0.2°F. - 58 - User Manual - CRONO.X programmable thermostat...
-
Page 29: Enabling Rs485 Output (Bus)
(Int) or by the External sensor (ESt). ENABLING RS485 OUTPUT (bUS) The terminals marked OUT BUS are dedicated to the remote control of CRONO.X through a phone dialer. Select “YES” if the phone dialer connected is a X.CODE BUS code VE072500 for the GSM network and RS485 serial communication is used. -
Page 30: Battery Charge Status
A full battery charge (100%) corresponds to 2.8V battery voltage; 0% corresponds to 1.8V (dead batteries). DISPLAY BRIGHTNESS ADJUSTMENT (Cnt) It is meant to improve the CRONO.X display view by adapting it to the light existing in the premises in which it is installed. Brightness ranges from 0 (light) and 15 (dark). -
Page 31: Error Messages
“---” in place of the relevant temperature reading (from internal or external sensor). • In case of sensor failure when CRONO.X is in WINTER-HEATING mode, the relay will go on for 10 minutes every 4 hours to prevent the system from freezing •... -
Page 32: Electromagnetic Compatibility
Input for telephone dialer (OUT BUS) The CRONO.X can be remote-switched on and off through a phone dialer. It is possible to connect a landline dialer (X.CODE WAVE code VN782900) or GSM dialer (X.CODE BUS code VE072500) or other dialer with a clean output contact, between the OUT BUS terminals. - Page 34 Vemer S.p.A. I - 32032 Feltre (BL) Via Camp Lonc, 16 Tel +39 0439 80638 Fax +39 0439 80619 e-mail: info@vemer.it - web site: www.vemer.it...
Need help?
Do you have a question about the Crono.X and is the answer not in the manual?
Questions and answers