
Related Manuals for Sun Microsystems StorageTek 6140 Array


Summary of Contents for Sun Microsystems StorageTek 6140 Array
- Page 1 ™ Sun StorageTek 6140 Array Release Notes Release 6.2 Sun Microsystems, Inc. www.sun.com Part No. 820-6710-10 November 2008, Revision A Submit comments about this document at: http://www.sun.com/hwdocs/feedback...
- Page 2 Copyright 2007 Sun Microsystems, Inc., 4150 Network Circle, Santa Clara, Californie 95054, Etats-Unis. Tous droits réservés. Sun Microsystems, Inc. a les droits de propriété intellectuels relatants à la technologie qui est décrit dans ce document. En particulier, et sans la limitation, ces droits de propriété...
-
Page 3: Table Of Contents
Contents Sun StorageTek 6140 Array Release Notes, Release 6.2 1 Features in This Release 2 Sun StorageTek 6140 Array Features 2 6140 Array Ship Kit Contents 3 Management Software 4 Array Expansion Module Support 4 Licenses For Optional Premium Features 4... - Page 4 Turning Off the DC Power During an Emergency 46 Relocation Cautions 46 Preparing the Two-Post Telco Rack 49 Preparing the Telco Rack 50 Attaching the Rails to a Telco 2-Post Rack 50 Sun StorageTek 6140 Array Release Notes • November 2008...
- Page 5 Installing a Tray in a Telco 2-Post Rack 55 Contents...
- Page 6 Sun StorageTek 6140 Array Release Notes • November 2008...
- Page 7 Tables TABLE 1 Comparison of 2GB Cache and 4GB Cache Array Configurations 2 TABLE 2 Supported Expansion Modules - 6000 Series Arrays 4 TABLE 3 Available Licenses for Premium Features, 5 TABLE 4 Supported Disk Drives 6 TABLE 5 6540 Multipathing Software 7 TABLE 6 Supported Solaris Data Host Platforms 9 TABLE 7...
- Page 8 Sun StorageTek 6140 Array Release Notes • November 2008...
-
Page 9: Sun Storagetek 6140 Array Release Notes, Release 6.2
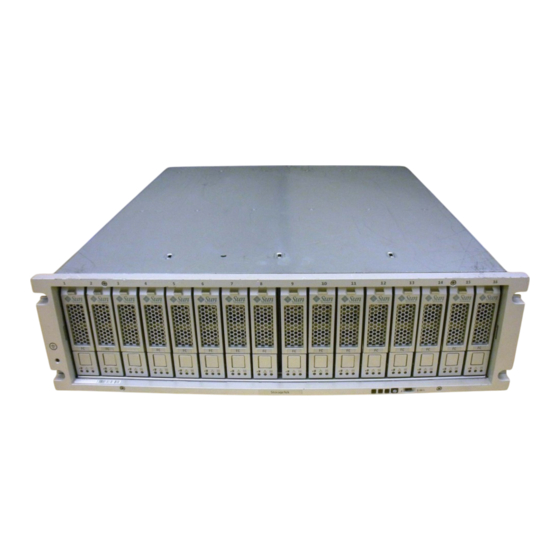
Sun StorageTek 6140 Array Release Notes, Release 6.2 This document contains important release information about the Sun StorageTek™ 6140 Array or information that was not available at the time the product documentation was published. Read this document so that you are aware of issues or requirements that can affect the installation and operation of the Sun StorageTek 6140 Array. -
Page 10: Features In This Release
112 maximum drives (7 trays with up to 16 drives each) for the 4-Gb array ■ AC or DC Power ■ The Sun StorageTek 6140 Array is available in a 2 GByte cache and a 4 GByte cache configuration. compares the 2 GB cache and 4GB cache array configurations. TABLE 1... -
Page 11: 6140 Array Ship Kit Contents
4/8/16 4/8/16/64 supported 6140 Array Ship Kit Contents The Sun StorageTek 6140 Array controller and expansion trays are shipped separately. The following is a list of the contents in the tray ship kits. Ship kit for the controller tray: ■... -
Page 12: Management Software
The Sun StorageTek Common Array Manager software provides you with an easy- to-use interface to configure, manage, and monitor Sun StorageTek storage systems, including the Sun StorageTek 6140 Array. You can also use the Common Array Manager software to diagnose problems, view events, and monitor the health of your array. -
Page 13: System Requirements
Combo Data Snapshot, Data Volume Copy, and Data Replicator System Requirements The software and hardware products that have been tested and qualified to work with the Sun StorageTek 6140 Array are described in the following sections: “Disk Drives and Tray Capacity” on page 6 ■... -
Page 14: Disk Drives And Tray Capacity
“Multipathing Software” on page 7 ■ “Supported Host Bus Adaptors (HBAs)” on page 8 ■ “Supported Enterprise Software” on page 19 ■ “Supported FC and Multilayer Switches” on page 20 ■ Sun StorageTek 6140 Array Release Notes • November 2008... -
Page 15: Multipathing Software
StorageTek SAN Foundation Kit (SFK) software. Solaris OS 10 includes the multipathing software. For data hosts running the Solaris OS, follow the instructions in the Sun StorageTek 6140 Array Hardware Installation Guide to download and install the software from the Sun Download Center. - Page 16 HBAs can be ordered from: /www.sun.com/storagetek/storage_networking/hba/ You can download HBA drivers and other host software from the Sun Download Center, http://www.sun.com/software/download/. Download operating system updates from the web site of the operating system company. Sun StorageTek 6140 Array Release Notes • November 2008...
-
Page 17: Table 6 Supported Solaris Data Host Platforms
SG-XPCI2FC-QF4 SG-XPCIE1FC-QF8-Z SG-XPCI2FC-QF2 (6768A) SG-XPCIE1FC-QF4 SG-XPCIE2FC-QF8-Z SG-XPCI2FC-QF2-Z (x6768A) SG-XPCIE2FC-QF4 SG-XPCIE1FC-EM8-Z SG-XPCIE1FC-EM4 SG-XPCIE2FC-EM8-Z SG-XPCIE2FC-EM4 Solaris 10 Update 6 SG-XPCI1FC-QF2 (6767A) SG-XPCI2FC-QF4 SG-XPCIE1FC-QF8-Z SG-XPCI2FC-QF2 (6768A) SG-XPCIE1FC-QF4 SG-XPCIE2FC-QF8-Z SG-XPCI2FC-QF2-Z (x6768A) SG-XPCIE2FC-QF4 SG-XPCIE1FC-EM8-Z SG-XPCIE1FC-EM4 SG-XPCIE2FC-EM8-Z SG-XPCIE2FC-EM4 Sun StorageTek 6140 Array Release Notes, Release 6.2... -
Page 18: Table 7 Supported Microsoft Windows Data Host Platforms
Emulex LP11000/LP11002 Server Emulex LP9802/9802DC/982 Emulex LP952/LP9002/LP9002DC Emulex 10000/10000DC/LP1050 Emulex LP8000 LSI 449290/409190 2-Gb Sun HBAs: SG-XPCI1FC-EM2 SG-XPCI2FC-EM2 SG-XPCI1FC-QL2 SG-XPCI1FC-QF2 SG-XPCI2FC-QF2-Z 4-Gb Sun HBAs: SG-XPCIE1FC-QF4 SG-XPCIE2FC-QF4 SG-XPCIE1FC-EM4 SG-XPCIE2FC-EM4 SG-XPCI1FC-QF4 SG-XPCI2FC-QF4 SG-XPCI1FC-EM4-Z SG-XPCI2FC-EM4-Z Sun StorageTek 6140 Array Release Notes • November 2008... - Page 19 Emulex 10000/10000DC/LP1050 LSI 7102XP/7202XP SysConnect SYS9843 2-Gb Sun HBAs: SG-XPCI1FC-EM2 SG-XPCI2FC-EM2 SG-XPCI1FC-QL2 SG-XPCI1FC-QF2 SG-XPCI2FC-QF2-Z 4-Gb Sun HBAs: SG-XPCIE1FC-QF4 SG-XPCIE2FC-QF4 SG-XPCIE1FC-EM4 SG-XPCIE2FC-EM4 SG-XPCI1FC-QF4 SG-XPCI2FC-QF4 SG-XPCI1FC-EM4-Z SG-XPCI2FC-EM4-Z 8-Gb Sun HBAs: SG-XPCIE1FC-QF8-Z SG-XPCIE2FC-QF8-Z SG-XPCIE1FC-EM8-Z SG-XPCIE2FC-EM8-Z Sun StorageTek 6140 Array Release Notes, Release 6.2...
- Page 20 Emulex 10000/10000DC/LP1050 LSI 7102XP/7202XP SysConnect SYS9843 2-Gb Sun HBAs: SG-XPCI1FC-EM2 SG-XPCI2FC-EM2 SG-XPCI1FC-QL2 SG-XPCI1FC-QF2 SG-XPCI2FC-QF2-Z 4-Gb Sun HBAs: SG-XPCIE1FC-QF4 SG-XPCIE2FC-QF4 SG-XPCIE1FC-EM4 SG-XPCIE2FC-EM4 SG-XPCI1FC-QF4 SG-XPCI2FC-QF4 SG-XPCI1FC-EM4-Z SG-XPCI2FC-EM4-Z 8-Gb Sun HBAs: SG-XPCIE1FC-QF8-Z SG-XPCIE2FC-QF8-Z SG-XPCIE1FC-EM8-Z SG-XPCIE2FC-EM8-Z Sun StorageTek 6140 Array Release Notes • November 2008...
- Page 21 Emulex LP952/LP9002/LP9002DC Emulex 10000/10000DC/LP1050 Emulex LPe12000/LPe12002 2-Gb Sun HBAs: SG-XPCI1FC-EM2 SG-XPCI2FC-EM2 SG-XPCI1FC-QL2 SG-XPCI1FC-QF2 SG-XPCI2FC-QF2-Z 4-Gb Sun HBAs: SG-XPCIE1FC-QF4 SG-XPCIE2FC-QF4 SG-XPCIE1FC-EM4 SG-XPCIE2FC-EM4 SG-XPCI1FC-QF4 SG-XPCI2FC-QF4 SG-XPCI1FC-EM4-Z SG-XPCI2FC-EM4-Z 8-Gb Sun HBAs: SG-XPCIE1FC-QF8-Z SG-XPCIE2FC-QF8-Z SG-XPCIE1FC-EM8-Z SG-XPCIE2FC-EM8-Z Sun StorageTek 6140 Array Release Notes, Release 6.2...
-
Page 22: Table 8 Supported Linux Data Host Platforms
Server Emulex LPe11000/LPe11002 Clustering Emulex LP9802/9802DC/982 Emulex LP952/LP9002/LP9002DC Emulex 10000/10000DC/LP1050 Emulex LPe12000/LPe12002 2-Gb Sun HBAs SG-XPCI1FC-EM2 SG-XPCI2FC-EM2 SG-XPCI1FC-QL2 SG-XPCI1FC-QF2 SG-XPCI2FC-QF2-Z 4-Gb Sun HBAs SG-XPCIE1FC-QF4 SG-XPCIE2FC-QF4 SG-XPCIE1FC-EM4 SG-XPCIE2FC-EM4 SG-XPCI1FC-QF4 SG-XPCI2FC-QF4 SG-XPCI1FC-EM4-Z SG-XPCI2FC-EM4-Z Sun StorageTek 6140 Array Release Notes • November 2008... - Page 23 Emulex LP952/LP9002/LP9002DC Emulex 10000/10000DC/LP1050 Emulex LPe12000/LPe12002 2-Gb Sun HBAs: SG-XPCI1FC-EM2 SG-XPCI2FC-EM2 SG-XPCI1FC-QL2 SG-XPCI1FC-QF2 SG-XPCI2FC-QF2-Z 4-Gb Sun HBAs: SG-XPCIE1FC-QF4 SG-XPCIE2FC-QF4 SG-XPCIE1FC-EM4 SG-XPCIE2FC-EM4 SG-XPCI1FC-QF4 SG-XPCI2FC-QF4 SG-XPCI1FC-EM4-Z SG-XPCI2FC-EM4-Z 8-Gb Sun HBAs: SG-XPCIE1FC-QF8-Z SG-XPCIE2FC-QF8-Z SG-XPCIE1FC-EM8-Z SG-XPCIE2FC-EM8-Z Sun StorageTek 6140 Array Release Notes, Release 6.2...
- Page 24 Emulex LP952/LP9002/LP9002DC Emulex 10000/10000DC/LP1050 Emulex LPe12000/LPe12002 2-Gb Sun HBAs: SG-XPCI1FC-EM2 SG-XPCI2FC-EM2 SG-XPCI1FC-QL2 SG-XPCI1FC-QF2 SG-XPCI2FC-QF2-Z 4-Gb Sun HBAs: SG-XPCIE1FC-QF4 SG-XPCIE2FC-QF4 SG-XPCIE1FC-EM4 SG-XPCIE2FC-EM4 SG-XPCI1FC-QF4 SG-XPCI2FC-QF4 SG-XPCI1FC-EM4-Z SG-XPCI2FC-EM4-Z 8-Gb Sun HBAs: SG-XPCIE1FC-QF8-Z SG-XPCIE2FC-QF8-Z SG-XPCIE1FC-EM8-Z SG-XPCIE2FC-EM8-Z Sun StorageTek 6140 Array Release Notes • November 2008...
-
Page 25: Table 9 Other Supported Data Host Platforms
QLogic QLA 2310F Novell NetWare 6.5 (SP7) x86 (IA32) QLogic QLA 2342 Novell Cluster Services QLogic QLA 2340 QLogic QLA 2310F QLogic QLA 246x IRIX 6.5.26, 6.5.27, 6.5.28, 6.5.29 MIPS QLogic QLA 2310 Sun StorageTek 6140 Array Release Notes, Release 6.2... - Page 26 Note – The multipathing driver for the IBM AIX platform is Veritas DMP, bundled in Veritas Volume Manager 3.x for the Sun StorageTek 6140 Array on AIX. Download the Array Support Library (ASL) from http://support.veritas.com/. Sun StorageTek 6140 Array Release Notes • November 2008...
-
Page 27: Supported Enterprise Software
Solaris 9 and 10 OSs Veritas Volume Manager (VxVM) 3.2, 3.5, 4.0, 4.1 Veritas File System (VxFS) 3.2, 3.5, 4.0, 4.1 Veritas Cluster Server (VCS) 3.2, 3.5, 4.0, 4.1 Veritas NetBackup 5.0 or higher Sun StorageTek 6140 Array Release Notes, Release 6.2... -
Page 28: Supported Fc And Multilayer Switches
Computer Network Technology Edge 3000 ■ Installing Firmware The array installation procedures are described in the Sun StorageTek 6140 Array Hardware Installation Guide that came with your array. Host management software installation and upgrades are described in the Sun StorageTek Common Array Manager Release Notes. -
Page 29: To Upgrade The Firmware On The Array
The 06.xx versions of firmware are online upgrades and customer installable. The transition from 06.xx to 07.xx firmware is an offline upgrade requiring a service call to implement. Contact Sun Microsystems Support Services at: http://www.sun.com/contact/support.jsp. While firmware 07.15.11.11 is bundled with CAM Release 6.2.0, it is still required to first update the 6140 array to 07.10.25.10 via a service call. -
Page 30: Updating The Ssd Driver For The Solaris Os
1. Download the 113277-44 or higher patch from SunSolve. Refer to the README file for more information on downloading patches. 2. Unpack the patch: unzip 113277-44.zip 3. Read the README file: Sun StorageTek 6140 Array Release Notes • November 2008... -
Page 31: Known Issues
7.x code. In such a case. the firmware on the controllers will not match the baseline firmware on the Common Array Manager Software 6.2.0 CD or download. An alarm will be generated. Sun StorageTek 6140 Array Release Notes, Release 6.2... - Page 32 The ethernet switch that the array’s management path connects with must have auto-negotiation turned on. If it is not set, the array will eventually lose visibility from the management host. Sun StorageTek 6140 Array Release Notes • November 2008...
-
Page 33: Hardware And Firmware Issues
Hardware and Firmware Issues This section describes general issues related to the Sun StorageTek 6140 Array hardware and firmware. Controllers Enter Reboot Loop After Data Replication Pairs are Restored Bug 6755990 – When using controller firmware version 7.10.25.10 or higher, if an event occurs which normally would cause a single data replication pair to become unsynchronized, all data replication pairs become unsynchronized at the same time. -
Page 34: Documentation Issues
Workaround - Do not install SFPs into these slots; they are reserved for future use. Documentation Issues This section describes known issues and bugs related to the Sun StorageTek 6140 Array documentation. Sun StorageTek 6140 Array Release Notes • November 2008... - Page 35 With Release 5.0, the Sun StorageTek 6140 Array Getting Started Guide (Release 2.0) has been replaced by the Sun StorageTek Common Array Manager Software Installation Guide and the Sun StorageTek 6140 Array Hardware Installation Guide. Refer to the Sun StorageTek Common Array Manager Software Installation Guide for information about Sun StorageTek Common Array Manager software installation, firmware files, and logging into the browser interface and sscs CLI man pages.
-
Page 36: Operational Information
Replacing Failed Disk Drives From Another Array If a volume failure on a Sun StorageTek 6140 Array results from failed disk drives, you must be careful when introducing replacement drives that were part of a volume in use by another Sun StorageTek 6140 Array. - Page 37 Verify that the volume on the Sun StorageTek 6140 Array with the failed disk ■ drives has not been deleted. You should leave the volume in a failed state and not delete the volume.
- Page 38 (it is field-replaceable). Status Codes The following is a list of the meanings of the status codes that may display on the numerical LEDs on the controller and expansion modules. Sun StorageTek 6140 Array Release Notes • November 2008...
-
Page 39: Release Documentation
H8 – SFP(s) Present in Currently Unsupported Slot (2A or 2B) Release Documentation Following is a list of documents related to the Sun StorageTek 6140 Array. For any document number with nn as a version suffix, use the most current version available. -
Page 40: Service Contact Information
Reference information for the Sun StorageTek Common Array Manager 819-5748-nn Common Array Manager CLI CLI Guide Service Contact Information If you need help installing or using this product, go to: http://www.sun.com/service/contacting Sun StorageTek 6140 Array Release Notes • November 2008... -
Page 41: Third-Party Web Sites
Sun will not be responsible or liable for any actual or alleged damage or loss caused by or in connection with the use of or reliance on any such content, goods, or services that are available on or through such sites or resources. Sun StorageTek 6140 Array Release Notes, Release 6.2... - Page 42 Sun StorageTek 6140 Array Release Notes • November 2008...
-
Page 43: Disk Drive Insertion
C H A P T E R Disk Drive Insertion This appendix describes how to properly insert a disk drive into a controller or expansion tray. Drives are inserted with the power on, unless specifically instructed not to by Sun technical support. - Page 44 Inserting a Disk Drive. FIGURE A-1 When the drive is completely installed, the drive and handle will be flush with the others, as shown in FIGURE A-2 Sun StorageTek 6140 Array Release Notes • November 2008...
- Page 45 Successfully Inserted Disk Drive FIGURE A-2 Caution – Do not insert a disk drive into a tray by pushing on its housing until it is all the way in. This can cause the handle to be stuck in the “up” position so it is unable to close.
- Page 46 Incorrect Way to Insert Disk Drive FIGURE A-3 Sun StorageTek 6140 Array Release Notes • November 2008...
-
Page 47: Using Dc Power
C H A P T E R Using DC Power This appendix describes using the DC Power Unit for the Sun StorageTek 6140 array in the following sections: “DC Power Overview” on page 39 ■ “Site Preparation for DC Power” on page 41 ■... - Page 48 Caution – Risk of electrical shock – This unit has more than one power source. To remove all power from the unit, all DC MAINS must be disconnected by removing all power connectors (item 4 in Appendix FIGURE B-2) from the power supplies. Sun StorageTek 6140 Array Release Notes • November 2008...
-
Page 49: Site Preparation For Dc Power
4. DC Power Connector Site Preparation for DC Power This section updates the Sun StorageTek 6140 Array Site Preparation Guide with information regarding site power and wiring, power requirements (–48 VDC), and power cord routing instructions for the Sun StorageTek 6140 array: “Site Wiring and Power”... -
Page 50: Dc Power Input
The DC power source must provide the correct voltage, current, and frequency specified on the array nameplate label and the serial number label. The DC power limits within which the Sun StorageTek 6140 array can run without interruption include the following: Nominal voltage ■... -
Page 51: Dc Power Connector Cables And Source Wires
DC Power Connector Cables and Source Wires The Sun StorageTek 6140 array is shipped with –48-VDC power connector cables if the DC power option is ordered. The power connector cable plugs into the DC power connector on the back of the array (Figure 6-3 on page 6-3). The three source wires on the other end of the power connector cable connect the array to centralized DC power plant equipment, typically through a bus bar above the cabinet. -
Page 52: Ship Kit Changes
Caution – Change the Link Rate switch only when there is no power applied to the controller tray. The link rate setting is read only at power-on. Before turning off any power switches on a DC-powered tray, you must disconnect the two-pole 20-amp circuit breaker. Sun StorageTek 6140 Array Release Notes • November 2008... -
Page 53: Connecting Power Cables
Connecting Power Cables To use the DC power option (–48-VDC) to power the array module, review the following points. Ensure that you use a separate power source for each optional DC power ■ connector on the array module. Connecting to independent power sources maintains power redundancy. -
Page 54: Turning Off The Dc Power During An Emergency
Note – Before turning off the power switches on a DC-powered tray you must disconnect the two-pole 20-amp circuit breaker. Relocation Cautions Use the following guidelines when relocating trays or drives from one storage array to another. Sun StorageTek 6140 Array Release Notes • November 2008... - Page 55 Caution – Potential data loss – Moving a array or array components that are configured as part of a volume group can result in data loss. To prevent data loss, always consult a Customer Support representative before relocating configured drives, controller trays or expansion trays. Note –...
- Page 56 Sun StorageTek 6140 Array Release Notes • November 2008...
-
Page 57: Preparing The Two-Post Telco Rack
C H A P T E R Preparing the Two-Post Telco Rack Use the procedures in this chapter to install trays in a standard Telco rack. (You can use the existing universal rack kit and procedures to install the Sun StorageTek 6140 array in a four-post Telco rack.) The number of trays you need to install depends on your overall storage requirements. -
Page 58: Preparing The Telco Rack
Install the rack as described in the installation instructions provided by the manufacturer. Note – Sun Microsystems makes no warranties or guaranties as to fit, form, or function of the Sun StorEdge 6140 array installed in third-party racks or cabinets. It is the customer’s responsibility to ensure that the rack or cabinet can house the Sun... - Page 59 Inserting Screws in the Front and Back Mounting Holes FIGURE C-1 2. Align the open slot of the left mounting rail over the front and back screws of the left post, and press the rail down until it is seated over the screws ).
- Page 60 3. Insert eight more (12-24 or 10-32) screws (two in each post side) in the lower mounting holes at the front and back of the left and right rails ( FIGURE C-3 Sun StorageTek 6140 Array Release Notes • November 2008...
- Page 61 Inserting Screws in the Lower Mounting Holes FIGURE C-3 Chapter C Preparing the Two-Post Telco Rack...
- Page 62 4. Using the #3 Phillips screwdriver, tighten all twelve screws (three on each side of a post) at the front and back of both mounting rails to secure each rail to its post ( FIGURE C-3 Securing Each Rail to its Post FIGURE C-4 Sun StorageTek 6140 Array Release Notes • November 2008...
- Page 63 Installing a Tray in a Telco 2-Post Rack When installing a tray in a Telco 2-post rack, follow these instructions: 1. Unsnap and remove the left and right end caps on the tray to permit access to the screw mounting holes ( FIGURE C-5 Removing the End Caps on the Tray FIGURE C-5...
- Page 64 3. Carefully slide the tray onto the mounting rails until the front bezel of the tray contacts the rail flange on each side ( FIGURE C-7 Sliding the Tray Into the Rack FIGURE C-7 Sun StorageTek 6140 Array Release Notes • November 2008...
- Page 65 4. Use the #2 Phillips screwdriver to insert and tighten four 10-32 x 1/2 screws, washers, and nuts (two each per side) to secure the tray to the front of the rack FIGURE C-8 Chapter C Preparing the Two-Post Telco Rack...
- Page 66 FIGURE C-9 7. At the back of the tray, use the flathead screwdriver to install and tighten two 6-32 flat-head screws (one per side) through the back mounting points FIGURE C-9 Sun StorageTek 6140 Array Release Notes • November 2008...
- Page 67 Securing the Tray to the Back of the Rack FIGURE C-9 8. Tighten the four10-32 locknuts (two on each rail) on each rail extension to secure the rail length. Chapter C Preparing the Two-Post Telco Rack...
- Page 68 Tightening the Locknuts on the Rail Extension. FIGURE C-10 Sun StorageTek 6140 Array Release Notes • November 2008...
Need help?
Do you have a question about the StorageTek 6140 Array and is the answer not in the manual?
Questions and answers