Dormakaba LA GARD 700 Series System User's Manual
Hide thumbs
Also See for LA GARD 700 Series:
- Manual (207 pages) ,
- System user's manual (63 pages) ,
- Installation manual (61 pages)
Table of Contents
Advertisement
Quick Links
Advertisement
Table of Contents

Related Manuals for Dormakaba LA GARD 700 Series


Summary of Contents for Dormakaba LA GARD 700 Series
- Page 1 LA GARD SERIES 700 System User Guide For Models 701-705 P a g e...
-
Page 2: Table Of Contents
3.3.2.2 Backlight Mode – 702 Keypad (Non-Display) ....................18 3.3.3 Buzzer Mode ............................. 18 3.3.3.1 Buzzer Mode – Display Keypad .........................18 3.3.3.2 Buzzer Mode – Non-Display Keypad ....................... 19 3.3.4 Combination Length ..........................19 dormakaba USA Inc. System User Guide 7040.1121 Rev E 10/22 | 1... - Page 3 3.5 Install (Electronically Pair) a Lock and Keypad ..............31 3.5.1 Install (Electronically Pair) Lock and OLED Display Keypad ............31 3.5.2 Install (Electronically Pair) Lock and non-Display Keypad ............32 3.5.2.1 Standard Install Process ........................... 32 dormakaba USA Inc. System User Guide 7040.1121 Rev E 10/22 | 2...
- Page 4 3.14.1.2 Time Delay Count Mode – Display Keypad ....................42 3.14.1.3 Enable/Disable Time Delay – Non-Display Keypad ................... 43 3.14.2 Open a Lock During Time Delay ......................43 dormakaba USA Inc. System User Guide 7040.1121 Rev E 10/22 | 3...
- Page 5 3.15.2 Configure Auto Open – Display Keypad ................... 49 3.16 Assign Time Lock Schedules ....................50 (704 & 705 Models Only) ......................50 3.17 Time/Date Rules in LA GARD 700 Series Locks ..............50 3.18 FOB Identification Feedback....................52 3.18.1 FOB Credential Feedback ........................52 3.18.2 FOB Low Battery and Critical Indicator ..................
- Page 6 Appendix C: LA GARD 700 Series Simple Set-Up: 701 with 1 Manager/1 Standard User/6 Digit Combination ........64 Appendix D: LA GARD 700 Series Simple Set-Up: 702 with 1 Manager/1 Standard User/6 Digit Combination ........68 dormakaba USA Inc. System User Guide 7040.1121 Rev E 10/22 | 5...
-
Page 7: Introduction
1 Introduction This guide outlines general information for using and programming LA GARD 700 Series Models 701- 705 electric combination safe locks and all its components, including accessories and software client. This guide assumes the installer has knowledge of electrical, mechanical, and computer concepts, as well as having familiarity with safe lock systems and associated components. -
Page 8: Electrical Precautions
When AC mains power is required the power supply shall be installed in accordance with NFPA 70 and any applicable electrical codes. 1.3 Tools dormakaba USA Inc. recommends having the following tools on hand to install LA GARD safe locks and their components: •... -
Page 9: Typical System Layout (Single & Multi)
Battery box, alarm box, or AC adaptor Lock #1 Swingbolt Safe Lock LA GARD Prgm Cable Swingbolt Safe Lock Multiplexor Swingbolt Safe Lock LA GARD Keypad Swingbolt Safe Lock dormakaba USA Inc. System User Guide 7040.1121 Rev E 10/22 | 8... -
Page 10: Safe Lock Hardware
The Alarm Box is a hard-wired external alarm device. If used, the Alarm Box must be plugged into the BAT port of Lock #1. The Alarm Box allows for a remote disable input that can block the open command to the lock if dormakaba USA Inc. System User Guide 7040.1121 Rev E 10/22 | 9... -
Page 11: Reset Box
• grant power to the system. A LA GARD 700 Series Alarm Box can be connected to the primary lock to provide power to the system. • This Alarm Box must be physically located in the secure side of the container. -
Page 12: Getting Started
Model 705 702D 703B 704B OLED Display Keypad 702D only (1.28”, Monochrome, 128 x 64) Compatible Lock Types ⸸All ⸸All ⸸All ⸸All ⸸All ⸸(Swing Bolt, Dead Bolt, Spring Bolt) dormakaba USA Inc. System User Guide 7040.1121 Rev E 10/22 | 11... - Page 13 Time Delay Override (TDO) TDO with BLE Key fob Programmable 702D Only at Keypad Programmable by PC Audit Events 2000 6000 View Audit 702D Only Trail Downloadable Audit Trail dormakaba USA Inc. System User Guide 7040.1121 Rev E 10/22 | 12...
- Page 14 Class 2 UL 2058 – UL Type 1 EN1300 – Level SBSC – 3880- 2015 CNPP q2p – Level B/E Time Lock Schedule Dual 703B only 704B only Credential dormakaba USA Inc. System User Guide 7040.1121 Rev E 10/22 | 13...
-
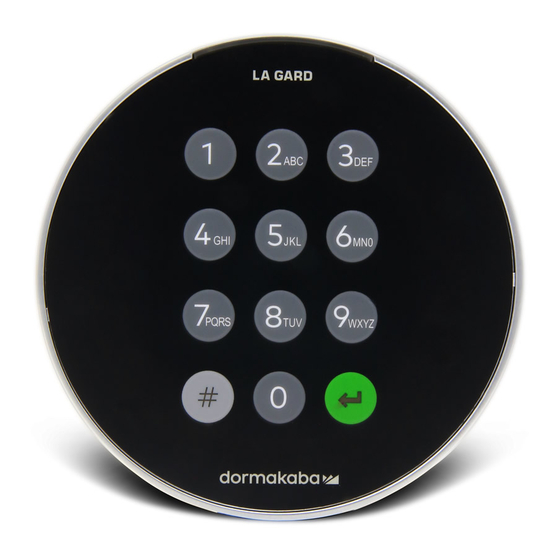
Page 15: Keypad - Layout, Usage, And Settings
Change the time and date. Select Enable/Disable to observe Daylight Saving Observe DST Time (DST). Designate a lock as 24/7 or assign one of two Time Lock Assign Access schedules. dormakaba USA Inc. System User Guide 7040.1121 Rev E 10/22 | 14... - Page 16 Configures the Input Signal for Remote Disable Disable Input Signal Open function. Configures the Input Signal for Time Delay Override Override function. Dual Configures the Input Signal for Dual User Override Override function dormakaba USA Inc. System User Guide 7040.1121 Rev E 10/22 | 15...
-
Page 17: Using A Non-Display Keypad - # Commands
Backlight, amongst other options. Below is a table that outlines Buzzer, LED, and Screen Messages in response to certain events. Table 4 – Buzzer, LED, and Screen Message(s) Event Buzzer Screen Message(s) (Display Only) System wakeup Short high beep Short green flash dormakaba USA Inc. System User Guide 7040.1121 Rev E 10/22 | 16... -
Page 18: System Info (Display Only)
The System Info screen provides information related to the Keypad and safe locks connected to the System, including Firmware version and Model number. Note: This information is only available to authorized users. Follow these steps to navigate through the System Info menu: dormakaba USA Inc. System User Guide 7040.1121 Rev E 10/22 | 17... -
Page 19: Backlight Mode
Follow these steps to toggle the Buzzer Mode On and Off on a Display Keypad: Enter an Authorized User ID and Combination. 2. Navigate through the Main Menu and select “System”. 3. Select Buzzer from the sub-menu. dormakaba USA Inc. System User Guide 7040.1121 Rev E 10/22 | 18... -
Page 20: Buzzer Mode - Non-Display Keypad
3.3.5 Force Change Combination The Force Change Combination setting is a security rule that, when enabled, forces Manager and Standard users to change their combination prior to first use. dormakaba USA Inc. System User Guide 7040.1121 Rev E 10/22 | 19... -
Page 21: Force Change Combination - Display Keypad
4. From the list provided, select between “Single”, “Dual”, and “Dual + Mgr”. 5. “Success Mode updated” will appear on screen and the Keypad will beep three times and flash a green LED once complete. dormakaba USA Inc. System User Guide 7040.1121 Rev E 10/22 | 20... -
Page 22: User Mode - Non-Display Keypad
Note: Combinations ending in 0 would use 1 or 9. Combinations ending in 9 will use 0 or 8. 3.3.8.1 Duress Mode – Display Keypad Follow these steps to Enable/Disable Duress Mode on a Display Keypad: dormakaba USA Inc. System User Guide 7040.1121 Rev E 10/22 | 21... -
Page 23: Duress Mode - Non-Display Keypad
3. Select “Input Signal” from the sub-menu. 4. Scroll through the list of options and select the desired setting. The settings on the keypad will be presented to the user for selection as: dormakaba USA Inc. System User Guide 7040.1121 Rev E 10/22 | 22... -
Page 24: Input Signal - Non-Display Keypad
• Master cannot change their combination to 1-2-3-4-5-6-7-8 • Master combination must be changed upon first use. It will be required as a part of installing the lock. dormakaba USA Inc. System User Guide 7040.1121 Rev E 10/22 | 23... -
Page 25: Manager
A user may be granted permission to open the lock. This capability allows the user to open the lock when they present the proper credential(s). Access restrictions such as Time Delay, are enforced unless override privileges are granted. dormakaba USA Inc. System User Guide 7040.1121 Rev E 10/22 | 24... -
Page 26: User Privileges - Audit Lock
The Table below shows the list of System User Functions available for each System User type. A blank space below a user type indicates that the corresponding function is not available. Table 8 – System User Functions dormakaba USA Inc. System User Guide 7040.1121 Rev E 10/22 | 25... - Page 27 Assign Time Lock Access Schedule Yes (default) Yes (default) Enable/Disable Dual User Mode Yes (default) Enable/Disable Dual User Mode Yes (default) Applies to Managers Enable/Disable Dual Credential Mode Yes (default) dormakaba USA Inc. System User Guide 7040.1121 Rev E 10/22 | 26...
- Page 28 Time Delay: Open Period Counting – Yes (default) up/down/none Requires Access Cancel Time Delay Yes (default) Yes (default) Privilege Duress Combo Enable/Disable per Yes (default) System Change Master Combination Yes (default) dormakaba USA Inc. System User Guide 7040.1121 Rev E 10/22 | 27...
-
Page 29: Assigning User Ids And Privileges
The new Combination must be different from the old Combination. The User is advised to use a strong combination. 7. “Confirm” appears on screen. Input the same Combination from the previous step. 8. “Enroll FOB?” appears on screen. Select Yes or No. dormakaba USA Inc. System User Guide 7040.1121 Rev E 10/22 | 28... -
Page 30: Add User - Non-Display Keypad
3.4.4.1 Edit User – Display Keypad Follow these steps to edit a User on a Display Keypad: Enter an Authorized User ID and Combination. 2. Navigate through the Main Menu and select “Users”. dormakaba USA Inc. System User Guide 7040.1121 Rev E 10/22 | 29... -
Page 31: Edit User - Non-Display Keypad
Input the number associated with the privilege level you want to assign the user. The options are as follows: > Open Lock Privilege > Audit Lock Privilege > Open Lock and Audit Lock Privileges dormakaba USA Inc. System User Guide 7040.1121 Rev E 10/22 | 30... -
Page 32: Delete User
Follow these steps to “INSTALL” (logically, electronically pair) a Safe Lock to an OLED Display Keypad: Press any button to Open factory setting Menu 2. To test the opening of the lock, highlight “Open Lock” and press the <return key> (←). dormakaba USA Inc. System User Guide 7040.1121 Rev E 10/22 | 31... -
Page 33: Install (Electronically Pair) Lock And Non-Display Keypad
Installed (paired with the keypad). Note: Once “Installed”, there is no need to “wake up” the system before another intended command sequence. dormakaba USA Inc. System User Guide 7040.1121 Rev E 10/22 | 32... -
Page 34: Install With A Preconfigured User
3 high beeps and 3 green LED flashes. The lock is now Installed (paired with the keypad) and User 01 has been added. The Keypad will beep three times with a green LED. dormakaba USA Inc. System User Guide 7040.1121 Rev E 10/22 | 33... -
Page 35: Open A Lock
A Keypad with a display will show ‘Lock #x NOT open’ when the Remove Disable is asserted. The ‘x’ would • be replaced by a lock that is targeted to be opened dormakaba USA Inc. System User Guide 7040.1121 Rev E 10/22 | 34... -
Page 36: Change Combination
Note: If the Force Change Rule is turned on, the user must change their combination on first use after being added or reset. For a User changing their own combination, do the following: dormakaba USA Inc. System User Guide 7040.1121 Rev E 10/22 | 35... -
Page 37: Reinstall Keypad
To effectively use the DST settings, the DST tables must be sent down from the 700 Series Software and the selected Time Zone must observe Daylight Savings Time. For more information, refer to section 3.17 “Time/Date Rules in LA GARD 700 Series Locks". dormakaba USA Inc. System User Guide 7040.1121 Rev E 10/22 | 36... -
Page 38: Change Time/Date/Dst - Non-Display Keypad
Upon wake-up, the Keypad will emit 2 high beeps and 2 green LED flashes, followed by 2 low beeps and • 2 red LED flashes. The screen will display “Low Battery” on wake-up and at the end of an open sequence. • dormakaba USA Inc. System User Guide 7040.1121 Rev E 10/22 | 37... -
Page 39: Low Battery Warning - Non-Display Keypad
Audit Privileges by default. Follow these steps to view Audits on screen: Enter an Authorized User ID and Combination. 2. Navigate through the Main Menu and select “Audits”. dormakaba USA Inc. System User Guide 7040.1121 Rev E 10/22 | 38... -
Page 40: Wrong Try Penalty
Follow these steps to Uninstall a safe lock on a Display Keypad: Enter an Authorized User ID and Combination. 2. Navigate through the Main Menu and select “System”. 3. Select “Locks” from the sub-menu. 4. Select “Uninstall”. dormakaba USA Inc. System User Guide 7040.1121 Rev E 10/22 | 39... -
Page 41: Uninstall A Lock - Non-Display Keypad
Follow these steps to perform a Master reset using a Display Keypad: Enter the Master ID and Master Combination. 2. From the Main Menu, navigate through the options to select “System”. dormakaba USA Inc. System User Guide 7040.1121 Rev E 10/22 | 40... -
Page 42: Master Reset - Non-Display Keypad
3.14.1 Enable/Disable Time Delay 3.14.1.1 Enable/Disable Time Delay – Display Keypad Follow these steps to Enable/Disable Time Delay on a Display Keypad: Enter an Authorized User ID and Combination. dormakaba USA Inc. System User Guide 7040.1121 Rev E 10/22 | 41... -
Page 43: Time Delay Count Mode - Display Keypad
00:00 and count up until the period expires c. Count Down i. the time will start at the period length and count down to 00:00 dormakaba USA Inc. System User Guide 7040.1121 Rev E 10/22 | 42... -
Page 44: Enable/Disable Time Delay - Non-Display Keypad
2. The Keypad will beep and flash a red LED once every 10 seconds during the Time Delay period. 3. The Keypad will then beep and flash a green LED once every 10 seconds during the Confirmation Window, signifying the safe lock can now be opened. dormakaba USA Inc. System User Guide 7040.1121 Rev E 10/22 | 43... -
Page 45: Cancel A Time Delay
Enter an Authorized User ID and Combination. 2. Navigate through the Main Menu and select “System”. 3. Select “Locks” from the sub-menu. 4. Select “TimeDelay” from the Locks menu. 5. Select “ChangeOveride”. dormakaba USA Inc. System User Guide 7040.1121 Rev E 10/22 | 44... -
Page 46: Allow Time Delay Override - Non-Display Keypad
Time Delay is active. The Time Delay Menu will have a list of options that vary based on the type of User and hardware options. Options that may appear in the Menu as follows: Single Lock System • dormakaba USA Inc. System User Guide 7040.1121 Rev E 10/22 | 45... - Page 47 Delay Period. The Keypad will return to the Time Delay ‘Wake-Up’ screen Selected Lock is in the Confirmation Window • the Lock opens “Cancel TD” dormakaba USA Inc. System User Guide 7040.1121 Rev E 10/22 | 46...
-
Page 48: Auto Open
Lag Time can be set from 0 to 60 seconds. • During the Auto Open Sequence, the Lag Time begins with the completed unlatching of Lock 1. • Open Privileges: dormakaba USA Inc. System User Guide 7040.1121 Rev E 10/22 | 47... -
Page 49: Auto Open Interactions With Other Features
Any keypresses will be rejected with a corresponding red LED flash and buzzer beep. • 3. After Approximately 2 seconds or less: Lock: All Locks are locked • dormakaba USA Inc. System User Guide 7040.1121 Rev E 10/22 | 48... -
Page 50: Auto Open Feedback With Battery Level Low Or Critical
5. If more than two locks are installed, you will be asked to select a lock. To choose a target lock for Auto Open, press the corresponding number on the Keypad. Note: Lock 1 is not available to be selected as the Target Lock. dormakaba USA Inc. System User Guide 7040.1121 Rev E 10/22 | 49... -
Page 51: Assign Time Lock Schedules
3.17 Time/Date Rules in LA GARD 700 Series Locks Understanding how the time and date are stored and managed in the LA GARD 700 Series locks is of great importance, as it impacts your ability to effectively utilize various time-based features in your system. - Page 52 The following rules are in effect for the La Gard 700 Series locks: On all models except the 701, DST information must be sent to the system via the PC and software • before system time is represented properly in the audits.
-
Page 53: Fob Identification Feedback
The encryption used will prevent an attacker from knowledge of the information exchanged between the communicating partners and prevent replay attacks. The entities that can communicate with each other include: dormakaba USA Inc. System User Guide 7040.1121 Rev E 10/22 | 52... -
Page 54: Initial Combination Handling
Repeat Steps 1 – 3 for any additional Users. From the LA GARD Software Main Menu, select System. Select the applicable System from the middle column. In the right column, select the Users tab. dormakaba USA Inc. System User Guide 7040.1121 Rev E 10/22 | 53... -
Page 55: Install A User Into The Keypad
Using the LA GARD Software client, keypad and lock firmware can be updated. There are four firmware files that can be updated: Bootloader for the Keypad • Application for the Keypad • Bootloader for the Lock • Application for the Lock • dormakaba USA Inc. System User Guide 7040.1121 Rev E 10/22 | 54... - Page 56 In the software client, select the Upload button. A progress bar will appear on screen. The Keypad will beep three times and flash a green LED once complete. If for some reason the FW update process has been interrupted, restart the process again from the SW. dormakaba USA Inc. System User Guide 7040.1121 Rev E 10/22 | 55...
-
Page 57: Retrieve Audits
If necessary, select the Generate icon located at the top-right of the screen to open a new window with a report. Select the applicable icon at the top of the window to Print, Enlarge or Save the report. dormakaba USA Inc. System User Guide 7040.1121 Rev E 10/22 | 56... -
Page 58: Add Time Lock Schedules Using La Gard Software (704 & 705 Models Only)
13. In the software client, select the Send icon located at the top-right of the screen. A progress bar will appear on screen. The Keypad will beep three times and flash a green LED once complete. dormakaba USA Inc. System User Guide 7040.1121 Rev E 10/22 | 57... -
Page 59: Appendix A: List Of Audits
Configure Input Signal via Combo Setting Wrong Try Penalty Remote Time Delay Started Override Remote Force Single Duress Alarm User Mode Open attempted, Require Combo Change remotely disabled dormakaba USA Inc. System User Guide 7040.1121 Rev E 10/22 | 58... -
Page 60: Appendix B: La Gard 700 Series Release Notes
2 numbers mismatch for the devices, the SW will restrict programming and require the user to update FW on the devices that are lower FW levels. dormakaba USA Inc. System User Guide 7040.1121 Rev E 10/22 | 59... - Page 61 Fixed issue with green/red LED blinks when backlight enabled. Various other bug fixes Notes about FW updating It is strongly recommended that all locks and keypad have the latest FW available. If the dormakaba USA Inc. System User Guide 7040.1121 Rev E 10/22 | 60...
- Page 62 Various other minor bug fixes. NOTE: When one of the devices (keypads or locks) is at this firmware level, the other devices must be updated to be configurable via software dormakaba USA Inc. System User Guide 7040.1121 Rev E 10/22 | 61...
- Page 63 FW level than the lock(s). Added robustness to startup processing during static 1.1.4.0 17 June 2021 discharge events in uninstalled state. dormakaba USA Inc. System User Guide 7040.1121 Rev E 10/22 | 62...
- Page 64 Various other minor bug fixes. NOTE: When one of the devices (keypads or locks) is at this firmware level, the other devices must be updated to be configurable via software dormakaba USA Inc. System User Guide 7040.1121 Rev E 10/22 | 63...
- Page 65 Lock: New User with Open User with Combo) 02 (ID) 123456 (Combo) 2 1 Privileges. Users should change Open Only: Open Only Privilege the combination for first use dormakaba USA Inc. System User Guide 7040.1121 Rev E 10/22 | 64...
- Page 66 Enable FW Master or Keypad: #99 _ _ (ID) _ _ _ _ _ _ (Combo) Update Port: Manager Lock: Firmware can be updated by 700 Series Software. dormakaba USA Inc. System User Guide 7040.1121 Rev E 10/22 | 65...
- Page 67 _ _ (New ID) _ _ _ _ _ _ _ _ (New Combo) 4 1 Manager must be Lock: New User with created by Master (Manager/Open Privilege) Privileges as identified. User should change combination Combination for first use. Length must meet requirement dormakaba USA Inc. System User Guide 7040.1121 Rev E 10/22 | 66...
- Page 68 All Factory Defaults restored, Lock will be uninstalled from Keypad Install Lock: Uninstalled: Master #22 00 (ID) 12345678 (Combo) Keypad: Combination has been Lock: Installed changed from default dormakaba USA Inc. System User Guide 7040.1121 Rev E 10/22 | 67...
- Page 69 Lock: New User with Privileges, Open Only: Combo) 02 (ID) 123456 (Combo) 2 1 Users should change the Open Only Privilege combination for first use Audit: Event 14 Recorded dormakaba USA Inc. System User Guide 7040.1121 Rev E 10/22 | 68...
- Page 70 #41 _ _ (ID) _ _ _ _ _ _ (Combo) 0 for Buzzer Off On/Off: #41 Manager Lock: Buzzer is On/Off #41 _ _ (ID) _ _ _ _ _ _ (Combo) 1 for Buzzer On dormakaba USA Inc. System User Guide 7040.1121 Rev E 10/22 | 69...
- Page 71 Delay Period, the new time delay setting will not be effective until the lock is opened successfully under the previous delay requirement dormakaba USA Inc. System User Guide 7040.1121 Rev E 10/22 | 70...
- Page 72 Lock: Combination Changed Standard User, _ _ (ID) _ _ _ _ _ _ (New Combo) Audit: Event 14 Recorded Combination length 6-9 as required (Master requires 8) dormakaba USA Inc. System User Guide 7040.1121 Rev E 10/22 | 71...
- Page 73 Keypad: Delay: #74 Manager, or Lock: Remains Locked. Standard User (702 Only) Delay Period is Ended. No Time Delay Opening Window will be Period must be started. active dormakaba USA Inc. System User Guide 7040.1121 Rev E 10/22 | 72...
- Page 74 _ _ (User to Change) 5 Open + Audit + TDO: #55 _ _ (ID) _ _ _ _ _ _ (Combo) _ _ (User to Change) 7 dormakaba USA Inc. System User Guide 7040.1121 Rev E 10/22 | 73...
- Page 75 Install Lock: #22 00 (ID) _ _ _ _ _ _ _ _ (Combo) Uninstalled: Master Keypad: Combination has Lock: Installed been changed from Audit: Event 5 Recorded default. dormakaba USA Inc. System User Guide 7040.1121 Rev E 10/22 | 74...
- Page 76 USA Inc. 1525 Bull Lea Rd. Lexington, KY 40511 (888) 950-4715 www.dormakaba.com dormakaba USA Inc. System User Guide 7040.1121 Rev E 10/22 | 75...
Need help?
Do you have a question about the LA GARD 700 Series and is the answer not in the manual?
Questions and answers