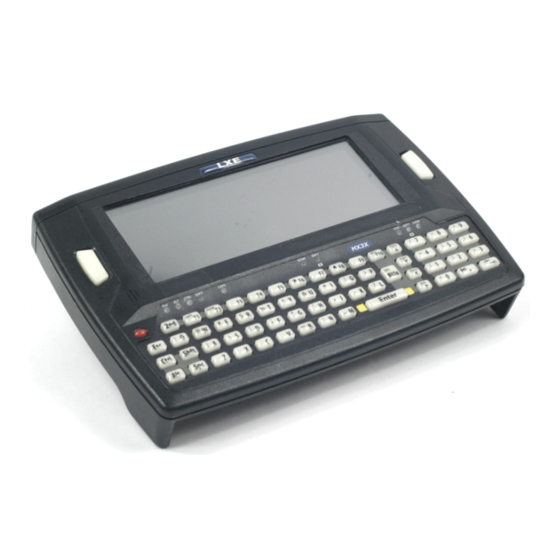
Sign In
Upload
Manuals
Brands
LXE Manuals
PDA
MX3
LXE MX3 Manuals
Manuals and User Guides for LXE MX3. We have
9
LXE MX3 manuals available for free PDF download: Programming Manual, Reference Manual, User Manual, Installation And Operator's Manual, Installation Instructions Manual
LXE MX3 Programming Manual (380 pages)
Integrated Scanner for LXE Mobile Devices with Microsoft Windows Operating Systems
Brand:
LXE
| Category:
Scanner
| Size: 1.83 MB
Table of Contents
C 1 Ihapterntroduction 1
3
Revision Notice
2
Table of Contents
3
Chapter 1 Introduction
17
Barcodes and Scanner Engines
17
LXE DOS Mobile Devices with Integrated Scanners
17
Tethered Scanners
18
Identify Your Barcode Reader Type
18
Figure 1-1 Identify Scan Engine Using Scanner / Imager Apertures
18
Mobile Device Barcode Reader Chart
19
Figure 1-2 Chart - Identify Your Barcode Scanner Type
19
MX3-RFID (Obsolete)
20
MX6 (Obsolete)
20
Rfid
20
Rx2
20
Mx7
21
Mx8
21
How to Scan a Barcode
22
Figure 1-3 Scanning Angle for Linear Barcodes
22
Scan Linear Barcode
22
Barcode Reader Indicators
23
Scan 2D Barcode
23
Cleaning the Scanner Aperture
23
Figure 1-4 Scanning a 2D Barcode
23
Troubleshooting
24
Beep after Good Decode
24
Beep on <BEL
24
Beeper Frequency Adjustment
24
Miscellaneous Programmable Barcodes
24
Printing Barcodes in this Guide
24
Barcode Quality
25
Barcode Symbology
25
Beeper Tone / Beeper Volume
25
Event Reporting
25
Factors that May Impact Scanner Performance
25
LED Mode
25
Lens Damage
25
Ambient Lighting
26
Factors that May Affect RFID Scanner Performance
26
Temperature
26
Getting Help
27
Obsolete LXE Equipment with Integrated Scanners
27
Handheld
27
LXE Legacy Devices with Integrated Scanners
28
LXE Legacy Wireless Ring Scanner
28
Obsolete Legacy System Software and Equipment
28
Chapter 2 Symbol Barcodes
29
Introduction
29
Scanner Identification Label
29
Figure 2-1 Supported Symbol (SE) Barcode Symbologies
29
Aiming Modes
30
SE1223 Scan Engine
30
SE1224 Scan Engine
30
SE1524 Scan Engine
30
SE2223 / SE3223 Scan Engine
30
SE824 Scan Engine
31
SE923 Scan Engine
31
SE955 Scan Engine
31
Troubleshooting
31
Pre-Configured Default Values
32
All MX3 Mobile Devices - SE923, SE955
32
Figure 2-2 Pre-Configured Default Values - Symbol Scan Engines
32
MX5X Mobile Devices - SE2223, SE1224, SE1223
37
MX7 Mobile Devices - SE1524, SE955, SE824
42
MX8 Mobile Device - SE955
47
Frequently Used Barcodes
52
Reset/Cancel Barcodes
52
Bookland EAN
53
Chinese 2 of 5
53
Configure the Decoder for Barcode Types
53
Codabar
54
Code 11
54
Code 128
54
Code 39
55
Code 93
55
Discrete 2 of 5
56
Ean-13
56
Ean-8
56
Interleaved 2 of 5
57
Isbt 128
57
MSI Plessey
57
Ucc/Ean-128
58
Upc-A
58
Upc-E
58
Micropdf417
59
Pdf417
59
Upc-E1
59
Scanner Parameters - General
60
Aim Duration
60
Aiming Mode
61
Bi-Directional Redundancy
62
Data Options
63
Prefix
63
Prefix and Suffix
63
Scan Data Transmission Format
65
Suffix 1
65
Suffix 2
65
Transmit Code ID Character
67
Transmit no Code ID Character
67
Transmit Symbol Code ID Character
67
Transmit AIM Code ID Character
68
Decode Buffering
71
Laser on Time
72
Linear Code Type Security Level (Redundancy Level)
73
Parameter Scanning
75
Power Mode
76
Raster Expansion Speed
77
Raster Height
77
Scan Angle (Laser Clipping)
78
Scan Angle
79
Scanning Mode
80
Set Default Parameter
81
Simple Serial Interface (SSI) Options
82
Baud Rate
83
Beep on <BEL> - SE2223 Only
84
Check Parity
85
Decode Data Packet Format
85
Host Character Time-Out
86
Host Serial Response Time-Out
87
Intercharacter Delay
87
Parity
88
Disable ACK/NAK Handshaking
89
Enable ACK/NAK Handshaking
89
Software Handshaking
89
Stop Bit Select
90
Time Delay to Low Power - SE2223 Only
91
Time-Out between Decodes, Different Symbols
92
Time-Out between Decodes, same Symbol
92
Transmit "No Read / Decode" Message
93
Trigger Mode
94
Scanner Parameters - SE Barcode Type Specific
96
Chinese 2 of 5
96
Codabar
96
CLSI Editing
97
NOTIS Editing
97
One Discrete Length (Parameter L1)
98
Set Lengths for Codabar
98
Any Length
99
Length Within Range
99
Two Discrete Lengths (Parameter L2)
99
Code 11
100
Set Lengths for Code 11
100
Length Within Range
101
One Discrete Length (Parameter L1)
101
Two Discrete Lengths (Parameter L2)
101
Any Length
102
Code 11 Check Digit Verification
102
Transmit Code 11 Check Digits
103
Code 128
104
Ucc/Ean-128
104
Isbt-128
106
Lengths for Code 128
106
Code 128 Decode Performance
107
Code 128 Decode Performance Level
108
Code 39
109
Code 39 Check Digit Verification
109
Code 32 Prefix
110
Convert Code 39 to Code 32
110
Code 39 Full ASCII Conversion
111
One Discrete Length (Parameter L1)
112
Set Lengths for Code 39
112
Any Length
113
Length Within Range
113
Two Discrete Lengths (Parameter L2)
113
Transmit Code 39 Check Digit
114
Code 39 Decode Performance
115
Trioptic Code 39
115
Code 39 Decode Performance Level
116
Code 93
117
Set Lengths for Code 93
117
One Discrete Length (Parameter L1)
118
Two Discrete Lengths (Parameter L2)
118
Any Length
119
Length Within Range
119
Discrete 2 of 5
120
Set Lengths for Discrete 2 of 5
120
One Discrete Length (Parameter L1)
121
Two Discrete Lengths (Parameter L2)
121
Any Length
122
Length Within Range
122
Interleaved 2 of 5
123
Check Digit Verification
124
Convert I 2 of 5 to EAN-13
125
One Discrete Length (Parameter L1)
126
Set Lengths for I 2 of 5
126
Length Within Range
127
Two Discrete Lengths (Parameter L2)
127
Any Length
128
Transmit I 2 of 5 Check Digit
128
MSI Plessey
129
MSI Plessey Check Digit Algorithm
129
MSI Plessey Check Digits
130
Set Lengths for MSI Plessey
130
One Discrete Length (Parameter L1)
131
Two Discrete Lengths (Parameter L2)
131
Any Length
132
Length Within Range
132
Transmit MSI Plessey Check Digit
133
Micropdf417
134
Pdf417
134
PDF417 / Micropdf417 - SE2223 Only
134
Code 128 Emulation
135
Decode Linked Symbol
136
Delete Character Set Ecis
137
Eci
137
ECI Decoder
138
Macro PDF Transmit / Decode Mode Symbols
139
Macropdf - SE2223 Only
139
Transmit Symbols in Codeword Format
141
Escape Characters
142
Transmit Unknown Codewords
142
Transmit File Name
143
Transmit Macro PDF User-Selected Fields
143
Transmit Block Count
144
Transmit Sender
144
Transmit Time Stamp
144
Transmit Addressee
145
Transmit Checksum
145
Transmit File Size
145
Last Blocker Marker
146
Transmit Macro PDF Control Header
146
Abort Macro PDF Entry
147
Flush Macro Buffer
147
Upc-A
148
Upc-E
148
Upc/Ean
148
Ean-8
149
Upc-E1
149
Bookland EAN
150
Ean-13
150
Linear UPC/EAN Decode
151
Check Digits
152
Transmit UPC-A Check Digit
152
Transmit UPC-E Check Digit
152
Transmit UPC-E1 Check Digit
153
Conversions
154
Convert UPC-E to UPC-A
154
Convert UPC-E1 to UPC-A
154
Convert EAN-8 to EAN-13 Type
155
Preambles
156
UPC-A Preamble
156
UPC-E Preamble
157
UPC-E1 Preamble
158
Decode UPC/EAN Supplementals
159
Supplementals
159
Decode UPC/EAN Supplemental Redundancy
160
EAN-8 Zero Extend
161
UCC Coupon Extended Code
162
UPC/EAN Security Level
163
UPC Composite Mode
165
GS1 Databar (RSS Codes)
166
GS1 Databar Expanded (RSS-Expanded)
166
GS1 Databar Limited (RSS-Limited)
166
GS1 Databar Omnidirectional (RSS-14)
166
Convert GS1 Databar (RSS) to UPC/EAN
167
Composite
168
Composite CC-A/B
168
Composite CC-C
168
Composite TLC-39
168
ASCII Character Equivalents
169
Figure 2-3 ASCII Character Equivalents
169
Keypad Number Symbols
173
Chapter 3 Ev-15 Imager
175
Introduction
175
Pre-Configured Default Values
175
Figure 3-1 Pre-Configured Default Values - EV-15 Imager
175
Frequently Used Barcodes
179
Codabar
179
Configure the EV-15 Decoder for Barcode Types
179
Reset/Cancel Barcodes
179
Codablock
180
Code 11
180
Code 39
180
Code 128
181
Code 93 / 93I
181
Interleaved 2 of 5
181
Isbt 128
181
Matrix 2 of 5
182
Msi
182
Plessey Code
182
Rss
183
Standard 2 of 5
183
Telepen
184
Upc/Ean
184
EV-15 Configuration Modes
186
Configuration
186
Transparent Configuration Mode
186
Symbology Settings
186
EV-15 Parameters - General
187
Level Triggering Mode Timeout
187
Scanning/Triggering
187
Aiming Beam
189
Aiming Beam Duration
189
Data Decoding Security
191
Data Decoding Timeout
192
Read Optimization
193
Sensor Optimization
193
Shutter Speed
193
Lighting
194
Power Hold
194
EV-15 Data Transmission Parameters
195
Preamble
195
Symbology Identifier
195
Postamble
196
Scanner Parameters - Barcode Type Specific
197
Codabar
197
Start/Stop
197
Check Digit (AIM Recommendation)
198
CLSI Library System
198
Barcode Length
199
Concatenation
199
Start/Stop
199
Transmit
199
Codablock
200
Codablock a
200
Codablock F
200
Code 11
201
Code 39
202
Format
202
Start/Stop
203
Check Digit
204
Barcode Length
205
Reading Range / Tolerance
205
Code 93 / Code 93I
206
Code 128 / EAN 128
207
Custom Symbology Identifier
207
CIP 128 French Pharmaceutical Code
208
EAN 128 Identifier
208
FNC1 Separator Character
208
Barcode Length
209
Reading Range
209
Tolerance
209
Isbt 128
210
ISBT 128 Transmit
210
GTIN Processing for EAN 128
211
ISBT 128 Concatenate
211
Interleaved 2 of 5
212
Reading Range
212
Check Digit
213
Barcode Length
214
Compose Minimum Length
214
Matrix 2 of 5
215
Check Digit
216
MSI Code
216
Barcode Length
217
Barcode Length 6
218
Check Digit
218
Plessey Code
218
GS1 Databar (RSS) Code
219
GS1 Databar Limited (RSS Limited)
219
GS1 Databar Expanded (RSS Expanded)
220
Format
221
Standard 2 of 5 Code
221
Barcode Length
222
Check Digit Mod 10
222
Telepen
223
Upc / Ean
224
Custom Symbology Identifier
225
Add-On Digits
226
Check Digit
227
UPC Number System
228
Transmit as
229
Reading Range
230
Chapter 4 5380SF 2D Imager
231
Introduction
231
Advertisement
LXE MX3 Reference Manual (232 pages)
Microsoft Windows CE .NET Equipped
Brand:
LXE
| Category:
Handhelds
| Size: 3.28 MB
Table of Contents
Table of Contents
3
Chapter 1 Introduction
15
Overview
15
When to Use this Guide
15
Document Conventions
16
Related Manuals
16
Rfid
17
Figure 1-1 MX3-RFID Device
17
MX3X Vs MX3-RFID Chart
18
Components
19
Front and Back Views
19
Figure 1-2 Front
19
Figure 1-3 Back
19
Endcap Options
20
RFID Module
20
Figure 1-4 Endcaps
20
Figure 1-5 Side View
20
Battery Well Vent Aperture
21
Figure 1-6 Vent Aperture in Battery Well - Do Not Cover
21
Getting Started
22
Insert Main Battery
23
About Lithium-Ion Batteries
23
Check Battery Status
23
Figure 1-7 Battery Contacts and Main Battery
23
Optional Devices
24
Apply the Protective Film to the Display (Optional)
24
Attach the Stylus Clip (Optional)
24
Connect External Power Supply (Optional)
25
Figure 1-10 Connect External Power Supply
25
Figure 1-8 US AC/DC 12V Power Supply and Automotive Power Adapter
25
Figure 1-9 International AC/DC 12V Power Supply
25
Connect Audio Jack (Optional)
26
Power Button
26
Figure 1-11 Connect Audio Jack
26
Figure 1-12 Power Button
26
Restart Sequence
26
Tapping the Touchscreen with a Stylus
27
Keypad Shortcuts
27
Touchscreen Calibration
28
Figure 1-13 Touchscreen Recalibration
28
Set the Display Contrast
29
Set the Display Backlight Timer
29
Set the Display Brightness
29
Set the Power Schemes Timers
30
AC Power Scheme
30
Battery Power Scheme
30
Set the Audio Speaker Volume
31
Using the Keypad
31
Using the Touchscreen
31
Setup the Radio and Network
32
Access the Terminal Emulation Parameters
32
Read an RFID Tag
33
Installing PCMCIA and CF Cards
34
Installing / Removing Cards
34
Figure 1-14 PCMCIA and CF Card Location
34
Installation
34
Preparation
34
Removal
35
Entering Data
35
Keypad Entry
35
Stylus Entry
35
Input Panel
36
Integrated Laser Scanner Data Entry
36
Figure 1-15 Scan Beam
36
Figure 1-16 Scanner LED Location
36
RFID Tag Data Collection
37
Tethered Scanner
37
Activesync
38
Introduction
38
Initial Setup
39
Radio
39
Serial Connection
39
USB Connection
39
Irda Connection
40
Synchronizing from the Mobile Device
40
Connect and Communicate
41
Explore
41
Copy the MX3-RFID Lxebook to the Mobile Device (Optional)
41
Backup Data Files Using Activesync
42
Connect
42
Disconnect
42
Infrared Port Transfer
42
Prerequisites
42
Serial Port Transfer
42
USB Transfer
42
Cold Boot and Loss of Host Re-Connection
43
Troubleshooting Activesync
44
The Passive Vehicle Cradle
45
Figure 1-17 MX3-RFID Passive Cradle with Attached RAM Ball
45
Figure 1-18 RAM Bracket Kit Components
46
Passive Cradle Assembly Components
46
Figure 1-19 RAM Assembly Footprint
47
RAM Mount Assembly
47
Getting Help
48
Manuals
48
Accessories
48
Chapter 2 Physical Description and Layout
49
Hardware Configuration
49
Central Processing Unit
49
System Memory
49
Core Logic
49
Figure 2-1 Hardware
49
Video Subsystem
50
Power Supply
50
Audio Interface
51
PCMCIA Slots
51
Slot 0 - Radio or SRAM Cards
51
Slot 1 - Compact Flash Card
51
RFID Reader Scan Range
51
Figure 2-2 RFID Tag Reading Ranges
51
Power Modes
52
Primary Events Listing
52
Figure 2-3 Power Modes - On, Suspend, Critical Suspend and off
52
On Mode
53
The Display
53
The Mobile Device
53
User Idle Mode
53
System Idle Mode
54
Suspend Mode
54
Critical Suspend Mode
55
Off Mode
55
Physical Controls
56
Power Button
56
Figure 2-4 Location of the Power (PWR) Button
56
Restart Sequence
56
Endcaps and COM Ports
57
Endcap Combination
57
Figure 2-5 Endcap and COM Ports
57
Activesync
58
Figure 2-6 USB Type a to Serial Port Cable Pinout
58
Integrated Scanner Port
58
USB Client Cable
58
USB Client Port
58
Programmable Scan Buttons
59
Field Exit Key Function (IBM 5250/TN5250 Only)
59
Figure 2-7 Programmable Buttons
59
Scan Buttons and the SCNR LED
59
The Keypad
60
Key Functions
60
Figure 2-8 the QWERTY Keypad
60
Caps Key and Capslock Mode
61
Keypad Shortcuts
61
Keypress Sequences
61
Custom Key Maps
62
LED Functions
63
Figure 2-9 LED Functions
63
Display
64
Display and Display Backlight Timer
64
Touchscreen
64
Cleaning the Glass Display/Scanner Aperture
65
Applying the Protective Film to the Display
65
Speaker
66
Infrared (IR) Port
66
Figure 2-10 Infrared Port - COM2 Port
66
Power Supply
67
Introduction
67
Check Battery Status
67
Figure 2-11 Main Battery
67
Handling Batteries Safely
67
Main Battery
68
Battery Hot-Swapping
68
Low Battery Warning
68
Critical Suspend State
69
Backup Battery
69
Maintenance
69
MX3 Multi-Charger Plus Battery Charger
70
Figure 2-12 MX3 Multi-Charger Plus
70
Figure 2-13 Insert Main Battery in Charge Pocket
70
LXE MX3 User Manual (68 pages)
Brand:
LXE
| Category:
Handhelds
| Size: 2.02 MB
Table of Contents
Revision Notice
3
Table of Contents
5
The Mx3 Hand Held Computer
9
Introduction
9
Getting Help
9
Scanner Warnings and Labels
10
Cleaning the Scan Aperture
10
Figure 1 CDRH / IEC 825 Caution Label Location - MX3, Back
10
Figure 2 Caution Label - Scanner
10
Components
11
Figure 3 Front of MX3
11
Figure 4 Back of MX3
11
Display
12
Cleaning the Display
12
Optional Touch Screen
12
Figure 5 MX3 Display
12
Display Backlight
13
Display Backlight Timer
13
Panning
14
Terminal Emulation Screen Sizes
14
Endcaps
15
Scanner / Serial Port
15
Laser Scanner Indicator
15
Dual Serial Port
15
Figure 6 Standard Range Scanner / Serial Port Endcap
15
Figure 7 Scanner LED Location
15
Figure 8 Dual Serial Port
15
COM Port Switching
16
IR Port
16
Figure 9 IR Port
16
The Keypads
17
QWERTY Keys
17
ABCD Keys
17
Figure 10 the QWERTY Keypad
17
Figure 11 the ABCD Keypad
17
The Overlays
18
Figure 12 ABCD Keypad - ANSI/LDS/PC Overlay
18
Figure 13 QWERTY Keypad - ANSI/LDS/PC Overlay
18
Figure 14 TN3270/3270 Overlay for QWERTY Keypad
18
Figure 15 TN5250/5250 Overlay for QWERTY Keypad
18
Programmable Buttons
19
Possible Button Configurations
19
Figure 16 Programmable Buttons (Field Exit / Scan / Enter)
19
Scan Key Function
20
Enter Key Function
20
Field Exit Key Function (IBM 5250/TN5250 Only)
20
2Nd Key Function
20
Ctrl Key Function
20
Alt Key Function
20
Shft Key Function
21
Spc Key Function
21
Mode Key Functions
21
Caps Key and Capslock Mode
21
Keypress Sequences
21
Reset Key Sequence
21
DOS Key Functions Not Available on the MX3
21
Function Leds
22
Figure 17 Function Leds
22
Power Button Functions
24
Off Timer and Critical Suspend Mode
24
Figure 18 Location of the Power (PWR) Button
24
Power Status and the Status LED
25
Power Management and the Keypad
25
Figure 19 Power Status and the Status LED
25
Cradles
26
Desktop Cradle
26
Figure 20 MX3 in the Desktop Cradle
26
Figure 21 Desktop Cradle Status Indicator
27
Figure 22 Desktop Cradle Power Connector
27
Power Connector
27
Status LED
27
Figure 23 Desktop Cradle RS-232 Connector
28
RS-232 Connector
28
Vehicle Mount Cradle
29
Status LED
29
Figure 24 Vehicle Mount Cradle - Front
29
Power Connector
30
RS-232 Connector
30
Figure 25 Vehicle Cradle Power Connector
30
Figure 26 Vehicle Cradle RS-232 Connector
30
Figure 27 Caution - Vehicle Mounting Brackets
31
Getting Help
32
Manuals
32
Accessories
33
Advertisement
LXE MX3 User Manual (64 pages)
Microsoft Windows CE .NET Equipped
Brand:
LXE
| Category:
Handhelds
| Size: 2.02 MB
Table of Contents
Table of Contents
3
Introduction
7
Overview
7
Features/Options for the MX3X Family
8
Related Manuals
8
Document Conventions
9
Environmental Specifications
9
Laser Warnings and Labels
10
Mx3-Rfid
10
Figure 1 CDRH / IEC 825 Caution Label Location - MX3-RFID, Back
10
Figure 2 Caution Label - Laser Scanner
10
Battery Well Vent Aperture
11
Figure 3 Vent Aperture in Battery Well - Do Not Cover
11
Components
12
Front and Back Views
12
Figure 4 Front
12
Figure 5 Back
12
Endcap Options
13
MX3-RFID Module
13
Figure 6 Endcap
13
Figure 7 Side View
13
RFID Introduction
14
RFID Reader Scan Range
14
Integrated Laser Scanner
14
RFID and the MX3 Cradles
14
Figure 8 RFID Tag Reading Ranges
14
Quick Start
15
Troubleshooting
15
Optional Devices
16
Connecting External Power Supply (Optional)
16
Figure 9 US AC/DC 12V Power Supply and Automotive Power Adapter
16
Figure 10 International AC/DC 12V Power Supply
16
Figure 11 Connect External Power Supply
16
Connecting the Audio Jack (Optional)
17
Attaching the Stylus Clip (Optional)
17
Applying the Protective Film to the Display (Optional)
17
Figure 12 Connect Audio Jack
17
Insert Main Battery
18
Check Battery Status
18
About Lithium-Ion Batteries
18
Figure 13 Battery Contacts in Battery Compartment
18
Figure 14 Main Battery
18
Power Button
19
Restart Sequence
19
Figure 15 Power Button
19
Tapping the Touchscreen with a Stylus
20
Keypad Shortcuts
20
Touchscreen
21
Calibration
21
Set the Display Contrast
21
Figure 16 Touchscreen Recalibration
21
Set the Display Backlight Timer
22
Set the Display Brightness
22
Set the Power Schemes Timers
23
Battery Power Scheme
23
AC Power Scheme
23
Set the Audio Speaker Volume
24
Using the Keypad
24
Using the Touchscreen
24
Enter Data
25
Keypad Entry
25
Stylus Entry
25
Input Panel
25
Integrated Laser Scanner Data Entry
26
Figure 17 Scan Beam
26
Figure 18 Scanner LED Location
26
RFID Tag Data Collection
27
Tethered Scanner
27
Getting Help
27
Accessories
27
LXE MX3 Installation And Operator's Manual (66 pages)
Brand:
LXE
| Category:
Handhelds
| Size: 2.68 MB
Table of Contents
Table of Contents
3
The Mx3 Hand Held Computer
7
Introduction
7
Components
8
Figure 1 Front of MX3
8
Figure 2 Back of MX3
8
Display
9
Cleaning the Display
9
Optional Touch Screen
9
Figure 3 MX3 Display
9
Display Backlight
10
Display Backlight Timer
10
Panning
11
Terminal Emulation Screen Sizes
11
Endcaps
12
Scanner / Serial Port
12
Laser Scanner Indicator
12
Dual Serial Port
12
Figure 4 Standard Range Scanner / Serial Port Endcap
12
Figure 5 Scanner LED Location
12
Figure 6 Dual Serial Port
12
COM Port Switching
13
IR Port
13
Figure 7 IR Port
13
The Keypads
14
QWERTY Keys
14
ABCD Keys
14
Figure 8 the QWERTY Keypad
14
Figure 9 the ABCD Keypad
14
The Overlays
15
Figure 10 ABCD Keypad - ANSI/LDS/PC Overlay
15
Figure 11 QWERTY Keypad - ANSI/LDS/PC Overlay
15
Figure 12 TN3270/3270 Overlay for QWERTY Keypad
15
Figure 13 TN5250/5250 Overlay for QWERTY Keypad
15
Programmable Buttons
16
Possible Button Configurations
16
Figure 14 Programmable Buttons (Field Exit / Scan / Enter)
16
Scan Key Function
17
Enter Key Function
17
Field Exit Key Function (IBM 5250/TN5250 Only)
17
2Nd Key Function
17
Ctrl Key Function
17
Alt Key Function
17
Shft Key Function
18
Spc Key Function
18
Mode Key Functions
18
Caps Key and Capslock Mode
18
Keypress Sequences
18
Reset Key Sequence
18
DOS Key Functions Not Available on the MX3
18
Function Leds
19
Figure 15 Function Leds
19
Power Button Functions
21
Off Timer and Critical Suspend Mode
21
Figure 16 Location of the Power (PWR) Button
21
Power Status and the Status LED
22
Power Management and the Keypad
22
Figure 17 Power Status and the Status LED
22
Cradles
23
Desktop Cradle
23
Figure 18 MX3 in the Desktop Cradle
23
Figure 19 Desktop Cradle Status Indicator
24
Figure 20 Desktop Cradle Power Connector
24
Power Connector
24
Status LED
24
Figure 21 Desktop Cradle RS-232 Connector
25
RS-232 Connector
25
Vehicle Mount Cradle
26
Status LED
26
Figure 22 Vehicle Mount Cradle - Front
26
Power Connector
27
RS-232 Connector
27
Figure 23 Vehicle Cradle Power Connector
27
Figure 24 Vehicle Cradle RS-232 Connector
27
Getting Help
28
LXE MX3 Reference Manual (50 pages)
Brand:
LXE
| Category:
Handhelds
| Size: 1.49 MB
Table of Contents
Table of Contents
3
Mx3 Cradles
7
Introduction
7
Identify Your MX3 Device
8
Figure 1 Identify Your MX3 Mobile Device and Compatible Cradles
8
Quick Start Installation
9
Desk Top Cradle
9
Powered Vehicle Mount Cradle
9
U-Bracket
9
RAM Ball Assembly
9
Desk Top Cradle
10
Desk Top Cradle Footprint
10
Figure 2 Desk Top Cradle
10
Figure 3 Desk Top Cradle Footprint
10
Status LED
11
Power Connector
11
Figure 4 Desk Top Cradle Status Indicator
11
Figure 5 Desk Top Cradle Power Connector
11
RS-232 Connector
12
Figure 6 Desk Top Cradle RS-232 Connector
12
Figure 7 RS-232 Connector
12
Figure 8 RS-232 Pinout
12
Desktop Cradle Power Supply
13
Figure 9 Desktop Cradle AC Power Supply
13
Powered Vehicle Mount Cradle
14
Status LED
14
Figure 10 Vehicle Mount Cradle - Front
14
Power Connector
15
RS-232 Connector
15
Figure 11 Vehicle Cradle Power Connector
15
Figure 12 Vehicle Cradle RS-232 Connector
15
Figure 13 Vehicle RS-232 Connector
16
Figure 14 Vehicle RS-232 Pinout
16
Attach U-Bracket to Vehicle
17
Figure 15 Attach Bracket to Vehicle
17
Vehicle Cradle Mounting Bracket Dimensions
18
Figure 16 Mounting Footprint
18
Figure 17 Correct Vehicle Cradle U-Bracket Installation
18
Assemble Vehicle Cradle
19
Figure 18 Vehicle Mount Cradle
19
Figure 19 Adjusting Knobs
19
Figure 20 Assembled Vehicle Mount Cradle
19
Attach RAM Ball Assembly to Vehicle and Mobile Device
20
Figure 21 RAM Bracket Kit Components
20
RAM Mount Assembly
21
Figure 22 RAM Assembly Footprint
21
Power Supplies
22
Desk Top/Mobile Device Power Supply, External, AC
22
US AC to DC Adapter Specifications
22
Figure 23 US AC Power Supply
22
LXE MX3 User Manual (38 pages)
Wavelink Avalanche
Brand:
LXE
| Category:
PDA
| Size: 0.69 MB
Table of Contents
Table of Contents
3
Chapter 1 Introduction
7
About this Manual
7
Overview
7
Avalanche Management Console
7
Avalanche Agent
8
Avalanche Enablers
8
Limitations of DOS Devices
8
Supported Computers
9
Supported Radios
9
Supported DOS Terminal Emulations
9
Configurable Parameters
10
Radio Parameters
10
Cisco 350 Radios
10
Lucent/Agere P1 Radios
10
Symbol 4121 Radios
10
Network Configuration Parameters
10
Terminal Emulation Parameters
10
Installation
11
Installation of Wavelink Software
11
Installation of LXE Package Builder
11
Installation of Enablers on LXE Computers
11
Operation
12
How to Use this Guide
12
Document Conventions
12
Getting Help
13
LXE Manuals
13
Wavelink Manuals
13
Chapter 2 LXE Features
15
Introduction
15
Communication Overview
15
Communication Using a Dock or Cradle
16
Configuring the Agent
16
Step 1: Detect COM Ports in Avalanche Manager
16
Step 2: Stop the Avalanche Service
16
Step 3: Modify the Avalanche Properties File
16
Step 4: Restart the Avalanche Service
17
LXE Package Builder
18
Using the GUI Interface
18
Figure 2-1 Select G-Number
18
Figure 2-2 Select Output Directory
19
Figure 2-3 End of Conversion Message
19
Using the Command Line Interface
20
Syntax Examples
20
Using Avalanche
21
Figure 2-4 Avalanche Management Console Components
21
Software Collections
23
Auto Run Software Packages
24
Figure 2-5 Software Collection
24
Figure 2-6 Sample Auto Run Software Package
24
Application Software Packages
25
Figure 2-7 Sample Application Software Package
25
Figure 2-8 Sample Support Software Package
26
Support Software Packages
26
Configuration
27
Terminal Emulation Parameters
27
Figure 2-9 Accessing the te Configuration Menu
27
Figure 2-10 the Configuration Menu
27
Radio and Network Parameters
29
Figure 2-11 Accessing Network Profile Configuration
29
Figure 2-12 Network Profile, Control Tab
29
Figure 2-13 Network Profile, Routing Tab
30
Figure 2-14 Network Profile, Security Tab
31
Figure 2-15 Static WEP Keys
32
Manual Network and Radio Parameter Configuration
32
Filtering LXE Computers
33
By Computer Type
33
By Radio Type
33
Figure 2-16 Filtering Devices by LXE Computer Type
33
Figure 2-17 Filtering Devices by Radio Type
33
Appendixa Dos Computer Software Load
35
LXE MX3 User Manual (50 pages)
MX3 Multi-Charger For Use with LXE 156213-0001 and 158224-0001 Lithium Ion Battery Packs
Brand:
LXE
| Category:
Battery Charger
| Size: 3.16 MB
Table of Contents
Caring for Batteries
3
Safety Instructions
3
Table of Contents
5
Introduction
7
Purpose of this Manual
7
Quick Start
7
Intended Use
7
Important MX3 Battery Charger Update
8
Battery Chargers Affected
8
Battery Label Location
8
Specifications
9
Electrical Specifications
9
Operating Temperature Ranges
9
Dimensions
9
Rechargeable Lithium Ion Battery Pack
9
Controls and Connectors
10
Multi-Charger
10
Figure 1 MX3 Multi-Charger Components
10
LXE 156213-0001 and 158224-0001 Rechargeable Lithium Ion Battery Packs
11
Figure 2 Lithium Ion Battery Pack Components
11
Installation and Operation
12
Introduction
12
Setup
12
Figure 3 Multi-Charger Charging Pocket
12
Placing the Battery Pack into the Charger
13
Orienting the Battery Pack
13
Inserting the Battery Pack
13
Figure 4 Battery Pack Insertion
13
Interpreting the Leds
14
RED - on any Charge Pocket
14
RED FLASHING - on All Charge Pockets
14
GREEN - on any Charge Pocket
14
YELLOW - on any Charge Pocket
14
NO LIGHT - on a Charge Pocket
14
NO LIGHT - on All Charge Pockets
14
Normal Operations
15
Maintenance
15
Storage
15
Service
15
Appendix
16
Troubleshooting Guide
16
Getting Help
17
Important Safety Warnings - Translations
18
Belangrijke Veiligheidsvoorschriften
40
LXE MX3 Installation Instructions Manual (6 pages)
Vehicle Remote Mount Antenna
Brand:
LXE
| Category:
Antenna
| Size: 0.15 MB
Table of Contents
Table of Contents
1
Vehicle Remote Mount Antennas for Lxe Computers
2
Introduction
2
Components
3
Figure 1 Remote Antenna Components
3
Mounting Instructions
4
Figure 2 Typical Remote Antenna Installation
4
Contacting LXE
5
Revision Notice
5
Advertisement
Related Products
LXE MX1-IS
LXE MX3X
LXE MX7
LXE MX5
LXE MX8
LXE MX2
LXE MX6 PPC
LXE MX1 Intrinsically Safe
LXE MX3Plus
LXE MX3A378
LXE Categories
Handhelds
Automobile Accessories
Battery Charger
PDA
Desktop
More LXE Manuals
Login
Sign In
OR
Sign in with Facebook
Sign in with Google
Upload manual
Upload from disk
Upload from URL