Table of Contents
Advertisement
Advertisement
Table of Contents

Related Manuals for ekwb EK-Quantum Velocity 2


Summary of Contents for ekwb EK-Quantum Velocity 2
- Page 1 EK-Quantum Velocity² - AM5 Backplate USER GUIDE...
- Page 2 Please note the installation of the product is intended to be undertaken by an adequately trained and experienced person. You are installing the product at your own risk. If you are not properly trained or experienced or feel unsure about the installation procedure, please refrain from installing the product yourself and contact our tech support for assistance.
-
Page 3: Table Of Contents
TABLE OF CONTENTS BOX CONTENTS BACKPLATE DIMENSIONS PREPARING THE AM4 WATER BLOCK FOR UPGRADE PREPARING THE AM5 MOTHERBOARD INSTALLING THE WATER BLOCK CONNECTING THE D-RGB LED STRIP TESTING THE LOOP WARRANTY SUPPORT AND SERVICE SOCIAL MEDIA - 3 -... -
Page 4: Box Contents
BOX CONTENTS Allen Key 2.5 mm (1 pc) TX20 L-Shaped Wrench (1 pc) AM5 Backplate Thermal grease (1 pc) - 4 -... -
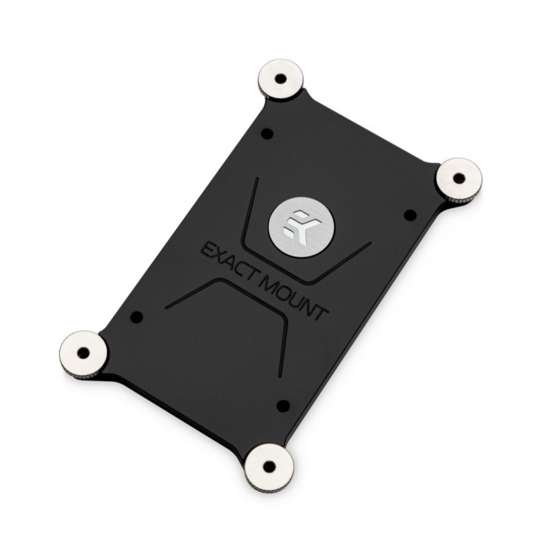
Page 5: Backplate Dimensions
BACKPLATE DIMENSIONS 6.3 mm 43 mm 7.6 mm 53 mm 8.9 mm - 5 -... -
Page 6: Preparing The Am4 Water Block For Upgrade
PREPARING THE AM4 WATER BLOCK FOR UPGRADE TOP OF THE Important! Before starting, make sure to have a clean, flat MOTHERBOARD surface to work on. It is recommended to put foam or soft material to lay a motherboard on. STEP 1 If the EK-Quantum Velocity2 AM4 water block is already installed, remove the backplate from the motherboard’s backside using Allen Key 2.5 mm (As shown in the picture). -
Page 7: Preparing The Am5 Motherboard
PREPARING THE AM5 MOTHERBOARD STEP 1 UNC 6-32 SCREW Using a Philips-head screwdriver remove the four screws securing the original plastic hold-down clamps around the socket as shown in the illustration. Remove the hold-down clamps and store them away. HOLD-DOWN CLAMPS STEP 1 STEP 2... - Page 8 STEP 3 AM5 BACKPLATE Attach the AM5 Backplate and secure it with the four (4) saved backplate screws. Do not peel off the protective sticker from the AM5 Backplate! For this step, you will need: TX20 L-Shaped Backplate screw AM5 Backplate Wrench (4 pcs) BACKPLATE...
-
Page 9: Installing The Water Block
STEP 5 Applying thermal compound: Apply the enclosed thermal grease (thermal compound) on the CPU heat spreader – IHS – as shown in the image. The layer of the thermal compound must be thin and even in thickness over the entire surface of the IHS. The excessive or uneven application of thermal grease may lead to poor performance! For this step, you will need:... - Page 10 STEP 2 Secure the water block from the backside of the motherboard using MAX TORQUE: the included Allen Key 2.5mm. 0.6 Nm TOP OF THE Start fastening the screws in a cross pattern. Do not tighten fully until MOTHERBOARD all of the screws are partially screwed in. The Allen Key 2.5mm must be used in a standing position! Otherwise, the mounting screws may crack during tightening! BACKPLATE...
-
Page 11: Connecting The D-Rgb Led Strip
CONNECTING THE D-RGB LED STRIP STEP 1 Plug the 3-pin connector from the water block’s D-RGB LED light to the DRGB HEADER on the motherboard. The LED will work if the pin layout on the header is as follows: +5V, Digital, empty, Ground. Please ensure that the arrow indicated on the connector is D-RGB HEADER plugged into the +5V line as indicated on your motherboard. -
Page 12: Warranty
Removing the label will void the leak-free guarantee, but not the guarantee on the product itself. Any other RMA issues can be reported to EK Customer Support at www.ekwb.com/support for further analysis. - 12 -... -
Page 13: Support And Service
SUPPORT AND SERVICE In case you need assistance or wish to order spare parts or a new mounting mechanism, please contact: https://www.ekwb.com/customer-support/ EKWB d.o.o. Pod lipami 18 1218 Komenda Slovenia - EU SOCIAL MEDIA EKWaterBlocks @EKWaterBlocks ekwaterblocks EKWBofficial ekwaterblocks...
Need help?
Do you have a question about the EK-Quantum Velocity 2 and is the answer not in the manual?
Questions and answers