Table of Contents
Advertisement
Quick Links
Advertisement
Table of Contents

Related Manuals for Advantech PAX-327-C8 Series


Summary of Contents for Advantech PAX-327-C8 Series
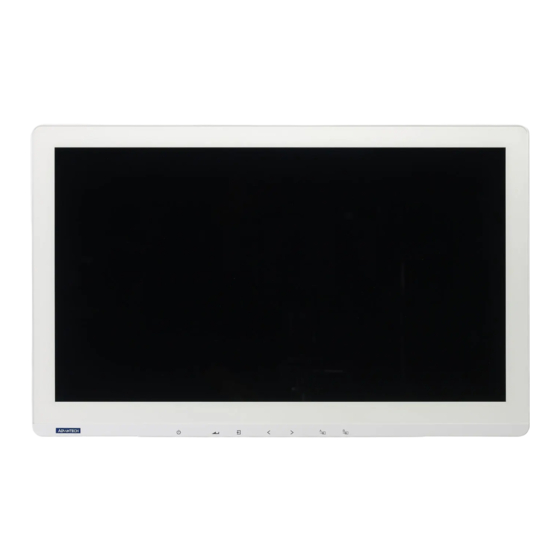
- Page 1 User Manual PAX-327-C8 Series 27” 4K True-Flat Medical Monitor...
- Page 2 No part of this manual may be reproduced, copied, translated, or transmitted in any form or by any means without the prior written permission of Advantech Co., Ltd. The information provided in this manual is intended to be accurate and reliable.
- Page 3 Additional Information and Assistance Contact your distributor, sales representative, or an Advantech customer service cen- ter for technical support if you need additional assistance. Please have the following...
- Page 4 PAX-327-C8 User Manual...
-
Page 5: Table Of Contents
1.3.2 Input / Output Terminals ............... 5 1.3.3 General ..................8 1.3.4 Environmental condition..............9 1.3.5 Optional Advantech Video Archiving Solution (AVAS)....9 1.3.6 I/O Connectors................10 Chapter Installation..........13 Unpacking ....................14 System Controls..................14 Figure 2.1 PAX-327-C8 Front View ........... 14 2.2.1... - Page 6 4.6.2 Keep Away From Windows............43 4.6.3 Storage Temperature..............43 4.6.4 Image Persistence ..............43 4.6.5 Placement and Adjustment of the Monitor........44 Appendix A Cleaning..........45 Cleaning the LCD Panel ................. 46 Cleaning the Cabinet ................46 Appendix B Troubleshooting........
- Page 7 Chapter Introduction...
-
Page 8: Chapter 1 Introduction
Variable gamma and DICOM (color temperature) modes Variable picture control Variable image size Variable multi-picture display mode Built-in Advantech AVAS video solutions (optional) Integrated touchscreen (optional) Wide input connectivity for maximum flexibility PAX-327-C8 User Manual... -
Page 9: Specifications
Specifications 1.3.1 Display Specifications Model Name PAX-327-C8A-NAS PAX-327-C8E-NAS PAX-327-C8D-NAS PAX-327-C8F-NAS PAX-327-C8A-NAR PAX-327-C8E-NAR PAX-327-C8D-NAR Screen Size 27" (596.74(H) x 335.66(V) [mm]) (Active Area) Aspect Ratio 16:9 Number of Pixels 3840 (H) x 2160 (V) Pixel Pitch 0.1554(H) x 0.1554(V) [mm] Displayable 1.07 billion (10-bit) Colors Brightness... - Page 10 Touchscreen Projected capacitive (Optional) Specifications Model Name PAX-327-C8L-HAS PAX-327-C8F-HAS PAX-327-C8J-HAS PAX-327-C8L-HAR Screen Size 27" (596.16(H) x 335.34(V) [mm]) (Active Area) Aspect Ratio 16:9 Number of 3840 (H) x 2160 (V) Pixels Pixel Pitch 0.15525(H) x 0.15525(V) [mm] Displayable 1.07 billion (10 bit) Colors Brightness 800 cd/m...
-
Page 11: Input / Output Terminals
1.3.2 Input / Output Terminals Specifications Item PAX-327-C8A-NAS PAX-327-C8E-NAS PAX-327-C8D-NAS PAX-327-C8F-NAS PAX-327-C8A-NAR PAX-327-C8E-NAR PAX-327-C8D-NAR DC Power DC Jack x 1 DC24V, 4.16A(MAX) or 5A(MAX) Input DC Power DC Jack x 1 DC5V or DC12V Output RS-232C D-Sub Jack x 1 Service Port DVI Jack x 1 Digital RGB: TMDS... - Page 12 Specifications Item PAX-327-C8A- PAX-327-C8A-HAS PAX-327-C8E-HAS PAX-327-C8D-HAS HAR-AI PAX-327-C8A-HAR PAX-327-C8E-HAR PAX-327-C8D-HAR DC Power DC Jack x 1 DC24V, 3.75A(MAX) DC24V, 6.25A(MAX) or 5A(MAX) Input DC Power DC Jack x 1 DC5V or DC12V Output RS-232C D-Sub Jack x 1 Service Port DVI Jack x 1 Digital RGB: TMDS DVI Input...
- Page 13 Specifications Item PAX-327-C8L-HAS PAX-327-C8F-HAS PAX-327-C8J-HAS PAX-327-C8L-HAR DC Power DC Jack x 1 DC24V, 6.25A(MAX) or 5A(MAX) Input DC Power DC Jack x 1 DC5V or DC12V Output RS-232C D-Sub Jack x 1 Service Port DVI Jack x 1 Digital RGB: TMDS DVI Input (Type D) MAX: 3840 x 2160@30Hz...
-
Page 14: General
If in doubt, contact a qualified technician or your local sales rep. Note! Although Advantech products are subject to change without notice, the following specifications were accurate at the time of manual publication: Type of protection against electric shock: Class l equipment... -
Page 15: Environmental Condition
5 ~ 90% Operating 500 ~ 1013 hPa Pressure Storage 500 ~ 1013 hPa Note! * The specifications are subject to change without notice 1.3.5 Optional Advantech Video Archiving Solution (AVAS) 1 x RJ45 jack 1 x GbE PAX-327-C8 User Manual... -
Page 16: I/O Connectors
SFP+ Module SFP+ 10 Gbps Built-in LEDs indicate the AVAS status, as explained below. Blinking green: operating as normal Blinking orange: warning notification Continuous orange: FPGA is starting up Blinking red: error notification Off: no power supplied to the AVAS Note! Disconnecting the power supply cable will terminate power to the AVAS modules. - Page 17 PAX-327-C8A-HAS, PAX-327-C8A-HAR, PAX-327-C8A-HAR-AI PAX-327-C8E-HAS, PAX-327-C8E-HAR PAX-327-C8D-HAS, PAX-327-C8D-HAR PAX-327-C8L-HAS, PAX-327-C8L-HAR PAX-327-C8 User Manual...
- Page 18 PAX-327-C8F-HAS Note! For connecting the SDI cable, the 3G-SDI 1-lane input for HD/3G sig- nals should be connected to Input Port 1. Meanwhile, the 3G-SDI 4-lane input for UHD signals should be connected to Input Ports 1, 2, 3 and 4. PAX-327-C8J-HAS PAX-327-C8 User Manual...
-
Page 19: Chapter 2 Installation
Chapter Installation... -
Page 20: Unpacking
Unpacking Before unpacking the monitor, prepare a suitable, level, and clean workspace near a power outlet. The monitor should be installed in a location with sufficient airflow and away from direct sunlight. After unpacking, check to ensure that the following items were included in the shipment: 1 x PAX-327 LCD monitor ... -
Page 21: I/O Ports
2.2.1 I/O Ports PAX-327-C8A-NAS, PAX-327-C8A-NAR PAX-327-C8E-NAS, PAX-327-C8E-NAR PAX-327-C8D-NAS, PAX-327-C8D-NAR PAX-327-C8F-NAS PAX-327-C8 User Manual... - Page 22 PAX-327-C8A-HAS, PAX-327-C8A-HAR, PAX-327-C8A-HAR-AI PAX-327-C8E-HAS, PAX-327-C8E-HAR PAX-327-C8D-HAS, PAX-327-C8D-HAR PAX-327-C8 User Manual...
-
Page 23: Display
PAX-327-C8L-HAS, PAX-327-C8L-HAR PAX-327-C8F-HAS PAX-327-C8J-HAS 2.2.2 Display All PAX-327-C8 series monitors feature a 27-inch TFT LCD panel that supports a max. resolution of 3840 x 2160 @ 60Hz. PAX-327-C8 User Manual... -
Page 24: Osd Key Functions
2.2.3 OSD Key Functions Key Name Function Power Key Power On/Off Menu/Enter Key Select main OSD menu Select sub-menu Apply adjustments (save) Wake up in DPMS mode Exit/Return to previous menu in main OSD menu Exit/Input Key Can be used to activate the Input hot menu when the main OSD menu is not displayed Can be used to Lock/Unlock settings for key activation by holding the key for longer than 30 seconds when the main OSD menu is not dis-... - Page 25 2.2.4.2 PAX-327-C8E-NAS, PAX-327-C8E-NAR (SDI 12G Optional) DC switch DC power input: +24V power connector DC power output: +5V/+12V power connector RS-232C DVI input/output HDMI input/output DP input USB up SDI input/output (optional) 2.2.4.3 PAX-327-C8D-NAS, PAX-327-C8D-NAR (SDI Quad 3G Optional) DC switch DC power input: +24V power connector DC power output: +5V/+12V power connector RS-232C...
- Page 26 2.2.4.6 PAX-327-C8E-HAS, PAX-327-C8E-HAR (SDI 12G Optional) DC switch DC power input: +24V power connector DC power output: +5V/+12V power connector RS-232C DVI input/output HDMI input/output DP input/output USB up SDI input/output (optional) 2.2.4.7 PAX-327-C8D-HAS, PAX-327-C8D-HAR (SDI Quad 3G Optional) DC switch DC power input: +24V power connector DC power output: +5V/+12V power connector RS-232C...
-
Page 27: Interface On Avas Back Panel
2.2.4.10 PAX-327-C8J-HAS (Ndcoder Optional) DC switch DC power input: +24V power connector DC power output: +5V/+12V power connector RS-232C DVI input/output HDMI input/output DP input/output USB up SFP+ (optional) Status (optional) LAN (optional) 2.2.5 Interface on AVAS Back Panel Name Function SFP+ SFP+ port for SFP+ modules only... -
Page 28: Positioning
Positioning Before setting up your workstation, prepare a suitable installation space. This should be a stable, flat, dust-free surface with good surrounding ventilation. Position the monitor screen away from direct sunlight. The glare caused by reflected sunlight may render the screen difficult to read. Caution! When positioning the equipment, ensure that the main ports and ... - Page 29 PAX-327-C8D-NAS, PAX-327-C8D-NAR PAX-327-C8F-NAS PAX-327-C8A-HAS, PAX-327-C8A-HAR, PAX-327-C8A-HAR-AI PAX-327-C8E-HAS, PAX-327-C8E-HAR PAX-327-C8 User Manual...
- Page 30 PAX-327-C8D-HAS, PAX-327-C8D-HAR PAX-327-C8L-HAS, PAX-327-C8L-HAR (10) PAX-327-C8F-HAS PAX-327-C8J-HAS PAX-327-C8 User Manual...
- Page 31 PAX-327-C8 User Manual...
- Page 32 PAX-327-C8 User Manual...
-
Page 33: Chapter 3 Osd Menu
Chapter OSD Menu... -
Page 34: Osd Menu Controls
OSD Menu Controls This chapter refers to the On Screen Display (OSD) controls. Using the OSD controls the user can adjust contrast, brightness, display clarity, color temperature and etc. Please read this chapter carefully to get the most out of this monitor. 3.1.1 Display Mode Menu... -
Page 35: Display Function
3.1.2 Display Function Menu Description Default Remarks Disp Rotate Used to rotate the screen. 0° Apply in 1P mode Disp Latency Not applicable. Used to adjust the ratio for the left LR Ratio and right displays. Apply in 2P LR mode Used to swap input sources for the Input Swap... -
Page 36: Select Region
3.1.3 Select Region Menu Description Default Remarks Left Side Select one region to control: Left side, Apply in 2P LR Right Side Left side Right side or Full. mode Full Top Side Select one region to control: Top Side, Apply in 2P TB Bottom Side Top Side Bottom Side or Full. -
Page 37: Picture
3.1.4 Picture Menu Description Default Remarks Backlight Used to adjust the backlight luminance. Used to adjust the screen brightness. Independent of Brightness Press the ˂ or > button to adjust. each input Used to adjust the screen contrast. Independent of Contrast Press the <... -
Page 38: Color
3.1.5 Color Menu Description Default Remarks Panel Uniformity Not applicable. Independent Gamma Used to select one of the various gammas. of each input Used to select one of the various color tem- peratures. Independent Temperature Clear * Set Gamma to OFF to adjust the red, green, of each input and blue values in the user mode. -
Page 39: Advance
3.1.6 Advance Menu Description Default Remarks Used to select one of the various screen Aspect Ratio Full aspect ratios. Used to activate/deactivate the over scan Over Scan function. [ON,OFF] Switching Time Used to set the screen switching time. Over Drive Not applicable. -
Page 40: Input
Used to activate/deactivate the Clone mode. [OFF, ON] DP MST should be set to OFF to select Clone mode Apply in 1P Clone mode. (Option) Mode For Clone mode to operate at 4K_60 Hz, the DP option/D0 on the sub-monitor must also be set to 1.2. -
Page 41: Audio (Option)
3.1.8 Audio (Option) Menu Description Default Remarks Used to adjust the speaker volume on Volume the monitor. Used to activate/deactivate the mute Mute function. [ON, OFF] Don't Switch Audio Source if Line In is Currently Playing unless a Digital Stand Alone Source is found. -
Page 42: Other
3.1.9 Other Menu Description Default Remarks Used to activate/deactivate the Reset monitor reset function. [YES, NO] Used to set the duration of the OSD Menu Time menu display. Used to adjust the horizontal posi- OSD H Position tion of the OSD menu. Used to adjust the vertical position OSD V Position of the OSD menu. -
Page 43: Information
3.1.10 Information Menu Description Default Remarks Used to access monitor infor- Information mation. 3.1.11 OSD Input Source HDMI Users can select the input source. (Note: The auto select option cannot be selected in SDI (Optional) multi-display mode. AVAS (Optional) Auto Select 3.1.12 PIP Table Main Source... - Page 44 PAX-327-C8 User Manual...
-
Page 45: Chapter 4 Safety Information
Chapter Safety Information... -
Page 46: Symbols
Symbols Symbol Title This symbol is intended to alert the user to the presence of important operat- ing and maintenance (servicing) instructions. This symbol is intended to alert the user to the presence of uninsulated “dan- gerous voltage” of sufficient magnitude to constitute a risk of electric shock. This symbol is intended to remind the user to follow the instructions for use, particularly with medical electrical equipment. -
Page 47: Ce Marking
CE Marking This marking is a declaration of conformity in accordance with Article 10(1) of the CE directive. This product has passed the CE test for environmental specifications. Test conditions for passing include the equipment being operated within an indus- trial enclosure. -
Page 48: Safety And Maintenance
Safety and Maintenance Caution! To ensure optimum performance, follow the safety instructions outlined below when setting up or using the equipment. Do not open the monitor. There are no user-serviceable parts inside. Opening or removing the cover may expose you to dangerous shock hazards or other risks. Refer all servicing to qualified service personnel. -
Page 49: Radio Frequency
Note! As with all personal display devices, Advantech recommends using a moving screen saver whenever the screen is idle and turning off the monitor when not in use. -
Page 50: Placement And Adjustment Of The Monitor
The configuration of the device should mainly be done by the user using the provided hardware keypad. Note! If software tools are provided by Advantech they should be operated using the specific instructions provided. Any software tools provided should only be installed on a computer with appropriate systems to pre- vent unauthorized access. -
Page 51: Appendix A Cleaning
Appendix Cleaning... -
Page 52: Cleaning The Lcd Panel
Cleaning the LCD Panel When the LCD panel becomes dusty or dirty, wipe it gently with a soft cloth. Do not rub the LCD panel with cloth of a hard or coarse material. Do not apply pressure to the LCD surface. ... -
Page 53: Appendix B Troubleshooting
Appendix Troubleshooting... -
Page 54: Non-Responsive Power Button
Note! As with all personal display devices, Advantech recommends using a moving screen saver whenever the screen is idle and turning off the monitor when not in use. - Page 55 PAX-327-C8 User Manual...
- Page 56 No part of this publication may be reproduced in any form or by any means, such as electronically, by photocopying, recording, or otherwise, without prior written permission from the publisher. All brand and product names are trademarks or registered trademarks of their respective companies. © Advantech Co., Ltd. 2021...
Need help?
Do you have a question about the PAX-327-C8 Series and is the answer not in the manual?
Questions and answers