Table of Contents
Advertisement
Quick Links
Advertisement
Table of Contents

Related Manuals for Newland NLS-EM20-EX


Summary of Contents for Newland NLS-EM20-EX
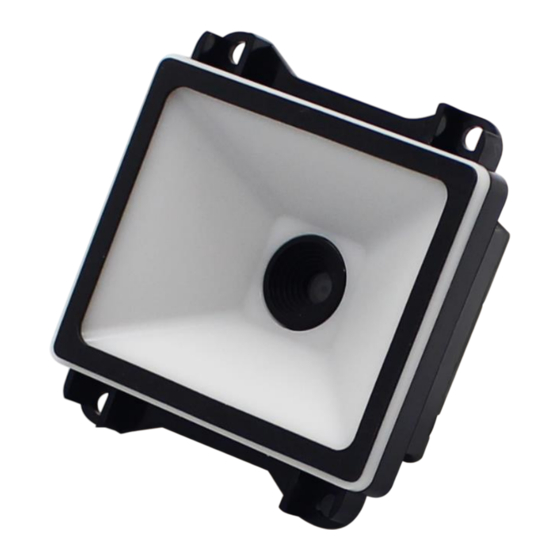
- Page 1 NLS-EM20-EX Barcode reading engine User manual...
- Page 2 Save it for future use. Do not disassemble the terminal or tear up the seal on the terminal by yourself, otherwise Fujian Newland Automatic Identification Technology Co., Ltd. will not be responsible for the warranty or replacement of the The pictures in this manual are for reference only. If some pictures do not match the actual product, please refer to the actual product. For the improvement and update of this product, Newland Automatic Identification Technology Co., Ltd.
- Page 3 Version record version number Version description Release date V1.0.1 2018-09-25 initial version. V1.0.2 2018.10.30 Update " Modify one-dimensional barcode Code ID" . 1 , Chapter 3 Modify the default setting of "Reading Mode" to "Level Trigger Mode". 2 , Chapter 3 Modify the default settings of "Reread Delay" and "Reread Timeout Reset" to "Off". V 1.0.3 2019.01.17 3 , Chapter 3 Modify the default setting of "Reading Preference"...
-
Page 4: Table Of Contents
Introduction..........................1 Chapter Outline................................1 Manual legend..........................1 Chapter One About NLS-EM20-EX ................................. 2 Chapter 2 Supporting Tools............................... 3 EasySet..................................3 Chapter 3 System Settings..................................4 Introduction... - Page 5 Decoding timeout................................17 Beeps................................18 Sensitivity........................19 Serial trigger command..............................20 Modify the start code reading instruction..............................20 Modify the stop reading instruction..............................20 Reading Preferences..........
- Page 6 Keyboard emulation input characters............................44 Control character output..............................48 Correspondence Table of Control Characters..............................49 Control character correspondence table (continued)............................50 Button delay..............................51 Caps Lock Setting................................ 52 Case conversion........
- Page 7 5 Bit extension code............................. 70 Convert to EAN-13..............................70 EAN-13 ..................................71 Restore factory defaults..............................71 Enable/disable reading............................... 71 Send check character............................71 2 Bit extension code........
- Page 8 Enable/disable reading............................... 91 Set the reading length................................ 92 GS1 Composite (EAN·UCC Composite) ........................93 Restore factory defaults..............................93 Enable/disable reading............................... 93 UPC/EAN version............................93 ISBN..............................
- Page 9 Enable/disable reading..............................110 Set the reading length............................... 111 Multi-code Same Image Processing Setting.............................. . 112 The number of multi-code barcodes with the same image..................... .. 113 Character encoding method..............................114 ECI Output..................
- Page 10 Code ID Prefix........................ 147 default Code ID............................... 147 modify Code ID............................... 148 Custom suffix..............................152 Modify custom suffix............................153 Data packaging................................154 Packaging format........
-
Page 11: Foreword
Preface Introduction This manual mainly introduces users NNLS-EM20-EX How to use. Chapter Outline "Chapter One About NNLS-EM20-EX 》 "Chapter Two Supporting Tools" Introduction of supporting tools EasySet Function of "Chapter 3 System Settings" Introduce the main setting methods of the scanner and the setting of system parameters "Chapter Four RS-232 Communication Settings description RS-232 Communication parameter setting "chapter Five USB Communication Settings... -
Page 12: Chapter One About Nls-Em20-Ex
Intelligent image recognition technology, creating image style The new era of 2D barcode reading engine. Newland’s two-dimensional decoding chip will be advanced The image recognition algorithm is perfectly integrated with advanced chip design and manufacturing technology, which greatly simplifies the production of 2D b The difficulty of product design has set an excellent benchmark for high performance, high reliability, and low power consumption of 2D imaging products. -
Page 13: Chapter 2 Supporting Tools
EasySet EasySet Is a Windows It runs under the operating system and is a configuration software for equipment bar codes, communication and other parameters independently developed by Newland Automatic Identification Company. It can pass EasySet Graphical interface settings or query device configuration, you can also directly interact with the device through instructions. -
Page 14: Chapter 3 System Settings
EasySet Set up EasySet Is a Windows The image user interface program under the system is independently developed by Newland Automatic Identification Company for bar code reading and processing. use EasySet You can view the decoded barcode information and the image taken by the scanner, and you can also set the scanner easily. -
Page 15: Set Logo
Startup settings Set logo This is a sign to disable the setting code function. The logo consists of four parts: Set the barcode part of the code. The setting command string corresponding to the setting code. The name of the set option or function, such as exiting the setting function. * * Indicates that this item is set as the default setting. -
Page 16: Setting Code Information
Startup settings Setting code information The setting code information can be sent to the host. The factory default setting is " Do not send configuration code information " , The setting code information will not be sent to the host at this time; " Send setting code information "... -
Page 17: Setting
Startup settings led Light settings Successfully decoded led Light settings 【Open】 【shut down】 Exit settings... -
Page 18: Successfully Decoded Led Lamp Duration Setting
Startup settings Successfully decoded led Lamp duration setting Optional 20ms , 120ms , 220ms , 320ms Quick setting. 【short( 20ms )】 【in( 120ms )】 【long( 220ms )】 【Features ( 320ms )】 [Decoding successful led Custom setting of light duration (range 1-2500ms )】 Set and decode successfully led The lamp duration is 800ms , You can read the following barcodes in order to set: read "... -
Page 19: Prompt
Startup settings Beep Power-on prompt 【Open】 【shut down】 Decoding successful sound settings Read " shut down " You can prohibit the successful decoding sound from ringing, reading " Turn on " The sound prompt of successful decoding can be restored. 【Open】... -
Page 20: Decoding Successful Sound Volume Setting
Startup settings Decoding successful sound volume setting 【Big】 【in】 【small】... -
Page 21: Reading Mode
Startup settings Reading mode • Level trigger mode: Press and hold the trigger key to start the code reading; after the code reading is successful or the trigger key is released, the code reading ends. • Induction mode: Power on and enter the barcode reading state until the barcode reading is successful or reaches One reading timeout Stop reading the code after the set time. When a new barcode appears, it will Newly enter the reading state. -
Page 22: One Reading Timeout
Startup settings One reading timeout • One reading timeout: The amount of time the scanner is in the reading state. The set time range is 0 To 3600000 Milliseconds, set to 0 At that time, the scanner will always be in reading mode. default: 3000 millisecond. -
Page 23: Image Stabilization Timeout (Sensing Mode)
Startup settings Image stabilization timeout (sensing mode) In the sensing mode, when the scanner stops reading the code, it will enter a process of re-adapting to the changes in the reading environment (image), and it will enter the sensing state after the image stabilization times out Wait for the barcode to appear. -
Page 24: Reread Delay Time
Startup settings Reread delay time It is used to prevent the same bar code from being read twice in succession. The reread delay setting is the minimum time interval that allows continuous reading of bar codes of the same type and data. The delay It is only used in automatic code reading mode and continuous code reading mode. -
Page 25: Reread Timeout Reset
Startup settings Reread timeout reset When the reread timeout reset is enabled, if the time interval between two consecutive readings of the same bar code is less than the "reread delay time", the reread interval will be cleared and re-timed. Only when the time interval between reading the same barcode twice is greater than or equal to "Reread Delay Time"... -
Page 26: Delay Time Of Successful Barcode Reading
Startup settings Delay time for successful barcode reading The length of time to pause the code reading after successful reading, the set time range is 1 To 3600000 Milliseconds, default is 500 millisecond. [Delay time for successful barcode reading] Set the delay time for successful barcode reading as 1000 Milliseconds, you can read the following barcodes in order to set: read "... -
Page 27: Decoding Timeout
Startup settings Decoding timeout The timeout period for each image decoding operation of the scanner. The set time range is from 1 To 3000 Milliseconds, default is 500 millisecond. [Decoding timeout time] Set the decoding timeout time to 1000 Milliseconds, you can read the following barcodes in order to set: 1. -
Page 28: Beeps
Startup settings Beep Send by Beep Instructions can control the scanner to emit a beep sound. The frequency and duration of the beep are used as Beep The parameters of the instruction need to be configured. instruction The format is BEEPON xxxFyyyTnnV ,among them: F Indicates the frequency of the prompt tone, the value range is 1 ~ 20000Hz , xxxF Indicates that the frequency of the tone is xxx Hz (E.g 2700F Indicates that the frequency of the sound is 2700Hz );... -
Page 29: Sensitivity
Startup settings Sensitivity Sensitivity specifies how the scanner responds to changes in the scanned image in sensing mode. This setting is only valid for the sensing mode of the reading mode. Custom sensitivity range Surrounded by 1 To 20 . The default is medium ( 11 ). 【low】... -
Page 30: Serial Trigger Command
Startup settings Serial trigger command When the reading mode is set to level trigger mode, it supports the serial communication command "Start reading" command to trigger the reading, the scanner reading successfully or reaching Read once Code timeout Or end the reading after receiving the "stop reading" command. •... -
Page 31: Prohibit/Allow Code Reading
Startup settings Literacy Preference 【ordinary】 【Screen reading mode】 * * 【Barcode Payment Mode】 Prohibit/Allow Code Reading Send by Prohibit reading with Allow reading Instructions can control whether the scanner needs to stop reading codes. The default is Allow reading . •... -
Page 32: Decoding Center Area
Startup settings Decoding center area • Whole area decoding: Select all areas of the captured image (the whole picture) for decoding, and only output the first barcode read. • Center area decoding: The center position of the barcode must be in the set area to be successfully read. When there are multiple barcodes in the set area at the same time, just enter The first barcode read (in this case, it is recommended to reduce the size of the center area). -
Page 33: Set The Center Area
Startup settings Set the center area The size of the area is set based on the ratio of the image width to the height. Need to set the top, bottom, left, and right ranges of the center area, the setting range is 0 To 100 , The bottom end must be greater than the top end, and the right end must be greater than the left end. - Page 34 Startup settings Set to read only in the picture above Bar Code 1 , The top of the center area is 10 At the bottom 45 On the left 15 , On the right 30 , You can read the following barcodes in order to set: 1 , Read "...
-
Page 35: Image Flip
Startup settings Image flip The image supports horizontal flip and vertical mirror output functions. by EasySet The images taken by the scanner can be acquired. [Normal image] 【horizontal flip】 【Vertical Flip】 【Horizontal and Vertical Flip】 Exit settings... -
Page 36: Sending The Message Of Unsuccessful Reading
Startup settings Send the unsuccessful reading message • Enable: When the code reading is unsuccessful, the button will be released or the code reading timeout will send the unsuccessful message. • Prohibited: When the barcode reading is unsuccessful, the message of unsuccessful barcode reading will not be sent. * * 【Prohibited】... -
Page 37: Default Setting
Startup settings default setting Factory default settings All scanners have a factory default setting, read " Load factory default settings " The barcode will restore all attributes of the scanner to the factory state. You are most likely to use this barcode in the following situations: •... -
Page 38: Product Information Inquiry
Startup settings product information inquiry Query system information You can read " Query system information " Set the code to get information about the product. After reading this setting code, the scanner will immediately send product information to the host. 【Query system information】... -
Page 39: Check The Firmware Version Number
Startup settings Check the firmware version number You can read " Query the firmware version number " To get the device firmware version number. After reading this configuration code, the scanner will immediately send the firmware version number to the host. 【Query firmware version number】... -
Page 40: Query Hardware Information
Startup settings Query hardware information You can read " Query hardware information " To get the hardware version information of the product. After reading this setting code, the scanner will immediately send hardware information to the host [Query hardware information] Query product serial number You can read "... -
Page 41: Query Product Oem Serial Number
Startup settings Query product OEM serial number You can read " Query product OEM serial number " To get the product OEM Serial number information. After reading this setting code, the scanner will send the product immediately OEM The serial number is given to the host. -
Page 42: Chapter Four Ttl-232 Communication Settings
Startup settings Chapter Four TTL-232 Communication settings Introduction can use TTL-232 Communication is also called serial communication. When the scanner and the host are connected by a serial cable, both parties need to set the same communication parameters to ensure the normal communication. The parameters that need to be set include the communication baud rate (that is, the transmission rate), the check character setting, and the data bit setting. Stop bit setting. -
Page 43: Baud Rate
Startup settings Baud rate The baud rate is the number of bits transmitted per second in serial data communication. The baud rate used by the scanner and the data receiving host must be consistent to ensure the accuracy of data transmission. sweep The scanner supports the baud rates listed below, the unit is bit/s . - Page 44 Startup settings 【 2400 】】 【 1200 】...
-
Page 45: Parity Character
Startup settings Parity character The scanner can choose different parity character types when using the serial port to transmit, but they must be consistent with the host's parity character type. • Select odd parity, if the transmitted data "1" If the number of is odd, the check character is 0 . •... -
Page 46: Data Bit Transmission
Startup settings Data bit transmission Optional transmission 7 , 8 Bit data, please ensure that the data bit of the scanner is consistent with that of the data receiving host. 【 7 Data bits] 【 8 Data bits] Stop bit The stop bit is located at the last part of each byte transmitted, and is used to mark the completion of this byte transmission and the next byte of data can be received. -
Page 47: Chapter Five Usb Communication Settings
Startup settings chapter Five USB Communication settings Introduction When you use USB When connecting the scanner and the host, there are the following four connection methods to choose from, and can be based on the actual needs of customers Set the default mode: •... - Page 48 Startup settings USB keyboard USB When the data line is connected, the scanner can be set to HID Keyboard Input mode. In this mode, the scanner will become a virtual keyboard, and the data receiving host accepts the virtual keyboard input like a real keyboard input. After the scanner decodes the data, the sending process is to hit the pair of data in the virtual keyboard. Each button should be.
-
Page 49: National Keyboard Layout
Startup settings National keyboard layout The keyboard key arrangement and symbols of different national languages are different. Therefore, the scanner can be virtualized into keyboard formats of different countries as needed. The default is the United States Standard keyboard. * * 【American English】 【Belgium】... - Page 50 Startup settings 【France】 【Germany/Austria】 【Greece】 【Hungary】 【Israel (Hebrew)】 【Italy】 【Latin America】 【Netherlands (Dutch)】...
- Page 51 Startup settings 【Norway】 【Poland】 【Portugal】 【Romania】 【Russia】 【Slovakia】 【Spain】 【Sweden】 Exit settings...
- Page 52 Startup settings 【Switzerland (German)】 【Turkey F 】 【Turkey Q 】 【United Kingdom】 【Japan】...
-
Page 53: Unknown Character Tone
Startup settings Unknown character tone Due to differences in keyboard layouts, some characters contained in the barcode data may not be available on the selected keyboard. Therefore, the scanner cannot transmit unknown characters. Scan down The corresponding barcode on the face to enable or disable the beep sound when an unknown character is detected. * * 【shut down】... -
Page 54: Keyboard Emulation Input Characters
Startup settings Keyboard emulation input characters When the keyboard emulation input character is turned on, the characters will be sent through the numeric keypad, and the national keyboard layout setting will be ignored. This mode also needs to be set Code Page selected select with Unicode Output . - Page 55 Startup settings Code Page Code page ( Code Page ) Defines the mapping of character codes to characters. If the received data does not display the correct characters, it may be because the barcode being scanned was created with a different code page than expected by the host program.
- Page 56 Startup settings 【 Code Page 1252 (Latin, Western Europe)] 【 Code Page 1251 (Cyrillic)] 【 Code Page 1250 (Central Europe)] 【 Code Page 1253 (Greek)】 【 Code Page 1254 (Turkish)] 【 Code Page 1255 (Hebrew)] 【 Code Page 1256 (Arabic)】 【...
- Page 57 Startup settings Unicode Output Different application software also has requirements for the received character encoding, such as MS Office of Word Using Unicode Encoding, you need to Unicode Output is set to " Turn on " ;and MSOffice of Excel Or notepad is Code Page Encoding, you need to Unicodes Output is set to " shut down " . "Unicode Output " Work Can only take effect after the keyboard emulation input function is turned on.
-
Page 58: Control Character Output
Startup settings Control character output lie in 0x00~0x1F between ASCII Characters can be escaped to become a control function key. The operation of the control function key input in the virtual keyboard is as follows, the specific ASCII The corresponding relationship between values and control function keys is shown in the attached table on the next page. Default: off. * * 【shut down】... -
Page 59: Correspondence Table Of Control Characters
Startup settings Control character correspondence table ASCII Function ASCII Value ( HEX ) Control character output is off Control character output Control + ASCII mode Null Ctrl+@ Keypad Enter Ctrl+A Caps Lock Ctrl+B Ctrl+C Null Ctrl+D CTRL Ctrl+E Ctrl+F Null Enter Ctrl+G Left Arrow... -
Page 60: Control Character Correspondence Table (Continued)
Startup settings Control character correspondence table (continued) In the above table " Control character output Control +ASCII mode " Time 0x1B~0x1F Corresponding to the US keyboard layout, if it is a keyboard layout of other countries, please refer to the following table: country Code United... -
Page 61: Button Delay
Startup settings Key delay This parameter specifies the delay between simulated keystrokes. When the host needs slower data transmission, scan the corresponding bar code below to increase the delay. Default: no delay. 【No delay】 【Long delay ( 40ms )】 【Short delay ( 20ms )】 Exit settings... -
Page 62: Caps Lock Setting
Startup settings Caps lock setting When turned on, the uppercase and lowercase characters contained in the barcode data can be reversed. Whatever on the host keyboard Caps Lock This reversal occurs regardless of the state of the key. Default: Off. * * 【Close (non-Japanese keyboard)】... -
Page 63: Case Conversion
Startup settings Case conversion Scan the corresponding bar code below to convert all bar code data to the desired situation. Default: no conversion. If set to " Convert all to uppercase letters " , Regardless of whether the letters in the barcode data are uppercase or lowercase, all letters are converted to uppercase letters. If set to "... -
Page 64: Analog Digital Keypad
Startup settings Analog numeric keypad Numerical characters use numeric keypad If this function is not turned on, all outputs will be output according to the corresponding key value of the main keyboard. After turning on this function, if the barcode data read by the scanner contains numbers "0~9" , The virtual keyboard will output according to the key value corresponding to the numeric keypad. The numeric keypad, as shown in the figure above, is generally located on the far right side of the keyboard, from the upper left corner Num Lock Control whether its key value is a number or a function key. - Page 65 Startup settings Turn on " Analog numeric keypad " After the scanner reads the content as "A4.5" Barcode. If the host "Num Lock" Is on, the host program will receive the string "A4.5" . If the host "Num Lock" Is off, the host program will receive the string ".A" : First get "A"...
-
Page 66: Quick Mode
Startup settings Characters'+','-','*','/' use numeric keypad * * 【shut down】 【Open】 Fast mode Turn on the fast mode, the scanner can send characters to the host faster. If the host discards characters, do not use fast mode, or increase Polling speed Settings. * * 【shut down】... -
Page 67: Polling Speed
Startup settings Polling speed The keyboard polling speed can be set to 1~10 millisecond. The smaller the set value, the faster the scanner can send characters to the host. If the host will discard characters, please increase Polling speed Settings. 【... - Page 68 Startup settings 【 8ms 】 【 9ms 】 【 10ms 】...
- Page 69 Startup settings USB CDC Serial port When you use USB Connection, and at the same time you want the host to receive data through the serial port, you should use USB Virtual serial port mode. From the point of view of the host system interface, the scanner is equivalent to connecting with the host through a serial port.
-
Page 70: Introduction
After successfully reading the barcode, the device will send the following Input Message: Byte Message ID = 0x02 Barcode data length 2-57 Barcode data ( 1-56 ) 58-61 Keep Newland barcode type identification symbol or useless: 0x00 Decoding data continues... -
Page 71: Send Data To The Device
Startup settings Send data to the device This one Output The message is used to send data to the device. All communication commands can be sent to the device in this way. Byte Report ID = 0x04 Length of the Data(“Output Data” field) 2-63 Output Data (1-62) Exit settings... - Page 72 VID with PID table USB use 2 Number to identify the device and find the correct device. The first number is VID (Vendor ID ),by USB Implementers Forum ( USB Application vendor forum) assigned. Manufacturers of Newland Automatic Identification Company ID ( VID ) Yes 1EAB (Hexadecimal). The second number is PID (equipment ID ). Each product automatically identified by Newland has a range PID , Each PID The number contains the base number and interface type of a product type.
-
Page 73: Chapter Vi Barcode Parameter Setting
Startup settings Chapter 6 Barcode Parameter Setting Introduction Each type of barcode has its own unique attributes, and the scanner can be adjusted to adapt to these attribute changes through the setting codes in this chapter. Turn on " Allow reading " The fewer barcode types there are, the faster the scanner can read. You can prohibit the scanner from reading unused barcode types to improve the scanner's working performance. Comprehensive settings Allow all barcodes Read "... -
Page 74: Allow All One-Dimensional Codes
Startup settings Allow all one-dimensional codes [Enable all one-dimensional barcodes] Prohibit all one-dimensional codes 【Prohibit all one-dimensional barcodes】 Allow all QR codes [Enable all QR codes] Ban all QR codes [Prohibit all QR codes]... -
Page 75: Allow All Postal Codes
Startup settings Allow all postal codes 【Enable all postal codes】 Ban all postal codes 【Prohibit all postal codes】 Exit settings... -
Page 76: Restore Factory Defaults
Startup settings Code 128 Restore factory default 【 Code 128 Factory default setting] Enable/disable reading * * 【Enable】 【Prohibited】 If the scanner cannot recognize Code 128 Barcode, please try to read " Enable " Set the code and try again. -
Page 77: Set The Reading Length
Startup settings Set reading length The scanner can be configured to read only those whose length is between (including) the minimum and maximum length Code 128 Barcode. [Minimum length (default: 1 )】 [Maximum length (default: 127 )】 The maximum length limit value of any one-dimensional barcode shall not exceed 127 , If the maximum length is less than the minimum length, it will only read the bars of these two lengths code. -
Page 78: Restore Factory Defaults
Startup settings EAN-8 Restore factory default * * 【 EAN-8 Factory default setting] Enable/disable reading 【Enable】 * * 【Prohibited】 Send check character EAN-8 The barcode data is fixed as 8 Bytes, where the last 1 One byte is the check character. 【Send】... - Page 79 Startup settings 2 Bit extension code 2 Bit extension code refers to the addition of the ordinary barcode 2 Digit barcode, the picture below shows the band 2 The barcode with bit extension code, the blue wire frame on the left is the ordinary barcode, and the red wire frame on the right is 2 Bit extension code: * * 【Don't read 2 Bit extension code 【Reading 2 Bit extension code...
-
Page 80: Convert To Ean-13
Startup settings 5 Bit extension code 5 Bit extension code refers to the addition of the ordinary barcode 5 Digit barcode, the picture below shows the band 5 The barcode with bit extension code, the blue wire frame on the left is the ordinary barcode, and the red wire frame on the right is 5 Bit extension code: * * 【Don't read 5 Bit extension code 【Reading 5 Bit extension code... -
Page 81: Restore Factory Defaults
Startup settings EAN-13 Restore factory default * * 【 EAN-13 Factory default setting] Enable/disable reading 【Enable】 * * 【Prohibited】 Send check character 【Send】 【Do not send】 Exit settings... - Page 82 Startup settings 2 Bit extension code 2 Bit extension code refers to the addition of the ordinary barcode 2 Digit barcode, the picture below shows the band 2 The barcode with bit extension code, the blue wire frame on the left is the ordinary barcode, and the red wire frame on the right is 2 Bit extension code: * * 【Don't read 2 Bit extension code 【Reading 2 Bit extension code...
- Page 83 Startup settings 5 Bit extension code 5 Bit extension code refers to the addition of the ordinary barcode 5 Digit barcode, the picture below shows the band 5 The barcode with bit extension code, the blue wire frame on the left is the ordinary barcode, and the red wire frame on the right is 5 Bit extension code: * * 【Don't read 5 Bit extension code 【Reading 5 Bit extension code...
-
Page 84: Upc-E
Startup settings UPC-E Restore factory default * * 【 UPC-E Factory default setting] Enable/disable reading 【Enable】 * * 【Prohibited】 If the scanner cannot recognize UPC-E Barcode, please try to read " Enable " Set the code and try again. -
Page 85: Upc-E0
Startup settings UPC-E0 【Reading UPC-E0 】 【Don't read UPC-E0 】 UPC-E1 【Reading UPC-E1 】 【Don't read UPC-E1 】 Exit settings... -
Page 86: Send Check Character
Startup settings Send check character UPC-E The barcode data is fixed as 8 Bytes, where the last 1 One byte is the check character. 【Send】 【Do not send】 2 Bit extension code 2 Bit extension code refers to the addition of the ordinary barcode 2 Digit barcode, the picture below shows the band 2 The barcode with bit extension code, the blue wire frame on the left is the ordinary barcode, and the red wire frame on the right is 2 Bit extension code: * * 【Don't read 2 Bit extension code 【Reading 2 Bit extension code... - Page 87 Startup settings 5 Bit extension code 5 Bit extension code refers to the addition of the ordinary barcode 5 Digit barcode, the picture below shows the band 5 The barcode with bit extension code, the blue wire frame on the left is the ordinary barcode, and the red wire frame on the right is 5 Bit extension code: * * 【Don't read 5 Bit extension code 【Reading 5 Bit extension code...
-
Page 88: Transmit Leading Characters
Startup settings Transmit leading characters The leading character is UPC Part of the symbol and includes the country code (for the United States, "0" ) And system characters ( "0" ). * * 【Transmission System Character】 [Do not transmit leading characters (Do not transmit country codes and system characters)] [Transfer country code + system characters] Convert to UPC-A... -
Page 89: Upc-A
Startup settings UPC-A Restore factory default * * 【 UPC-A Factory default setting] Enable/disable reading 【Enable】 * * 【Prohibited】 If the scanner cannot recognize UPC-A Barcode, please try to read " Enable " Set the code and try again. Exit settings... -
Page 90: Send Check Character
Startup settings Send check character 【Send】 【Do not send】 2 Bit extension code 2 Bit extension code refers to the addition of the ordinary barcode 2 Digit barcode, the picture below shows the band 2 The barcode with bit extension code, the blue wire frame on the left is the ordinary barcode, and the red wire frame on the right is 2 Bit extension code: * * 【Don't read 2 Bit extension code 【Reading 2 Bit extension code... - Page 91 Startup settings 5 Bit extension code 5 Bit extension code refers to the addition of the ordinary barcode 5 Digit barcode, the picture below shows the band 5 The barcode with bit extension code, the blue wire frame on the left is the ordinary barcode, and the red wire frame on the right is 5 Bit extension code: * * 【Don't read 5 Bit extension code 【Reading 5 Bit extension code...
-
Page 92: Transmit Leading Characters
Startup settings Transmit leading characters The leading character is UPC Part of the symbol and includes the country code (for the United States, "0" ) And system characters ( "0" ). [Do not transmit leading characters (Do not transmit country codes and system characters)] * * 【Transmission System Character】... -
Page 93: Upc-A/Ean-13 With Coupon Extension Code
Startup settings Coupon UPC-A/EAN-13 With Coupon Extension code UPC-A with EAN-13 Two symbologies can be attached Coupon Extension code. Coupon Have 3 Types of composition: • To 5 The beginning UPC-A + GS1-128 • To 5 The beginning UPC-A + GS1 Databar •... - Page 94 Startup settings Coupon GS1 DataBar Output Coupon Type is: to 5 The beginning UPC-A + GS1 Databar Time, When on GS1 Databar When output function, the device only outputs GS1 Databar Part of the information. When closed GS1 Databar When outputting function, refer to device information output situation "Coupon connection " Chapter settings. * * 【shut down】...
-
Page 95: Code 39
Startup settings Code 39 Restore factory default * * 【 Code 39 Factory default setting] Enable/disable reading 【Enable】 * * 【Prohibited】 If the scanner cannot recognize Code 39 Barcode, please try to read " Enable " Set the code and try again. Exit settings... -
Page 96: Set The Reading Length
Startup settings Set reading length The scanner can be configured to read only those whose length is between (including) the minimum and maximum length Code 39 Barcode. [Minimum length (default value: 1 )】 [Maximum length (default value: 127 )】 The maximum length limit value of any one-dimensional barcode shall not exceed 127 , If the maximum length is less than the minimum length, it will only read the bars of these two lengths code. -
Page 97: Check
Startup settings check Code 39 It is not mandatory to include a check character in the barcode data. If there is a check character, it must be the last of the data 1 Bytes. The check character is a value calculated from all data except the check character to check whether the data is correct. - Page 98 Startup settings Start and stop You can set whether to transmit the start character and stop character together with the barcode data after the barcode is successfully read. * * 【Do not send】 【Send】 Full ASCII Enable Code 39 Full ASCII Can open to read the complete ASCII Character function 【Forbidden Code 39 Full ASCII 】...
-
Page 99: Code32 Pharmaceutical (Paraf)
Startup settings Code32 Pharmaceutical (PARAF) Code 32 Pharmaceutical Used by Italian pharmacies Code 39 A form of barcode. This barcode is also called PARAF . Code 32 The output format is: * + A + 8 Digit + 1 Bit check + *. * * 【Prohibited】... - Page 100 Startup settings Code32 Start and stop * * 【Do not send】 【Send】 Code32 Check character * * 【Do not send】 【Send】...
-
Page 101: Gs1-128 (Ucc/Ean-128)
Startup settings GS1-128 (UCC/EAN-128) Restore factory default * * 【 GS1-128 Factory default setting] Enable/disable reading 【Enable】 * * 【Prohibited】 If the scanner cannot recognize GS1-128 Barcode, please try to read " Enable " Set the code and try again. Exit settings... -
Page 102: Set The Reading Length
Startup settings Set reading length The scanner can be configured to read only those whose length is between (including) the minimum and maximum length GS1-128 Barcode. [Minimum length (default value: 1 )】 [Maximum length (default value: 127 )】 The maximum length limit value of any one-dimensional barcode shall not exceed 127 , If the maximum length is less than the minimum length, it will only read the bars of these two lengths code. -
Page 103: (Ean·ucc Composite)
Startup settings GS1 Composite (EAN·UCC Composite) Restore factory default 【 GS1 Composite Factory default setting] Enable/disable reading 【Enable】 * * 【Prohibited】 UPC/EAN version 【Enable】 * * 【Prohibited】 If the scanner cannot recognize GS1 Composite Barcode, please try to read " Enable " Set the code and try again. Exit settings... -
Page 104: Isbn
Startup settings ISBN Restore factory default * * 【 ISBN Factory default setting] Enable/disable reading 【Enable】 * * 【Prohibited】 If the scanner cannot recognize ISBN Barcode, please try to read " Enable " Set the code and try again. -
Page 105: Issn
Startup settings ISBN format 【 ISBN-10 】 【 ISBN-13 】 ISSN Restore factory default * * 【 ISSN Factory default setting] Exit settings... - Page 106 Startup settings Enable/disable reading 【Enable】 * * 【Prohibited】 If the scanner cannot recognize ISSN Barcode, please try to read " Enable " Set the code and try again.
-
Page 107: Restore Factory Defaults
Startup settings AIM 128 Restore factory default * * 【 AIM 128 Factory default setting] Enable/disable reading 【Enable】 * * 【Prohibited】 If the scanner cannot recognize AIM 128 Barcode, please try to read " Enable " Set the code and try again. Exit settings... - Page 108 Startup settings Set reading length The scanner can be configured to read only those whose length is between (including) the minimum and maximum length AIM 128 Barcode. [Minimum length (default value: 1 )】 [Maximum length (default value: 127 )】 The maximum length limit value of any one-dimensional barcode shall not exceed 127 , If the maximum length is less than the minimum length, it will only read the bars of these two lengths code.
-
Page 109: Restore Factory Defaults
Startup settings ISBT 128 Restore factory default * * 【 ISBT 128 Factory default setting] Enable/disable reading 【Enable】 * * 【Prohibited】 If the scanner cannot recognize ISBT 128 Barcode, please try to read " Enable " Set the code and try again. Exit settings... -
Page 110: Pdf417
Startup settings PDF417 Restore factory default * * 【 PDF417 Factory default setting] Enable/disable reading * * 【Enable】 * * 【Prohibited】 If the scanner cannot recognize PDF417 Barcode, please try to read " Enable " Set the code and try again. -
Page 111: Set The Reading Length
Startup settings Set reading length The scanner can be configured to read only those whose length is between (including) the minimum and maximum length PDF417 Barcode. [Minimum length (default value: 1 ) 】 [Maximum length (default value: 2710) 】 The maximum length limit of any two-dimensional barcode shall not exceed 65535 Bytes, and the maximum length limit value must not be less than the minimum length limit value. If you want to read only a fixed length PDF417 Barcode, you can set the minimum length limit value to the maximum length limit The values are equal. - Page 112 Startup settings PDF417 Double code PDF417 Double code: two arranged up and down or left and right PDF417 Barcode. The direction of the two codes must be consistent, the difference should be as small as possible, and the distance should be as close as possi The dual code setting is divided into the following three setting modes.
-
Page 113: Character Encoding Method
Startup settings PDF 417 Inverted PDF 417 There are positive and reverse barcodes. Normal phase bar code: bar code with light background and dark bar Inverted barcode: dark-colored bottom, light-colored barcode * * [Only identify the normal phase barcode] [Only recognize reverse barcode] [Recognize both positive and negative barcodes] Character encoding 【default】... - Page 114 Startup settings ECI Output 【Prohibited】 * * 【Enable】...
-
Page 115: Qr Code
Startup settings QR Code Restore factory default * * 【 QR Factory default setting] Enable/disable reading * * 【Enable】 【Prohibited】 If the scanner cannot recognize QR Code Barcode, please try to read " Enable " Set the code and try again. Exit settings... -
Page 116: Set The Reading Length
Startup settings Set reading length The scanner can be configured to read only those whose length is between (including) the minimum and maximum length QR Code Barcode. [Minimum length (default value: 1 )】 [Maximum length (default value: 7089) 】 The maximum length limit of any two-dimensional barcode shall not exceed 65535 Bytes, and the maximum length limit value must not be less than the minimum length limit value. If you want to read only a fixed length QR Code Bar code, you can set the minimum length limit value to be equal to the maximum length limit value. - Page 117 Startup settings QR Double code QR Double code: two arranged up and down or left and right QR Barcode. The direction of the two codes should be the same, the difference should be as small as possible, and the distance should be as close as possible. There are three setting modes for dual code setting: •...
-
Page 118: Character Encoding Method
Startup settings QR Inverted QR There are positive and reverse barcodes. Normal phase bar code: bar code with light background and dark bar Inverted barcode: dark-colored bottom, light-colored barcode * * [Only identify the normal phase barcode] [Only recognize reverse barcode] [Recognize both positive and negative barcodes] Character encoding 【default】... - Page 119 Startup settings ECI Output 【Prohibited】 * * 【Enable】 Exit settings...
-
Page 120: Aztec
Startup settings Aztec Restore factory default 【 Aztec Code Factory default setting] Enable/disable reading 【Enable】 * * 【Prohibited】 If the scanner cannot recognize Aztec Code Barcode, please try to read " Enable " Set the code and try again. -
Page 121: Set The Reading Length
Startup settings Set reading length The scanner can be configured to read only those whose length is between (including) the minimum and maximum length Aztec Barcode. [Minimum length (default value: 1 )】 [Maximum length (default value: 3832 )】 The maximum length limit of any two-dimensional barcode shall not exceed 65535 Bytes, and the maximum length limit value must not be less than the minimum length limit value. If you want to read only a fixed length Aztec Code Bar code, you can set the minimum length limit value to be equal to the maximum length limit value. -
Page 122: Multi-Code Same Image Processing Setting
Startup settings Multi-code same image processing settings There are three modes for multi-code and image processing. • Read only single code: do not process multiple codes in the same image, that is, only process a single code Aztec code • Read only a fixed number of barcodes: only process multiple codes with a fixed number of barcodes in the same image •... -
Page 123: The Number Of Multi-Code Barcodes With The Same Image
Startup settings Number of barcodes in the same image 【 1 A 【 2 A 【 3 A 【 4 A 【 5 A 【 6 A 【 7 A 【 8 A Exit settings... -
Page 124: Character Encoding Method
Startup settings Character encoding 【default】 【 UTF-8 】 ECI Output 【Prohibited】 * * 【Enable】... -
Page 125: Data Matrix
Startup settings Data Matrix Restore factory default 【 Data Matrix Factory default setting] Enable/disable reading 【Enable】 * * 【Prohibited】 If the scanner cannot recognize Data Matrix Barcode, please try to read " Enable " Set the code and try again. Exit settings... -
Page 126: Set The Reading Length
Startup settings Set reading length The scanner can be configured to read only those whose length is between (including) the minimum and maximum length Data Matrix Barcode. [Minimum length (default value: 1 )】 [Maximum length (default value: 3116) 】 The maximum length limit of any two-dimensional barcode shall not exceed 65535 Bytes, and the maximum length limit cannot be less than the minimum length Degree limit value. -
Page 127: Code
Startup settings Data Matrix Double code Data Matrix Double code: two arranged up and down or left and right Data Matrix Barcode. The direction of the two codes should be the same, the difference should be as small as possible, and the distance should be as close as possible. -
Page 128: Rectangular Code
Startup settings Rectangular code Rectangular code, here specifically refers to rectangular Data Matrix Barcode. Data Matrix There are two formats for barcodes: • Square code with the same number of length and width modules: 10*10 , 12*12..144*144 . • Rectangular codes with inconsistent length and width modules: 6*16 , 6*14...14*22 . * * 【Enable】... -
Page 129: Character Encoding Method
Startup settings Character encoding 【default】 【 UTF-8 】 Exit settings... - Page 130 Startup settings ECI Output 【Prohibited】 * * 【Enable】...
-
Page 131: Chapter 7 Data Format Editing
Startup settings Chapter 7 Data Format Editing Introduction You can use the data format editing function to change the output data of the scanner. For example, you can use the data format editing function to insert in a specific position of the barcode data character. -
Page 132: Open/Close Data Format Editing
Startup settings Open/close data format editing Turn off or turn on the data format editing function through the following settings. • Close data format editing Turn off the data format editing function. • Open data format editing, require matching, keep the prefix and suffix Turn on the data format editing function. - Page 133 Startup settings * * 【Close data format editing】 [Open data format editing, matching is required, and prefixes and suffixes are reserved] [Open data format editing, request matching, discard the prefix and suffix] [Open data format editing, do not require matching, keep the prefix and suffix] [Open data format editing, do not require matching, discard the prefix and suffix] Exit settings...
-
Page 134: Add Data Format
Startup settings Add data format step 1 : Read "Startup Settings"; step 2 : Read "Add Data Format"; 【Add data format】 step 3 : Choose data format Read Data code " 0 "or" 1 "or" 2 "or" 3 ", they respectively represent the selected data format 0 ~ 3 . step 4 : Read sequentially Data code "... -
Page 135: Clear Data Format
Startup settings Add data format 0 , This data format only applies to data length 10 Byte Code 128 , Send the barcode data and add the character " A ", the setting steps are as follows: read " Startup settings " read "... -
Page 136: Select Data Format
Startup settings Choose data format After opening the data format editing function, you can choose which set of data formats to use, and select different data formats through the following four setting codes. Default: Number According to the format 0 . 【Data Format 0 】... -
Page 137: Single Use Data Format
Startup settings Single use data format The single-use data format means that it only affects a barcode read after setting, and the data format used afterwards will be restored to the original data format. Can pass the following The setting code selects the data format for single use. For example, the scanner has been set to select the data format 3 , But want to use the data format when reading a barcode 1 , In this case, you need to scan the "Single Use Data Format"... -
Page 138: Set The Reading Length
Startup settings Query data format • Query the current data format Get the currently configured data format 0 To data format 3 Configuration content • Query the factory default data format Get the data format of factory configuration 0 To data format 3 The configuration content. The configuration content format of all data formats found is as follows: Data Format 0:xxxx;... -
Page 139: Data Format Editing Command
Startup settings Data format editing commands Using the data format editor is like moving a virtual cursor in the input data string. The following commands can be used not only to move the cursor to different positions, but also to select and replace Exchange, insert data into final output, etc. - Page 140 Startup settings F3 Send all characters before a character Command format= F3ssxx ( ss : The hexadecimal value of a character; xx : The hexadecimal value of the character to be inserted) Output current cursor right to character ss All characters between the left side (excluding characters ss ), then output characters xx . Cursor to the right ss To the left. F3 Example: Send all characters before a character and add a character at the end Send the above barcode content "...
- Page 141 Startup settings B9 Send all characters before a string Command format= B9nnnns...s ( nnnn : String s...s length; s...s : String that can be matched) Output the right side of the current cursor to the string s...s All characters between the left side (excluding the string s...s ). Cursor to the right s...s To the left. B9 Example: Send all characters before a defined string Send the above barcode content "...
- Page 142 Startup settings E9 with F4 Example: Send all characters before the last few characters, then send two Tab Send the above barcode content at the end 9 All characters before the bit character, send two more tab . Command string: E909F40902 E9 : "Send all characters before the last few characters"...
- Page 143 Startup settings 20 : The hexadecimal value of the space 01 : The number of times a space was sent B4 : "Insert barcode length" command F4 : "Insert a character multiple times" command 20 : The hexadecimal value of the space 01 : The number of times a space was sent F1 : "Send all characters"...
-
Page 144: Move Command
Startup settings Move command F5 Move the cursor a few characters to the right Command format= F5nn ( nn : 00-99 , The number of characters the cursor moves to the right) Move cursor right nn Characters. F5 Example: Move the cursor to the right and send barcode data In the above barcode, move the cursor to the right 3 Characters, send all barcode data to the right of the cursor, and send a carriage return at the end. -
Page 145: Search Command
Startup settings Search command F8 Search characters to the right Command format= F8xx ( xx : The hexadecimal value of the character to be searched) Search for characters from the current cursor position to the right in the input information xx , The cursor moves to the left of the character. F8 Example: Send a character and subsequent data in a barcode message Search for the letter "in the above barcode information D ", send letters"... - Page 146 Startup settings B0 Example: Send a character string and subsequent data in barcode information Search in the above barcode information " FGH ",send" FGH "And the following data, and finally send a carriage return. Command string: B00003464748F10D B0 : "Search string forward" command 0003 : Length of string ( 3 Characters) 46 : "...
- Page 147 Startup settings E6 Example: Delete leading zeros in barcode information The above barcode information has a leading zero, and the barcode data after the leading zero is required to be sent. Search for the first non-zero character to the right, send the character and subsequent data, and send one at A carriage return.
-
Page 148: Other Orders
Startup settings Other commands FB Block output characters Command format= FBnnxxyy..zz ( nn : The number of the same character that prevents output; xxyy..zz : Prevent the hexadecimal value of the output character) Starting from the right side of the current cursor, block output of characters (up to 15 Different characters), the movement of the cursor is determined by other commands. FB Example: Delete characters such as spaces in the barcode information The above barcode information contains spaces, underscores and "*", it is required to delete this 3 Send the rest of the data after the character type. - Page 149 Startup settings When the barcode contains characters not needed by the host application, it can be used E4 The command replaces unnecessary characters with other characters. This example requires replacing zeros in the barcode with carriage returns. Command string: E402300DF10D E4 : "Replace character"...
- Page 150 Startup settings 02 : Number of replacements 02 : String " twenty three "length 3233 : String " twenty three The hexadecimal value of 03 : String " XYZ "Length (if set to 00 No string is added afterwards) 58595A : String " XYZ The hexadecimal value of F1 : "Send all characters"...
- Page 151 Startup settings EF : " Delay " command 0200 : The delay length is 5ms of 200 Times, namely 1s Output result: 12345{1s Delay} 67{1s Delay} 890ABCDEFGHIJ B5 Insert button for USB Keyboard communication mode Command format: B5nnssxx ( nn : The total number of keys inserted (excluding control keys); ss :Control key serial number, which is a hexadecimal number; xx : Indicates the key sequence number, which is a hexadecimal number) Refer to appendix for button number Keyboard key sequence number middle 104 Key and 105 Key keyboard layout, control key numbers are shown in the table below: Control key...
- Page 152 Startup settings B5 Example: American English 104 Keyboard layout mode, insert at the beginning of the barcode aBc Command string characters: B503001F01320030F100 B5 : "Insert button" command 03 :Number of keys inserted 00 : No control key 1F : " a ”Key sequence number 01 :left Shift Control key number 32 : "...
-
Page 153: Chapter 8 Prefix And Suffix Setting
Startup settings Chapter 8 Prefix and Suffix Setting Introduction After the scanner is successfully decoded, a string of data is obtained. This string of data can be numbers, English, symbols, etc., for QR codes, it can also be Chinese characters, and this string of data is a barcode Contained data information. -
Page 154: Comprehensive Settings
Startup settings Comprehensive settings All suffixes If set to " Prohibit " , The decoded information only contains the data information of the barcode without the prefix and suffix. If set to " Enable " , It will increase before and after decoding the information "CodeID Prefix " , "AIM Prefix " , " Custom prefix " , " Custom suffix " , " End suffix " . * * 【Prohibit all prefixes and suffixes】... -
Page 155: Custom Prefix
Startup settings Custom prefix The custom prefix adds a user-defined string before the decoded information. For example, it is allowed to add a custom prefix and set the prefix to a string "AB" , The reading data is "123" After the barcode, the scanner is "123" Add before the string "AB" String, received by the host "AB123" . * * 【Prohibited】... - Page 156 Startup settings AIM ID Prefix AIM Yes Automatic Identification Manufacturers (Automatic Identification Manufacturers Association) abbreviation, AIM ID The identification codes are defined for various standard bar codes. The specific definition is shown in the table below. The scanner can add this identification code before the barcode data after decoding, that is AIM Prefix. Prefix format: "]"+AIM Prefix + number "0" , Such as Code 128 of AIM ID Prefixed with "]C0"...
-
Page 157: Code Id Prefix
Startup settings Code ID Prefix apart from AIM The prefix can be used to identify different barcode types, users can also use Code ID Prefix to identify the barcode type. versus AIM The prefix is different, each barcode type corresponds to Code ID The prefix can be customized. -
Page 158: Modify Code Id
Startup settings modify Code ID modify Code ID And restore Code ID Please refer to the following example for the factory setting method. modify PDF417 of CodeID for "P" ( 16 The base value is 0x70 ): read " Startup settings " read "PDF417"... - Page 159 Startup settings Modify one-dimensional barcode Code ID 【 Code 128 】 【 GS1-128 (UCC/EAN-128) 】 【 EAN-8 】 EAN-13 【 UPC-E 】 【 UPC-A 】 Exit settings...
- Page 160 Startup settings 【 Code 39 】 【 AIM 128 】 【 ISBT 128 】 【 ISSN 】 【 ISBN 】 【 GS1 Composite 】...
- Page 161 Startup settings Modify the QR code Code ID 【 PDF417 】 【 QR 】 【 Aztec 】 【 Data Matrix 】 Exit settings...
-
Page 162: Custom Suffix
Startup settings Custom suffix The custom suffix is to add a user-defined string after decoding the information. For example, allow adding a custom suffix and set the suffix as a string "AB" , The reading data is "123" After the barcode, the scanner is "123" Add after the string "AB" String, Received by the host "123AB"... -
Page 163: Modify Custom Suffix
Startup settings Modify custom suffix Read first " Modify custom suffix " , And then read each byte in the suffix string to be set in sequence 16 Base value, read last " Save Settings " Complete the setting of the custom suffix. Note: The total length of the custom suffix string cannot exceed 10 Characters. -
Page 164: Data Packaging
Startup settings Data packing For some applications, there are high requirements for data integrity, reliability, etc., and the data can be packaged and output, and the content format can be checked and verified. Ensure complete and reliable data transmission. For data transmission using the packaged format, the software on the host computer is required to parse the packaged format. * * 【Prohibition of data packing】... -
Page 165: Packaging Format
Startup settings Packaging format Format 1: [ STX + ATTR + LEN] + [AL_TYPE + DATA] + [LRC] • STX: 0x02 • ATTR: 0x00 • LEN: The length of the DATA data, expressed in two bytes, with the high byte first, and the value range is 0~65535. •... -
Page 166: Terminator Suffix
Startup settings End suffix The terminator suffix is used to mark the end of a complete data message. The terminator suffix exists independently and will not participate in any other forms of data formatting; terminator suffix one It must be the final content when a piece of data is sent, and there will be no additional data after that. 【Prohibited】... -
Page 167: Chapter 9 Batch Processing Setting
Startup settings Chapter 9 Batch Processing Settings Introduction When multiple settings are required to read the device, it may be cumbersome to set one by one. At this time, we can save all the information that needs to be set as a barcode information, and the device will read After taking the barcode, multiple settings can be completed. -
Page 168: Generate Batch Instruction
Startup settings Generate batch instructions A batch command can contain many individual commands. Each individual command is separated by a semicolon. Command structure: command (+setting information) A total of 3 Set command form 1 , Setting syntax 1 :command The most commands in this form are the setting commands that can be completed in one setting without using data codes. E.g: Set the baud rate 38400bps The command is @ 232BAD6 The command to set automatic code reading is @ SCNMOD2... -
Page 169: Make Batch Bar Codes
Startup settings Make batch barcode Batch barcodes can use any barcode supported and enabled by the scanner. Two-dimensional barcodes are recommended. For example, you need to set and save: turn on the light, read the code in the induction mode, modify the timeout time of one reading to 2 second. The instructions are: "@ ". -
Page 170: Use Batch Barcode
Startup settings Use batch barcode Follow the steps below to read the setup code and batch barcode in sequence: 【Startup Settings】 [Start batch setting] 【Batch Setting Code】 【Exit setting】... -
Page 171: Appendix
appendix Data code Be sure to read after reading the data code " save " To save the data code settings. 【 0 】 【 1 】 【 2 】 【 3 】 【 4 】 【 5 】... - Page 172 【 6 】 【 7 】 【 8 】 【 9 】...
- Page 173 【 A 】 【 B 】 【 C 】 【 D 】 【 E 】 【 F 】...
-
Page 174: Save Or Cancel
Save or cancel After reading the data code, you must read the save code to save the read data. If there is an error when reading the data code, in addition to resetting, you can also cancel the reading Bad data. For example, read a set code and read the data in sequence "1"... -
Page 175: Default Setting Table
Default setting table parameter name default setting Remarks System settings Setting code function shut down Send setting code information Do not send flashlight Turn on Successfully decoded LED light Turn on Short (20 ms) Successful decoding LED light duration Power-on prompt Turn on Successfully decoded sound Turn on... - Page 176 Code Page Code Page 1252 (Latin, Western Europe) USB keyboard Unicode output shut down USB keyboard Leading "0" shut down USB keyboard Control character output shut down USB keyboard Key delay No delay USB keyboard Case lock setting Close (non-Japanese keyboard) USB keyboard Case conversion No conversion...
- Page 177 Convert to UPC-A Does not convert to UPC-A UPC-A Enable/disable reading Prohibit Send Send check character 2-digit extension code Do not read 2-digit extension code 5-digit extension code Cannot read 5-digit extension code Transmit leading characters Transmission system characters Coupon UPC-A/EAN-13 with Coupon extension code Coupon shut down GS1 DataBar output...
- Page 178 Minimum length ISBT 128 Enable/disable reading Prohibit PDF417 Enable/disable reading Prohibit 2710 The maximum length Minimum length PDF417 double code Only read a single PDF417 code PDF417 invert Only recognize normal barcodes Character encoding default ECI output Enable QR Code Enable/disable reading Enable 7089...
- Page 179 Turn on/off data format Prohibit Choose data format Data format 0 Data format mismatch error sound Turn on Suffix setting All suffixes Prohibit Code ID+custom prefix+AIM ID Prefix order Custom prefix Prohibit AIM ID prefix Prohibit Code ID prefix Prohibit Custom suffix Prohibit Data packing...
- Page 180 AIM ID List AIM ID Barcode type Possible AIM ID qualification parameters (m) Code128 GS1-128 (UCC/EAN-128) EAN-8 EAN-8 with Addon EAN-13 EAN-13 with Addon UPC-E UPC-E with Addon UPC-A UPC-A with Addon Code 39 0 , 1 , 3 , 4 , 5 , 7 AIM 128 ISBT 128 ISSN...
-
Page 181: Code Id List
Code ID List Code ID Barcode type Code128 GS1-128 (UCC/EAN-128) EAN-8 EAN-13 UPC-E UPC-A Code 39 AIM 128 ISBT 128 ISSN ISBN GS1 Composite PDF417 QR Code Aztec Data Matrix... -
Page 182: Barcode Serial Number Comparison Table
Barcode serial number comparison table Barcode type Serial number Code 128 GS1-128 (UCC/EAN-128) EAN-8 EAN-13 UPC-E UPC-A Code 39 AIM 128 ISBT 128 ISSN ISBN GS1 Composite PDF417 QR Code Aztec Data Matrix... -
Page 183: Table
ASCII Stopwatch Decimal Hexadecimal character ( Null char. ) ( Start of Header ) ( Start of Text ) ( End of Text ) ( End of Transmission) ( Enquiry ) ( Acknowledgment ) ( Bell ) ( Backspace ) ( Horizontal Tab ) ( Line Feed ) ( Vertical Tab ) - Page 184 ( Exclamation Mark ) twenty one " ( Double Quote ) twenty two ( Number Sign ) twenty three ( Dollar Sign ) twenty four ( Percent ) & ( Ampersand ) ( Single Quote ) ( Right / Closing Parenthesis ) ( Right / Closing Parenthesis ) ( Asterisk ) ( Plus ) ( Comma )
- Page 185 ( Left / Opening Bracket ) ( Back Slash ) ( Right / Closing Bracket ) ( Caret / Circumflex ) ^ ̂ ( Underscore ) ( Grave Accent )
- Page 186 ( Left/ Opening Brace ) ( Vertical Bar ) ( Right/Closing Brace ) ( Tilde ) DEL ( Delete )
-
Page 187: Keyboard Key Sequence Number
Keyboard key sequence number 104 American keyboard 105 Key European keyboard...
Need help?
Do you have a question about the NLS-EM20-EX and is the answer not in the manual?
Questions and answers