Advertisement
Quick Links
INSTALLATION INSTRUCTIONS
MEMBER
AND OWNERS MANUAL
Part # ISCHX80, Rev 1, 10/2016
w w w . s e a s t a r s o l u t i o n s . c o m
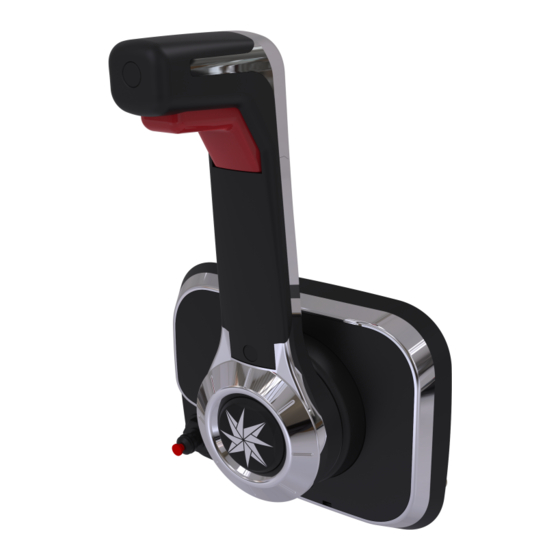
CHX8100
xtreme
ch2200
CHX8000
CHX8300
ch2300
mt3
MECHANICAL ENGINE CONTROLS
pro-trim
CHX8000, CHX8100, CHX8300, CHX8500,
CHX8600 and CHX8800 SERIES
single s
twin s
®
MANUFACTURED BY
MARINE ACQUISITION INCORPORATED
DBA SEASTAR SOLUTIONS
U.S.A.
Advertisement

Related Manuals for Seastar Solutions ABYC CHX8000 Series


Summary of Contents for Seastar Solutions ABYC CHX8000 Series
- Page 1 . s e a s t a r s o l u t i o n s . c o m CHX8100 xtreme ch2200 CHX8000 CHX8300 ch2300 MECHANICAL ENGINE CONTROLS pro-trim CHX8000, CHX8100, CHX8300, CHX8500, CHX8600 and CHX8800 SERIES single s twin s ® MANUFACTURED BY MARINE ACQUISITION INCORPORATED DBA SEASTAR SOLUTIONS U.S.A.
- Page 2 Installer: these instructions contain important safety information and must be forwarded to the boat owner. This SeaStar Solutions Control provides both shift and throttle opera- tion for inboards, outboards, and inboard/outboards. In addition to this control, the following components are required for a complete control system: •...
- Page 3 (5) and the lanyard itself must be secured to the boat operator. If the clip is pulled free of the control, the engine will shut down. web: www.seastarsolutions.com SeaStar Solutions 640 North Lewis Road, Limerick, PA 19468 USA Page 3 of 20...
-
Page 4: Section 1: Location Of Control
Add four (4) feet to the measurement to allow for a loop which pro- vides unrestricted engine movement. Round UP to the next whole foot and order the required cable part number. (Last two digits of the SeaStar Solutions cable number equal the length of the cable in feet.) INBOARDS AND STERNDRIVES: Measure from the control connection—along an unobstructed cable... - Page 5 C. CABLE ROUTING. Cables shall not be installed in areas of excess heat such as on, or close to, exhaust manifolds where temperatures may exceed 212°F (100°C). web: www.seastarsolutions.com SeaStar Solutions 640 North Lewis Road, Limerick, PA 19468 USA Page 5 of 20...
-
Page 6: Section 3: Shift & Throttle Cable Connection-Control End
NEST KIT LEVER NEST KIT LEVER O/B = Outboard. 3300 Cables MerCruiser #7/8 #5/6 Mercury I/O & OB BRP/OMC I/O #7/8 #5/6 Evinrude/Johnson Honda/Nissan/Suzuki Tohatsu/US Marine Yamaha Inboards Page 6 of 20 SeaStar Solutions Installation Instructions and Owner’s Manual Telephone: 610-495-7011... - Page 7 (note blacknest color) • Mercury, MerCruiser (note black nest color) • Mercury Gen II Cables (note neutral nest color) Each cable type connects differently. web: www.seastarsolutions.com SeaStar Solutions 640 North Lewis Road, Limerick, PA 19468 USA Page 7 of 20...
-
Page 8: Section 4: Shift & Throttle Cable Connection-Engine End
TRIM AND TILT. Refer to the following wiring diagrams for the correct “Trim” and “Tilt” switch connections and wire accordingly. Page 8 of 20 SeaStar Solutions Installation Instructions and Owner’s Manual Telephone: 610-495-7011... - Page 9 INBOARD = PURPLE WIRES OUTBOARD = BLACK WIRES web: www.seastarsolutions.com SeaStar Solutions 640 North Lewis Road, Limerick, PA 19468 USA Page 9 of 20...
- Page 10 1/4 inch female disconnect terminals. A crimping tool designed for insulated terminals MUST be used. STEP 4. Attach the female disconnects to each of the male terminals on the Interrupt Switch. Page 10 of 20 SeaStar Solutions Installation Instructions and Owner’s Manual Telephone: 610-495-7011...
- Page 11 STEP 5. Strip one end of each wire and crimp on an insulated 1/4 inch female disconnect terminal. A crimping tool designed for insulated terminals MUST be used. web: www.seastarsolutions.com SeaStar Solutions 640 North Lewis Road, Limerick, PA 19468 USA Page 11 of 20...
- Page 12 Diagram B. Before 1969 Outboard Wiring. Solid Blue Suzuki Solid Brown Blue with Black Stripe or US Marine Solid Blue Yamaha Black with Yellow Stripe Reference Table 1. Page 12 of 20 SeaStar Solutions Installation Instructions and Owner’s Manual Telephone: 610-495-7011...
- Page 13 DO NOT APPLY EXCESSIVE FORCE as this may result in breakage of the snap features. web: www.seastarsolutions.com SeaStar Solutions 640 North Lewis Road, Limerick, PA 19468 USA Page 13 of 20...
- Page 14 General Control Dimensions CHX8000: SIDE-MOUNT CONTROL GENERAL DIMENSIONS. CHX8100 TOP-MOUNT CONTROL GENERAL DIMENSIONS. Page 14 of 20 SeaStar Solutions Installation Instructions and Owner’s Manual Telephone: 610-495-7011...
- Page 15 (just beyond the shift position). Remove the cover and adjust the fric- tion adjust screw: turning the screw clockwise increases the friction. Do not over-tighten. web: www.seastarsolutions.com SeaStar Solutions 640 North Lewis Road, Limerick, PA 19468 USA Page 15 of 20...
- Page 16 Service Parts Kits All service parts can be purchased from your local SeaStar Solutions Distributor. KIT NUMBER KIT NAME AND DESCRIPTION MODEL USED ON 212151-003 Cable Nest and Connection Kit with Mercury Gen II Nest 051801-023 Neutral Safety Switch CHX8000 REPLACEMENT PARTS...
- Page 17 Instructions and Owner’s Manual with the delivery of boat. Boat owner keep these instructions with your boat for future reference. Boat owner consult with your boat builder, boat dealer, or SeaStar Solutions if you have any questions regarding these instructions.
- Page 18 INTER R UPT SWITCH NOTICE This template may not be to scale. Its presence is for information purposes. A separate work template—MT-CHX81 has been included with this control. Page 18 of 20 SeaStar Solutions Installation Instructions and Owner’s Manual Telephone: 610-495-7011...
- Page 19 Top Mount Single Lever Control NOTICE This template may not be to scale. Its presence is for information purposes. A separate work template—MT-CHX81—has been included with this control. web: www.seastarsolutions.com SeaStar Solutions 640 North Lewis Road, Limerick, PA 19468 USA Page 19 of 20...
- Page 20 © 2016 MARINE ACQUISITION (US) INC. PART # ISCHX80 10-2016 Rev. 1...
Need help?
Do you have a question about the ABYC CHX8000 Series and is the answer not in the manual?
Questions and answers