
Related Manuals for Seastar Solutions SeaStation


Summary of Contents for Seastar Solutions SeaStation
- Page 1 INSTALLATION INSTRUCTIONS AND USER’S MANUAL w w w . s e a s t a r s o l u t i o n s . c o m S I X T Y S I X ISO 9001 GPS Anchor Positioning System...
- Page 2 Solutions and shall not be disclosed, copied, reproduced or used in whole or in part for any purpose other than as specifically authorized in writing by Marine Canada Acquisition (DBA SEASTAR SOLUTIONS). All information, illustrations and specifications in this manual are based on the latest information available at the time of publishing.
- Page 3 Thank you for choosing Optimus SeaStation by SeaStar Solutions. SeaStation is an automatic vessel positioning system that will ease and improve your boating experience. About this Book This manual serves as both an installation and user’s manual for Optimus SeaStation. It contains the information you need to install and safely operate SeaStation.
-
Page 4: Abbreviations
A protocol for digital communication on a CAN Bus ® Pump Control Module Revolutions Per Minute SBAS Satellite-Based Augmentation System STBD Starboard (right) Note: Some abbreviations not listed here may be found in their respective sections. © 2016 SeaStar Solutions SeaStation Automatic Vessel Positioning System, Rev. C... -
Page 5: Table Of Contents
3.0 User ................3-1 3.1 Overview ..............3-1 3.2 SeaStation Operation ..........3-1 3.2.1 SeaStation Modes ..........3-1 3.2.2 How to Engage and Disengage SeaStation ..3-2 3.2.3 Standby Mode ..........3-3 3.2.4 Heading Bump..........3-4 3.3 Station Transfer ............3-4 3.4 SeaStation Tips ............ - Page 6 This page left intentionally blank. © 2016 SeaStar Solutions SeaStation Automatic Vessel Positioning System, Rev. C...
-
Page 7: Safety Information
THE OPTIMUS SEASTATION SYSTEM MUST ONLY BE INSTALLED BY AN AUTHORIZED DEALER OR BOAT BUILDER. Safe operation of the SeaStation system depends upon proper installation and maintenance of the system, and the common sense, safe judgment, knowledge, and expertise of the operator. Every installer and operator of SeaStation should know the following requirements before installing or operating. - Page 8 Refer to your Optimus 360 manual for maintenance instructions. Keep our waters clean for all current and future users. Dispose of all fluids in accordance with your local regulations. © 2016 SeaStar Solutions SeaStation Automatic Vessel Positioning System, Rev. C...
-
Page 9: Safety Labels
If you have any questions or if you require additional decals, please SUPPORT FOR MORE COPIES contact SeaStar Solutions Technical Support by: FREE OF CHARGE. Email: seastar@seastarsolutions.com Phone: 604-248-3858 Web: www.seastarsolutions.com © 2016 SeaStar Solutions SeaStation Automatic Vessel Positioning System, Rev. C... - Page 10 This page left intentionally blank. © 2016 SeaStar Solutions SeaStation Automatic Vessel Positioning System, Rev. C...
-
Page 11: Installation
Optimus 360 system by adding a GPS and heading sensor. The system uses position and heading data to automatically position the vessel through shift, throttle, and rudder controls. Once your Optimus 360 system is installed, adding SeaStation is simple: 1. Place warning decal(s) 2. Install the SeaStation Sensor 3. -
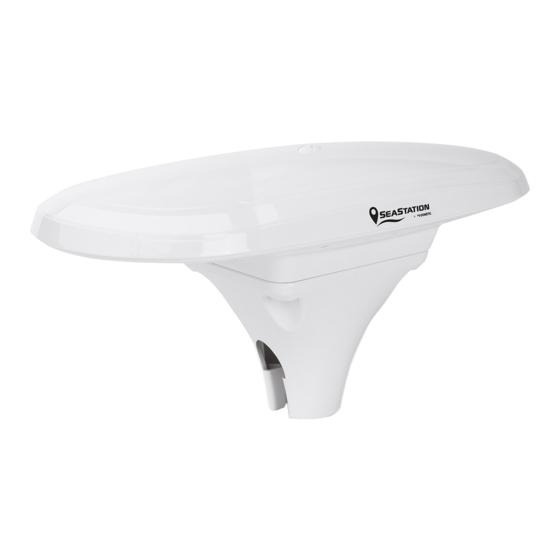
Page 12: Installing The Gps
Before installing the sensor use the following diagram to ensure there are no nearby devices that may cause VHF interference. © 2016 SeaStar Solutions SeaStation Automatic Vessel Positioning System, Rev. C... -
Page 13: Mounting Alignment
Figure 2-1. Sensor mounting distance from nearby VHF radios. 2.4.2 Mounting Alignment The SeaStation sensor should be mounted parallel to, and along the centerline of, the axis of the boat. The bottom of the sensor has an arrow - the arrow must point forward. -
Page 14: Mounting Options
SeaStation Sensor Dimensions Figure 2-3 and figure 2-4 illustrates the physical dimensions of the sensor. 10 3/16” 2 7/8” Ø1/4” MOUNTING HOLE 2 PLACES 5” 1 3/4” Figure 2-3. Sensor dimensions © 2016 SeaStar Solutions SeaStation Automatic Vessel Positioning System, Rev. C... -
Page 15: Cable Considerations
10 3/16” 5” 5” Figure 2-4 : SeaStation sensor dimensions with adapter 2.5.2 Cable Considerations Before mounting the sensor, consider the following regarding cable routing: • Avoid running the cable in areas of excessive heat WARNING • Keep cable away from corrosive chemicals IMPROPERLY INSTALLED •... -
Page 16: Flush Mount
2.5.3 Flush Mount The bottom of the SeaStation sensor contains two holes for flush mounting the unit to a flat surface (figure 2-5). The flat surface may be something you fabricate per your installation, an off-the-shelf item (such as a radar mounting plate), or an existing surface on your vessel. -
Page 17: Pole Mount
6. Use 5 mm Allen key to fasten two M6 screws to secure sensor OVER-TIGHTENING MAY DAMAGE onto adapter. Use 15 in-lb torque. THE SYSTEM. THIS IS NOT 7. Insert each O-ring onto a plastic cap. COVERED UNDER WARRANTY. © 2016 SeaStar Solutions SeaStation Automatic Vessel Positioning System, Rev. C... - Page 18 8. Install plastic cap with O-ring onto sensor unit (rectangular notch COVERED UNDER WARRANTY. faced towards the outside). 9. Align and set the direction of sensor unit, while using the jam nut to secure the unit (hand-tighten). © 2016 SeaStar Solutions SeaStation Automatic Vessel Positioning System, Rev. C...
-
Page 19: Electrical Connection
In this case the 30 foot cable must be connected directly to the hub and the tee, and the terminator and 1 foot cable are connected at the SeaStation sensor end of the 30 foot cable. - Page 20 3. Make sure the new license code is correct and press OK to confirm. Figure 2-8. 4. Check that the Sensor Status has changed to Licensed. If it has not, retry entering the license code. Figure 2-9. 2-10 © 2016 SeaStar Solutions SeaStation Automatic Vessel Positioning System, Rev. C...
-
Page 21: Commissioning
Tuning The key to good SeaStation performance is a well tuned joystick. SeaStation usually operates at low RPMs so emphasis needs to be put on tuning the joystick at its “Off-Idle” position. There are three steps: 1. Balance rotation power Off-Idle REV/FWD Ratio NOTICE 2. - Page 22 Note: the boat will rotate counterclockwise as it gains speed. This is normal - our objective is to remove rotation during initial movement. b. Press Save. c. Repeat until the boats initial movement is directly sideways. 2-12 © 2016 SeaStar Solutions SeaStation Automatic Vessel Positioning System, Rev. C...
- Page 23 Press Save. c. Repeat until the boat rotates on the spot with no fore/aft movement. The final value should lie between 100% and the Normal Rev/FWD Ratio value. 2-13 © 2016 SeaStar Solutions SeaStation Automatic Vessel Positioning System, Rev. C...
-
Page 24: Settings
2.8.2 Settings There are several SeaStation parameters and they are not intended to be changed in a typical installation – they are available for special cases. All parameters are accessible through the CANtrak at Dealer Menu > Devices > Main Joystick > Configuration > SeaStation > General Settings. -
Page 25: Troubleshooting Guide
SOLUTIONS OFFERS THE FOLLOWING AS A GUIDE ONLY AND IS NOT RESPONSIBLE FOR ANY CONSEQUENCES RESULTING FROM INCORRECT DISMANTLING OR REPAIRS. Optimus SeaStation will provide years of safe reliable performance with a minimum of service if properly commissioned. Most faults occur when the installation instructions are not followed and usually show up immediately. - Page 26 Conditions are too strong. Some conditions may be too strong detected for position holding The error threshold to throw this fault can be increased. See section 2.8.2. 2-16 © 2016 SeaStar Solutions SeaStation Automatic Vessel Positioning System, Rev. C...
-
Page 27: User
3.2 SeaStation Operation 3.2.1 SeaStation Modes SeaStation has two modes that can be combined for a third mode. The joystick has a button and LED for the two primary modes. POSITION MODE BUTTON & LED HEADING MODE BUTTON &... -
Page 28: How To Engage And Disengage Seastation
4. The LED(s) of selected mode(s) will be flashing. 5. Press Engage on display to confirm the warning and engage the selected mode(s). 6. The LED(s) of the selected mode(s) will be solid. © 2016 SeaStar Solutions SeaStation Automatic Vessel Positioning System, Rev. C... -
Page 29: Standby Mode
Figure 3-2. SeaStation Engagement Screen. Once SeaStation is engaged, POSITION MODE and HEADING MODE can be toggled on and off at any time without deactivating SeaStation. For example, if you were to engage POSITION MODE, you could later add on HEADING MODE. Target position or heading is captured either when Engage is pressed on the display, or when the respective mode is toggled on while SeaStation is already active. -
Page 30: Heading Bump
Figure 3-3. Heading Bump Screen. 3.3 Station Transfer Transferring to another station functions as it does in normal joystick use. SeaStation is disengaged when control is transferred and is not automatically resumed when control returns. WARNING NEVER LEAVE THE ACTIVE HELM WHILE SEASTATION IS ENGAGED. -
Page 31: Seastation Tips
3.4 SeaStation Tips WARNING The following are tips on how to get best results from SeaStation: SEASTATION POSITIONS THE • Grab the joystick at any time for immediate control (This will VESSEL IN A GENERAL AREA. disengage SeaStation). ONLY ENGAGE SEASTATION IF •... -
Page 32: Gps-Compass Faults
In many cases, drift faults can be prevented by using POSITION MODE on its own. It is more difficult for SeaStation to hold position and heading at the same time. If heading is not truly required, disengage this mode. -
Page 33: Maintenance And Replacement Parts
See Book 65 for details on replacement parts within your steering and joystick systems. EPSK1600 – GPS-Compass Kit A new SeaStation license key will be provided with the kit — the system must be updated with this new license. See section 2.7. © 2016 SeaStar Solutions... - Page 34 This page left intentionally blank. © 2016 SeaStar Solutions SeaStation Automatic Vessel Positioning System, Rev. C...
-
Page 35: Warranty
In such a case SeaStar Solutions products found to be defective and covered by this warranty, will be replaced at SeaStar Solutions’ option, and returned to the customer. - Page 36 IMPORTANT: License key to activate SeaStation. DO NOT LOSE. SEASTAR SOLUTIONS 3831 NO. 6 ROAD RICHMOND, B.C. CANADA V6V 1P6 FAX 604-270-7172 www.seastarsolutions.com © 2016 MARINE CANADA ACQUISITION INC. DBA SEASTAR SOLUTIONS PRINTED IN CANADA 02/18 ISO 10592 Please scan FORM NO.
Need help?
Do you have a question about the SeaStation and is the answer not in the manual?
Questions and answers