
Related Manuals for KaVo Scan eXam One


Summary of Contents for KaVo Scan eXam One
- Page 1 Scan eXam™ One Digital Intraoral Imaging Plate System User Manual 209643 rev. 10 | 0.805.5080 ENGLISH Dental Excellence...
- Page 3 Copyright Code: 209643 rev. 10 Copyright© 2021-11 by Instrumentarium Dental, PaloDEx Group Oy. All rights reserved. Scan eXam™, CLINIVIEW™ and IDOT™ are either registered trademarks or trademarks of PaloDEx Group Oy in the United States and/or other countries. All other trademarks are property of their respective owners.
-
Page 5: Table Of Contents
Table of Contents Introduction..................1 1.1 Unit with accessories ..............1 1.2 System setup ................2 1.3 Controls and indicators ..............3 Basic use..................7 2.1 Preparing the imaging plates ............9 2.2 Positioning and exposure ............10 2.3 Processing the imaging plates............. 11 Advanced use................ - Page 6 Installation of the imaging plate system........41 6.1 Positioning the unit ..............41 6.2 Connecting the unit to a network ..........42 6.3 Install the Application software ........... 43 6.4 Accessing the unit from CLINIVIEW ..........44 6.4.1 Direct connection method (uses the unit s/n) ....... 44 6.4.2 IP method (using the unit static address) ......
-
Page 9: Introduction
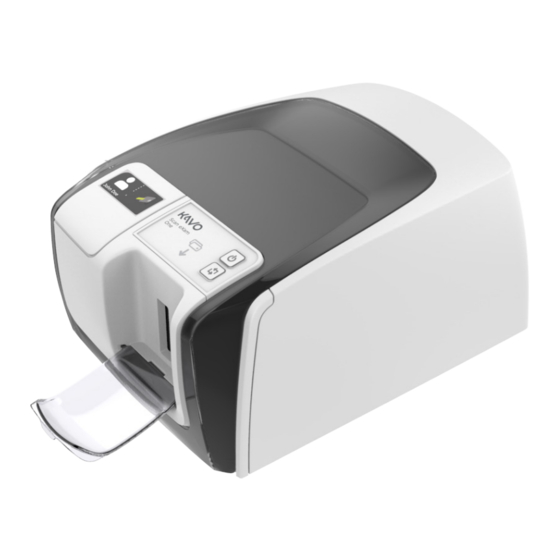
1 Introduction Introduction KaVo Scan eXam™ One system is intended to be used dentist other qualified dental professionals to process x-ray images exposed to the imaging plates from the intraoral complex of the skull. 1.1 Unit with accessories 1. ON/OFF key 2. -
Page 10: System Setup
5. Optional workstation (WS) computers (not in- cluded) For more options and details of installing and setting up the Scan eXam™ One system see chapters 6 Installation of the imaging plate system and 9 Technical specifications. KaVo Scan eXam One... -
Page 11: Controls And Indicators
(skip) the 2nd plate in the Occlusal 4C mode. • to access startup screen-information (IP, se- rial number) when the scanner is not re- served by any user. KaVo Scan eXam One... - Page 12 The unit is not reserved by any workstation in the system. Unit is activated The unit is activated for image processing. The name of the current patient is shown. The green plate feeding indicator is showing readiness for plate insert. KaVo Scan eXam One...
- Page 13 Remove the imaging plate from the plate carrier. Rotate the plate Rotate the imaging plate. Light blue side to the left. Remove cover Remove the hygienic cover gently leaving the imaging plate in the plate carrier. KaVo Scan eXam One...
- Page 14 Missing ethernet connection. Check the connec- tors, cables and the network. Error Error ID and a short description is displayed. Contact service. Press START Press the START button to wake the unit from a standby mode. KaVo Scan eXam One...
-
Page 15: Basic Use
Activate the Scan eXam™ One from the im- aging application. Refer to the application software manual for more information. Position and take an exposure. See chapter 2.2 for more information. Process the imaging plate. See chapter 2.3 for more information. KaVo Scan eXam One... - Page 16 24 hours. • Imaging plates have stored in dark (not ex- posed to ambient light) susceptible for back- ground radiation for more than 24 hours. This will remove any potential fogging due to collected natural background radiation. KaVo Scan eXam One...
-
Page 17: Preparing The Imaging Plates
Active side of the imaging plate has a light blue color. NOTICE! Keep the imaging plates packed max. 24 hours before using. Packaged plates accumulate radiation from the background. Plates can be erased by reading the plate. KaVo Scan eXam One... -
Page 18: Positioning And Exposure
Correct exposure settings depend on the X-ray unit type in use. For an AC-unit or for a low tube current (i.e. portable X-ray) apply higher exposure times. Exposure factors close to F-speed film are often appropriate. KaVo Scan eXam One... -
Page 19: Processing The Imaging Plates
NOTICE! Do not partially slide the imaging plate from the cover. You can place the plate with cover and leave it to the plate carrier. Unit will not start the processing before removing the cover. 2. Remove the cover. KaVo Scan eXam One... - Page 20 2 Basic use image appears imaging application screen. NOTICE! Process within one hour after exposure. 3. Processed imaging plate is ready to be packed and exposed again. KaVo Scan eXam One...
-
Page 21: Advanced Use
The Scan eXam™ One setup options allow you to configure the Scan eXam™ One to the user’s clinical preferences. From the imaging application software you are using select unit Setup/Scanner page (for more instruction on how to access setup page review application software manual). KaVo Scan eXam One... -
Page 22: Scanner
Super gives a pixel size of 30 μm. This results in images with better resolution, but may require longer exposure time compensate. High (recommended default) gives a pixel size of 60 μm. This results in images with less noise especially if short exposure times are used. KaVo Scan eXam One... -
Page 23: Image Processing
2. Workstation: If the image is not automatically transferred to the workstation, select the Setup > Scanner page from the imaging application software your are using. KaVo Scan eXam One... -
Page 24: Scanner Unit Serial Number
3.1.1.5 Scanner Unit Serial number Adds the unit serial number to all new images. 3.1.2 Settings See chapter 6 Installation of the imaging plate system for more information on connecting the unit to a workstation/LAN. KaVo Scan eXam One... -
Page 25: Workflow
• After Cover removal: after the imaging plate and protective cover have been inserted into the plate carrier, processing starts automat- ically when the protective cover is removed. KaVo Scan eXam One... - Page 26 NOTICE! Processing starts even if the plate is: • Wrong way round • Not detected • Not inserted at all NOTICE! Unit turns off in manual mode if user is pressing ON/ OFF key regardless of imaging plate sensing in the plate carrier. KaVo Scan eXam One...
-
Page 27: Plate Eject Mode
This option extends service life of the imaging plates and allows greater hygiene standards to be ob- served. KaVo Scan eXam One... -
Page 28: Power Options
Beep when entering standby mode: Audible signal is heard before the unit enters the standby mode. Shutdown after (minutes): Allows you to select the period of time the unit remains in standby mode before automatically switching itself off. KaVo Scan eXam One... -
Page 29: Occlusal 4C Projection Imaging (Not Included In Delivery)
Occlusal 4C hygiene bag. 4. Seal the bag. Place the sealed Occlusal 4C hy- giene bag into the patient’s mouth and take an exposure. 5. Remove the sealed Occlusal 4C hygiene bag from the patient’s mouth. Open it. KaVo Scan eXam One... -
Page 30: Scan Exam™ One Settings With Dtx Studio™ Core
NOTICE! For most accurate and up to date information, refer to DTX Studio™ Instructions for Use. 1. Sign into DTX Studio™ Core with the same user credentials as you use to login to DTX Studio™. 2. Select Manage devices menu. KaVo Scan eXam One... - Page 31 3. Click on the device image to open Device de- tails. Status: Shows the status of the device (default: Available) Device model: Shows the model of the device (Scan eXam™ One). IP address: Shows the IP address of the de- vice. KaVo Scan eXam One...
-
Page 32: Device Settings
• Device name: Device identification shown in DTX Studio. • Image processing computer: Normally, the workstation where DTX Core is installed. • Device color: Device identification shown in DTX Studio. • Autorelease timeout: 40s default KaVo Scan eXam One... -
Page 33: Power Settings
Enable or disable if the device serial number is added to all images. • Add default exposure values to metada- ta: Enable or disable if the device’s default exposure values (kV, mA, s) are saved to KaVo Scan eXam One... -
Page 34: Workflow Settings
Processing will start automatically when the device detects an inserted imaging plate in the plate carrier. • Automatic after cover removal: Process- ing starts automatically after the protective cover has been removed from the inserted imaging plate. KaVo Scan eXam One... - Page 35 Size 3/occlusal: • Size 3: Size 3 imaging plates are processed as individual images. • Occlusal 4C: Two sequential size 3 imaging plates are stitched together to create a sin- gle occlusal image. KaVo Scan eXam One...
- Page 36 3 Advanced use KaVo Scan eXam One...
-
Page 37: Accessories
THE MANUFACTURER to ensure the optimal clinical results, safe use of the system and long service life for the imaging plates. 4.1 Hygiene covers NOTICE! Never use hygiene accessories more than once. Risk of infection. Protective covers Hygiene bags KaVo Scan eXam One... -
Page 38: Imaging Plates
1, 2, 3 and Occlusal 4C, all with film-like usability. IDOT™ imaging plates have individual identification marking that appear on the images. Standard (STD) imaging plates (optional) have no identification mark on the sensitive side of the plate. KaVo Scan eXam One... -
Page 39: Imaging Plate Handling
You can bend. Do not fold or bend exces- sively. Touch the edges Do not touch only. the sensitive surface. Do not scratch. Do not stab. Avoid moist and Do not sink. water. Allowed Avoid dust. temperature. KaVo Scan eXam One... -
Page 40: Imaging Plate Cleaning
4.2.2 Imaging plate cleaning Use ONLY > 70% Ethanol Do not apply Ethanol directly on the plate. Apply Ethanol on lint free soft fabric. Wipe the plate gently. Wipe dry or let dry for 1 minute. KaVo Scan eXam One... -
Page 41: Imaging Plate Storage Box
(which may decrease image quality) • Ultraviolet radiation (which is harmful for the imaging plates) Base part of the storage box is autoclavable at 121°C (250 F) or 134°C (272 F). The top cover cannot be autoclaved. KaVo Scan eXam One... -
Page 42: Holders
Occlusal 4C kit and on chapter 3 Advanced use. 4.6 Microfiber cloth Imaging plate microfiber cloth is used for dry cleaning of the imaging plates (comparable to eyeglasses cleaning). KaVo Scan eXam One... -
Page 43: Introduction To Imaging Plate Technique
Even when packed properly, the image starts to fade out slightly within time. NOTICE! If imaging plates show any signs of deterioration affecting image quality, do not use them. KaVo Scan eXam One... -
Page 44: Hygiene Accessories
2. Magnet on the plate carrier grabs the imaging plate. 3. Processing starts automatically after you re- move the protective cover. The hygiene bag should be disinfected after an exposure and must be disposed of after a single use. KaVo Scan eXam One... -
Page 45: Processing
The imaging plate is dropped out of the unit. X-ray exposures and processing are not aging the imaging plate, so it is re-usable hundreds of times. In practice, mechanical wearing limits the service life of the plate. KaVo Scan eXam One... -
Page 46: Background Radiation
Imaging plates may gather radiation also during transportation from the manufacturer. Therefore it is recommended to perform initial erasing for the new plates. This means that all imaging plates should be processed once prior to use. KaVo Scan eXam One... -
Page 47: Light
“fogging”. NOTICE! Ambient light is harmful for the image information on the plate between the exposure and processing. NOTICE! UV light is harmful for the imaging plates. KaVo Scan eXam One... - Page 48 5 Introduction to imaging plate technique KaVo Scan eXam One...
-
Page 49: Installation Of The Imaging Plate System
Typical location for a scanner unit in a shared use by multiple operators is somewhere in a common space for all users having an easy access to. KaVo Scan eXam One... -
Page 50: Connecting The Unit To A Network
The unit can obtain an IP address automatically (DHCP) or it can be set manually (static IP). The unit will show its IP number during the boot up sequence when powered on. KaVo Scan eXam One... -
Page 51: Install The Application Software
Client software (CLINIVIEW or DTX Studio with DTX Studio Core) • KaVo Drivers NOTICE! KaVo Drivers are automatically installed with CLINIVIEW but they must be separately in- stalled for DTX Studio installation. The imaging plate system is delivered with an software required to operate the system. -
Page 52: Accessing The Unit From Cliniview
2. Switch the unit on. The imaging application soft- ware symbol appears in the unit user interface. This indicates that the unit is not communicating with the workstation(s) in the network. 3. Workstation: Install the imaging application software to be used in the workstation(s). KaVo Scan eXam One... -
Page 53: Ip Method (Using The Unit Static Address)
IP field and then click OK to connect the workstation to the unit (it is not necessary to hold down the Start key and click Send to Scanner with the other workstations once the unit has already got an IP address). KaVo Scan eXam One... -
Page 54: Accessing The Unit From Dtx Studio™ Core
6.5 Accessing the unit from DTX Studio Core ™ 1. Sign into DTX Studio™ Core with the same user credentials as you use to login to DTX Studio™. 2. Select Manage devices menu. KaVo Scan eXam One... - Page 55 Scan network. • If the device still does not appear on the list, add the device manually by clicking Manu- ally search device and fill the prompted device information fields. Select the device from the list. KaVo Scan eXam One...
-
Page 56: Other Devices
The minimum horizontal distance between the patient and the workstation is 1.5 m (4.5 ft). The minimum vertical distance between the patient and the workstation is 2.5 m (6.5 ft). KaVo Scan eXam One... -
Page 57: Troubleshooting
- Plate has been stored in the bag or in dark too long • Use dedicated imaging plate storage box to avoid these. • Alternatively, perform initial erasing for the plate(s) if they have been stored in dark and/or near X-ray unit. KaVo Scan eXam One... -
Page 58: Application Errors
Too light, noisy image with decreased diagnostic value. Showing only part of the image. Showing wrong size of the image (Image smaller than imaging plate). • Too short exposure time / Too low X-ray dose. KaVo Scan eXam One... - Page 59 If leds are defected, ap- plication SW shows warning. Circular shape on the image Imaging plate has been exposed from the wrong side, which shows the phantom of the metal disc on the rear side of the plate. KaVo Scan eXam One...
- Page 60 Geometry distortion Improper patient positioning. • Use proper holders to avoid this. NOTICE! Never do accurate measurements on in- traoral images unless having known size of refer- ence object in the imaging plane. KaVo Scan eXam One...
-
Page 61: Imaging Plate Wearing
Can be caused by moisture or improper cleaning. Clean the plate(s), ONLY >70% ETHANOL MUST BE USED. Replace if cleaning does not help. Pay attention on handling, storing and maintenance. Ensure that only the genuine hygiene accessories are used. KaVo Scan eXam One... -
Page 62: Error Messages
K400 control panel error (con- trol panel button defected / stuck) 1234 Other, see driver status window Turn power off and on to see if the unit recovers. If not, please contact local dealer or distributor. KaVo Scan eXam One... -
Page 63: Other Information
Never use unfamiliar or untested cleaning agents. If you are not sure what the cleaning agent contains, DO NOT use it. If you use a spray cleaning agent DO NOT spray it directly into the unit door. KaVo Scan eXam One... -
Page 64: Disinfecting The Unit
The unit includes some or all of the following parts that are made of or include materials that are non-environmentally friendly or hazardous: • electronic circuit boards • electronic components • imaging plates KaVo Scan eXam One... -
Page 65: Technical Specifications
This product complies with DHHS 21 CFR Chapter I, Subchapter J at the date of manufacture. The device is in conformity with the provisions of Council Directive 93/42/EEC as amended by the Directive 2007/47/EC concerning med- ical devices. KaVo Scan eXam One... - Page 66 +10°C - +40°C, 30 – 90 RH%, Operating environment 700 – 1060 mbar -10°C – +50°C, 0 – 90 RH%, Storage / transportation environment 500 – 1080 mbar Integrated Kensington security slot Other securing unit with Microsaver series locks. KaVo Scan eXam One...
-
Page 67: System Requirements And Connections
• The workstation connected to the de- vice must use an antivirus software and have individual password pro- tected user accounts to prevent un- authorized access to patient data. KaVo Scan eXam One... - Page 68 Do not disconnect unit PSU adapter before network is operational and image has been transferred to imaging application software. For more details of the hardware requirements running the imaging application software please refer to the user manual of it. KaVo Scan eXam One...
-
Page 69: Imaging Plate Specifications
Never use damaged imaging plates! High resolution mode image sizes approximately half of the values in the table. KaVo Scan eXam One... -
Page 70: Hygiene Bag Specifications
Single use only. Do not reuse. Disposal Observe relevant national requirements. KaVo Scan eXam One... -
Page 71: Electromagnetic Compatibility (Emc) Tables
Not to be used or installed near active HF SURGICAL EQUIPMENT and the RF shielded room of an ME SYSTEM for magnetic resonance imaging, where the intensity of EM DISTURBANCES is high. KaVo Scan eXam One... - Page 72 Not to be used or installed near active HF SURGI- IEC61000-3-3 CAL EQUIPMENT and the RF shielded room of an ME SYSTEM for magnetic resonance imaging, where the intensity of EM DISTURBANCES is high. KaVo Scan eXam One...
- Page 73 IEC 61000-4-8 and/ or hospital environment. The device shall not be used closer than 15cm to sources of 50/60Hz magnetic field. NOTICE! UT is the a.c. mains voltage prior to application of the test level. KaVo Scan eXam One...
- Page 74 (m). Field strengths from fixed RF transmitters, as deter- mined by an electromagnetic site survey,* are less than the compli- ance level each frequency range.** Interference may occur in the vicinity of equipment marked with the following symbol: KaVo Scan eXam One...
- Page 75 Separation Distances are listed in the next table. NOTICE! These guidelines may not apply in all situations. Electromagnetic propagation is af- fected by absorption and reflection from structures, objects, and people. NOTICE! RF communications equipment can effect medical electrical equipment. KaVo Scan eXam One...
- Page 76 WARNING! Use of accessories, transducers and cables other than those specified or provided by the manufacturer of this equipment could result in increased electromagnetic emissions or decreased electromagnetic immunity of this device and result in improper operation. KaVo Scan eXam One...
- Page 77 Interference may occur in the vicinity of equipment marked with the following symbol: KaVo Scan eXam One...
- Page 78 9 Technical specifications KaVo Scan eXam One...
-
Page 79: Symbols And Labeling
Do not reuse (Single use) Recyclable Operating instructions Refer to operating instructions for more information. The operating instructions can be supplied elec- tronically or in paper format CLASS II equipment (Double insulated electrical appli- ance) UL symbol KaVo Scan eXam One... - Page 80 Ethernet connector CE (0537) Symbol UKCA (UK Conformity Assessed) marking Swiss authorised representative Caution: Federal law restricts this to sale by or on the order of a li- censed healthcare practitioner. ETL symbol GOST-R symbol Importer KaVo Scan eXam One...
-
Page 81: Device Labels
The device labels are located at the rear of the device Type label: NOTICE! The type label shown below is for reference only. The texts may be different in the actual label. CLASS 1 Laser product warning label: KaVo Scan eXam One... -
Page 82: Warnings And Precautions
In order to maintain safe and correct func- tioning of the unit, only the power supply unit (PSU) delivered with the unit or distrib- uted by authorized dealers. Please refer to the unit technical specifications for a list of the PSUs. KaVo Scan eXam One... - Page 83 This includes, for example, the Medical Device Directive 93/42/EEC and/or FDA if applica- ble. • Do not position the workstation where it could be splashed with liquids. KaVo Scan eXam One...
- Page 84 • Report any incident, related to the use of this device, having a serious effect on the health of a patient, user or other person to the manufacturer and the local competent authority. KaVo Scan eXam One...
- Page 85 216456 r4 Headquarters PaloDEx Group Oy Nahkelantie 160 | FI-04300 Tuusula | FINLAND Tel. +358 10 270 2000 | https://www.kavo.com/en/contact www.kavokerr.com Dental Imaging Technologies Corporation 1910 North Penn Road | Hatfield, PA 19440 | USA Tel: 1-215-997-5666 | Fax: 1-215-997-5665 Dental Excellence https://www.kavo.com/en-us/contact-us...
Need help?
Do you have a question about the Scan eXam One and is the answer not in the manual?
Questions and answers