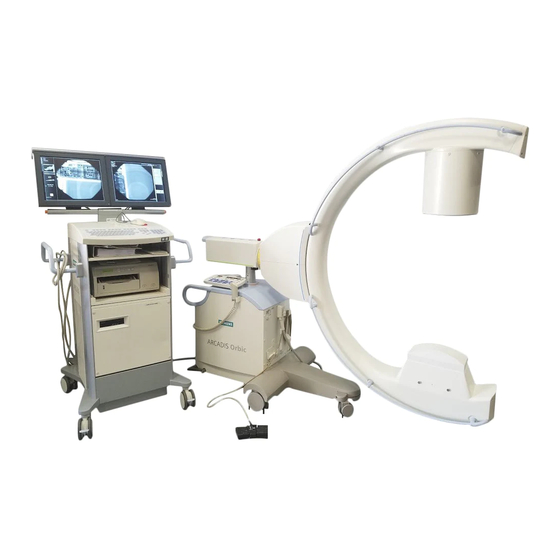
Siemens ARCADIS Orbic Installation And Startup Manual
Hide thumbs
Also See for ARCADIS Orbic:
- Quick manual (132 pages) ,
- Installation and startup (46 pages) ,
- Manual (34 pages)
Table of Contents
Advertisement
Quick Links
W ü r t h w e i n
ARCADIS Orbic
Installation and Startup
System
3D Navigation
Print No.:
SPR2-320.814.03.02.02
Replaces: SPR2-320.814.03.01.02
08080009
SP
2005
© Siemens AG
The reproduction, transmission or use
of this document or its contents is not
permitted
without
express
authority. Offenders will be liable for
damages. All rights, including rights
created by patent grant or registration
of a utility model or design, are
reserved.
English
Doc. Gen. Date: 06.05
written
Advertisement
Table of Contents

Summary of Contents for Siemens ARCADIS Orbic
- Page 1 W ü r t h w e i n ARCADIS Orbic Installation and Startup System 3D Navigation 08080009 2005 © Siemens AG The reproduction, transmission or use of this document or its contents is not permitted without express written authority. Offenders will be liable for damages.
- Page 2 Assemblers and other persons who are not employed by or otherwise directly affiliated with or authorized by Siemens or one of its affiliates are directed to contact one of the local offices of Siemens or one of its affiliates before attempting installation or service pro- cedures.
-
Page 3: Table Of Contents
3D navigation with the ARCADIS Orbic ........ -
Page 4: 3D Navigation With The Arcadis Orbic
Prerequisites 3D navigation with the ARCADIS Orbic 1Prerequisites Fig. 1: Navigation systems Fig. 2: 3D_marker ring The 3D navigation kit is a universal HW and SW interface which serves navigation sys- tems from different navigation companies (Fig. 1 / p. -
Page 5: General Requirement
Prerequisites A Siemens engineer is responsible for attaching the grid holder to the image intensifier, testing and loading the SW, calibration without the marker ring on the I.I., as well as con- figuration. An additional calibration must be performed with the navigation system installed (marker ring on the I. -
Page 6: Tools
Prior to the installation of the 3D navigation kit, check that the system is functioning properly. • Visually inspect the 3D navigation kit and the calibration phantom with navigation inter- face to ensure they are in good condition. ARCADIS Orbic SPR2-320.814.03.02.02 Siemens AG Page 6 of 16 06.05... -
Page 7: Work Sequence
Fig. 3: Plug Attaching the HW interface to the image intensifier Fig. 4: I.I._01 Siemens AG SPR2-320.814.03.02.02 ARCADIS Orbic Page 7 of 16 Medical Solutions 06.05 CS SD 24... - Page 8 Installation and settings Fig. 5: I.I._02 Fig. 6: I.I._03 ARCADIS Orbic SPR2-320.814.03.02.02 Siemens AG Page 8 of 16 06.05 CS SD 24 Medical Solutions...
- Page 9 Wait for the silicone to harden (approx. 30 min.). • Attach the grid holder to the I.I. and secure it with screws 11 22 571 and contact wash- ers 34 16 666. Siemens AG SPR2-320.814.03.02.02 ARCADIS Orbic Page 9 of 16 Medical Solutions 06.05 CS SD 24...
-
Page 10: Attaching The Identification Label
Click <Options> - <Service> - <Local Service>. • Enter the password and click <ok>. • Click <Configuration>. • “Attached to Network” and “Dicom Networking” must be selected. • Click <Next>. ARCADIS Orbic SPR2-320.814.03.02.02 Siemens AG Page 10 of 16 06.05 CS SD 24 Medical Solutions... - Page 11 Click “Find” to check whether the host is alive and also that the TCP/IP address from the navigation system appears into the address fields. Connected by • Select LAN • Click <Save>. • Click “>”. Siemens AG SPR2-320.814.03.02.02 ARCADIS Orbic Page 11 of 16 Medical Solutions 06.05 CS SD 24...
- Page 12 Click <Verification> to make sure the “AE Title” is alive. • Select <Storage> under “Supported DICOM services”. • Click <Save>. • Click ok The system starts a reboot. ARCADIS Orbic SPR2-320.814.03.02.02 Siemens AG Page 12 of 16 06.05 CS SD 24 Medical Solutions...
- Page 13 Installation and settings Fig. 11: NAVD Siemens AG SPR2-320.814.03.02.02 ARCADIS Orbic Page 13 of 16 Medical Solutions 06.05 CS SD 24...
-
Page 14: Final Work Steps
Installation and settings Final work steps • Perform a function check. • Perform the Image Quality Quick Test SPR2-320.820.02.01.02, chapter 10 and 11. ARCADIS Orbic SPR2-320.814.03.02.02 Siemens AG Page 14 of 16 06.05 CS SD 24 Medical Solutions... - Page 15 Changes to the previous versio 3Changes to the previous versio Chapter 2: Change of Fig.7 Siemens AG SPR2-320.814.03.02.02 ARCADIS Orbic Page 15 of 16 Medical Solutions 06.05 CS SD 24...
- Page 16 Changes to the previous versio ARCADIS Orbic SPR2-320.814.03.02.02 Siemens AG Page 16 of 16 06.05 CS SD 24 Medical Solutions...


Need help?
Do you have a question about the ARCADIS Orbic and is the answer not in the manual?
Questions and answers