Table of Contents
Advertisement
Quick Links
Advertisement
Chapters
Table of Contents

Related Manuals for QMS PS 410


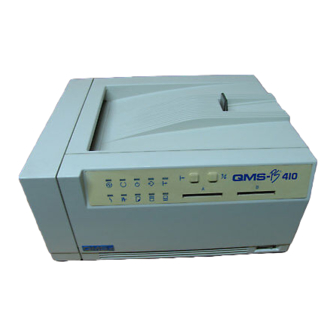
Summary of Contents for QMS PS 410
- Page 1 ® QMS-PS User’s Guide 1800148-001E...
- Page 2 Trademark Acknowledgements ® ® , QMS-PS , the QMS logo , JetScript trademarks of QMS, Inc.; PS Executive Series ® ® PostScript and Adobe registered in the U.S.A.; Adobe Garamond trademarks of Adobe Systems, Inc.; Apple ® LaserWriter are registered trademarks of Apple Computers, Inc; PhoneNET a registered trademark of Farallon Computing, Inc.;...
-
Page 3: Copyright Notice
Proprietary Statement The digitally encoded software included with the QMS-PS 410 is Copyrighted 1989 by QMS, Inc., All Rights Reserved. This software may not be reproduced, modified, displayed, transferred, or copied in any form or in any manner or on any media, in whole or in part, without the express written permission of QMS, Inc. -
Page 4: Laser Safety
Laser Safety This printer is certified as a Class 1 laser product under the U.S. Department of Health and Human Services (DHHS) Radiation Performance Standard according to the Radiation Control for Health and Safety Act of 1968. This means that the printer does not produce hazardous laser radiation. - Page 5 CAUTION: To prevent electrical shock, do not remove any covers from your printer, except to install a memory upgrade as described in this manual. Any other servicing should be referred to a qualified technician. NOTE: A shielded cable is required to comply with the limits for a Class B digital device, pursuant to Part 15 of the FCC Rules.
-
Page 6: Electronics Emissions
Übereinstimmung und der Regierung zu bestätigen, wurde der Deutschen Bundespost gegeben. Bescheinigung des Herstellers/Importeurs Hiermit wird bescheinigt, daß Thermal Transfer Printer model #QMS PS-410 in Übereinstimmung mit den Bestimmungen der Vfg 1046/1984 funkentstört ist. Der Deutschen Bundespost wurde das Inverkehrbringen dieses Gerätes angezeigt und die... - Page 7 Declaration of the Manufacturer or Importer We hereby certify that the QMS-PS PRINTER MODEL: QMS-PS 410 is in compliance with Vfg 1046/1984 and is RFI suppressed. The marketing and sale of this equipment was reported to the German Postal Service.
-
Page 9: Table Of Contents
About the Manuals ......1-1 About the QMS-PS 410 Printer ....1-2 The Resident Typefaces . - Page 10 Breaking in a New EP-L Cartridge... . . 6-8 Handling the Printer ......6-9...
- Page 11 Power Light....... 7-4 Printer Error ......7-4 Preventing Jams .
- Page 12 Chapter 10 Chapter 11 Appendix A Appendix B About Timeouts ......9-11 Auto Select and Emulation Timeouts ..9-12 Manual Feed Notes .
- Page 13 Computer Literacy How Your Computer Talks to Your Printer ..E-1 Bibliography ......E-2 Product Sales and Support Product Support.
- Page 15 About the QMS-PS 410 Printer ........1-2...
-
Page 17: Introduction
Introduction This chapter briefly describes printer documentation and introduces the features and benefits of the QMS-PS 410 printer, including how your printer works with application software, how it receives and processes data, and how it transforms data into a printed page. -
Page 18: About The Qms-Ps 410 Printer
Chapter 1 About the QMS-PS 410 Printer The QMS-PS 410 printer is the most powerful laser printer in its price range. It gives you rapid processing speed, scalable and rotatable fonts, and the ability to merge text and graphics. Your printer fits easily on your desktop. - Page 19 Outstanding print quality The QMS-PS 410 printer produces solid blacks and crisp fonts no matter what point size. RS-232C serial, Centronics parallel, and LocalTalk (AppleTalk) interfaces which are simultaneously active This gives you the capability of having more than one system hooked up to the printer at the same time.
- Page 20 Chapter 1 Optional paper and envelope cassettes Also available for the QMS-PS 410 printer is a lower paper tray which changes your printer to a dual tray printer. With cassettes available in popular paper sizes, it expands paper capacity to 320 sheets. Envelope size cassettes are also avail- able.
-
Page 21: The Resident Typefaces
It also increases space for downloadable typefaces. The Resident Typefaces Your printer comes with 45 typefaces resident in memory. The fonts in these typefaces can be rotated, scaled to any size, and filled, depending on your software. -
Page 22: Application Software And Your Printer
Many “printer” problems are in fact related to how your software application package and your printer interact. The QMS-PS 410 printer is unique because it has ESP; it can read most files and determine the printer language if that language is supported by the printer. -
Page 23: Software Printer Drivers
If you use this type of application package, you usually do not see printer commands displayed on the screen. The driver sends them automatically. If the QMS-PS 410 printer is in the default ESP mode, it prints your files whether they are prepared for a PostScript printer or a LaserJet series II printer. - Page 25 Introduction ..........2-1 How Software Drives Your Printer ....... . 2-1 About Paper .
-
Page 27: Printer Use
Before using this chapter, you should already have installed your QMS-PS 410 printer and the QMS PS Executive Series Utilities and have your printer communicating with the host. See the QMS-PS 410 Getting Started Guide and the PS Executive Series Utilities manual for these instructions. -
Page 28: About Paper
ESP mode; however, you will not be able to access PostScript fonts. About Paper The printer accommodates paper as light as 16 pound or as heavy as 28 pound (60 to 105 g/m for most applications. Copier paper has a smooth surface, controlled electrical properties, heat stability, and cleanliness. -
Page 29: Paper Storage
NOTE: Hammermill Paper offers free samples of their laser paper in varying weights. Call toll free 1-800-242-2148. The QMS-PS 410 standard tray supports the following sizes of paper: Letter, 8 1/2" x 11" Legal, 8 1/2" x 14"... - Page 30 Chapter 2 drastically affect the appearance of your printed pages. Keep paper in good condition by storing it In its wrapper On a flat surface In a closed cabinet In a cool dry area Do not leave paper unwrapped or in a place where it can be damaged by humidity or heat.
-
Page 31: Paper Handling
“Using Optional Accessories” chapter.) Envelope Cassette Cassette (A4, Letter, Legal, B5, Executive) Fig. 2.1 The QMS-PS 410 Paper Trays P r i n t e r U s e (Optional) (Optional) Chapter 2... -
Page 32: The Standard Tray
It may be opened or closed, allowing you to make the printer’s size even more compact. This is useful when you are not printing or when you are printing from the optional tray. - Page 33 Tap a stack of no more than 70 sheets of paper to align the edges. Insert the paper into the printer, placing the top left corner of the stack firmly into the printer. Make sure the paper depth is not above the mark on the side of the standard tray.
-
Page 34: Optional Lower Cassette
320 sheets (70 for the standard tray, 250 for the optional). The optional feeder tray is installed under the printer so that the printer rests on top. The lower paper cassette fits into the optional feeder tray. Instructions for installation are included later in the “Optional Accessories”... -
Page 35: The Face-Up Output Tray
(circled in fig. 2.5) to the “down” position. Fig. 2.5 The Printer’s Output Trays Attach the face-up output tray to the front of the printer. Flex the tray slightly so the round knobs on the outside edges of the tray slip into the two holes just below the output selector bar. -
Page 36: Manual Feed
(this is sometimes called feeder bin) or from the PS Executive Series Utilities program. If you want to manually feed multiple pages, set your printer for manual feed through the PS Executive Series Utilities program or through the PostScript commands. -
Page 37: Double-Sided Printing
To print on the back side, simply turn the sheet over and insert it back into the printer. The most frequent problem with double-sided printing is jamming. If you experience this, give the printer and the sheet a short breathing time to cool down before reinserting. Check to see if the paper is curled. -
Page 38: Printing On Labels
Transparencies are especially sensitive to a dirty paper path. If shadows are apparent either on the top or the bottom of the sheets, produce a cleaning page to clean the printer’s rollers (see the “Printer Maintenance” chapter). NOTE: You should remove each transparency from the output tray immediately after printing to prevent jams of subsequent sheets. - Page 39 Because envelopes pass through heated rollers, the gummed area on the flap may seal. Open the flap immediately after it passes through the printer, before the seal cools. It can then be resealed later in the normal manner. The use of envelopes with emulsion-based glue avoids this problem.
-
Page 40: The Optional Envelope Cassette
Chapter 2 Non-standard envelopes are also accommodated as long as they fall into the following size ranges: Width = 3 4/5" to 6 2/5" (96.4 mm to 164 mm) Length = 7 2/5" to 10" (188 mm to 255 mm) The Optional Envelope Cassette To load up to 20 envelopes at a time, use the optional envelope cassette. - Page 41 Load the envelopes (address side up/flap side down) with the corner of the stack set into the corner of the tray as shown (fig. 2.7). Fig. 2.7 Load Envelopes in Tray Align the two envelope guides with the edges of the stack. The guides must be neither too tight nor too loose.
-
Page 42: Adjusting Print Density
Adjusting Print Density Normally, your laser printer produces a rich, black image on the paper. You may want to increase the print contrast setting as the toner cartridge is used. The adjustment dial for print contrast is inside the printer. -
Page 43: Printing Diagnostics Pages
Moving the lever toward the display panel side of the printer darkens print. Moving the lever away from the display panel side lightens it. The lever has four settings from light to dark. As you move the lever, it clicks at each of the two positions in the middle. - Page 44 The default paper tray is also identified. The picture of the printer in the upper right corner shows the current status of the printer’s name, the default paper tray, the size paper the printer is configured for, and whether tray chaining is enabled or disabled.
- Page 45 Selecting Printer Languages........3-4...
-
Page 47: Selecting Printer Languages
Since most printers only understand their native language, files prepared in other printer languages print incorrectly. A file prepared in HP PCL and sent to a LaserJet printer usually prints incorrectly when sent to a PostScript printer; PostScript printers normally understand only PostScript. -
Page 48: Language Language
Chapter 3 However, the QMS-PS 410 printer has ESP, the unique ability to recognize different printer command languages without user intervention. All you do is send the file from a popular commercial application to the printer. You do not have to make any adjustments to either the printer or the file. - Page 49 When your printer is first installed, the default for two of its interfaces (serial and parallel) is ESP. Whether you have one or two host systems, the printer prints almost any type file as long as that file is in a format and language which the printer understands (PostScript, HP PCL, or a optional card emulation like HP-GL or LN03).
-
Page 50: Selecting Printer Languages
Selecting Printer Languages There are two methods of configuring a printer port to a specific language: you may use the PS Executive Series Utilities Program (which you should have already installed) or you may use PostScript commands to change your mode selection. -
Page 51: Selecting Printer Language: Postscript Commands
You specify in this volatile S e l e c t i n g P r i n t e r L a n g u a g e s... -
Page 52: The Integers To Use With The Operators
Chapter 3 command sequence the integer for both the printer language and the printer port to be configured. setdefaultemulation is a persistent operator which acts the same as setemulation, except that it lasts after power off. It configures both the port and the printer language mode. -
Page 53: Setsoftwareiomode Operator
Make sure the printer is on, the Ready indicator is on, and the printer is online. Make sure that your current port is configured to PostScript or ESP. (PostScript operators do not work with HP PCL language.) I f you do not know your current port configurations, produce a test configuration page (see “Printing Diagnotic Pages"). - Page 54 Chapter 3 create one of the following command files in a text editor and use it to set the parallel port to HP PCL printer language. serverdict begin Ø exitserver statusdict begin 1 5 setdefaultemulation T he syntax for the setdefaultemulation and setemulation...
-
Page 55: Configuring The Parallel Port To Postscript
Configuring the Parallel Port to PostScript To configure the parallel port to PostScript mode from the parallel port, send one of the following commands. Type the file, pressing the ENTER key after each line. serverdict begin Ø exitserver serverdict begin Ø exitserver statusdict begin 1 Ø... -
Page 56: Configuring The Serial Port To Postscript
Chapter 3 Configuring the Serial Port to PostScript To conf igure the serial port to PostScript language, send one of the following commands. Type the file, pressing the ENTER key after each line. serverdict begin Ø exitserver serverdict begin Ø exitserver statusdict begin Ø... -
Page 57: Exiting Non-Postscript Printer Languages
Exiting Non-PostScript Printer Languages To exit a non-PostScript language such as HP PCL, you must send a command in the HP language since that is all your printer understands at that time. HP commands are called “escape sequences” since they begin with the ASCII value for an escape key. -
Page 58: Returning All Ports To The Esp Default
Returning All Ports to the ESP Default If you experience problems either entering or exiting a printer language, you may return the printer to its default ESP mode by any one of the following: Enter the PS Executive Utilities’ Special Menu and choose “Reset Default Parameters."... -
Page 59: Operating Notes For Emulation Selection
TEST/CANCEL and ONLINE buttons. Your printer is now reset to factory defaults. Operating Notes for Emulation Selection The most common use of the QMS-PS 410 printer (if attached with both serial and parallel cables and one host system) is to configure one port for HP PCL emulation and one port for PostScript mode. - Page 60 Chapter 3 If you are communicating through the serial port and parity settings for your host and your printer do not match, you may experience a loss of data and only part of the file will print. The printer’s parity setting is listed on the test configuration page.
- Page 61 Chapter 4 Using Optional Accessories Introduction ..........4-1 About Optional Accessories .
-
Page 63: Using Optional Accessories
Introduction The QMS-PS 410 printer has many options which expand the printer’s capabilities. Available from your QMS vendor are 250-sheet lower paper cassettes in A4, letter, legal, Executive, or B5 size An envelope cassette Cards which contain typeface families (such as the... -
Page 64: The Paper Feeder Tray
The only tool necessary to install the paper feeder tray is a small screwdriver (supplied with the accessory). Since the feeder attaches to the printer’s bottom and the cassette slides into the feeder, no extra space is needed. -
Page 65: Installing A Feeder Tray
Do this by touching the printer’s metal casing before touching the accessory. Do not walk across carpet while holding the acces- sory. - Page 66 Turn the printer on end and rest it on a stable, horizontal surface. Hold the feeder tray on both sides and position it against the printer’s bottom as shown in figure 4.3.
- Page 67 Chapter 4 First, align the left side of the feeder tray with the bottom of the printer (if you have the feeder in the correct position, the left side is the side without the printed circuit board). Next, swing the right side of the feeder into position. Be careful to align the printed circuit board on the feeder properly with the bottom of the printer.
- Page 68 Place the printer back in its normal orientation and verify that the feeder tray is securely installed on the printer. Make sure that there is no gap between the feeder and printer, and that the feeder is not loose (fig. 4.5).
-
Page 69: Putting Paper Into The Optional Cassettes
Putting Paper into the Optional Cassettes Load paper into the optional cassette with the printing side face-up. This is the reverse of the way you put paper in the standard tray. Fig. 4.6 Putting Paper in the Tray You may load up to 250 sheets into any of the optional paper cassettes. - Page 70 Chapter 4 Make sure the paper is under the white plastic tabs at the rear of the cassette (fig. 4.7). Pressing down on all four corners of the paper stack ensures that the paper is loaded correctly. Fig. 4.7 Push Paper Under White Plastic Tabs 4 - 8 U s i n g O p t i o n a l A c c e s s o r i e s...
- Page 71 Press down on the front of the stack to place it under the metal retaining clips at the front of the cassette. See figure 4.8. Fig. 4.8 Place Paper Under Metal Clips Installing the paper cassette into the feeder tray is a simple procedure.
- Page 72 Chapter 4 Cassette types and sizes and the weights of paper used with each of the cassettes are shown below (Table 4.1). Type Plain Paper Letter: 8 1/2" x 11" Legal: 8 1/2" x 14" A4: 210 x 297 mm B5: 182 x 257 mm Exec: 7 1/4"...
- Page 73 Paper should be placed in the cassette in the proper position or excessive curl may occur. See the section on paper in the “Printer Use” chapter and follow the same guidelines for the optional cassette. An optional cassette expands your paper handling capacity to 320 sheets.
-
Page 74: Installing A Legal Cassette
To install a legal size cassette The legal cassette is longer than the printer and extends beyond the rear of the printer when in place. To install the legal cassette, remove the flap from the back of the printer by grasping it in the middle. - Page 75 Chapter 4 The legal cassette includes a rear cover to keep out foreign material such as dirt and dust. Insert this cover into the same holes from which the back flap was removed. You may leave this cover permanently installed. It is compatible with the other cassettes (fig.
-
Page 76: Configuring For Multiple Cassettes
Configuring for Multiple Cassettes With an optional cassette, you have a choice of which tray your printer draws from and in what order it draws. The method for doing this varies from system to system, but there are usually three options. -
Page 77: Optional Cards
Caution: The printer must be offline before inserting or removing cards. Press the online button to turn the indicator off. If you forget to take the printer offline, turn the printer power off and back on to regain access to the printer’s resident fonts and data stored in the printer’s memory. -
Page 78: Memory Upgrades
The 1, 2, or 4 MB memory upgrade modules allow you to print more complex graphics. They provide memory to hold downloaded fonts, forms, and macros, and allow the printer to accept larger jobs. 1 MB Memory Upgrade Module This board offers space for more fonts and forms in memory. -
Page 79: Installing Memory Upgrade Modules
4 MB Memory Upgrade Module A single printer shared by many users often requires a 4 MB upgrade. It expands the printer’s memory to allow for sophisticated forms and graphics, and for many fonts. Installing Memory Upgrade Modules Memory modules contain electrical components which are extremely sensitive to static electricity. - Page 80 Chapter 4 Under the printer’s interface ports is a sheet metal access panel (fig. 4.12). Use the Phillips screwdriver to remove the screws from the sides of the panel. Remove the access panel. Fig. 4.12 Remove Screws from Side of Panel...
- Page 81 Fig. 4.13 Slide Module into Printer Make sure the module is firmly seated by placing your free hand on the front of the printer and firmly pushing against the knob of the access panel. Replace the screw at each corner of the access panel. Plug in power cord and interface cables;...
- Page 83 Professional Printing Introduction ..........5-1 The Resident Typeface Families .
-
Page 85: Professional Printing
You can place letters at any angle, even rotate them. The possibilities are limitless. If you have correctly installed a printer driver, you are ready to put the QMS-PS printer to work. Create a file within your software program and send it to the printer. -
Page 86: The Resident Typeface Families
Chapter 5 The Resident Typeface Families The following typefaces are resident in your printer. See your QMS vendor if you are interested in other typeface families. Serif 5 - 2 Times Roman Times Bold Times Roman Italic Times Bold Italic... - Page 87 Sans Serif Other typefaces: Symbol ITC Zapf Dingbats P r o f e s s i o n a l P r i n t i n g ITC Zapf Chancery Medium Italic This typeface does not come in any other but the calligraphic italic style Helvetica Helvetica Bold...
-
Page 88: About Typeface And Fonts
Often confused, typeface is the larger category, while font is a subset of typeface. Typeface Font You may notice that the printer’s resident typefaces are divided into two sections. One way of classifying different kinds of typeface is to group them as serif... - Page 89 been called feet and curlicues. Times-Roman, Courier, Palatino, Garamond, New Century Schoolbook, ITC Zapf Chancery, and ITC Bookman Light have serifs. In figure 5.1, only the letters e and o do not have serifs. Fig. 5.1 Serif Sans serif (sans is French for without) indicates a typeface without any of these small tails.
-
Page 90: Point
Computer typefaces are harder to measure since they are not physical objects. However, the typefaces provided with the printer, licensed from Linotype, are all sized by true printing standards. Fig. 5.3 8, 10, 24, and 36 Point Sizes Pitch Pitch refers to the number of characters per horizontal inch (fig. -
Page 91: Proportional Spacing
(fig. 5.5). A fixed-spaced typeface is useful for spreadsheets and other documents needing columnar data. Fixed spacing is the opposite of proportional spacing. Only one of this printer’s typefaces is a monospaced typeface: Courier. Fig. 5.5 Fixed Spacing Proportional Spacing The term proportionally-spaced refers to a typeface that varies the size of each character (fig. -
Page 92: Character Set
Frequently used in opposition to the term fixed-spacing, proportionally-spacing places the characters according to their individual sizes, and can increase legibility and readability. All of your printer’s typefaces except Courier are proportionally spaced typefaces. Character Set A character set is a collection of symbols. The symbols contained in character sets are designed to perform various printing applications. -
Page 93: Stroke Weight
Italic and Oblique Forms Italic typeface derives from the early sixteenth century and is the printed form of cursive writing. Italic forms are individually crafted typefaces. Oblique type forms are not designed and crafted individually but are mechanically-slanted versions of the upright form from which they derive. Oblique forms can be very attractive in their own right. -
Page 94: Page Orientation
Chapter 5 Page Orientation Orientation refers to the direction of print on the page (fig.5.8). Portrait orientation reads from left to right, across the more narrow dimension of the page. This manual is in portrait orientation. Landscape orientation also reads from left to right but places the print across the wider dimension of the page. -
Page 95: Rotation
Chapter 5 Rotation Although many software programs only access portrait and landscape, PostScript is capable of printing text at any angle on the page. Text can even be rotated. P r o f e s s i o n a l P r i n t i n g 5 - 1 1... -
Page 96: Page Design
Chapter 5 Page Design One rule to know when designing documents is keep it simple. Avoid cluttering your documents with unnecessary font changes. It takes experience and talent to skillfully blend a wide range of typefaces. Always consider your reader first. Select a typeface that’s best for your particular document and consider the meaning of your words. -
Page 97: A Typeface Sampler
Base Line Fig. 5.9 Typeface Terms A Typeface Sampler Your QMS-PS 410 printer offers you a wide selection of resident typefaces from which to choose. Helvetica Helvetica is a popular typeface, a modification of a kind of sans serif typeface called Grotesque. Helvetica is... -
Page 98: Helvetica Narrow
Chapter 5 Helvetica Narrow Problem! Your space is limited, your copy is too long, and you need a typeface that’s bold and attention-getting. Answer: use this typeface. This face conserves space, gets attention, and is readable. There is a bold form, an oblique form and a bold oblique form. ITC Avant Garde Book ITC Avant Garde Book is a sans serif typeface dating from 1970. -
Page 99: Adobe Garamond
It conserves space while making small type quite readable. It’s one of the few typefaces you can do almost anything with, and simply not go wrong. There are six forms resident in the QMS-PS 410 printer: Garamond Regular, Garamond Regular Italic, Garamond Bold, Garamo nd Bo ld Italic, Garamond Semibold, and Garamond Semibold Italic. -
Page 100: Zapf Chancery Medium Italic
Chapter 5 Zapf Chancery Medium Italic Zapf Chancery Medium Italic Dating from 1979, ITC Zapf Chancery Medium Italic is a graceful typeface that has the look of calligraphy. Designed by Hermann Zapf, this typeface is announcements, and text that needs elaborate flourish. This the Medium Italic used here. - Page 101 Keeping the Printer Clean ........
-
Page 103: Printer Care
It includes how to install an EP-L toner cartridge, how to produce a cleaning sheet, and how to handle the printer if you need to move When to Replace the EP-L Cartridge Usually, the EP-L cartridge lasts for approximately 3,500 prints (estimated for an average of 5% coverage on letter size paper). -
Page 104: Removing The Ep-L Cartridge
Chapter 6 Additional EP-L cartridges may be purchased from your QMS vendor. See “Optional Accessories Available” appendix C of this manual. Removing the EP-L Cartridge To remove the EP-L cartridge Remove any paper from the standard paper tray. Close the tray by pushing in the tray extension (fig. - Page 105 Chapter 6 Pull up on the release button on the right side to open the paper path door (fig. 6.2). Release Button Fig. 6.2 Open Paper Path Door P r i n t e r C a r e 6 - 3...
- Page 106 Chapter 6 Remove the EP-L cartridge by pulling on the center tab (fig. 6.3). Fig. 6.3 Remove EP-L Cartridge If the EP-L cartridge does not release easily, push the release button to the right of the inserted cartridge (fig. 6.3). Discard the used cartridge.
-
Page 107: Installing The New Ep-L Cartridge
Save the aluminum bag in case you need (at some time in the future) to remove a partially-used cartridge from the printer; storing a partially used cartridge in this bag protects it from light. Fig. 6.4 Distributing Toner in Cartridge Hold the cartridge as shown in figure 6.4 and gently rock it... - Page 108 Chapter 6 Grasp the orange tab protruding from the side of the cartridge and flex it to break it loose. Pull the tab and the attached clear tape (18 inches/457.2 mm) completely out of the cartridge (fig. 6.5). Discard the tab and tape. Fig.
-
Page 109: The Cleaning Sheet
EP-L cartridge. To accomplish the cleaning procedure Make sure there is paper in the standard tray. If the Online indicator on the printer display panel is on, press the Online/Offline button to take the printer offline (the indicator light goes off). -
Page 110: Breaking In A New Ep-L Cartridge
Chapter 6 Press the Online/Offline button to put the printer back online. The printer produces a test configuration page and then a cleaning sheet. Check the diagonal bar on the cleaning sheet. It should be solid black. If it is not, toner may be low or may need to be redistributed by gently rocking the toner cartridge from side to side (fig. -
Page 111: Handling The Printer
If you break in a cartridge and then store it longer than a few weeks, you may want to run a several copies to refresh the toner. Handling the Printer Handle your printer with care to extend its life. Abuse may cause damage. -
Page 112: Keeping The Printer Clean
Keeping the Printer Clean The QMS-PS 410 printer requires a minimum of cleaning. However, at times it may be necessary to clean the inside or outside of your printer. To maintain the appearance of your printer Remove the printer’s power cord from the power outlet... - Page 113 (circled in fig. 6.7). Use water or an alcohol-based cleaning solution to clean the outside of your printer. Test the cleaner on a small area of your printer to check its performance. Never spray solutions directly onto the printer. Always spray cleaning solution onto a cloth, and then wipe your printer with it.
- Page 115 Printer Ejects Blank Pages ........
-
Page 117: Introduction
Printer hardware This section contains a list of possible printer problems and solutions. If you have just installed your printer, be sure you have followed the steps outlined in the Getting Started Guide. Follow the steps below to identify the source of your problem and to learn about possible solutions. - Page 118 YES - Go to question 3. NO - Check the following: Is the printer offline before you try to perform a self test? It should be. Does the standard tray have paper? If out of paper, the Paper Out indicator should be lit.
-
Page 119: Troubleshooting Printer Problems
“Printer/Host Communication.” If you still cannot identify the problem, contact your QMS vendor. Is the printer printing garbage output or not printing at all when in ESP mode? Reconfigure the port to which you want to print to the specific printer language of the file you are trying to print. -
Page 120: Power Light
If the Active indicator is on, but no start-up page prints, turn off the printer and check the following: From a cold start, it takes a minute for the printer to warm up. Be sure you have waited long enough for a start-up page before suspecting a problem. -
Page 121: Preventing Jams
Turn the printer back on and release the Test/Cancel and Online/Offline when the Online indicator comes on. If upon powering up, the printer error light is still on, contact your QMS vendor. NOTE: Pressing both the Test/Cancel button and the On-line/Offline button restores the printer to its factory defaults. -
Page 122: Clearing A Paper Jam
QMS vendor. Clearing a Paper Jam When a paper jam occurs, the Paper Jam indicator on the printer’s display panel lights. Frequent jams in any area indicate that area should be checked and repaired or cleaned. Repeated jams may also signal you are using the wrong weight paper. - Page 123 Paper jams occur typically around the fuser roller assembly (A), and the paper feed area (B). See figure 7.1. Clear paper jams as follows: Close the standard tray if it is open. (If the face-up tray is installed, remove it.) Pull up the release button on the side of the front cover to unlatch the paper path door (fig.
- Page 124 Chapter 7 If you are printing from the standard tray, first check the paper feed area. If there is a jam, remove the paper by pulling it in the direction of the arrow (fig. 7.3). Fig. 7.3 Remove Paper from Paper Feed Area 7 - 8 T r o u b l e s h o o t i n g P r i n t e r P r o b l e m s...
- Page 125 If you are printing from the optional paper tray, pull out the tray and check the paper feed area (fig. 7.4). Remove paper by pulling straight out of the printer. Fig. 7.4 Remove Paper from Paper Feed Area T r o u b l e s h o o t i n g P r i n t e r P r o b l e m s...
- Page 126 Chapter 7 Check the fixing assembly area. If paper is jammed here, pull back toward printer to remove it. Fig. 7.5 Remove Paper from Fixing Assembly Area 7 - 1 0 T r o u b l e s h o o t i n g P r i n t e r P r o b l e m s...
- Page 127 Fig. 7.6 Remove Paper from Fixing Assembly Area NOTE: Pulling paper in the opposite direction of the arrows may cause toner to adhere to the inside of the printer. This toner may stain subsequent prints. Also, avoid touching the paper as much as possible since the toner is not completely fixed at this area and may smudge on your hands or clothing.
- Page 128 Chapter 7 If the end of the paper has completely passed through the fixing assembly, pull the paper in the direction of the arrow (away from printer). Fig. 7.7 Remove Paper from Fixing Assembly Area 7 - 1 2 T r o u b l e s h o o t i n g P r i n t e r P r o b l e m s...
- Page 129 If all the jam has been removed, printing restarts when the cover is closed. If printing does not restart, or the printer jams again, make sure that no pieces of paper remain in the printer.
-
Page 130: Printer Resets
LaserWriter program sends to the printer at the beginning of the first job printed by a Macintosh. This file sets the state of the printer for use by the Macintosh. Each Macintosh on the network must send the same version of setup file or the network experiences re-initialization. -
Page 131: Not All Pages Are Printed
Printer Ejects Blank Pages Check the Active indicator. If the light is on, try sending your file to the printer again, and if the Active indicator does not light, check the interface setting. You may not be configured for the correct cable and port. See the “Connecting the IBM PC”... -
Page 132: Ibm Pc/Compatible Users - Check The Following
Send a simple Print Screen by pressing the Print Screen key on the keyboard. If this produces a page it tells you that your serial port, cable, and the printer are working. If you get a printout, then your application program is configured incorrectly. -
Page 133: Paper Jam Indicator Stays On
Is AppleTalk active? Is the LocalTalk cabling properly terminated? Paper Jam Indicator Stays On If the Paper Jam indicator lights, open the printer and clear the jam. See the previous section, “Clearing a Paper Jam,” for more information. General Print Quality Problems Print quality problems are those related to the appearance of the pages you have printed. -
Page 134: Specific Print Quality Problems
Install a new toner cartridge. Light Image (entire page) Increase print density by using the print density adjustment dial inside the printer. Remove the toner cartridge and rotate it as you would when installing a new cartridge. This redistributes toner inside the cartridge. -
Page 135: Dark Image (Entire Page)
Produce a cleaning sheet from the buttons on the display panel. The paper path may be dirty. Toner may have escaped into the printer. See “Keeping Your Printer Clean” earlier in this chapter. The EP-L cartridge may be damaged. It may need to be replaced. -
Page 136: Dark Vertical Lines
This redistributes toner inside the cartridge. Make sure your software and printer settings match. If you are printing an HP file in either an HP or ESP mode and you get a pattern of white lines, then the problem is most likely a mismatch of parity settings. -
Page 137: Placing A Service Call
If you call for assistance, have answers ready for the following questions to help the technicians serve you more quickly. 1. What printer model are you using? 2. What kind of host computer are you using? 3. What operating system and version are you using? 4. - Page 139 Printer/Host Communication Introduction ..........8-1 About Serial Communication .
-
Page 141: Printer/Host Communication
This chapter provides more advanced information on your printer and your host’s communication with the printer. The simplest way to change your printer’s method of communicating is to use the PS Executive Series Utilities software included in your purchase. The following tasks may be accomplished, however, without the print utilities. -
Page 142: Baud Rate
The baud rate is a measure of the speed of information or data transfer. The baud rate is a number, such as 1200, 2400, or 9600. The baud rates that this printer is capable of handling are Table 8.1 Baud Rates For most users, 1200, 9600, or 19200 (depending on the system) is used. - Page 143 Flow control indicates the protocol used. Parity indicates either ignored, odd, even, or none is being used. The eight bits of the option byte are assigned as Options Byte Stop Bit 0 - - - 1 Stop Bit 0 - - 7 Bit Data 1 - - - 2 Stop Bit 1 - - 7 Bit Data 2 - - 8 Bit Data 3 - - Undefined...
- Page 144 Chapter 8 The most commonly used option integers for 7-bit data are Option No. Table 8.3 7 Bit Data The most commonly used option integers for 8-bit data are Option No. Table 8.4 8 Bit Data 8 - 4 Parity Ignored Even None...
-
Page 145: More About Flow Control For Serial Users
The problem is usually noticed when sending long documents to the printer. The first few pages are fine, then the printer begins to print erratically or not at all. If this happens, you must change the printer’s flow control setting. This may be done... -
Page 146: Changing The Default Parameters
The manual may say which flow control protocol the program uses to print. If you can not find this information, try sending a long document to the printer. A flow control conflict is usually indicated by erratic printing: several pages print but not the complete file. -
Page 147: Channel (Interface)
For example, a command might look like this: Channel (Interface) The interface must be 25 (for 25-pin cable serial port) Baud Rate The baud rate must be chosen from Table 8.1. For example 9600 Parity and Protocol We recommend choosing the parity and protocol from Table 8.3. For example, to change from the default DTR/DSR, choosing option number 67 from the table results in Parity = None... - Page 148 Chapter 8 To send the sccbatch command to change parameters, you must Make a file. Using a text editor allows you to make sure the commands are typed correctly. Popular text editors are DOS Edlin, WordStar (non-document mode), PC-Write, SideKick, or most of the professional word-processing packages.
-
Page 149: Testing Communication: Sample Files
Send the file to the printer. Use either the text editor’s printing commands or, on the DOS level, the copy or print (C:> print filename) command. (Remember, you must be either in the PostScript or ESP mode for the above command to work.) Re-boot your system and turn the printer off, then back on. -
Page 150: Sample Edlin Files
If you have an IBM PC/compatible and use the Edlin editing system, you may use the following sample files to test your laser printer and PC connection. Filename should be substituted with whatever name you chose for your file. ^D (hold down the control key while pressing D) and ^Z (hold down the control key while pressing Z) are end-of-file signals.The print filename sends the file... - Page 151 Send this file to select a font with PostScript: C:\>edlin filename New file 1:*/Times-Roman findfont 30 scalefont setfont 2:*144 432 moveto 3:*(Your Name) show 4:*showpage 5:*^D 6:*^Z C:\>print filename NOTE: The parentheses around your name must be included. If you typed the previous file correctly, your name prints in Times-Roman beginning two inches from the left of the page and 6 inches from the bottom of the page.
-
Page 152: Sample Postscript File
Any mistake results in an error and no output is delivered. Remember, you must first make a file in the text editor you are using and then send the file to the printer. /inch {72 mul} def /Helvetica-Bold findfont 30 scalefont setfont... -
Page 153: The Error Handler
Error Handler. Whenever the printer encounters an error while in PostScript mode, it prints a page identifying the error. The file must be sent to the printer after each power cycle. The Error Handler file in the PS Executive Utilities program included with your QMS-PS printer. - Page 155 How Your Printer Works ........
-
Page 157: Postscript: Technical Overview
The printer is composed of two major parts: the engine and the controller. The engine is the main body of the printer where the pages are physically printed. The controller is the part of the printer which houses the PostScript software where data is processed for printing. - Page 158 Chapter 9 Once in the printer, the data is used to modulate a tightly-focused beam of light produced by a laser. The laser beam is directed to a rotating, hexagonal mirror which causes the beam to scan across a photosensitive print drum. Each scan results in a raster line on the print drum.
-
Page 159: Using Postscript: Interactive Mode
PostScript programs are usually generated by application programs such as word processors. However, PostScript is available for direct use. In interactive mode, the printer and PostScript function like a computer. You input a command and this command is carried out. - Page 160 Chapter 9 Put the printer in PostScript-only mode using the PS Executive Series Utiltities. Enter your communication program enabling you to talk directly to the printer. NOTE: Most PostScript commands are in lower case and should be typed in lower case with few exceptions (i.e., font names with capital letters).
-
Page 161: Exiting Interactive Mode
(Hold down the Control key while pressing D.) This inserts the serial end-of-the-file character. If you want to return to ESP mode, quit you application and return the printer to ESP mode using the PS Executive Series Utilities. Editing Keys... -
Page 162: Changing The Default Paper Cassette
The default paper tray change takes effect after the printer is powered off and back on. The lower optional tray is known by the printer as tray Ø. The upper standard tray is tray 1. To change the default back to multi-purpose tray, simply change the Ø in the above program to a 1. -
Page 163: Switching Cassettes (Tray Chaining)
Switching Cassettes (Tray chaining) You can set your printer to switch to the other cassette automatically when the current cassette is out of paper; this is called chaining. You must have the same size paper in each tray to enable chaining. -
Page 164: The Postscript Manualfeed Operator
PostScript contains an operator, manualfeedtimeout, which limits how long the printer waits for a sheet of paper to be inserted. If no paper is inserted within the time allotted by manualfeedtimeout, then a timeout error occurs and the current job is aborted. If you want to remain in the manual feed mode without time constraints, redefine manualfeedtimeout to 0. -
Page 165: Manual Feed Within Your Program
ASCII file: statusdict begin /manualfeed true def Send the file to the printer using the PS Executive Series program or DOS. If on the DOS level, make sure you understand the manualfeed timeout as it could limit the time of the procedure. -
Page 166: Changing Default Manualfeed
Chapter 9 Changing Default manualfeed You can set your printer to manual feed for an indefinite period of time. However, you have to enter the proper commands to reset the printer to automatic feed. To set printer default to manual feed, send the following commands exactly as they appear here. -
Page 167: About Timeouts
The wait timeout The emulation wait timeout The autoselectwait timeout At the beginning of each job, the printer sets these timeouts to default values. You can send your printer a PostScript command which changes these values. The operators which control the timeout values are described in chapter 10, “PostScript: Operator... -
Page 168: Auto Select And Emulation Timeouts
Chapter 9 The timeout facility is not ordinarily enabled when the printer is in interactive mode. Auto Select and Emulation Timeouts The other two modes of communication, emulation and ESP, also have timeouts associated with them. They are emulation wait... -
Page 169: About The Statusdict
PostScript: Operator Dictionary Introduction ..........10-1 About the statusdict . -
Page 171: Introduction
Introduction The printer has an extensive set of system parameters that control its behavior. These govern the baud rate, the communication protocol of the serial channels, the printer’s margins, the timeouts, and other similar functions. There are two kinds of system parameters: Volatile - parameters that remain in effect only through the processing of a single file. -
Page 172: About The Statusdict
Cookbook, published by Addison-Wesley. Entering the statusdict There are two ways to enter the statusdict: Send a file to the printer with the following command at the top: Use the interactive mode and the command: Either of these procedures gets you into the statusdict. You can then change system parameters by invoking operators by their names and specifying new parameters. -
Page 173: Changing Persistent Parameters
In such cases, only a system administrator should be permitted to make such changes. But in the case of a dedicated printer or a small group of cooperative users, the users should be permitted to make changes freely. - Page 174 When you want to change a persistent parameter, begin the file with this exitserver command: The serverdict is another special dictionary containing definitions controlling the printer. The above command works where 0 is the system administrator password. If the password is incorrect, exitserver executes the error, PasswordIncorrect (which immediately invokes stop, bypassing errordict).
-
Page 175: Operators In The Statusdict
The operators which require this are in the Operator 2 † column. Also some of the operators require you to turn the printer off and back on before they take effect; these operators are marked with an astrisk (*). - Page 176 Paper Tray Tray Size Tray Switch Start-up Page Printer Margins Printer Name †When you want to change a persistent parameter with these operators, begin the file with this command: * These operators require a power cycle before they take effect.
-
Page 177: Syntax Key
Chapter 10 In general, most of the following system parameters have one operator for determining current status of the system parameter. The second operator sets the parameter to the specified value or state. Each operator is examined in the following section. Syntax Key Varying fonts and placement of words in the syntax examples have distinct meanings. - Page 178 If you change the password and later cannot recall it, refer to the “Printer Error” section in chapter 7, “Trou- bleshooting Printer Problems,” to return to factory de- faults.
- Page 179 defaulttimeouts Syntax: defaulttimeouts job manualfeed wait Function Default Errors setdefaulttimeouts† Syntax: job manualfeed wait setdefaulttimeouts Function Errors P o s t S c r i p t : O p e r a t o r D i c t i o n a r y Returns the default job, manual feed, and wait timeout values.
- Page 180 PostScript interpreter executes a timeout error. The value 0 disables the job timeout altogether. At the beginning of a job, the printer initially sets the job timeout to the default job timeout returned by defaulttimeouts. (However, in interactive mode, the initial job timeout is always 0.)
- Page 181 P o s t S c r i p t : O p e r a t o r D i c t i o n a r y The wait timeout currently in effect for the PostScript mode; i.e., the number of seconds the printer waits to receive additional characters from the host computer before it gives up and aborts the current job by executing a timeout.
- Page 182 1 0 - 1 2 The wait timeout currently in effect for the emulation mode; i.e., the number of seconds the printer waits to receive additional characters from the host computer before it gives up and abort the current job by executing a timeout.
- Page 183 Sets the wait timeout for ESP mode. A PostScript program may change it to any non-negative integer value. It is ignored unless the printer is in ESP mode. rangecheck, stackunderflow, typecheck Chapter 10 1 0 - 1 3...
- Page 184 Function Default 1 0 - 1 4 The number of seconds the printer waits for a page to be inserted into the manual feed slot. This timeout applies only when the printer is in manual feed mode; i.e., when manualfeed is true.
- Page 185 emulation Syntax: integer1 emulation integer2 Function Errors setemulation† Syntax: integer1 integer2 setemulation Function Special Note Format Errors P o s t S c r i p t : O p e r a t o r D i c t i o n a r y Returns the current emulation for the specified interface.
- Page 186 Chapter 10 defaultemulation Syntax: integer1 defaultemulation integer2 Function Errors setdefaultemulation† Syntax: integer1 integer2 setdefaultemulation Function Special Note Format Default Errors 1 0 - 1 6 Returns the default emulation for the specified interface. rangecheck, stackoverflow, stackunderflow, typecheck Sets the current emulation for the specified interface port.
- Page 187 The new setting does not take effect until the end of the current job. (The end of the job is defined by a ^D or a timeout.) Only use this command when the printer is in either ESP or PostScript mode.
- Page 188 The new baud rate and options do not take effect until the end of the current job, and you must cycle the printer off and on. Setting a channel’s baud rate to zero disables the channel;...
- Page 189 25 9600 71 rangecheck, stackoverflow, stackunderflow, typecheck Sets the 25-pin serial communication channel parameters. Also, you must cycle the printer off and on for the new commands to take effect. invalidaccess, rangecheck, stackunderflow, typecheck Chapter 10 1 0 - 1 9...
- Page 190 Chapter 10 buffersizes Syntax: buffersizes integer1 integer2 integer3 integer4 Function Default fontcachesize Syntax: fontcachesize integer Function getallfontcachesizes Syntax: getallfontcachesizes integer integer integer integer Function 1 0 - 2 0 Returns configuration, in bytes, of the frame, fontcache, displaylist and communications buffer sizes. 1028096 bytes - frame buffer 153600 bytes - font cache buffer 65536 bytes - displaylist buffer...
- Page 191 AppleTalk buffer sizes, or virtual memory to be smaller than their minimum sizes. Also, you must cycle the printer off and on for this command to take effect. The user should use extreme care when configuring memory buffers.
- Page 192 Sets the parallel host buffer size. This size is forced to the nearest larger 2k boundary. Also, you must cycle the printer off and on for this command to take effect. Default size = 8192 bytes Minimum size = 4096 bytes...
- Page 193 Sets the AppleTalk host buffer size. This size is forced to the nearest larger 2k boundary. Also, you must cycle the printer off and on for this command to take effect. Default size = 8192 bytes Minimum size = 8192 bytes...
- Page 194 Chapter 10 numberofpapertrays Syntax: numberofpapertrays integer Function Default Errors defaultpapertray Syntax: defaultpapertray value Function Default Errors 1 0 - 2 4 Returns an integer indicating the number (1 or 2) of paper trays currently installed (since last power up cycle). invalidaccess, rangecheck, stackunderflow, typecheck Returns the default paper tray number.
- Page 195 setdefaultpapertray† Syntax: value setdefaultpapertray Function Default Errors defaultmultipurposetraysize Syntax: defaultmultipurposetraysize name boolean Function Errors P o s t S c r i p t : O p e r a t o r D i c t i o n a r y Establishes the default paper tray to determine paper tray feed.
- Page 196 Chapter 10 setdefaultmultipurposetraysize† Syntax: name boolean setdefaultmultipurposetraysize Function Default Errors 1 0 - 2 6 Sets the standard paper tray size for the standard paper tray. The boolean, true, results in portrait orientation. name = /letter /legal /envelope /executivepage 110 volt units default to /letter 220 volt units default to /a4 invalidaccess, rangecheck, stackunderflow, typecheck P o s t S c r i p t : O p e r a t o r D i c t i o n a r y...
- Page 197 P o s t S c r i p t : O p e r a t o r D i c t i o n a r y Returns whether the printer is to switch to the other paper tray on paper out. This variable accepts a legal boolean value, true or false.
-
Page 198: Other Operators In The Statusdict
Chapter 10 Other Operators in the statusdict There are several additional statusdict operators. They have to do with the operation of the printer and are not intended for execution by user programs, but may be useful for obtaining information. dostartpage... - Page 199 (The top of the page is the edge that emerges first from the printer.) Similarly, a positive left widens the left margin and a negative left narrows it. setmargins is intended only for use at installation time to correct any physical alignment errors that may exist;...
- Page 200 Errors 1 0 - 3 0 Returns the number of pages that have been printed by this printer. (There is no way to reset this value.) stackoverflow Stores the printer’s name into the supplied string (overwriting some initial portion of its value) and returns a string object designating the substring actually used.
- Page 201 ‘:’or ‘@’. A string is a composite object whose value must be enclosed in ’(’ ’)’. If you wish to name your printer Bill, it must be entered through the keyboard as (Bill). invalidaccess, rangecheck, stackunderflow, typecheck A string that specifies the name of the current job.
- Page 202 Chapter 10 jobtimeout Syntax: jobtimeout integer Function Default Error manualfeed Syntax: /manualfeed boolean def Function Default 1 0 - 3 2 Returns the number of seconds remaining before the job timeout occurs. A returned value of 0 means the job never times out.
-
Page 203: The Resettodefaults Operator
Function Default The resettodefaults operator PostScript provides a way to return your printer to all of its default factory settings, except pagecount and defaultpapertray. You may use this operator as a safeguard in case you really mess things up and want to return all volatile (persistent) and non-volatile parameters to the factory configuration. - Page 205 HP LaserJet series II Emulation Introduction ..........11-1 About HP Emulation .
-
Page 207: Hp Laserjet Series Ii Emulation
Introduction Because your printer is an intelligent general purpose computer, it can emulate the Hewlett-Packard LaserJet series II printer. If you have a software package that does not support PostScript but does work with the HP LaserJet series II, you can use this emulation with your program. - Page 208 Positioning commands Typeface selection commands Bitmap graphics Unlike the LaserJet series II, your printer does not limit the area covered by bitmaps. Additionally, your printer does not limit the rules, macros, overlays, and downloadable fonts of the LaserJet series II printer.
-
Page 209: Default Settings
Default Settings The following table shows the default settings for the LaserJet emulator: Command Page Orientation Page Length Top Margin Text Length Left Margin Right Margin Vertical spacing Horizontal Spacing Character Set Pitch Size Style Weight Typeface Graphics Resolution Underlining Line Termination End-of-Line # of copies... -
Page 210: About Pcl Commands
Chapter 11 About PCL Commands Escape sequences are commands sent to the printer to tell the printer what actions to perform. These commands are based on the Printer Control Language (PCL) used by the HP LaserJet and LaserJet series II. There are two kinds of commands in PCL:... - Page 211 <gc> <p1> <c1> <pn> and <cn> <data> The brackets, [ and ], shown in the example are NOT part of the command. These symbols are used here to separate the parts of the commands. Do not use the brackets or the < and > when entering the escape sequence.
-
Page 212: Laserjet Command Summary
The following is a summary of the commands used with the LaserJet series II. This summary is provided for those somewhat familiar with the LaserJet or LaserJet series II printer. You may need to check the LaserJet or LaserJet series II documentation for additional information. -
Page 213: The Reset Command
“defaults” to your change when it powers up. In order for the printer to default to the settings listed in Table 12.1, you may enter a RESET command. If you enter the RESET command of <esc><E>... - Page 214 Chapter 11 Function Parameter Page Layout Commands Orientation Portrait Landscape Page Size Executive Letter Legal Page Length # of Lines Top Margin # of Lines Text Length # of Lines Perf Skip Mode Left Margin # of Columns Right Margin # of Columns Clear Side Margins...
- Page 215 Function Parameter Print Position Command Set HMI # of 1/20" Move to Row Row # Move to Col Col # Horizontal # of decipoints Vertical # of decipoints Horizontal # of dots Vertical # of dots Push/Pop Push Position Raster Graphics Resolution 100 Dots/Inch 150 Dots/Inch...
- Page 216 Chapter 11 Function Parameter Advanced Graphics (con’t) Gray Scale Pattern ID 10% Gray 15% Gray 30% Gray 45% Gray 70% Gray 90% Gray 100% Gray HP Pattern ID 1 Horiz. Lines 2 Vert. Lines 3 Diag. Lines 4 Diag. Lines 5 Grid 6 Diag.
- Page 217 8.5 Pt. 10 Pt. 12 Pt. 14.4 Pt. Style Upright Italic Typeface Courier Line Printer *Helv *TMS RMN *Prestige Elite *Gothic Compressed Print * These fonts are available on the HP ProCollection Card. Table 11.2 LaserJet Command Summary H P L a s e r J e t s e r i e s I I E m u l a t i o n...
- Page 218 Chapter 11 Function Parameter Font Management Font ID Font ID # Character ASCII Code # Code Font and Character Control Delete all Delete last Delete last Make Temp Font <ESC>*c4F Create Font # of Bytes (Font Header) Download # of Bytes Character Designate Download...
-
Page 219: Additional Technical Information
HP LaserJet series II printer. Paper Size Interactions The LaserJet series II printer has a few commands that interact with the PostScript operator to change the printer’s paper (note that the lowercase letter l appears in the commands, and not the numeral 1): <ESC>&l#H... -
Page 220: Storage Of Information
^D, ^T, and ^C Commands The bitmap graphics of the LaserJet series II printer require that 8-bit data be transmitted to the printer. Hence, when the printer is in the LaserJet series II printer emulation mode, it configures the communication parameters so that all 256 characters are transmitted uninterpreted to the emulator. - Page 221 II printer. Fonts and/or macros may be designated permanent or temporary and may be deleted via the standard LaserJet series II printer escape sequences. When a typeface or macro is deleted, the storage that it occupies becomes available for new downloaded fonts or macros.
-
Page 223: Cable Pinouts
Cable Pinouts IBMPC ........... . A-l IESMPCDTRCablePinouts.. -
Page 225: Ibm Pc
DTR for the IBM PC/XT and IBM PC/AT or compatible computers. The cable has a 25pin male connector on the printer end and either a 25-pin or g-pin female connector on the computer end. -
Page 226: Ibm Pc Dtr
DTR cable so you can use the default DTR/DSR flow control. With a typical RS-232C cable, you can use only XON/XOFF flow control. Plnouts: IBM PC/XT A - 2 Printer IBM PC/XT DB-25 S DB-25 P T 6+8 C a b l e Pinouts... -
Page 227: Localtalk
LocalTalk Pinouts The table below gives the pin assignments and functions for the cable used to connect a Macintosh and printer with a DIN-8 cable. Fig. PhoneNET Cable LocalTalk Pinouts: C a b l e Pinouts LocalTalk Pin No. Signal Name... -
Page 228: Centronics Parallel
36-pin Male Amphenol Fig. Typical Parallel Cable The table on the next page lists the pin assignments for the Centronics parallel interface cable that can be used with your printer. _____- A - 4 C a b l e Pinouts... - Page 229 Pinouts: Centronics Parallel C a b l e Pinouts Signal Return Pin No. Signal Pin No. STROBE DATA 1 DATA 2 DATA 3 DATA 4 DATA 5 DATA 6 DATA 7 DATA 8 ACKNLG BUSY SLClT. C H A S S I S G N D - 19-30 Direction A - 5...
- Page 230 To effectively prevent noise, these cables should be shielded and connected to the chassis of the system unit and printer, respectively. All interface conditions are based on TI’L level. Both the rise and fall times of each signal must be less than 0.2 ps.
- Page 231 Technical Specifications Print Engine ..........B-1 Controller.
-
Page 233: Technical Specifications
Print Engine Print Method Resolution Print Speed Toner Toner Cartridge Life Warm-Up Time Maximum Duty Cycle T e c h n i c a l S p e c i f i c a t i o n s Electrophotographic recording with semiconductor laser. -
Page 234: Controller
1 degree increments. Host-resident downloadable fonts are also available. Your printer uses PostScript licensed by Adobe Systems, Incorporated. T e c h n i c a l S p e c i f i c a t i o n s... -
Page 235: Paper Handling
A4: 210 mm x 297 mm B5: 182 mm x 257 mm Executive: 7 1/4" x 10 1/2" Your printer can handle special stocks including envelopes, labels and transparency film. Envelope minimum of 3 1/2" x 7" (86 mm x 178 mm) maximum of 7 2/5"... - Page 236 Appendix B Basis Weight Grain Moisture Content Furnish (Composition) Acid Content Ash Content Opacity Brightness Caliper Curl Cut edge conditions Finishing Fusing Compatibility Packaging Smoothness Stiffness Surface Strength Electrical Surface Resistivity Electrical Volume Resistivity Table B.2 Paper Specifications B - 4 16 to 28 pound (60 to 105 g/m Long grain 4% to 6% weight...
-
Page 237: Interfaces
19200), Centronics parallel, and LocalTalk. T e c h n i c a l S p e c i f i c a t i o n s QMS-PS 410 (with standard tray) accommodates: Letter: 8 1/2" x 11"... -
Page 238: Physical Characteristics
Environmental Requirements Temperature Humidity Noise Level B - 6 Compact, dual tray, desktop laser printer with internal controller 350 x 405 x 204 mm Height increases 55 mm when optional tray is added. Approximate 11 kg. 110/120v 50/60 Hz or 220/240v 50 Hz. -
Page 239: Environments
IBM PC and compatibles Most mini and mainframe computers Your printer uses industry-standard RS-232 null modem serial, Centronics parallel, or DIN-8 LocalTalk interfaces. T e c h n i c a l S p e c i f i c a t i o n s... -
Page 241: Optional Accessories Available
Appendix C Optional Accessories Available QMS Accessories..........C-1... -
Page 243: Qms Accessories
QMS Accessories The following optional accessories are available from your QMS vendor. Other accessories may have become available since this printing; check with your vendor, or contact QMS through Q-Fax, CompuServe, or the QMS Bulletin Board. See appendix F, “Product Sales and Support,” for information about these services. EP-L Cartridge Paper Trays: Letter Cassette... - Page 244 Appendix C Documentation: QMS-PS 410 User’s Guide QMS-PS 410 PS Executive Series User’s Guide QMS-PS 410 Getting Started Guide C - 2 O p t i o n a l A c c e s s o r i e s A v a i l a b l e...
-
Page 245: Character Encoding Tables
Appendix D Character Encoding Tables Character Encoding Tables ........D-1... - Page 247 Character Encoding Tables Character encoding tables are included with this manual as a reference. The standard PostScript fonts use a flexible encoding scheme by which character codes select character descriptions. These tables show the codes of each character. Some programs require you to input character encoding information in order to fully use the available fonts.
- Page 248 Appendix D Standard Fonts Character Set \02x \03x \15x D - 2 C h a r a c t e r E n c o d i n g T a b l e s...
- Page 249 Appendix D Symbol Encoding C h a r a c t e r E n c o d i n g T a b l e s D - 3...
- Page 250 Appendix D ITC Zapf Dingbats Encoding I octal D - 4 C h a r a c t e r E n c o d i n g T a b l e s...
-
Page 251: Computer Literacy
Your Printer’s Memory ........ -
Page 253: How Your Computer Talks To Your Printer
The following sections introduce you to the method of data transfer between your computer and your printer. This is not essential knowledge to operate and fully use your QMS-PS 410 printer. This information may help you to understand, however, the operation of your printer. -
Page 254: Bibliography
In its long-term memory (EEPROM), the printer stores choices not likely to be changed on a daily basis, such as emulation mode. These things stay in memory even when you reset or turn off the printer. In its short-term memory (RAM), the printer stores the current page data, downloaded fonts, and any other data used to print the current page. - Page 255 Appendix E Holzgang, David, Understanding PostScript Programming. Alameda, CA: Sybex, 1988. ISBN 0-89588-566-2. Karsnitz, John R., Graphic Arts Technology. Albany, NY: Delmar, 1984. ISBN 0-8273-1828-6. PostScript Language Journal, the PostScript industry newsletter, West Orange, NJ: Pipeline Associates. ISBN 0891-5873. Smith, Ross. Learning PostScript: A Visual Approach. Berkeley: Peachpit Press, 1990.
-
Page 257: Product Support
Appendix F Product Sales and Support Product Support ..........F-1 QMS Bulletin Board . -
Page 259: Product Sales And Support
QMS has an established worldwide network of authorized QMS vendors. Your local vendor (the one from whom you bought the printer) is best equipped to help you. He has specially trained service technicians available to answer any questions. Your dealer also has the latest programs to examine and analyze any problems. -
Page 260: Compuserve
CompuServe. When you use CompuServe, simply type GO DTPVEN to enter the DTP Vendor forum; QMS is section 3 of that forum. The QMS library section contains such things as printer drivers, utilities, technical information, and announcement files. Third Party Development If you would like a list of software applications which support this printer, call Third Party Development, Telephone (205) 633-4300. -
Page 261: Qms International Service And Support
QMS International Service and Support Canada Europe P r o d u c t S a l e s a n d S u p p o r t QMS Canada Inc. 9630 Rte Trans-Canadienne Saint-Laurent, Quebec Canada H4S 1V9 Telephones: (514) 333-5940 (800) 361-3392 Fax: (514) 333-5949... - Page 262 Appendix F New Zealand Australia F - 4 QMS New Zealand Limited P.O. Box 56380 Unit A, 123 Dominion Road Mt. Eden Auckland, New Zealand Telephone: (64)-9/607912 Fax: (64)-9/603599 QMS Australia Pty Ltd. 651 Canterbury Road Surrey Hills, Victoria 3127 Australia Telephone: (61)-3/8995777 Fax: (61)-3/8990972...
-
Page 263: Glossary
Baud rate is the data transfer rate between the computer and the printer. The computer and the printer must be configured at the same baud rate. It can be set between 300 and 19,200 baud depending upon the type of computer used. - Page 264 Card (Font or Emulation) Credit-card sized cartridges which contains various fonts and/or emula- tions not available as resident on the printer. For a complete list, contact your QMS dealer or representative. Character A single letter, number, symbol, space, or punctuation mark.
- Page 265 The software that controls the engine of a printer. The controller is the intelligence of the printer. Concurrent Interfaces The QMS-PS 410 printer’s three interface ports are all active simultane- ously. This gives you the ability to print all three ports concurrently rather than be restricted to one. See also simultaneous interfaces.
- Page 266 See EP-L cartridge. Emulation In this manual, emulation refers to the ability of the printer to respond to commands that are intended for a different type of printer. For example, when the printer is set for LaserJet series II emulation, it will respond to the same commands (HP PCL) that a LaserJet series II printer would.
-
Page 267: Escape Character
Engine The part of a printer where the paper is physically processed and printed. It is the body and internal components that house the controller. EP-L Cartridge The EP-L (electrophotographic) cartridge contains a photosensitive print drum and a supply of toner. Because the drum is photosensitive, it must be protected from exposure to light. -
Page 268: Factory Default
Face-Up Output Tray A paper tray attached to the printer above the standard tray that results in paper, transparencies or envelopes being stacked in face-up order. This tray is mandatory for transparencies, envelopes and labels. Factory Default Factory defaults refer to the printer settings that are programmed into the printer at the factory. -
Page 269: Font Characteristics
Your printer uses either XON/XOFF or DTR/DSR protocol to communicate with a computer. HP-GL (Hewlett Packard-Graphics Language) The HP-GL plotter language emulation is an optional cartridge-based emulation on the QMS-PS 410 printer. G l o s s a r y G - 7... -
Page 270: Interface Cable
A special cable used to connect the printer to the computer so they can communicate. Interface Port The QMS-PS 410 printer comes with three interface ports, serial, parallel, and LocalTalk located on the back panel. The cable that attaches the computer to the printer must be plugged into the proper interface port. See I/O cable. -
Page 271: Landscape Orientation
AppleTalk protocol. See AppleTalk also. Media This refers to any material (paper, envelopes, transparencies, etc.) used in the QMS-PS 410 printer for printed output. See printing media. Memory Upgrade An available option that is easily attached to the printer’s controller board to expand its RAM to a maximum of 6MB. - Page 272 The output tray selector, a lever located on the upper right front side of the paper path door on the printer, is used to adjust the paper path. It series either the correct order (face down) or face-up output tray.
-
Page 273: Paper Jam
A paper jam describes what happens when paper gets stuck somewhere along the paper path. Paper Path This is the path the paper follows in its journey through the printer; it begins at the paper tray pickup point and ends where it exists the printer. Parallel A data transmission technique that sends each bit simultaneously over separate lines. -
Page 274: Point Size
Persistent This term is used to reference printer parameters which remain in the printer’s memory after you power off. They appear each time you power on the printer. Pitch Pitch refers to the number of characters printer per horizontal inch. For example, 12 pitch means that 12 characters will be printed per horizontal inch. -
Page 275: Printer Driver
Printer Driver A printer driver is a file that enables the application program to talk with the printer. Usually, the printer driver is installed within an applications program. PROM An acronym for Programmable Read Only Memory. A storage device that can be programmed by electrical pulses. - Page 276 Resolution A measurement of the dots-per-inch (dpi) in output material, either printed or visual, as in a “high-resolution monitor.” Your printer features a 300-dpi resolution. An acronym for Read Only Memory, ROM is a more stable kind of memory than RAM. Information stored in ROM is retained and can be retrieved each time the machine is activated.
-
Page 277: Serial Interface
Simultaneous Interface The QMS-PS 410 printer’s three interface ports are all active concurrently. This gives you the capability to print to all three ports simultaneously rather than be restricted to one. See concurrent interfaces. -
Page 278: Symbol Set
Toner Toner is a dry, powdered substance capable of being attracted to electri- cally charged areas on a photosensitive revolving drum. The QMS-PS 410 printer’s EP-L cartridge holds the toner. The toner is first attracted to this charged area, then attracted to the negatively charged paper. The toner is melted (or fused) in place by the fuser roller. - Page 279 Courier, Times Roman, and Garamond Gothic typefaces each print characters of different designs. Volatile This term is used to reference printer parameters which remain in the printer’s memory only during the current power cycle. They are lost when you power off.
- Page 281 Buffer ......E-1 Printer ......E-1 Buffer Sizes .
- Page 282 Face-up Tray..... . 2-9 Features Printer ......1-2 Feeder Tray Installing .
- Page 283 Feeding Envelopes ....2-10 Feeding Paper Manual Feed ....2-10 Flow control .
- Page 284 Allocation ..... . 2-18 Printer ......E-1 Memory Modules Installing .
- Page 285 Weight ......2-2 Paper Cassette Installing Optional ....4-2 Legal .
- Page 286 Troubleshooting ....7-3 Printer Drivers ..... 1-6 Printer Error Light .
- Page 287 Status printer ......2-17 Status page ..... . . 2-17 statusdict.
- Page 288 WingZ ......3-3 WordPerfect ....1-7, 3-3 WordStar .
Need help?
Do you have a question about the PS 410 and is the answer not in the manual?
Questions and answers