
Subscribe to Our Youtube Channel
Related Manuals for Moxa Technologies DA-660 Series


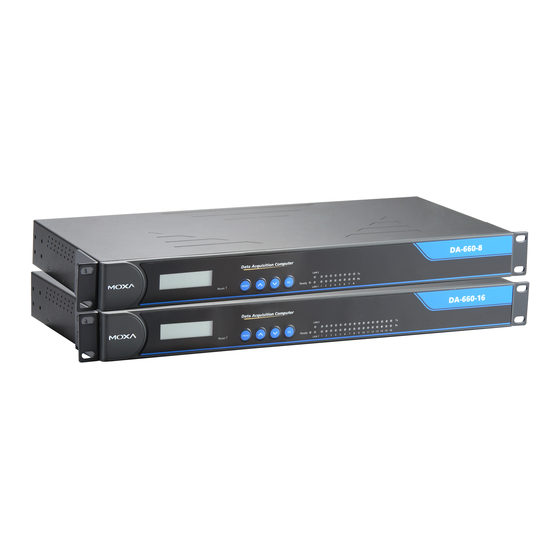
Summary of Contents for Moxa Technologies DA-660 Series
- Page 1 DA-660-8/16-LX User’s Manual Seventh Edition, February 2009 www.moxa.com/product © 2009 Moxa Inc. All rights reserved. Reproduction without permission is prohibited.
- Page 2 DA-660-8/16-LX User’s Manual The software described in this manual is furnished under a license agreement and may be used only in accordance with the terms of that agreement. Copyright Notice Copyright © 2009 Moxa Inc All rights reserved. Reproduction without permission is prohibited. Trademarks MOXA is a registered trademark of Moxa Inc.
-
Page 3: Table Of Contents
Table of Contents Chapter 1 Introduction ....................1-1 Overview..........................1-2 Software Architecture ......................1-2 Journaling Flash File System (JFFS2) ................1-3 Software Package ......................1-4 Chapter 2 Getting Started .....................2-1 Powering on the DA-660 ......................2-2 Connecting the DA-660 to a PC ....................2-2 Serial Console....................... - Page 4 PPPoE ............................ 4-13 NFS (Network File System)....................4-15 Setting up the DA-660 as a NFS Server ..............4-15 Setting up the DA-660 as a NFS Client ..............4-16 Mail............................4-17 SNMP ............................ 4-17 OpenVPN..........................4-18 Chapter 5 Programmer’s Guide..................5-1 Flash Memory Map........................5-2 Linux Tool Chain Introduction....................
-
Page 5: Chapter 1 Introduction
Introduction Chapter 1 Welcome to the DA-660 RISC-based Communication Platforms. Features include RS-232/422/485 serial ports, and dual 10/100 Mbps Ethernet ports, making the DA-660 ideal for your embedded applications. The following topics are covered in this chapter: Overview Software Architecture Journaling Flash File System (JFFS2) Software Package... -
Page 6: Overview
DA-660-8/16-LX User’s Manual Introduction Overview The DA-660 computer is ideal for embedded applications. This computer features a RISC CPU, RAM memory, and communication ports that connect to RS-232/422/485 serial devices and dual 10/100 Mbps Ethernet. The Da-660 computer uses an Intel XScale IXP-422 266 Mhz RISC CPU. Unlike the X86 CPU, which uses a CISC design, the RISC architecture and modern semiconductor technology provide this computer with a powerful computing engine and communication functions, but without generating a lot of heat. -
Page 7: Journaling Flash File System (Jffs2)
DA-660-8/16-LX User’s Manual Introduction In order to prevent user applications from crashing the User AP Root File System, the DA-660 uses a specially designed User Directory Mini Root File System Mini File System with Protected Configuration for (User Configuration) Configuration emergency use. -
Page 8: Software Package
DA-660-8/16-LX User’s Manual Introduction affected. Additional information about JFFS2 is available at: http://sources.redhat.com/jffs2/jffs2.pdf http://developer.axis.com/software/jffs/ http://www.linux-mtd.infradead.org/ Software Package Boot Loader Redboot (V1.92) Kernel Monta Vista embedded Linux 2.4.18 ARP, PPP, CHAP, PAP, IPv4, ICMP, TCP, UDP, DHCP, FTP, SNMP Protocol Stack V1/V3, HTTP, NTP, NFS, SMTP, SSH 1.0/2.0, SSL, Telnet, PPPoE, OpenVPN JFFS2, NFS, Ext2, Ext3, VFAT/FAT... -
Page 9: Chapter 2 Getting Started
Getting Started Chapter 2 In this chapter, we explain how to connect the DA-660, turn on the power, and then get started using the programming and other functions. The following topics are covered in this chapter: Powering on the DA-660 Connecting the DA-660 to a PC Serial Console Telnet Console... -
Page 10: Powering On The Da-660
DA-660-8/16-LX User’s Manual Getting Started Powering on the DA-660 Connect the SG wire to the Shielded Contact located on the upper left corner of the DA-660, and then power on the computer by connecting it to the power adaptor. It takes about 30 to 60 seconds for the system to boot up. -
Page 11: Telnet Console
DA-660-8/16-LX User’s Manual Getting Started Telnet Console If you know at least one of the two IP addresses and netmasks, then you can use Telnet to connect to the DA-660’s console utility. The default IP address and netmask for each of the two ports are given below: Default IP Address Netmask... -
Page 12: Ssh Console
DA-660-8/16-LX User’s Manual Getting Started SSH Console The DA-660 supports an SSH Console to offer users with better security options. Windows Users Click the link http://www.chiark.greenend.org.uk/~sgtatham/putty/download.html to download PuTTY (free software) to set up an SSH console for the DA-660 in a Windows environment. The following figure shows a simple example of the configuration that is required. -
Page 13: Configuring The Ethernet Interface
DA-660-8/16-LX User’s Manual Getting Started Configuring the Ethernet Interface The network settings of the DA-660 can be modified with the serial Console, or online over the network. Modifying Network Settings with the Serial Console In this section, we use the serial console to configure the network settings of the target computer. 1. -
Page 14: Modifying Network Settings Over The Network
DA-660-8/16-LX User’s Manual Getting Started Auto eth0 eth1 lo iface lo inet loopback iface eth0 inet dhcp iface eth1 inet dhcp 3. After modifying the boot settings of the LAN interface, issue the following command to activate the LAN settings immediately: #/etc/init.d/networking restart NOTE After changing the IP settings, use the networking restart command to activate the new IP... -
Page 15: Installing The Tool Chain (Linux)
DA-660-8/16-LX User’s Manual Getting Started Installing the Tool Chain (Linux) The PC must have the Linux Operating System pre-installed before installing the DA-660 GNU Tool Chain. Redhat 7.3/8.0, Fedora Core, and compatible versions are recommended. The Tool Chain requires about 100 MB of hard disk space on your PC. The DA-660 Tool Chain software is located on the DA-660 CD. -
Page 16: Compiling Hello.c
DA-660-8/16-LX User’s Manual Getting Started Compiling Hello.c The package CD contains several example programs. Here we use Hello.c as an example to show you how to compile and run your applications. Type the following commands from your PC to copy the files used for this example from the CD to your computer’s hard drive: # cd /tmp/ # mkdir example # cp –r /mnt/cdrom/example/* /tmp/example... -
Page 17: Developing Your First Application
DA-660-8/16-LX User’s Manual Getting Started Developing Your First Application We use the tcps2 example to illustrate how to build an application. The procedure outlined in the following subsections will show you how to build a TCP server program plus serial port communication that runs on the DA-660. -
Page 18: Uploading And Running The "Tcps2-Release" Program
DA-660-8/16-LX User’s Manual Getting Started root@server11:/home/da660/1st_application [root@server11 1st_application]# pwd /home/da660/1st_application [root@server11 1st_application]# 11 total 20 -rw-r—r-- 1 root root 514 Nov 27 11:52 Makefile -rw-r—r-- 1 root root 4554 Nov 27 11:52 tcps2.c -rw-r—r-- 1 root root 6164 Nov 27 11:55 tcps2.c [root@server11 1st_application]# make_ /usr/local/mxscaleb/bin/mxscaleb-gcc -o tcps2-release tcps2.c /usr/local/mxscaleb/bin/mxscaleb-strip –s tcps2-release... - Page 19 DA-660-8/16-LX User’s Manual Getting Started root@server11:/home/da660/1st_application [root@server11 1st_application]# ftp 192.168.3.127 Connected to 192.168.3.127 220 Moxa FTP server (Version wu-2.6.1(2) Mon Nov 24 12:17:04 CST 2003) ready. 530 Please login with USER and PASS. 530 Please login with USER and PASS. KERBEROS_V4 rejected as an authentication type Name (192.168.3.127:root): root 331 Password required for root.
- Page 20 DA-660-8/16-LX User’s Manual Getting Started root@Moxa:~# ./tcps2-release & [1] 187 start root@Moxa:~# jobs [1]+ Running ./tcps2-release & root@Moxa:~# NOTE Use the command for job number 1 to terminate this program: kill #kill %1 #ps -ef // use this command to check if the program is running 192.168.3.127 - PuTTY [1]+ Running ./tcps2-release &...
-
Page 21: Testing Procedure Summary
DA-660-8/16-LX User’s Manual Getting Started Testing Procedure Summary 1. Compile tcps2.c ( #make 2. Upload and run tcps2-release in the background (#./tcps2-release &) 3. Check that the process is running (#jobs or #ps -ef) 4. Use a serial cable to connect PC1 to the DA-660’s first serial port. 5. -
Page 22: Managing Embedded Linux
Managing Embedded Linux Chapter 3 This chapter includes information about version control, deployment, updates, and peripherals. The information in this chapter is particularly useful when you need to run the same application on several DA-660 units. The following topics are covered in this chapter: System Version Information System Image Backup Upgrading the Firmware... -
Page 23: System Version Information
DA-660-8/16-LX User’s Manual Managing Embedded Linux System Version Information To determine the hardware capability of your DA-660, and what kind of software functions are supported, check the version numbers of your DA-660’s hardware, kernel, and user file system. Contact Moxa to determine the hardware version. You will need the Production S/N (Serial number), which is located on the DA-660’s bottom label. - Page 24 DA-660-8/16-LX User’s Manual Managing Embedded Linux 192.168.3.127 - PuTTY root@Moxa:~# df –h Filesystem Size Used Available Use% Mounted on /dev/ mtdblock3 26.0M 8.9M 17.1M 34% / /dev/mtdblock3 26.0M 8.9M 17.1M 34% / /dev/ram2 2.0M 40.0k 1.8M 2% /var tmpfs 62.1M 62.1M 0% /dev/shm root@Moxa:~# upramdisk...
-
Page 25: Loading Factory Defaults
DA-660-8/16-LX User’s Manual Managing Embedded Linux 3. Next, use the command to upgrade the kernel and root file system: upfirm #upfirm da660-x.x.x.frm 192.168.3.127 - PuTTY root@Moxa:/mnt/ramdisk# upfirm DA660-1.0.frm Upgrade firmware utility version 1.0. To check source firmware file context. The source firmware file conext is OK. This step destroy all your firmware. - Page 26 DA-660-8/16-LX User’s Manual Managing Embedded Linux 192.168.3.127 - PuTTY root@Moxa:~# cd /etc root@Moxa:/etc# ps –ef PID Uid VmSize Stat Command 1 root 1296 S init 2 root [keventd] 3 root [ksoftirqd_CPU0] 4 root [kswapd] 5 root [bdflush] 6 root [kupdated] 7 root [mtdblockd] 8 root...
-
Page 27: Setting The Run-Level
DA-660-8/16-LX User’s Manual Managing Embedded Linux View the list of enabled daemons, after reboot, to see whether your application daemon is enabled. 192.168.3.127 - PuTTY root@Moxa:~# ps –ef PID Uid VmSize Stat Command 1 root 1296 S init 2 root [keventd] 3 root [ksoftirqd_CPU0]... -
Page 28: Adjusting The System Time
DA-660-8/16-LX User’s Manual Managing Embedded Linux xx: a number between 00-99. The smaller number has a higher priority. RUNFILE: the file name. 192.168.3.127 - PuTTY root@Moxa:/ect/rc.d/rc3.d# ls S19nfs-common S25nfs-user-server S99showreadyled S20snmpd S55ssh S24pcmcia S99rmnologin root@Moxa:/ect/rc.d/rc3.d# ln –s /root/tcps2-release S60tcps2 root@Moxa:/ect/rc.d/rc3.d# ls S19nfs-common S25nfs-user-server S99rmnologin S20snmpd S55ssh... -
Page 29: Ntp Client
DA-660-8/16-LX User’s Manual Managing Embedded Linux Write current system time to RTC: The following figure illustrates how to update the system time and set the RTC time. 192.168.3.127 - PuTTY root@Moxa:~# date Fri Jun 23 23:30:31 CST 2000 root@Moxa:~# hwclock Fri Jun 23 23:30:35 2000 -0.557748 seconds root@Moxa:~# date 120910002004 Thu Dec 9 10:00:00 CST 2004... -
Page 30: Cron-Daemon To Execute Scheduled Commands
DA-660-8/16-LX User’s Manual Managing Embedded Linux Copy the example shell script fixtime to directory /etc/init.d, and then use chmod 755 fixtime to make the shell script executable. Next, use the vi editor to edit the file /etc/inittab. Add the following line to the bottom of the file: ntp : 2345 : respawn : /etc/init.d/fixtime Use the command #init q to re-init the kernel. -
Page 31: Timezone Setting
DA-660-8/16-LX User’s Manual Managing Embedded Linux Timezone Setting Two methods are available for configuring the timezone setting. 1. Using the TZ variable TZ=standardHH[:MM[:SS]][daylight[HH[:MM[:SS]]][,startdate[/starttime], enddate[/endtime]]] The time kept by the local machine should be a universal standard representation, such as Greenwich Mean Time (GMT) or Universal Time Coordinated (UTC), which we refer to collectively as the “universal reference time.”... - Page 32 DA-660-8/16-LX User’s Manual Managing Embedded Linux 2. How to use the file /etc/localtime. The local timezone is stored in /etc/localtime and is used by GNU Library for C (glibc) if the TZ environment variable is not set. This file is either a copy of the /usr/share/zoneinfo/ tree or a symbolic link to it.
-
Page 33: Chapter 4 Managing Communications
Managing Communications Chapter 4 In this chapter, we explain how to configure the DA-660’s various communication functions. The following topics are covered in this chapter: Telnet / FTP Web Service—Apache IPTABLES NAT Example Enabling NAT at Bootup Dial-up Service—PPP PPPoE NFS (Network File System) Setting up the DA-660 as a NFS Server Setting up the DA-660 as a NFS Client... -
Page 34: Telnet / Ftp
DA-660-8/16-LX User’s Manual Managing Communications Telnet / FTP In addition to supporting Telnet client/server and FTP client/server, the DA-660 also supports SSH and SFTP client/server. To enable or disable the Telnet/FTP server, you first need to edit the file /etc/inetd.conf. Enabling the Telnet/FTP server The following example shows the default content of the file /etc/inetd.conf. -
Page 35: Web Service-Apache
DA-660-8/16-LX User’s Manual Managing Communications Web Service—Apache The Apache web server’s main configuration file is /etc/apache/httpd.conf, with the default homepage located at /usr/www/html/index.html. Save your own homepage to the following directory: /usr/www/html/ Save your CGI page to the following directory: /usr/www/cgi-bin/ Before you modify the homepage, use a browser (such as Microsoft Internet Explore or Mozilla Firefox) from your PC to test if the Apache Web Server is working. - Page 36 DA-660-8/16-LX User’s Manual Managing Communications To open the default CGI test script report page, type http://192.168.3.127/cgi-bin/test-cgi in your browser’s address box. NOTE The CGI function is enabled by default. If you want to disable the function, modify the file /etc/apache/conf/httpd.conf. When you develop your own CGI application, make sure your CGI file is executable.
-
Page 37: Iptables
DA-660-8/16-LX User’s Manual Managing Communications IPTABLES IPTABLES is an administrative tool for setting up, maintaining, and inspecting the Linux kernel’s IP packet filter rule tables. Several different tables are defined, with each table containing built-in chains and user-defined chains. Each chain is a list of rules that apply to a certain type of packet. Each rule specifies what needs to be done with a matching packet. - Page 38 DA-660-8/16-LX User’s Manual Managing Communications Incoming Packets Mangle Table PREROUTING Chain NAT Table PREROUTING Chain Local Host Other Host Packets Packets Mangle Table Mangle Table INPUT Chain FORWARD Chain Filter Table Filter Table INPUT Chain FORWARD Chain Local Mangle Table Process POSTROUTING Chain Mangle Table...
- Page 39 DA-660-8/16-LX User’s Manual Managing Communications The basic syntax to enable and load an IPTABLES module is as follows: #lsmod #modprobe ip_tables #modprobe iptable_filter Use lsmod to check if the ip_tables module has already been loaded in the DA-660. Use modprobe to insert and enable the module. Use the following command to load the modules (iptable_filter, iptable_mangle, iptable_nat): #modprobe iptable_filter NOTE...
- Page 40 DA-660-8/16-LX User’s Manual Managing Communications Define policy for chain rules Usage: # iptables [-t tables] [-P] [INPUT, OUTPUT, FORWARD, PREROUTING, OUTPUT, POSTROUTING] [ACCEPT, DROP] -P: Set the policy for the chain to the given target. INPUT: For packets coming into the DA-660. OUTPUT: For locally-generated packets.
-
Page 41: Nat
DA-660-8/16-LX User’s Manual Managing Communications NOTE: In Example 8, remember to issue the command #modprobe ipt_mac first to load module ipt_mac. NAT (Network Address Translation) protocol translates IP addresses used on one network to different IP addresses used on another network. One network is designated the inside network and the other is the outside network. -
Page 42: Enabling Nat At Bootup
DA-660-8/16-LX User’s Manual Managing Communications Enabling NAT at Bootup In the most real world situations, you will want to use a simple shell script to enable NAT when the DA-660 boots up. The following script is an example. #!/bin/bash # If you put this shell script in the /home/nat.sh # Remember to chmod 744 /home/nat.sh # Edit the rc.local file to make this shell startup automatically. - Page 43 DA-660-8/16-LX User’s Manual Managing Communications The pppd daemon is used to connect to a PPP server from a Linux system. For detailed information about pppd, see the man page. Example 1: Connecting to a PPP server over a simple dial-up connection The following command is used to connect to a PPP server using a modem.
- Page 44 DA-660-8/16-LX User’s Manual Managing Communications defaultroute Once the PPP link is established, make it the default route; if you have a PPP link to the Internet, this is probably what you want. 192.1.1.17 This is a degenerate case of a general option of the form x.x.x.x:y.y.y.y. Here x.x.x.x is the local IP address and y.y.y.y is the IP address of the remote end of the PPP connection.
-
Page 45: Pppoe
DA-660-8/16-LX User’s Manual Managing Communications round-trip min/avg/max = 247/260/268 ms waddington:~$ Try typing: netstat –nr This should show three routes similar to the following: Kernel routing table Destination iface Gateway Genmask Flags Metric 129.67.1.165 ppp0 0.0.0.0 255.255.255.255 127.0.0.0 0.0.0.0 255.0.0.0 0 lo 0.0.0.0 ppp0 129.67.1.165... - Page 46 DA-660-8/16-LX User’s Manual Managing Communications 4. Edit the file /etc/ppp/pap-secrets and add the following: “username@hinet.net” * “password” * support hostname "*" stats hostname "*" # OUTBOUND connections # ATTENTION: The definitions here can allow users to login without a # package already provides this option; make sure you don't change that. # INBOUND connections # Every regular user can use PPP and has to use passwords from /etc/passwd hostname...
-
Page 47: Nfs (Network File System)
DA-660-8/16-LX User’s Manual Managing Communications nameserver ip_addr_of_second_dns_server For example: nameserver 168..95.1.1 nameserver 139.175.10.20 8. Use the following command to create a pppoe connection: pppd eth0 The eth0 is what is connected to the ADSL modem LAN port. The example above uses LAN1. To use LAN2, type: pppd eth1 9. -
Page 48: Setting Up The Da-660 As A Nfs Client
DA-660-8/16-LX User’s Manual Managing Communications no_root_squash If no_root_squash is selected, then the root on the client machine will have the same level of access to files on the system as the root on the server. This can have serious security implications, although it may be necessary if you want to do administrative work on the client machine that involves the exported directories. -
Page 49: Mail
DA-660-8/16-LX User’s Manual Managing Communications #mount –t nfs NFS_Server(IP):/directory /mount/point Example: #mount –t nfs 192.168.3.100/home/public /home/nfs/public Mail smtpclient is a minimal SMTP client that takes an email message body and passes it on to an SMTP server. It is suitable for applications that use email to send alert messages or important logs to a specific user. -
Page 50: Openvpn
DA-660-8/16-LX User’s Manual Managing Communications 22: system.9.1.3.6 (octet string) View-based Access Control Model for SNMP. 23: system.9.1.3.7 (octet string) The SNMP Management Architecture MIB. 24: system.9.1.3.8 (octet string) The MIB for Message Processing and Dispatching. 25: system.9.1.3.9 (octet string) The management information definitions for the SNMP User-based Security Model. 26: system.9.1.4.1 (timeticks) 0 days 00h:00m:00s.04th (4) - Page 51 DA-660-8/16-LX User’s Manual Managing Communications Host A (B) represents one of the machines that belongs to OpenVPN A (B). The two remote subnets are configured for a different range of IP addresses. When this setup is moved to a public network, the external interfaces of the OpenVPN machines should be configured for static IPs, or connect to another device (such as a firewall or DSL box) first.
- Page 52 DA-660-8/16-LX User’s Manual Managing Communications done IFS=$oIFS if [ “$FOUND” = “no” ]; then modprobe $mname start() ifcfg_vpn if [ ! \( -d “/dev/net” \) ]; then mkdir /dev/net if [ ! \( -r “/dev/net/tun” \) ]; then # create a device file if there is none mknod /dev/net/tun c 10 200 # load modules “tun”...
- Page 53 DA-660-8/16-LX User’s Manual Managing Communications # disconnect tap device from the bridge brctl delif br0 tap${i} openvpn --rmtun --dev tap${i} i=`expr $i + 1` if [ $i -ge $maxtap ]; then break done brctl delif br0 $iface brctl delbr br0 ifconfig br0 down ifconfig $iface $IPADDR netmask $NETMASK broadcast $BROADCAST killall -TERM openvpn...
- Page 54 DA-660-8/16-LX User’s Manual Managing Communications dev tap0 secret /etc/openvpn/secrouter.key cipher DES-EDE3-CBC auth MD5 tun-mtu 1500 tun-mtu-extra 64 ping 40 up /etc/openvpn/tap0-br.sh Then modify the routing table in /etc/openvpn/tap0-br.sh script file. #----------------------------------Start------------------------------ #!/bin/sh # /etc/openvpn/tap0-br.sh # value after “-net” is the subnet behind the remote peer route add -net 192.168.2.0 netmask 255.255.255.0 dev br0 #---------------------------------- end ------------------------------ NOTE...
- Page 55 DA-660-8/16-LX User’s Manual Managing Communications ping 192.168.4.174 A successful ping indicates that you have created a VPN system that only allows authorized users from one internal network to access users at the remote site. For this system, all data is transmitted by UDP packets on port 5000 between OpenVPN peers.
- Page 56 DA-660-8/16-LX User’s Manual Managing Communications 2. Create a configuration file named “A-tun.conf” and an executable script file named “A-tun.sh”. # point to the peer remote 192.168.8.174 dev tun secret /etc/openvpn/secrouter.key cipher DES-EDE3-CBC auth MD5 tun-mtu 1500 tun-mtu-extra 64 ping 40 ifconfig 192.168.2.173 192.168.4.174 up /etc/openvpn/A-tun.sh Then modify the routing table in /etc/openvpn/tun.sh script file.
-
Page 57: Chapter 5 Programmer's Guide
Programmer’s Guide Chapter 5 This chapter includes important information for programmers. The following functions are covered in this chapter: Flash Memory Map Linux Tool Chain Introduction Debugging with GDB Device API RTC (Real Time Clock) Buzzer WDT (Watch Dog Timer) UART KeyPad Makefile Example... -
Page 58: Flash Memory Map
DA-660-8/16-LXUser’s Manual Programmer’s Guide Flash Memory Map Partition sizes are hard coded into the kernel binary. To change the partition sizes, you will need to rebuild the kernel. The flash memory map is shown in the following table. Address Size Contents 0x00000000 –... -
Page 59: Debugging With Gdb
DA-660-8/16-LXUser’s Manual Programmer’s Guide Obtaining help Use the Linux man utility to obtain help on many of the utilities provided by the tool chain. For example to get help on the armv5b-linux-gcc compiler, issue the command: #man armv5b-linux-gcc Cross Compiling Applications and Libraries To compile a simple C application, just use the cross compiler instead of the regular compiler: #mxscaleb-gcc –o example –Wall –g –O2 example.c #mxscaleb-strip –s example... -
Page 60: Device Api
DA-660-8/16-LXUser’s Manual Programmer’s Guide 3. Enter the following command: #ddd --debugger mxscaleb-gdb hello-debug & 4. Enter the following command at the GDB, DDD command prompt: Target remote 192.168.4.99:2000 The command produces another line of output on the target console, similar to the following: Remote debugging using 192.168.4.99:2000 192.168.4.99 is the machine’s IP address, and 2000 is the port number. -
Page 61: Wdt (Watch Dog Timer)
DA-660-8/16-LXUser’s Manual Programmer’s Guide WDT (Watch Dog Timer) 1. Introduction The WDT works like a watch dog function. You can enable it or disable it. If the user enables WDT but the application does not acknowledge it, then the system will reboot. You can set the acknowledgement time from a minimum of 50 msec to a maximum of 60 seconds. - Page 62 DA-660-8/16-LXUser’s Manual Programmer’s Guide Output The output will be zero if everything is OK. Any other value indicates an error. Use the errno() function to get the actual error description. int swtd_disable(int fd) Description Disable the application Watch Dog. The kernel will auto acknowledge the action. Input int fd - the file handle from swtd_open() return value.
- Page 63 DA-660-8/16-LXUser’s Manual Programmer’s Guide int swtd_close(int fd) Description Close the file handle. Input int fd - the file handle from swtd_open() return value. Output The output will be zero if everything is OK. Any other value indicates an error. Use the errno() function to get the actual error description.
- Page 64 DA-660-8/16-LXUser’s Manual Programmer’s Guide Example 2: #include <stdio.h> #include <stdlib.h> #include <signal.h> #include <string.h> #include <sys/stat.h> #include <sys/ioctl.h> #include <sys/select.h> #include <sys/time.h> #include <moxadevice.h> static void mydelay(unsigned long msec) struct timeval time; time.tv_sec = msec / 1000; time.tv_usec = (msec % 1000) * 1000; select(1, NULL, NULL, NULL, &time);...
-
Page 65: Uart
DA-660-8/16-LXUser’s Manual Programmer’s Guide UART The normal tty device node is located at /dev/ttyM0 … ttyM7, and the modem tty device node is located at /dev/cum0 … cum7. The DA-660 supports Linux standard termios control. The MOXA UART Device API allows you to configure ttyM0 to ttyM7 as RS-232, RS-422, 4-wire RS-485, or 2-wire RS-485. -
Page 66: Lcm
DA-660-8/16-LXUser’s Manual Programmer’s Guide Baudrate inaccuracy Divisor = 921600/Target Baudrate. (Only Integer part) ENUM = 8 * (921600/Target - Divisor) ( Round up or down) Inaccuracy = ( (Target Baud Rate – 921600/(Divisor + (ENUM/8))) / Target Baud Rate )* 100% E.g., To calculate 500000 bps Divisor = 1, ENUM = 7,... -
Page 67: Keypad
DA-660-8/16-LXUser’s Manual Programmer’s Guide KeyPad The device node is /dev/keypad. The key value is defined in moxadevice.h. int ioctl(fd, IOCTL_KEYPAD_HAS_PRESS, int *flag); Checks how many keys have been pressed. Argument 3 returns the number of pressed keys. 0 means no keys were pressed. int ioctl(fd, IOCTL_KEYPAD_GET_KEY, int *key);... -
Page 68: Appendix A System Commands
System Commands Appendix A Linux normal command utility collection File Manager 1. cp copy file 2. ls list file 3. ln make symbolic link file 4. mount mount and check file system 5. rm delete file 6. chmod change file owner, group, and user 7. -
Page 69: Process
DA-660-8/16-LX User’s Manual Using the LCM Keypad Process kill kill process display now running process Other dmesg dump kernel log message to set serial port zcat dump .gz file context mknod make device node free display system memory usage date print or set the system date and time run a program in a modified environment clear...
Need help?
Do you have a question about the DA-660 Series and is the answer not in the manual?
Questions and answers